Want a beautiful bathroom but think you need thousands to make it happen? Think again.
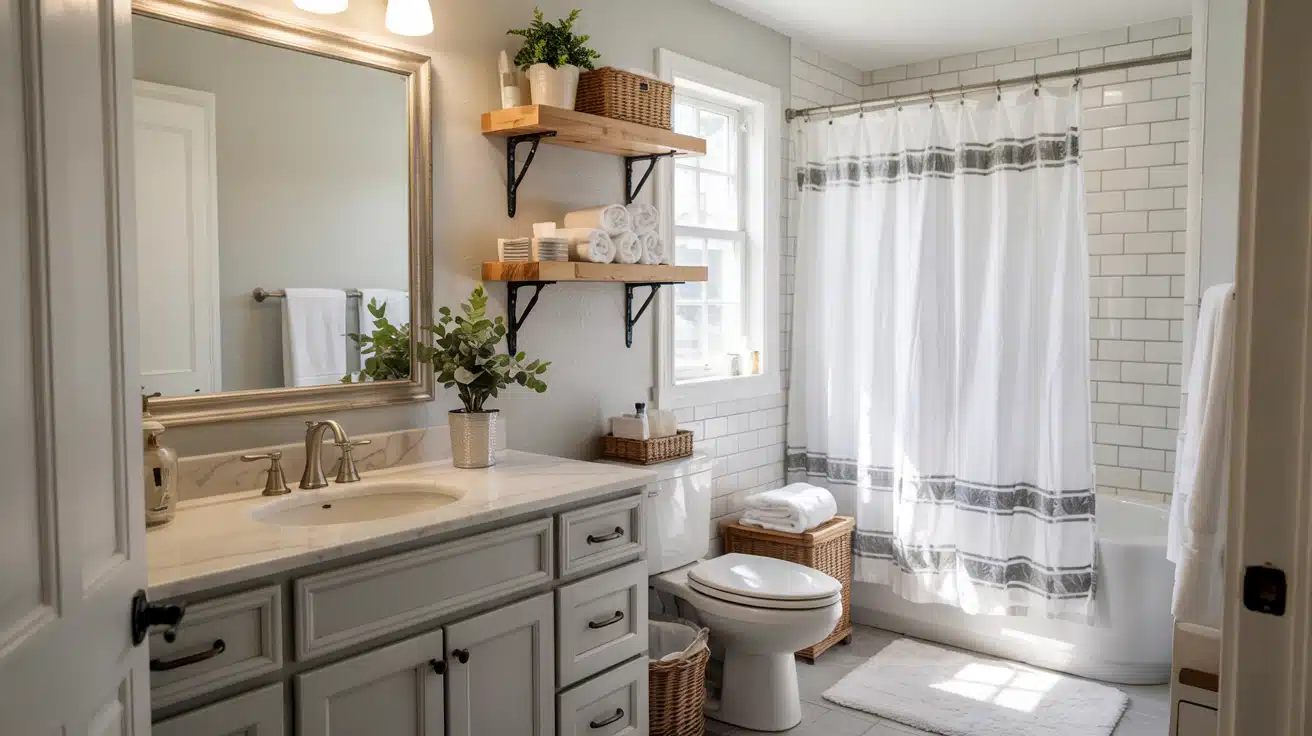
A lovely bathroom makeover doesn’t require a massive budget or a full renovation. Small changes make huge differences when you know where to focus your money.
Most bathroom updates cost between $3,000 and $25,000, but you can change yours for much less. The secret is choosing smart, high-impact projects that look expensive but aren’t.
In this guide, you’ll learn bathroom remodel ideas on a budget, average costs, step-by-step remodeling tips, common mistakes to avoid, and exactly where to save versus splurge.
Let’s get started.
Average Cost to Remodel a Bathroom
A bathroom remodel in the U.S. typically costs between $3,000 and $25,000. Budget remodels stay under $5,000 with mostly cosmetic updates.
Mid-range projects run $10,000 to $15,000 with new fixtures and some layout changes. Premium remodels exceed $20,000 and include full gut jobs.
Your final cost depends on materials, labor rates, layout changes, plumbing work, and your bathroom’s current condition.
| Remodel Type | Average Cost | What You Get |
|---|---|---|
| Budget | $3,000 – $5,000 | Paint, new fixtures, hardware swaps, refinishing, DIY updates |
| Mid-Range | $10,000 – $15,000 | New vanity, tub/shower upgrade, tile work, lighting, and some plumbing |
| Premium | $20,000 – $25,000+ | Full gut, custom cabinets, high-end tile, layout changes, pro labor |
A simple formula: Multiply your bathroom’s square footage by $100 to $200 for budget work, or $200 to $400 for mid-range upgrades.
26 Bathroom Remodel Ideas on a Budget
Now let’s get into the good stuff. Here are 26 proven ways to transform your bathroom without breaking the bank.
1. Paint the Bathroom Walls for a Fresh Look
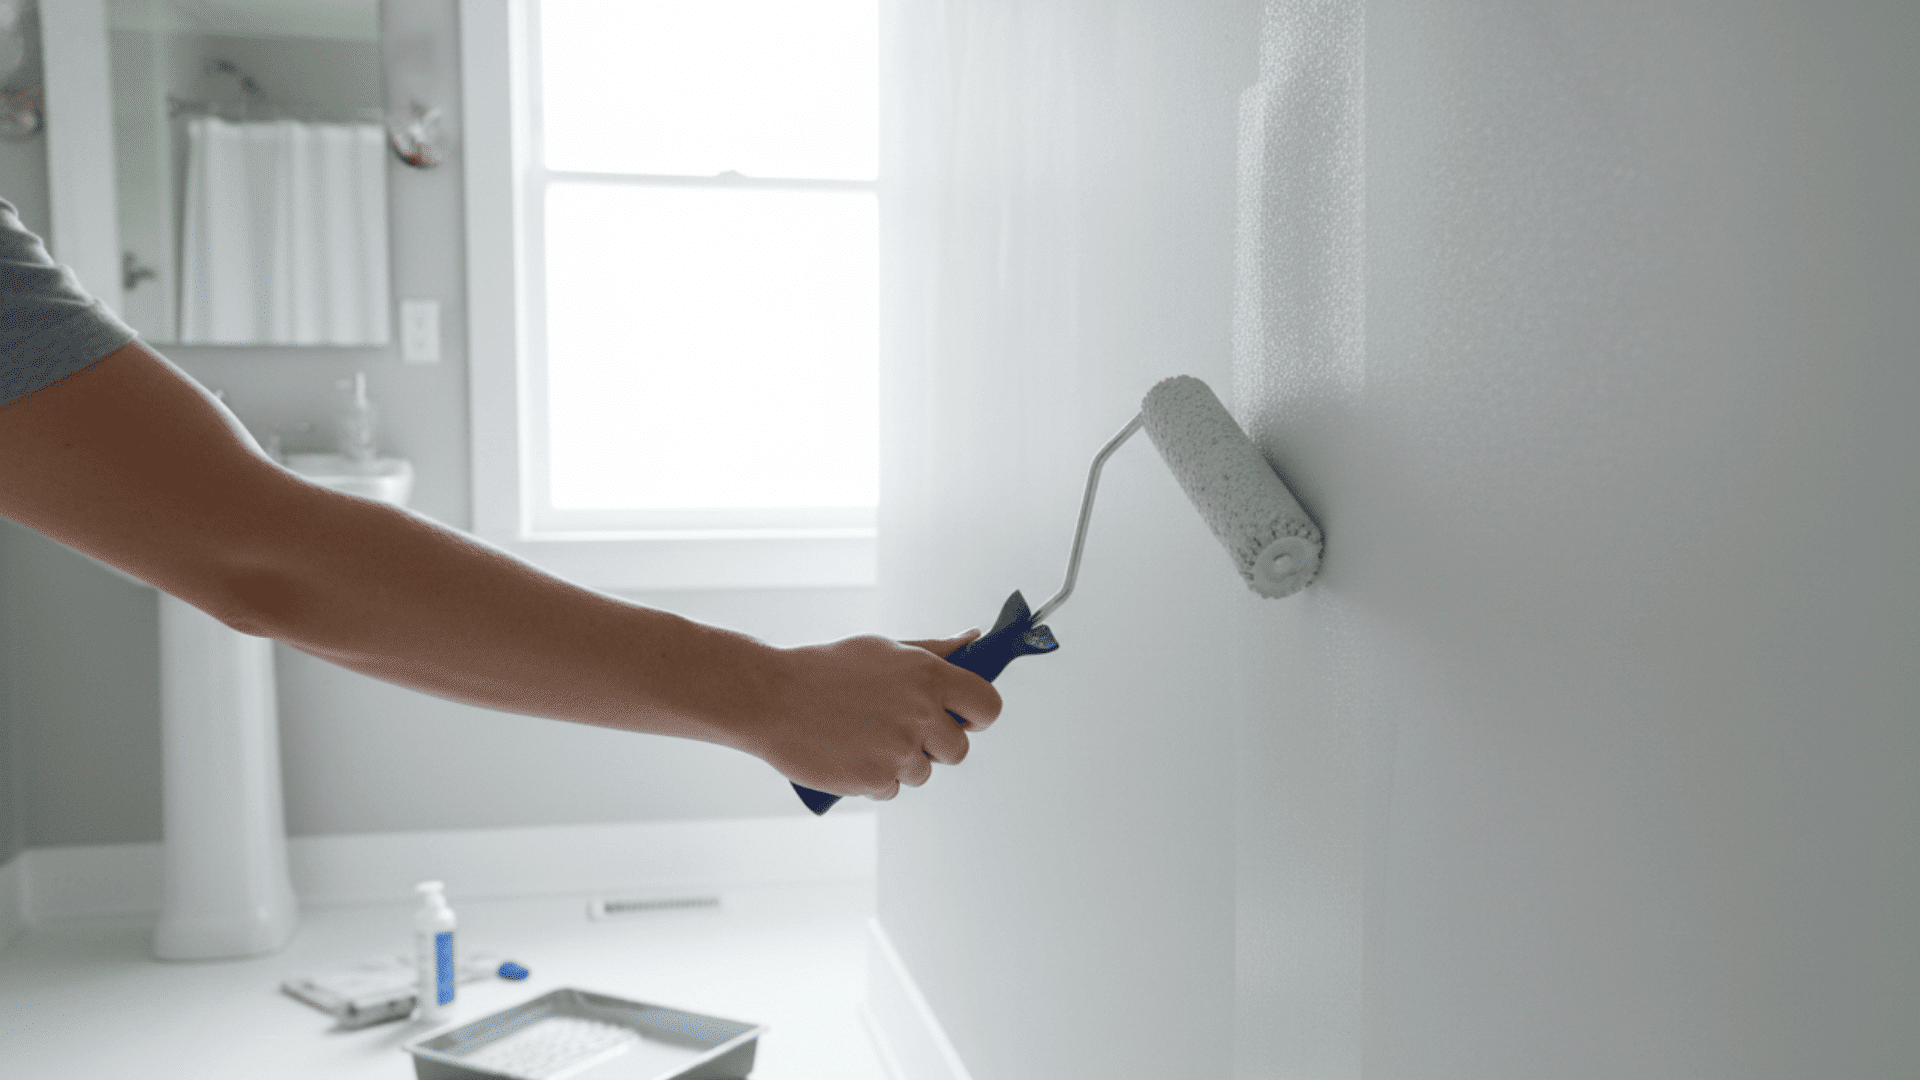
A fresh coat of paint changes everything. Choose moisture-resistant paint in light colors to make small bathrooms feel bigger. This is the easiest way to start any remodel. Neutral tones work best if you plan to sell your home soon.
- DIY: Very easy. Most people can finish in a weekend with basic tools.
- Budget: $30–$80 for paint and supplies
2. Refinish Existing Cabinets Instead of Replacing Them
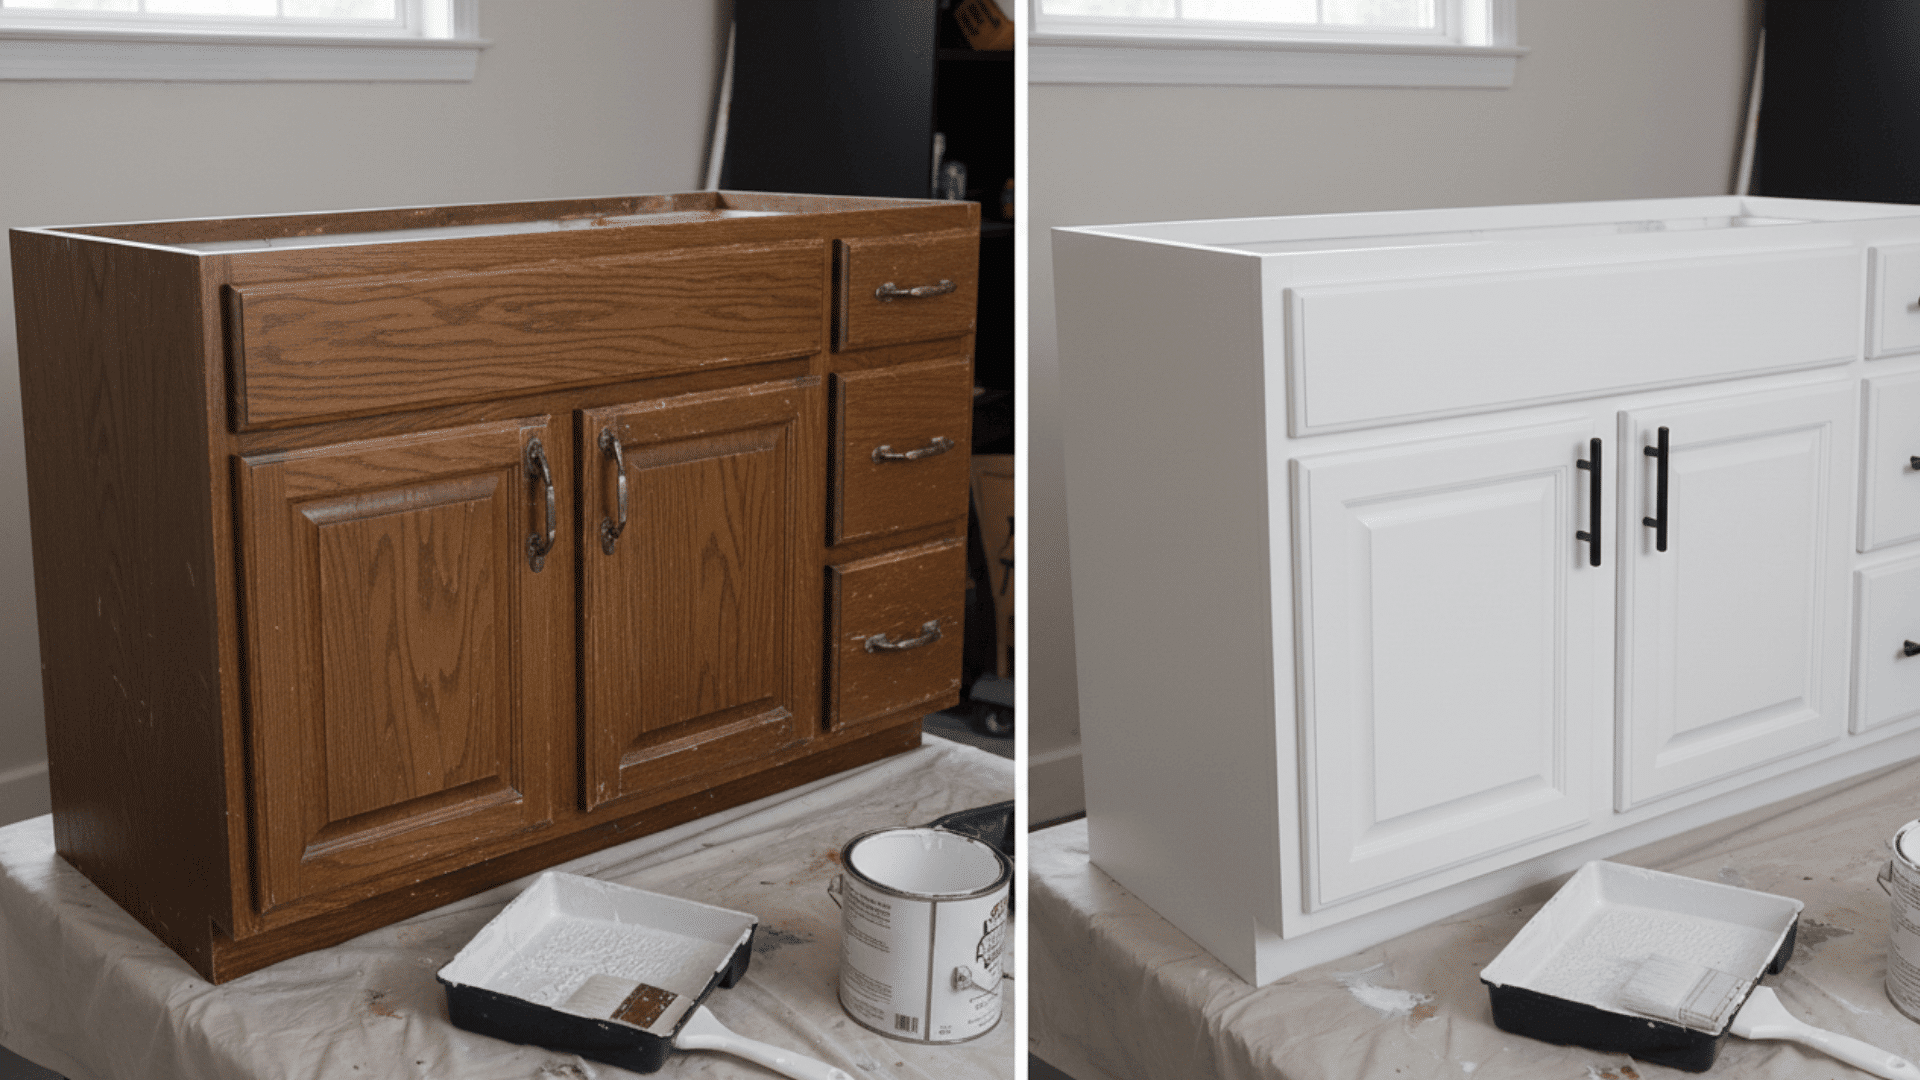
Skip the expensive cabinet replacement. Sand down your current cabinets, add primer, and paint them a modern color. You’ll save hundreds while getting a brand-new look. White, gray, and navy blue are popular cabinet colors right now.
- DIY: Moderate. Requires sanding, priming, and painting in thin coats.
- Budget: $50–$150 for paint, primer, and brushes
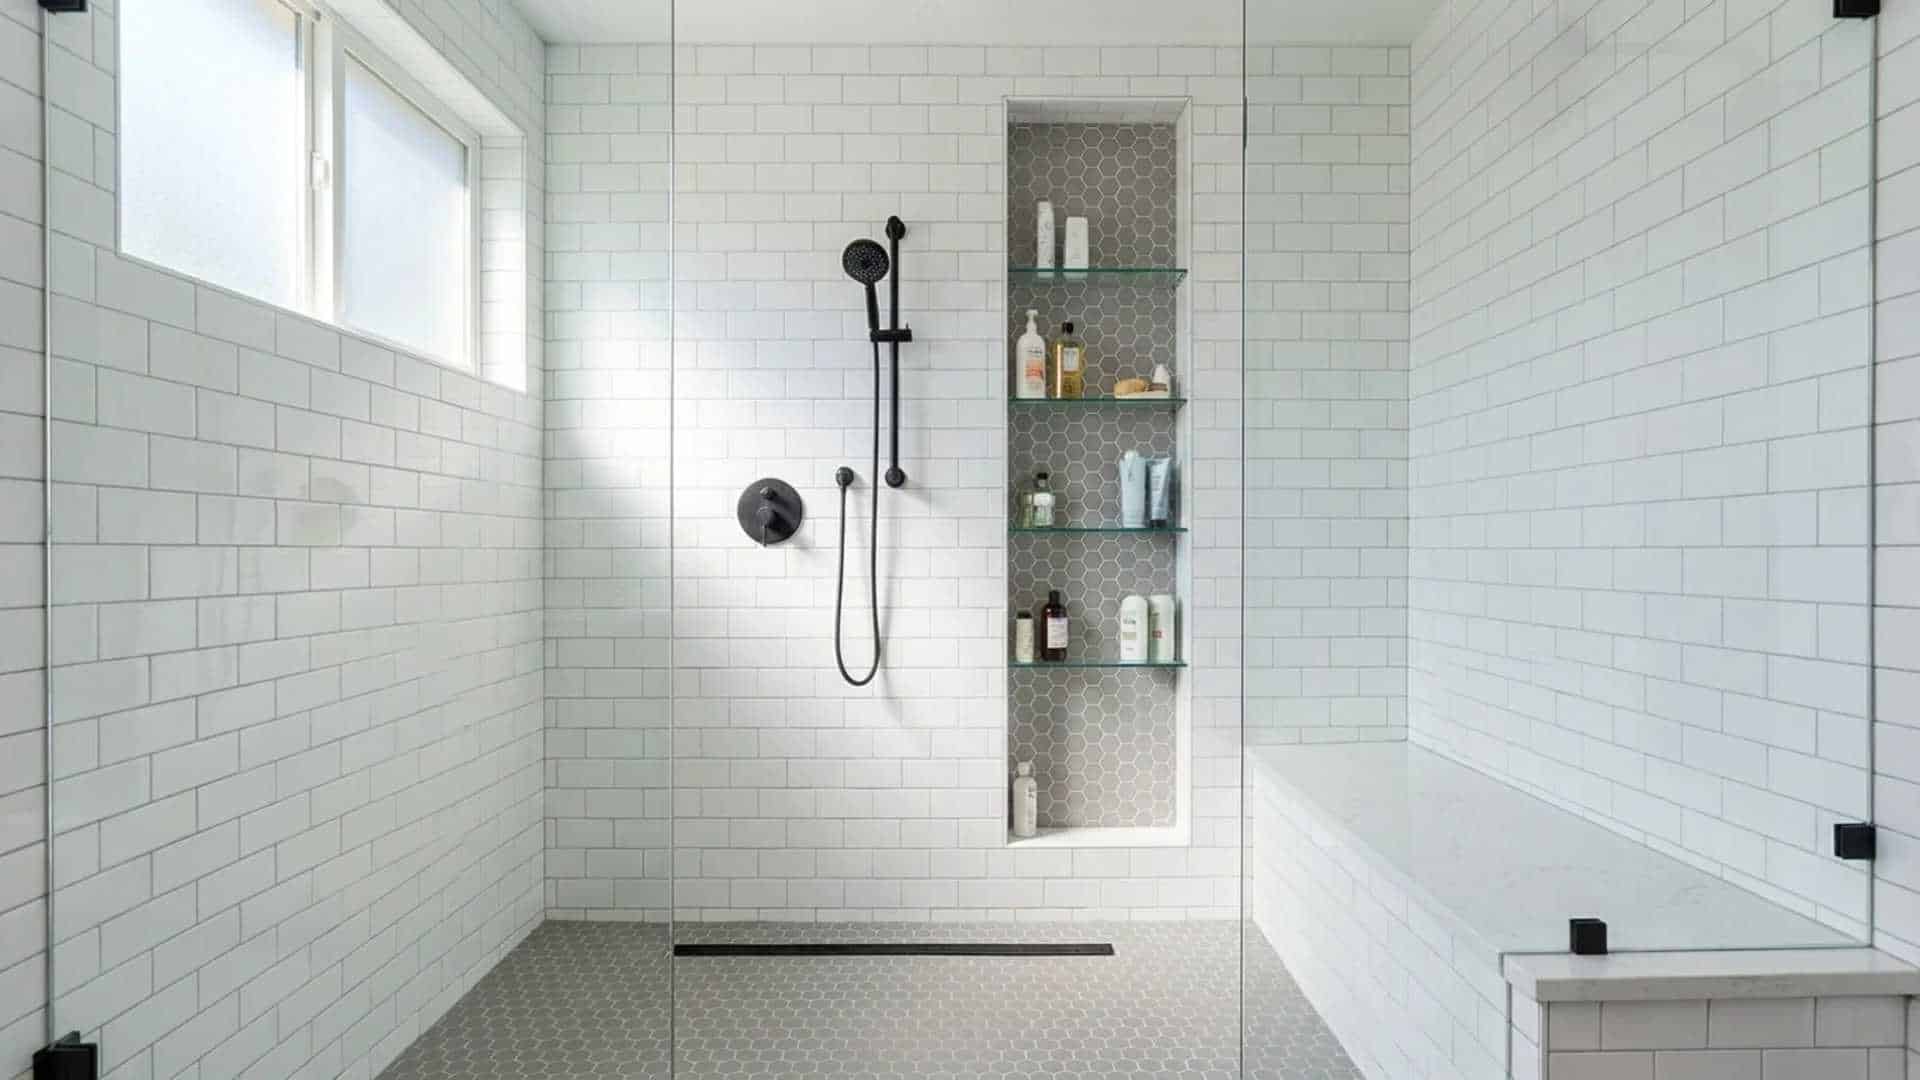
3. Add Peel-and-Stick Tile to Walls or Backsplash
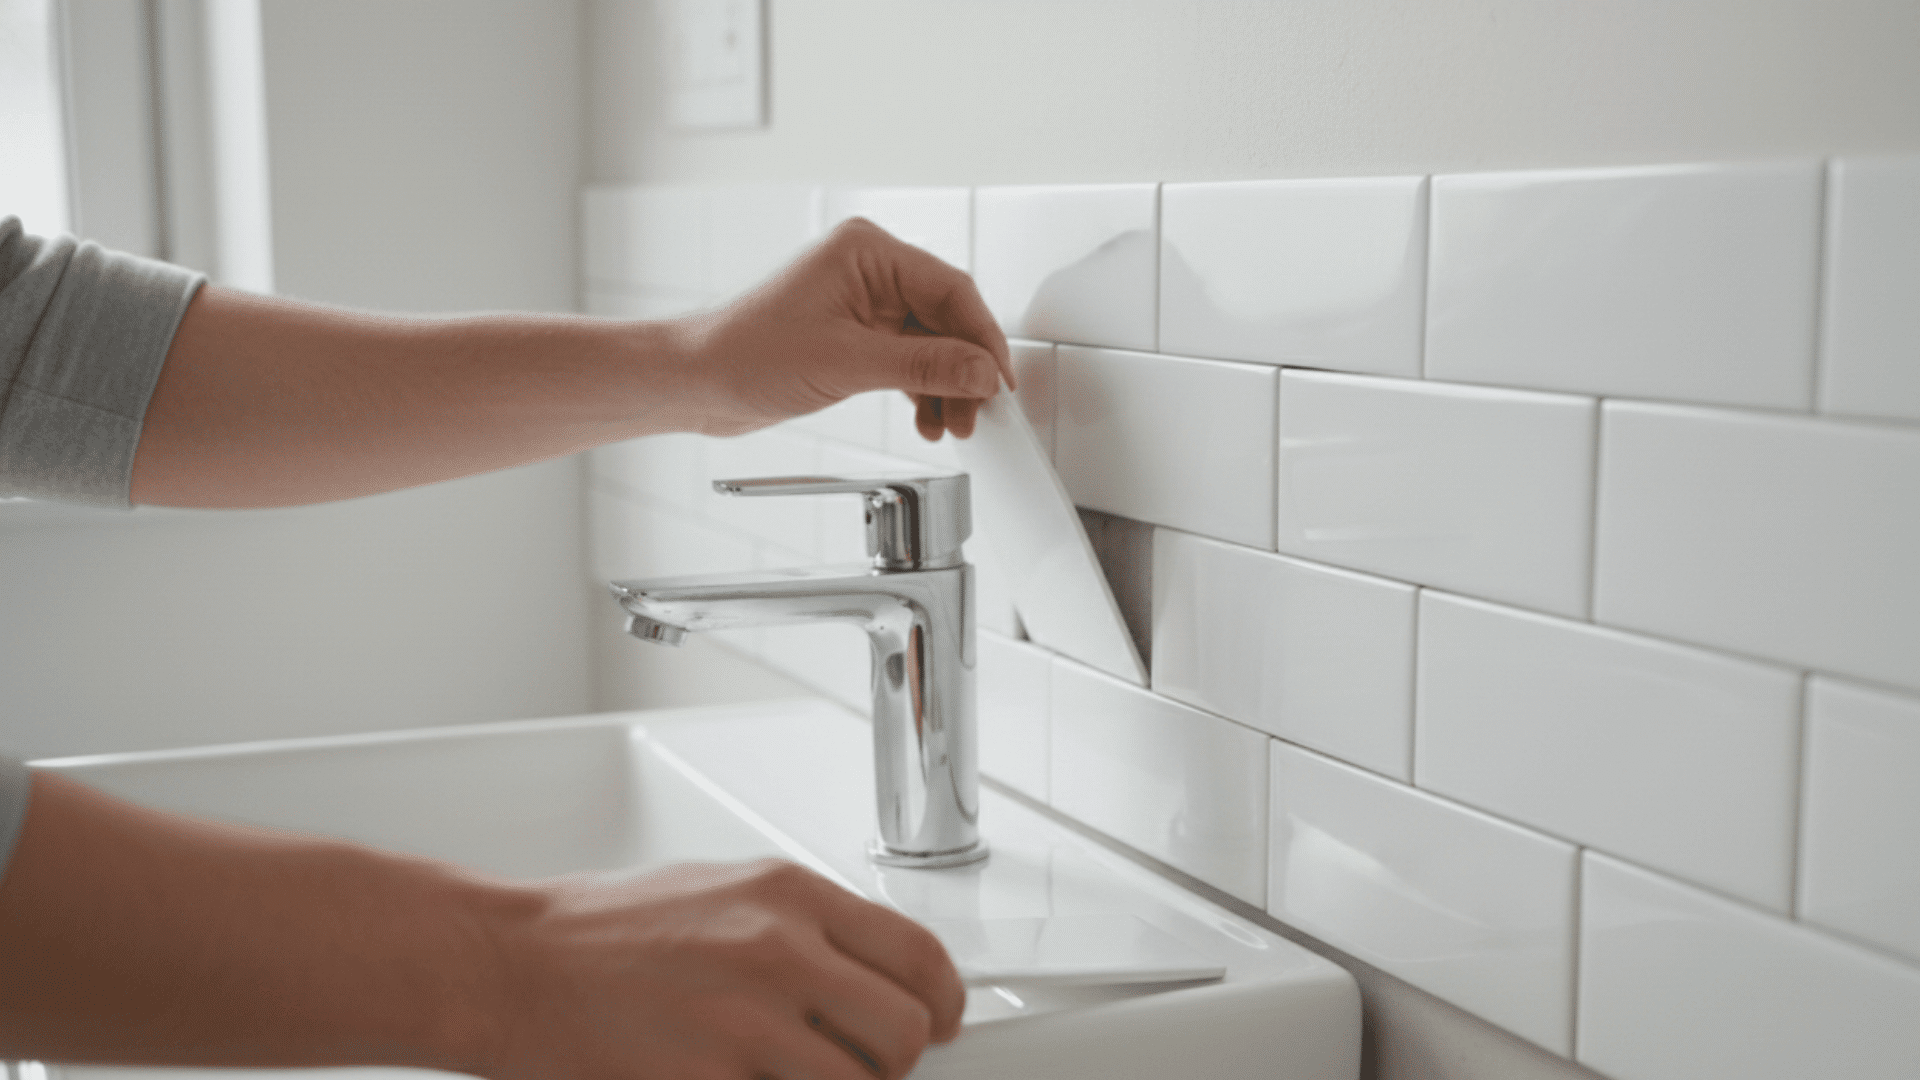
Peel-and-stick tiles go up in minutes without grout or special tools. Use them behind the sink or along one accent wall. They’re water-resistant and removable. Subway tile and hexagon patterns give the most value for your money.
- DIY: Easy. Just measure, peel, and press into place.
- Budget: $25–$100 depending on coverage area
4. Swap Out Cabinet Hardware with Updated Knobs and Pulls

New handles and knobs give cabinets an instant facelift. Choose brushed nickel, matte black, or brass finishes for a modern touch. This takes less than an hour. Make sure your new hardware fits existing drill holes to avoid extra work.
- DIY: Very easy. Just unscrew old hardware and install new pieces.
- Budget: $15–$60 for a full set
5. Replace the Vanity Mirror with a Framed or Thrifted Option

Builder-grade mirrors feel boring. Swap yours for a framed mirror or hunt for vintage options at thrift stores. You can also frame your existing mirror with trim. Round mirrors add softness while rectangular ones keep things classic.
- DIY: Easy to moderate. Hanging or gluing trim takes basic skills.
- Budget: $20–$100, depending on style
6. Install a New Budget-Friendly Faucet

Old faucets date a bathroom fast. Replace yours with a sleek modern option from a home improvement store. Look for finishes that match your hardware. Single-handle faucets are easier to install than widespread models.
- DIY: Moderate. Requires basic plumbing skills and tools.
- Budget: $40–$120 for a quality faucet
7. Upgrade to a More Stylish Shower Curtain
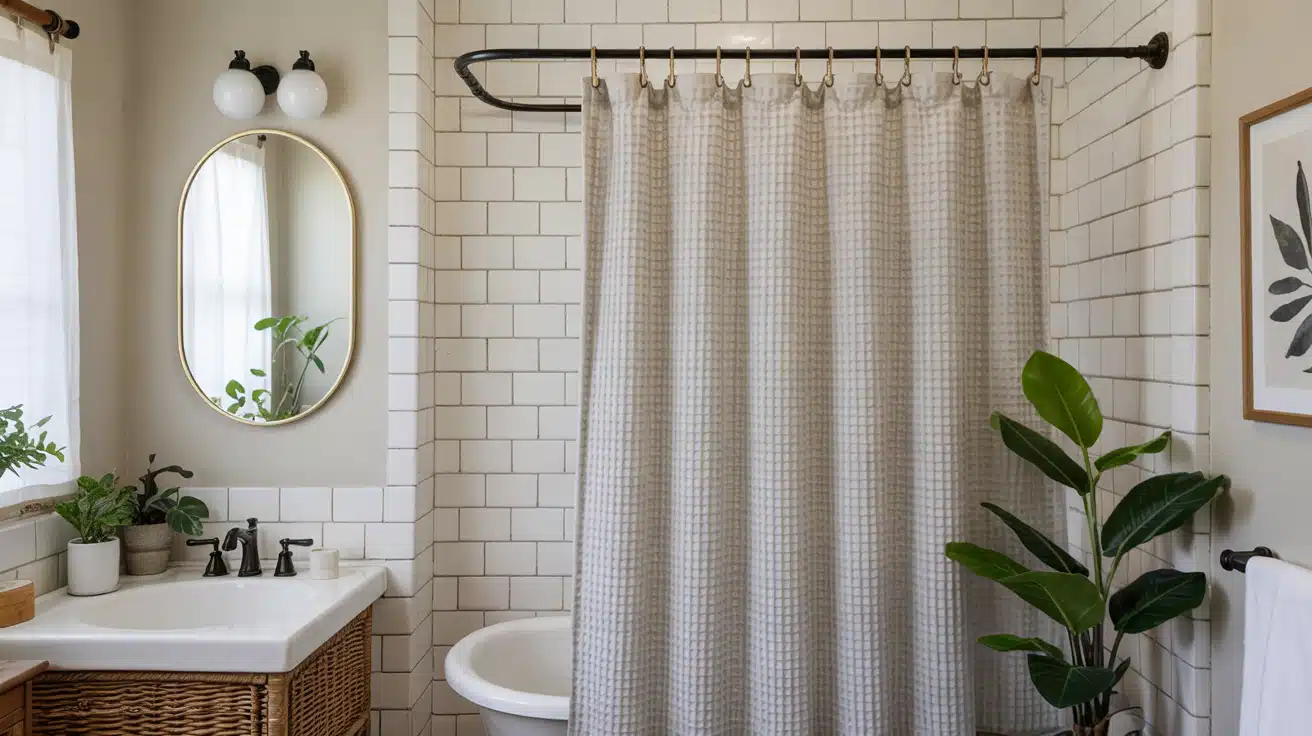
Your shower curtain sets the mood for the whole room. Pick one with texture, pattern, or a color that ties your design together. This is a five-minute upgrade. Waffle weave and linen-look curtains feel more expensive than they are.
- DIY: Very easy. Just hang and go.
- Budget: $15–$50 for a good-quality curtain
8. Add Open Shelving for Extra Storage
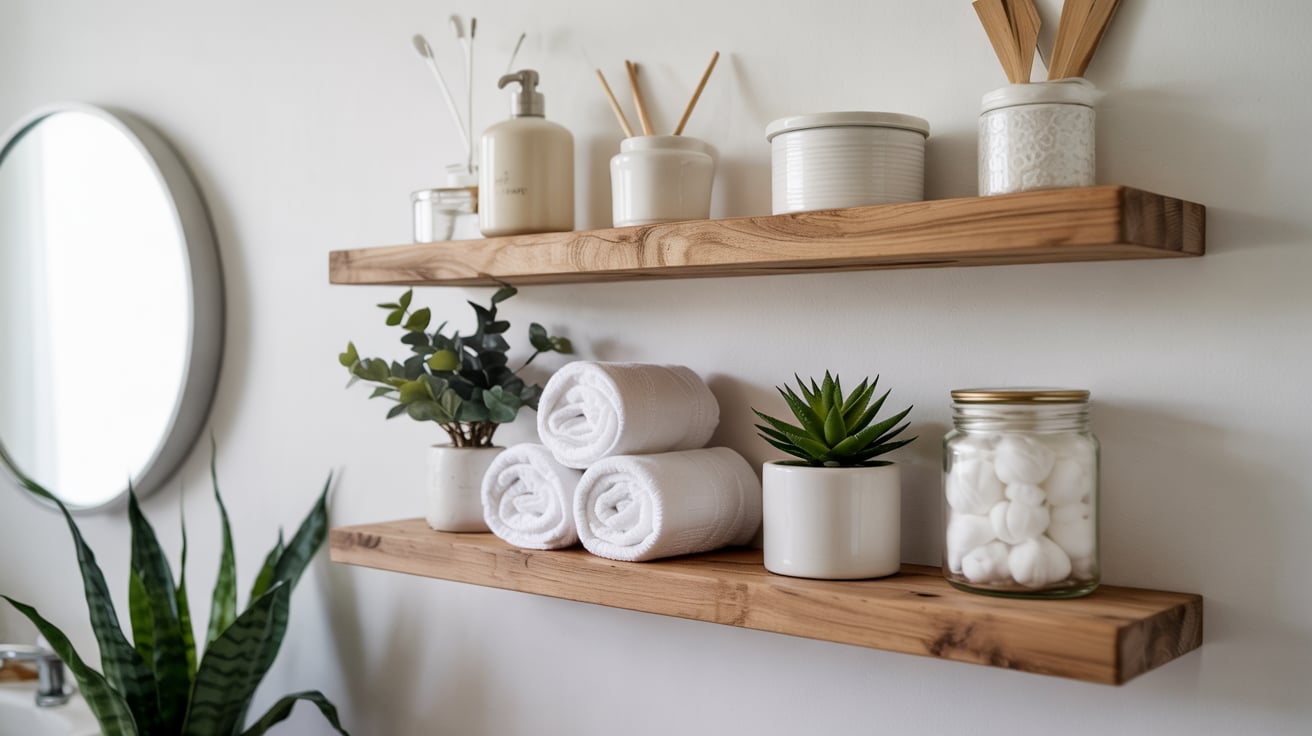
Floating shelves give you storage without taking up floor space. Install them next to the mirror or above the toilet. Use them for towels, plants, or decorative items. Wood shelves add warmth while metal ones feel industrial and modern.
- DIY: Easy. Most shelves come with mounting hardware.
- Budget: $20–$70 per shelf
9. Re-Caulk and Re-Grout to Make Tiles Look New
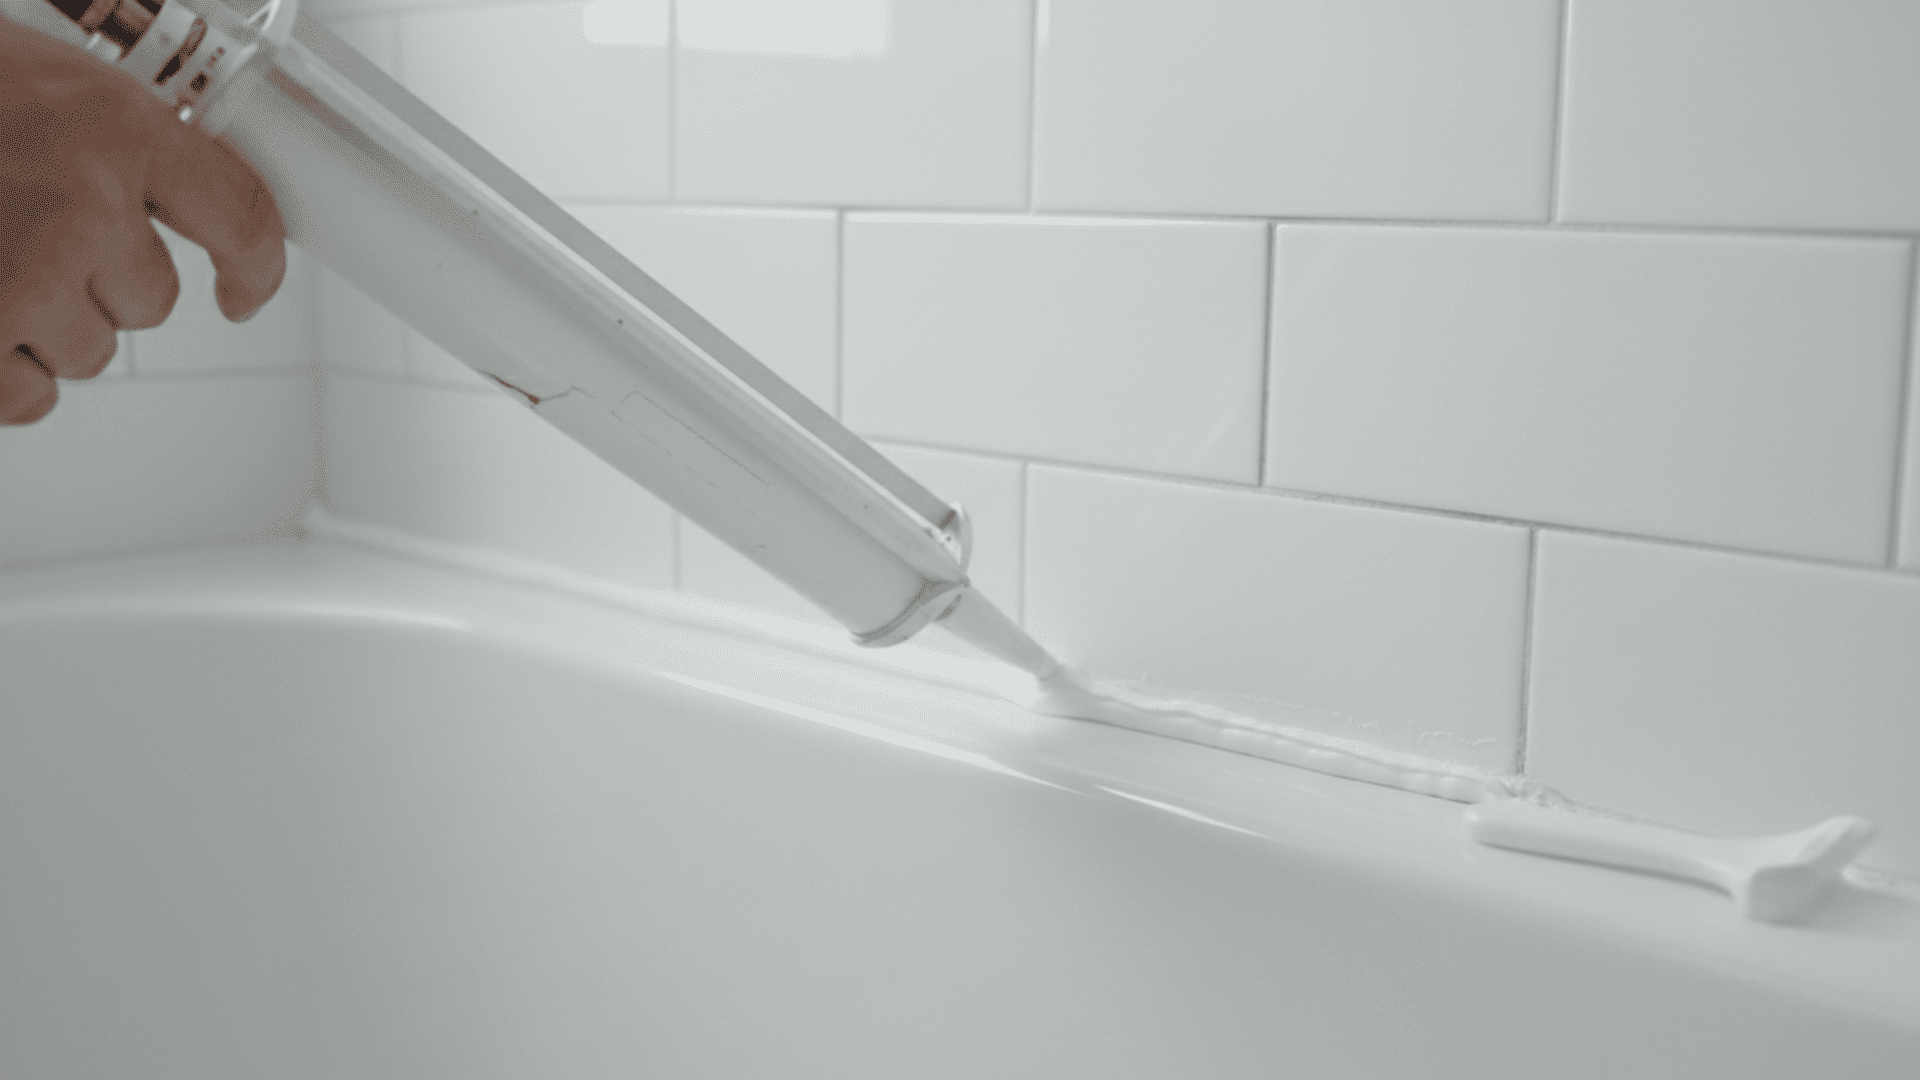
Dirty grout and cracked caulk make even nice bathrooms look old. Remove the old caulk, scrub grout lines, and apply fresh sealant. Your tiles will look brand new. White or light gray grout hides stains better than pure white over time.
- DIY: Moderate. Requires patience and a steady hand.
- Budget: $10–$30 for caulk, grout cleaner, and tools
10. Install a New Showerhead

A better showerhead improves your daily routine. Choose rain-style, handheld, or dual options. Most install in minutes without a plumber. Look for WaterSense-certified models to save water and lower bills.
- DIY: Very easy. Just unscrew the old one and twist on the new.
- Budget: $20–$80, depending on features
11. Use a DIY Tile Refinishing Kit

Refinishing kits let you paint over outdated tile. They work on walls, tubs, and even shower surrounds. This saves thousands compared to retiling. Results last for several years when you follow prep instructions exactly.
- DIY: Moderate. Follow the kit instructions carefully for durability.
- Budget: $30–$100 for a complete kit
12. Add Peel-and-Stick Floor Tiles
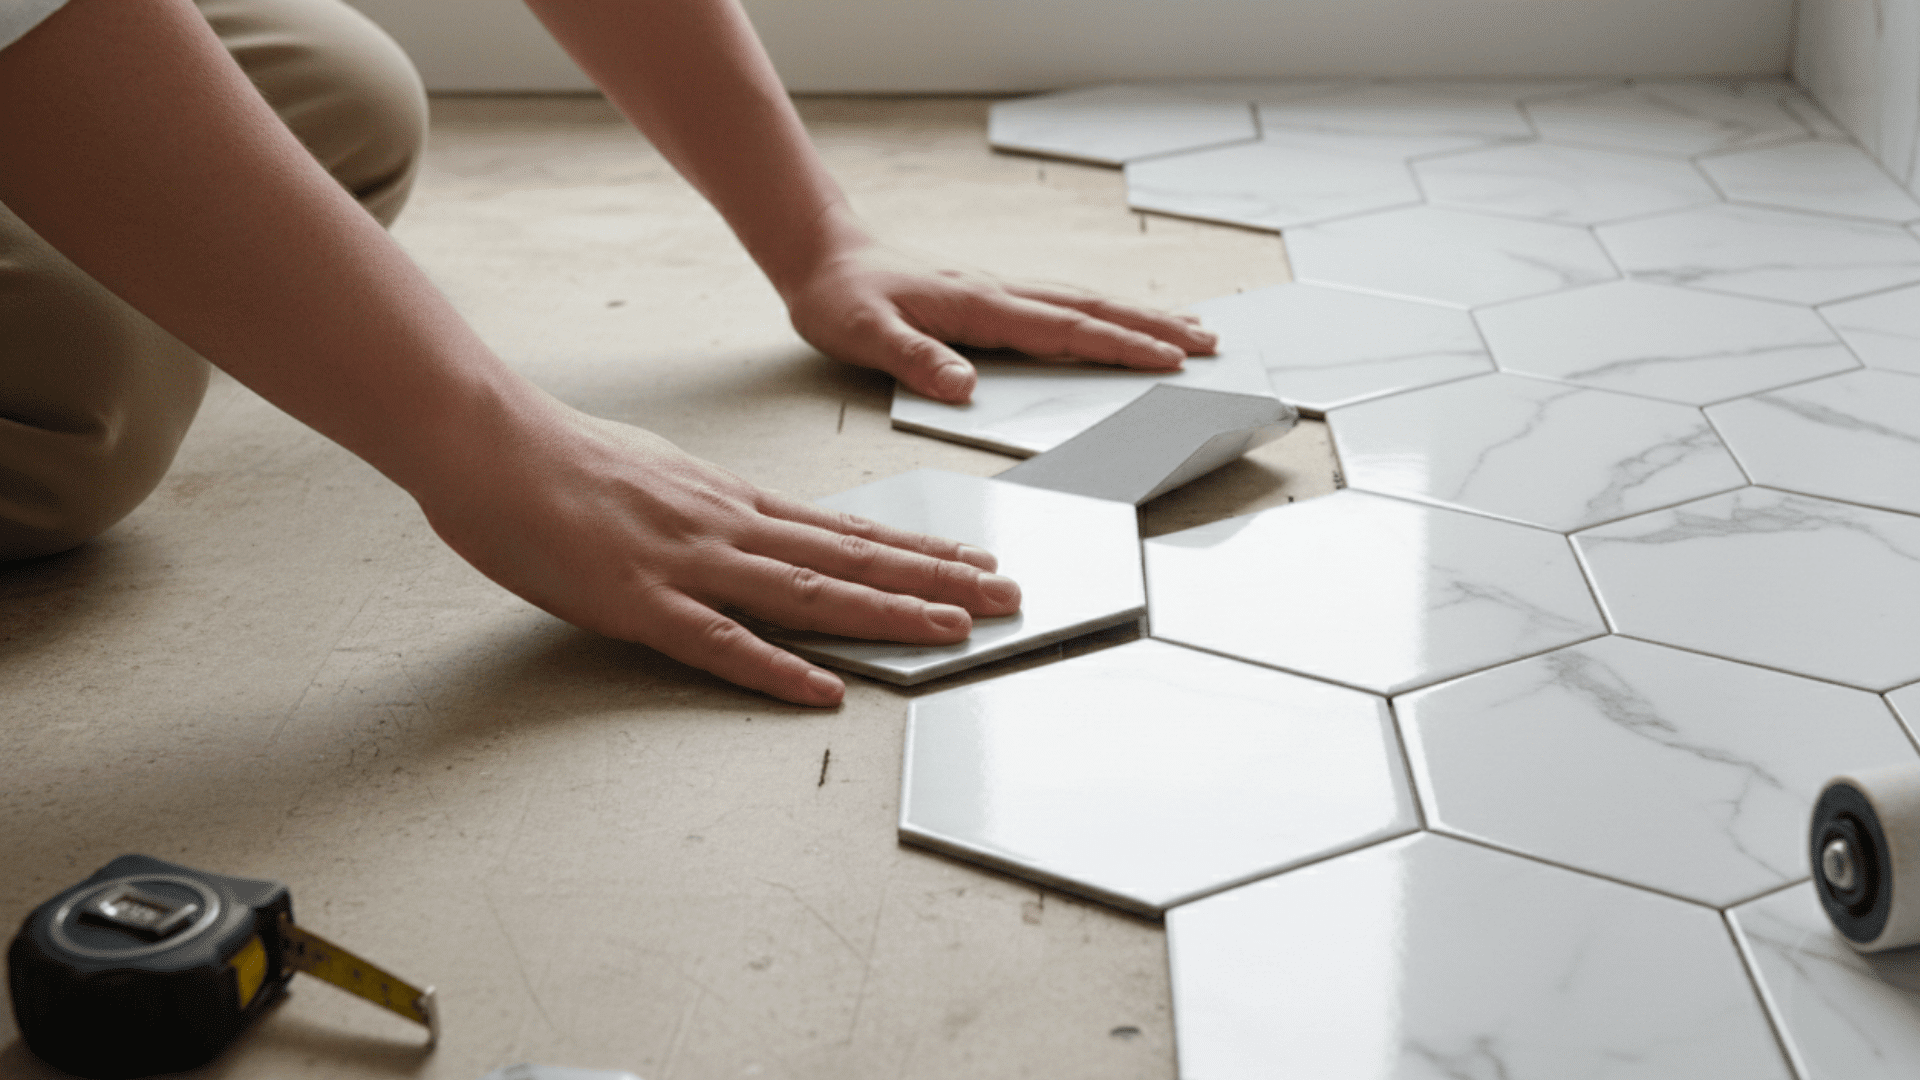
Transform worn floors with stick-on vinyl tiles. They come in styles that mimic marble, wood, or classic patterns. Installation takes just a few hours. Clean your floor really well before applying the best stick.
- DIY: Easy. Clean the floor, measure, peel, and stick.
- Budget: $50–$150, depending on bathroom size
13. Refresh Lighting with Modern Fixtures

Bad lighting ruins good design. Replace outdated fixtures with modern sconces or a statement vanity light. Choose LED bulbs to save on energy costs. Three-light vanity bars give the most flattering light for mirrors.
- DIY: Moderate. Basic electrical knowledge required.
- Budget: $40–$150 per fixture
14. Replace Towel Bars and Toilet Paper Holders
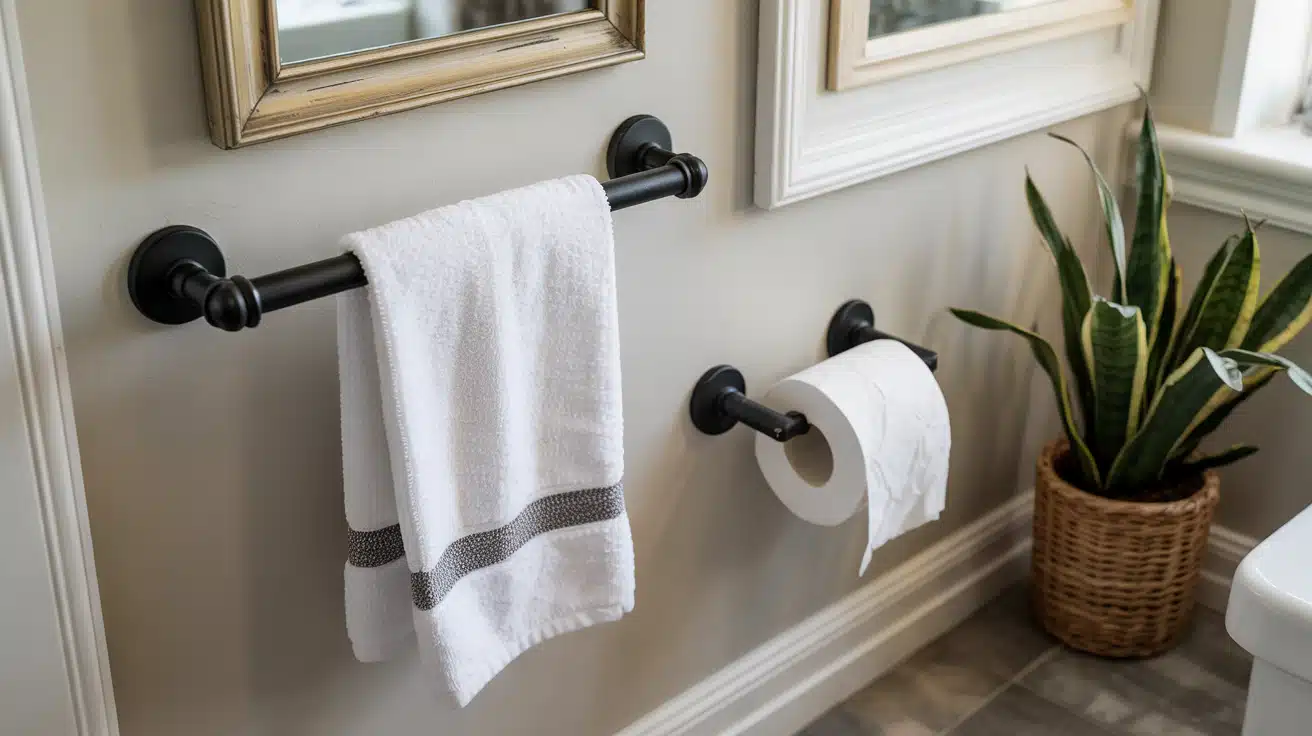
These small details matter more than you think. Match your new hardware finish across towel bars, hooks, and toilet paper holders. Consistency makes a big difference. Buy all pieces from the same collection to ensure finishes match perfectly.
- DIY: Very easy. Most are mounted with screws or adhesive.
- Budget: $15–$50 for a complete set
15. Add Waterproof Wallpaper to a Feature Wall
Waterproof wallpaper brings pattern and color without tile costs. Use it behind the vanity or on one accent wall. Peel-and-stick versions make it renter-friendly. Bold patterns work best in powder rooms, while subtle prints suit full baths.
- DIY: Easy to moderate. Measure carefully and smooth out bubbles.
- Budget: $30–$100 depending on brand and coverage
16. Repaint Old Floor Tiles with Tile Paint

Tile paint covers outdated colors or worn finishes. Clean and prep your floor, then apply specialty tile paint. It holds up well with proper sealing. This works best on ceramic and porcelain tiles in low-traffic bathrooms.
- DIY: Moderate. Requires thorough cleaning and multiple coats.
- Budget: $25–$60 for paint and sealer
17. Update the Vanity Countertop with Affordable Materials

You don’t need marble to get a high-end look. Try laminate, butcher block, or concrete overlays. Paint kits that mimic stone also work well. Butcher block needs regular sealing, but it adds serious warmth and character.
- DIY: Moderate to challenging, depending on material choice.
- Budget: $50–$200 for materials and tools
18. Add Floating Shelves Above the Toilet

The space above your toilet is prime real estate. Install two or three floating shelves for toiletries, decor, or rolled towels. This keeps counters clear. Stack them about 10 to 12 inches apart for balanced spacing.
- DIY: Easy. Mount with brackets or hidden hardware.
- Budget: $25–$80 for multiple shelves
19. Swap Outdated Blinds for Moisture-Resistant Shades

Old blinds collect dust and look tired. Replace them with faux wood or vinyl options that handle humidity. Roller shades also work well in bathrooms. Top-down, bottom-up shades give you privacy while still letting in natural light.
- DIY: Easy. Most hang with simple brackets.
- Budget: $20–$70, depending on window size
20. Hang Wall Art to Bring Personality into the Space
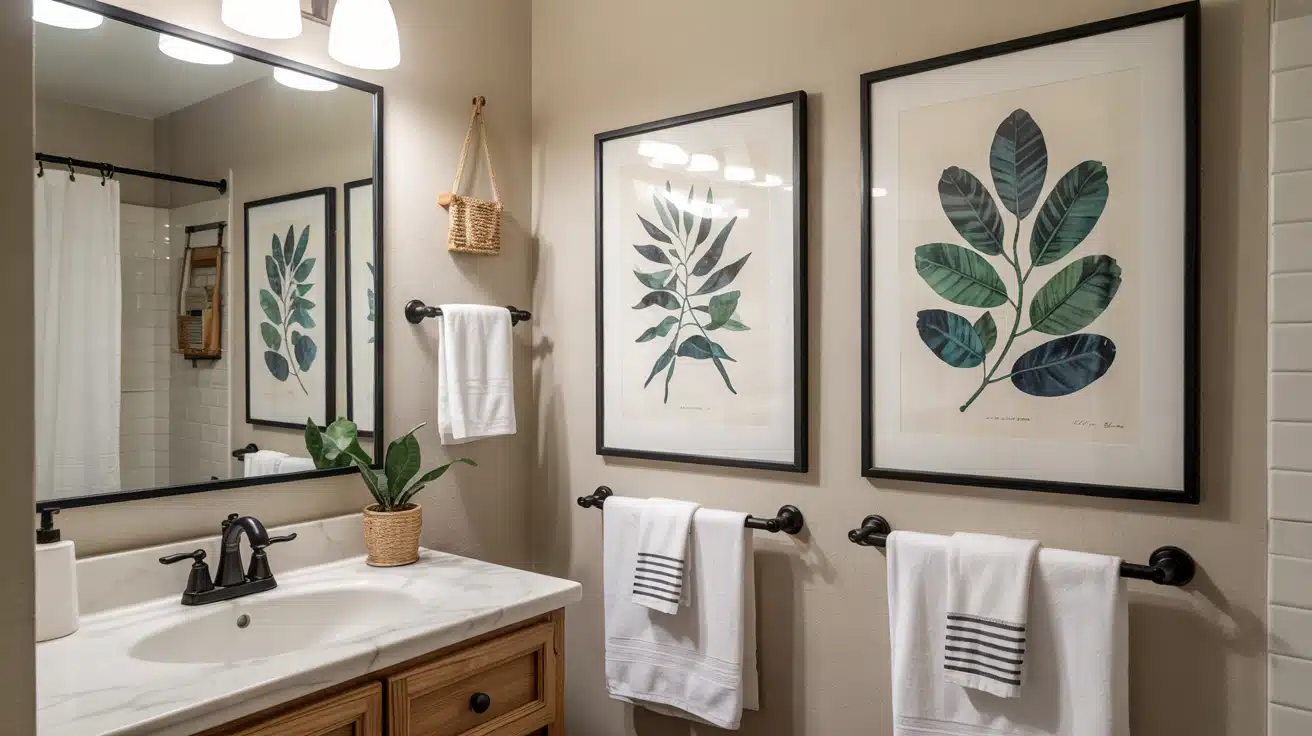
Bathrooms deserve art too. Choose prints in frames with glass to protect them from moisture. Lean into humor, nature themes, or abstract pieces. Gallery walls work great in larger bathrooms with empty wall space.
- DIY: Very easy. Hang with nails or adhesive strips.
- Budget: $10–$50 per piece
21. Upgrade Your Bath Vent Fan

A quiet, efficient vent fan prevents mold and keeps mirrors clear. Newer models run silently and move more air. This protects your whole remodel. Run the fan during showers and for 20 minutes after to control moisture.
- DIY: Moderate to challenging. May require electrical work.
- Budget: $50–$150 for a quality fan
22. Add LED Strip Lighting Under the Vanity

Under-vanity lighting creates a modern floating effect. Adhesive LED strips install in minutes and plug into outlets. They add mood and function. Motion-sensor strips turn on automatically when you enter at night.
- DIY: Easy. Stick and plug in.
- Budget: $15–$40 for a strip kit
23. Use Baskets and Organizers for Instant Order

Clutter makes any space feel messy. Add woven baskets under the sink, drawer dividers in vanities, and countertop trays for daily items. The organization looks like a remodel. Clear acrylic organizers work best if you want to see what’s inside.
- DIY: Very easy. Just shop and arrange.
- Budget: $20–$60 for multiple organizers
24. Replace Bath Mats, Towels, and Textiles for a Cohesive Look
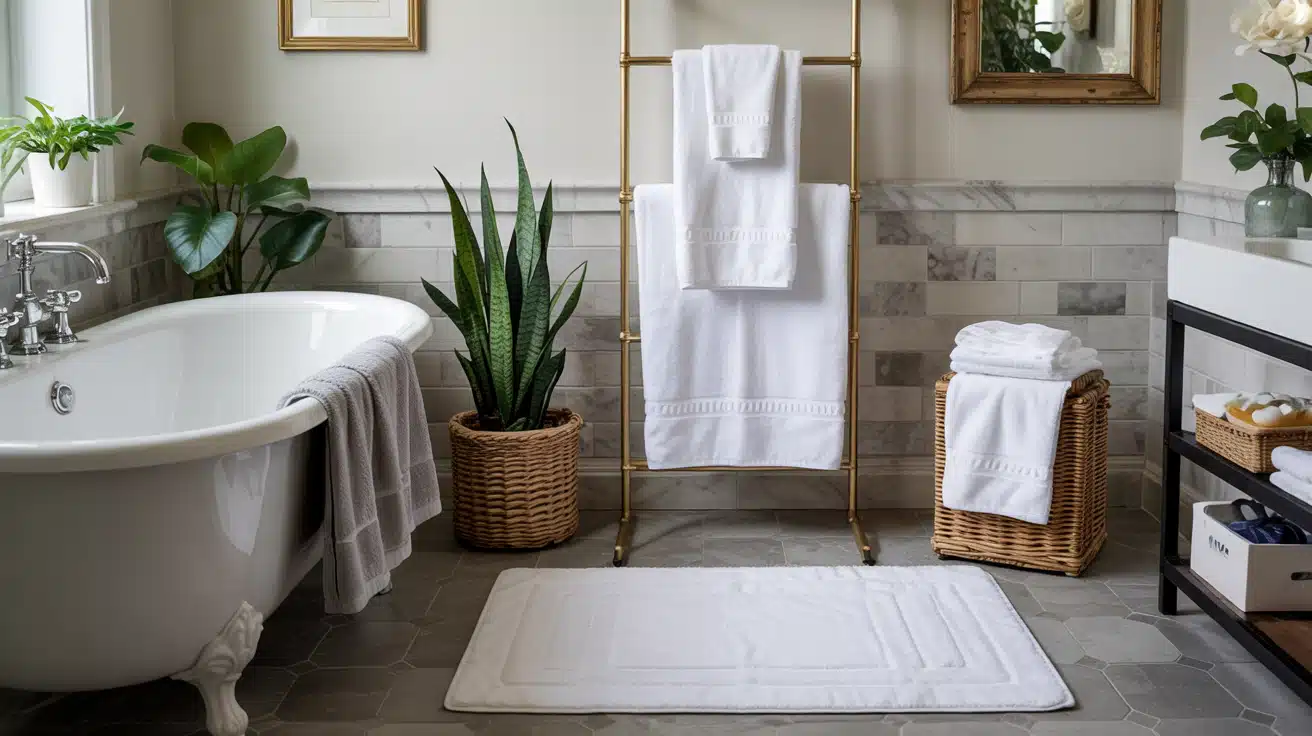
New towels and bath mats tie everything together. Pick a color scheme that matches your walls and accents. Matching textiles feel intentional and fresh. Stick to a maximum of two or three colors to avoid a busy look.
- DIY: Very easy. Shop and swap.
- Budget: $40–$100 for a complete set
25. Install a New Shower Rod (Curved or Modern Styles)
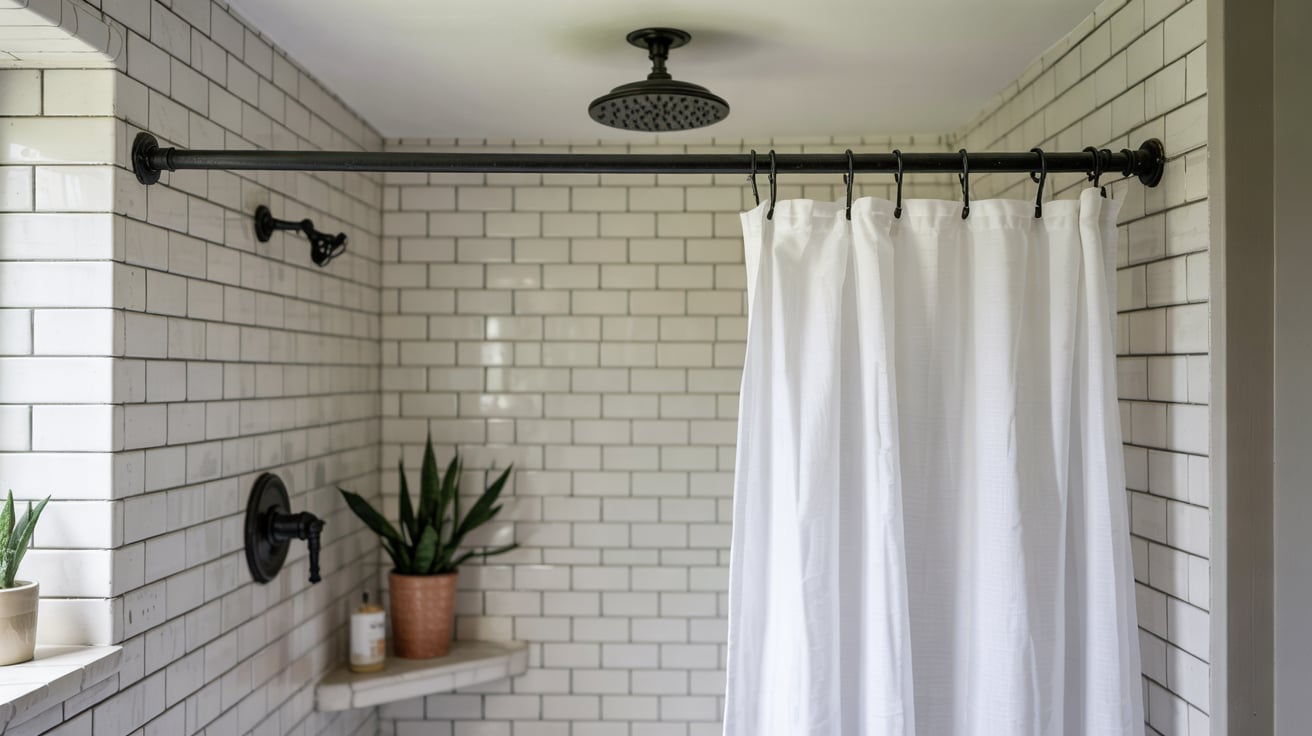
Curved shower rods add space inside the tub. Modern matte black or brass rods look more finished than basic chrome. This small change packs a visual punch. Tension rods can be installed without drilling holes if you’re renting your home.
- DIY: Easy. Most are mounted with tension or brackets.
- Budget: $20–$60, depending on style
26. Add Greenery or Faux Plants for a Spa-Like Feel
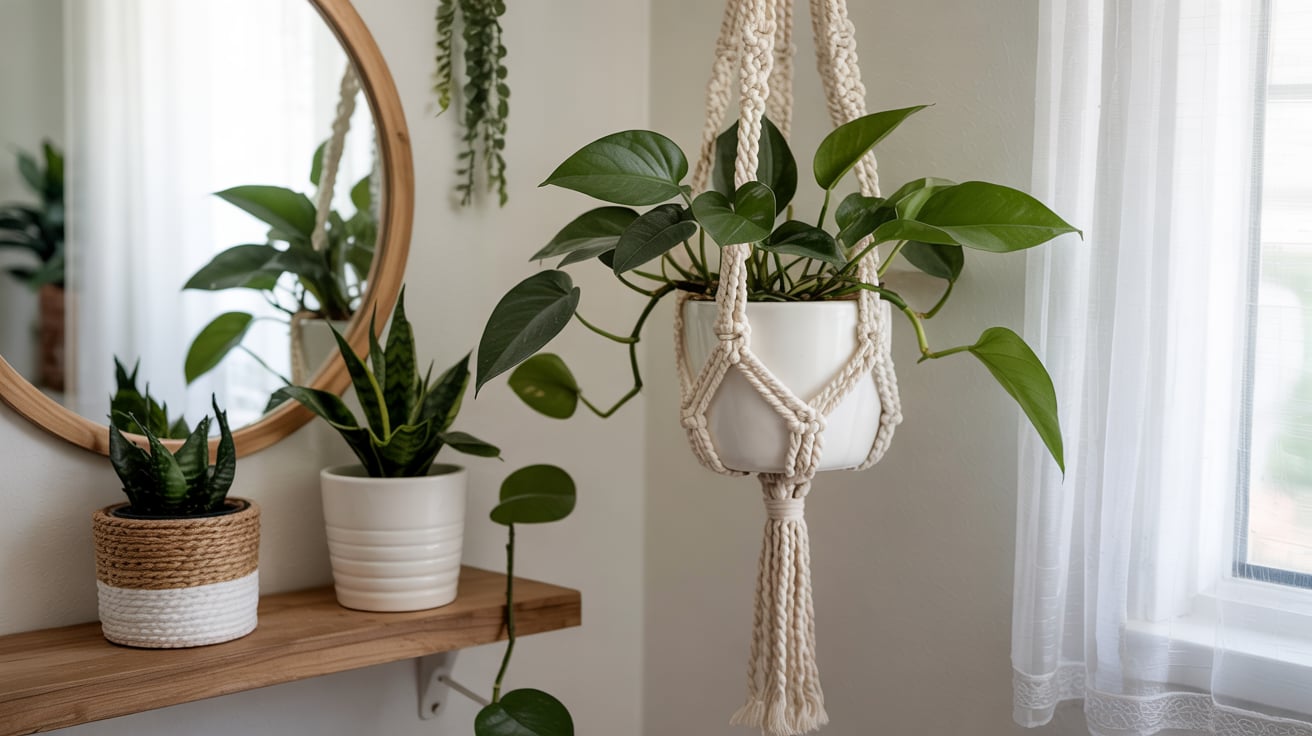
Plants bring life to bathrooms. Choose ferns, pothos, or snake plants that thrive in humidity. Faux options work if your bathroom lacks natural light. Hanging planters save counter space and draw the eye upward.
- DIY: Very easy. Place on shelves or hang in corners.
- Budget: $10–$40 per plant
How to Remodel a Bathroom on a Budget
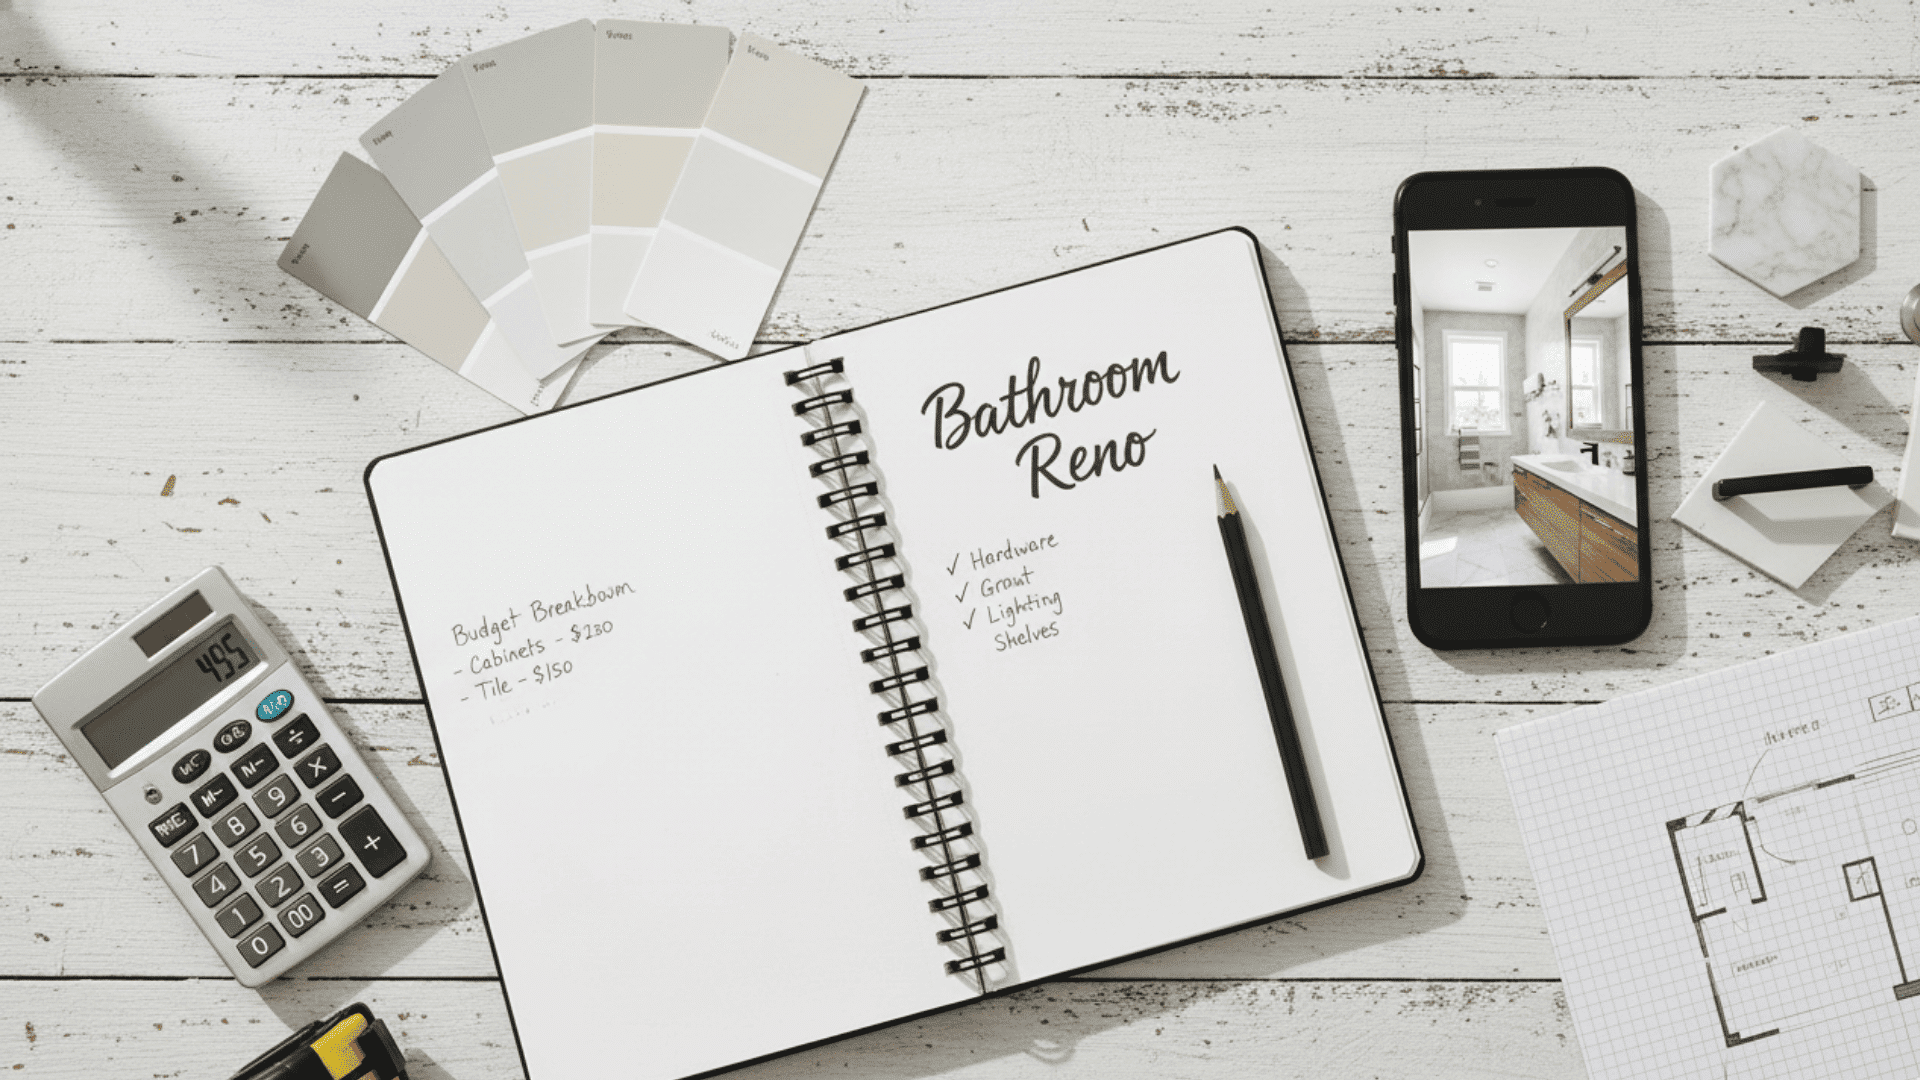
Having all these ideas is great, but where do you actually start? Follow these simple steps to plan and complete your bathroom remodel without stress or overspending.
Step 1: Set a Realistic Budget
Decide how much you can actually spend before you start shopping. Add 10% to 15% extra for unexpected repairs or cost overruns.
Step 2: Assess the Current Bathroom (What Stays, What Goes)
Walk through your bathroom and list what works and what doesn’t. Keep functional items like tubs, toilets, and tile if they’re in good shape.
Step 3: Focus on High-Impact, Low-Cost Upgrades First
Start with paint, hardware, lighting, and mirrors. These changes give you the biggest visual return for the smallest investment.
Step 4: Reuse, Refinish, or Repurpose Before Replacing
Paint cabinets instead of buying new ones. Refinish your tub or countertop rather than ripping them out.
Step 5: Pick DIY-Friendly Projects
Choose tasks you can handle with basic tools and skills. Save complicated plumbing and electrical work for professionals if needed.
Step 6: Save Labor-Heavy Tasks for Last or Hire Selectively
Do cosmetic updates yourself first. Hire pros only for specialized work, such as moving pipes, installing electrical panels, or major tile installation.
Mistakes to Avoid in Budget Bathroom Remodels
Even the best remodel plans can go wrong if you make common mistakes. Avoid these five pitfalls to protect your investment and keep your bathroom looking great for years.
| Mistake | Why It’s a Problem | What to Do Instead |
|---|---|---|
| Ignoring moisture control or ventilation | Poor ventilation causes mold, peeling paint, and warped cabinets. Your remodel won’t last. | Install or upgrade your exhaust fan. Run it during and after showers. |
| Choosing styles that date quickly | Trendy colors and patterns look outdated fast. You’ll want to remodel again sooner. | Stick with classic neutrals. Add trends through towels, art, and accessories. |
| Using the wrong paint for humid spaces | Regular paint peels and grows mildew in bathrooms. You’ll be repainting within a year. | Buy moisture-resistant or bathroom-specific paint. Satin or semi-gloss finishes work best. |
| Cutting corners on waterproofing | Water damage leads to expensive repairs down the road. Rotted walls cost more than waterproofing. | Use proper caulk, grout sealer, and waterproof materials around wet areas. |
| Overbuying or buying unnecessary decor | Too much decor eats your budget without improving function. Clutter makes small bathrooms feel smaller. | Buy only what you need first. Add decor slowly after the main work is done. |
Tips to Save the Most Money on a Bathroom Remodel
Want to stretch your budget even further? These five money-saving strategies help you get the most value from every dollar you spend on your bathroom remodel.
- Where to Splurge and Where to Save: Spend more on faucets, lighting, and hardware you use daily, but save on paint, mirrors, and decor you can easily change later.
- How to Reuse or Salvage Bathroom Elements: Keep your existing tub, toilet, and tile if they’re in decent condition, and focus your money on cosmetic updates like paint and new fixtures instead.
- Best Materials to Pick for Long-Term Durability: Choose vinyl or porcelain tiles for floors, quartz or solid surface for countertops, and moisture-resistant paint to avoid needing to replace things in a few years.
- When DIY Helps vs When It Hurts the Budget: DIY painting, hardware swaps, and shelf installation save money, but hire professionals for plumbing, electrical work, and tile setting to avoid costly mistakes.
- Smart Buying Strategies (Clearance, Marketplaces, Returns, Bundles): Shop clearance sections at home stores, check Facebook Marketplace for gently used items, buy fixture bundles, and keep receipts for easy returns if things don’t fit.
Summing It Up
You don’t need a huge budget to create a bathroom you love. Start with one or two high-impact changes, such as paint, new hardware, or better lighting.
Then layer in more updates as your budget allows. Mix and match ideas from our list of bathroom remodel ideas on a budget to fit your style and needs.
Remember to focus on what matters most: moisture control, durability, and timeless design choices. Skip the trends that date quickly and invest in quality where it counts.
Ready to start your bathroom makeover? Pick your favorite idea from this guide and tackle it this weekend.
Your dream bathroom is closer than you think. Share your before and after photos in the comments below!