Vinyl plank flooring looks sharp, feels solid, and installs more easily than hardwood. But one wrong move and you’re stuck with gaps, buckling, or a floor that sounds hollow with every step.
The good news? Most installation mistakes are totally avoidable once you know what to watch for.
In this guide, I’ll walk you through the most common errors people make, why they matter, and exactly how to fix them before they become expensive problems.
You’ll learn what works, what doesn’t, and how to get it right the first time. Let’s make sure your floor looks professional and lasts for decades.
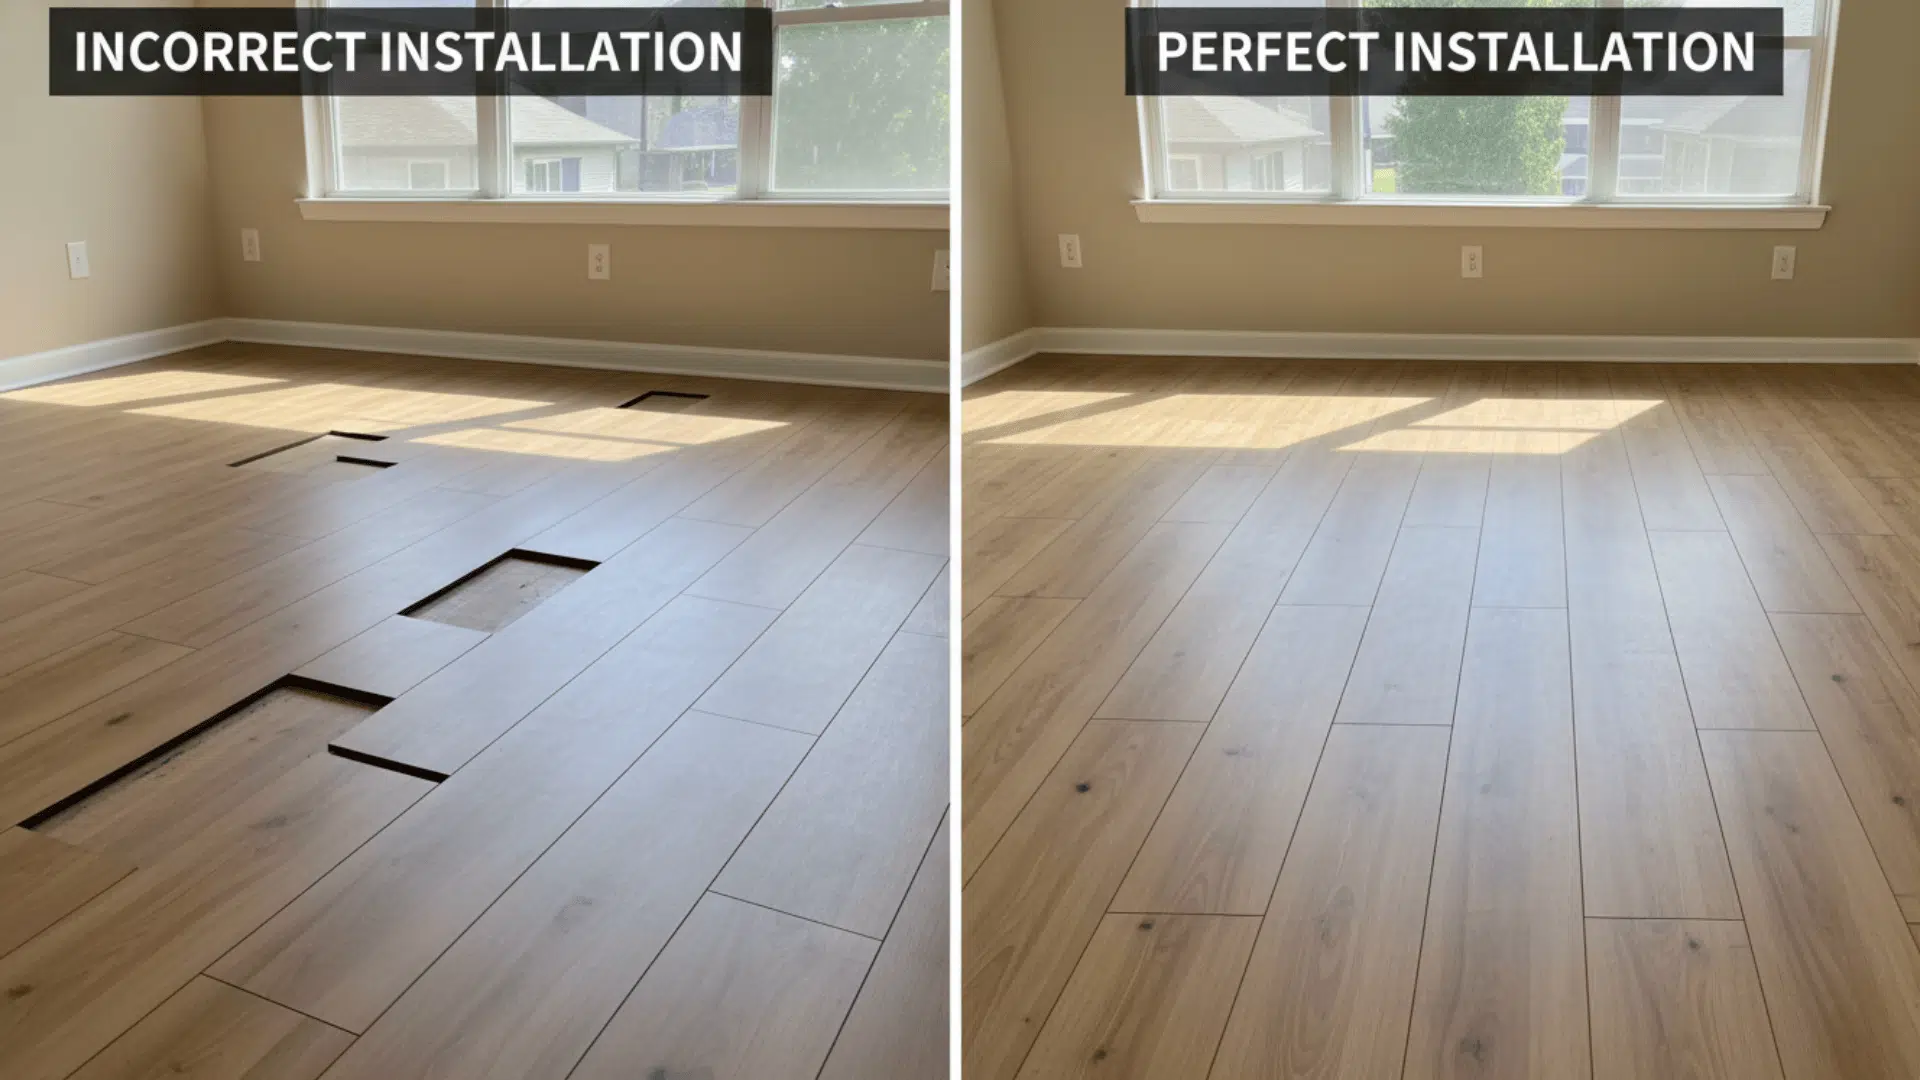
What Happens When Installation Goes Wrong
Proper installation is what separates a floor that lasts 20 years from one that starts failing in two.
When vinyl planks sit flat and tight, they block moisture, stay quiet underfoot, and handle daily wear without buckling or gapping.
Skip the prep work or rush through the steps, and you’ll deal with wobbly spots, lifted edges, and voided warranties.
Do it right from the start, and your floor stays beautiful and solid for decades with almost zero maintenance.
11 Mistakes When Installing Vinyl Plank Flooring With Solutions
Now that you know why proper installation matters, let’s look at the specific errors that trip people up. Below is a breakdown of each mistake along with a practical fix you can apply immediately.
1. Skipping Subfloor Preparation
The Mistake: Installing planks over uneven, dirty, or damaged subfloors.
Why It Matters: Any bump, dip, or debris under the planks can create soft spots, noise, or misalignment over time.
The Solution:
- Vacuum the entire subfloor thoroughly
- Patch holes or dips with leveling compound
- Sand down high areas until smooth
- Ensure the subfloor is completely flat and dry before you begin
2. Not Acclimating the Planks
The Mistake: Installing vinyl straight from the box without letting it adjust to the room.
Why It Matters: Temperature and humidity changes can cause planks to expand or contract after installation, leading to gaps or buckling.
The Solution:
- Let the vinyl acclimate in the room for at least 48 hours
- Keep the room temperature stable during this time
- Stack boxes flat and open them slightly for air circulation
3. Ignoring Moisture Problems
The Mistake: Installing over damp concrete or moisture-prone areas without protection.
Why It Matters: Moisture causes mold, warping, and adhesive failures that ruin your floor from the inside out.
The Solution:
- Use a moisture barrier on concrete slabs or basements
- Check for leaks and humidity issues before you start
- Test moisture levels with a meter if you’re unsure
4. Forgetting to Leave Expansion Gaps
The Mistake: Planks installed tightly against walls with no space to move.
Why It Matters: Vinyl needs room to expand; without gaps, floors can buckle or warp when temperatures change.
The Solution:
- Leave a ¼-inch expansion gap around the entire perimeter
- Use spacers to maintain consistent spacing
- Trim will cover the gap, so it won’t show
5. Poor Layout Planning
The Mistake: Starting the installation without measuring or checking plank direction first.
Why It Matters: You might end up with awkward sliver cuts or mismatched lines that look unprofessional.
The Solution:
- Dry-lay a few planks to visualize the layout
- Measure the room width and plan your cuts ahead of time
- Adjust your starting point to avoid thin strips at the end
6. Repeating Seam Patterns
The Mistake: Lining up seams too uniformly or too closely row after row.
Why It Matters: Floors can look unnatural and lose structural stability when seams stack vertically.
The Solution:
- Stagger seams at least 6 inches apart
- Randomize plank lengths for a more natural look
- Use leftover cut pieces to start new rows
7. Using the Wrong Underlayment
The Mistake: Installing unnecessary underlayment or skipping one when needed.
Why It Matters: Wrong underlayment affects sound, stability, and moisture resistance in ways that show up later.
The Solution:
- Read manufacturer guidelines carefully
- Use underlayment only if your planks don’t have built-in padding
- Choose moisture barriers for concrete or basement floors
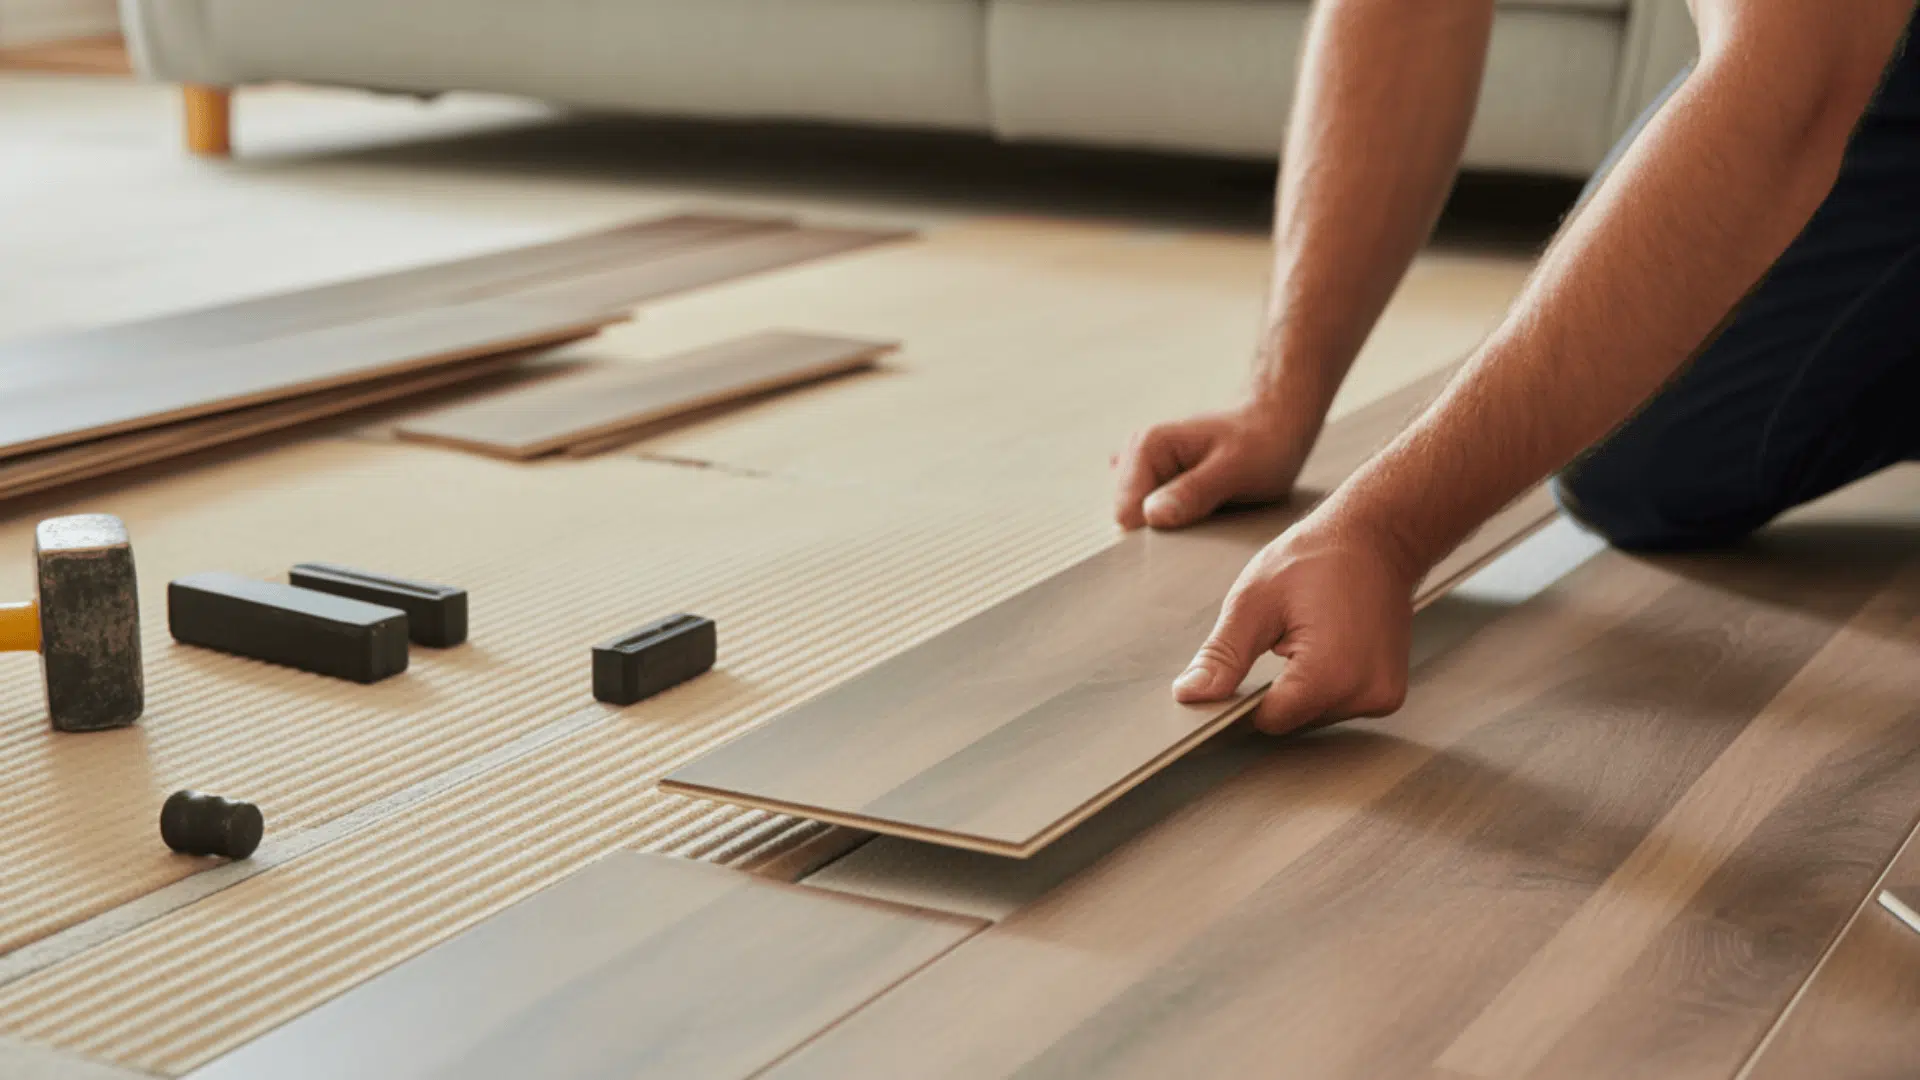
8. Cutting Planks Incorrectly
The Mistake: Making jagged or uneven cuts, or using unsafe tools that damage the planks.
Why It Matters: Bad cuts affect alignment and leave visible gaps that collect dirt and moisture.
The Solution:
- Score planks with a utility knife and snap cleanly
- Use a fine-tooth saw for complex or angled cuts
- Measure twice, cut once to avoid waste
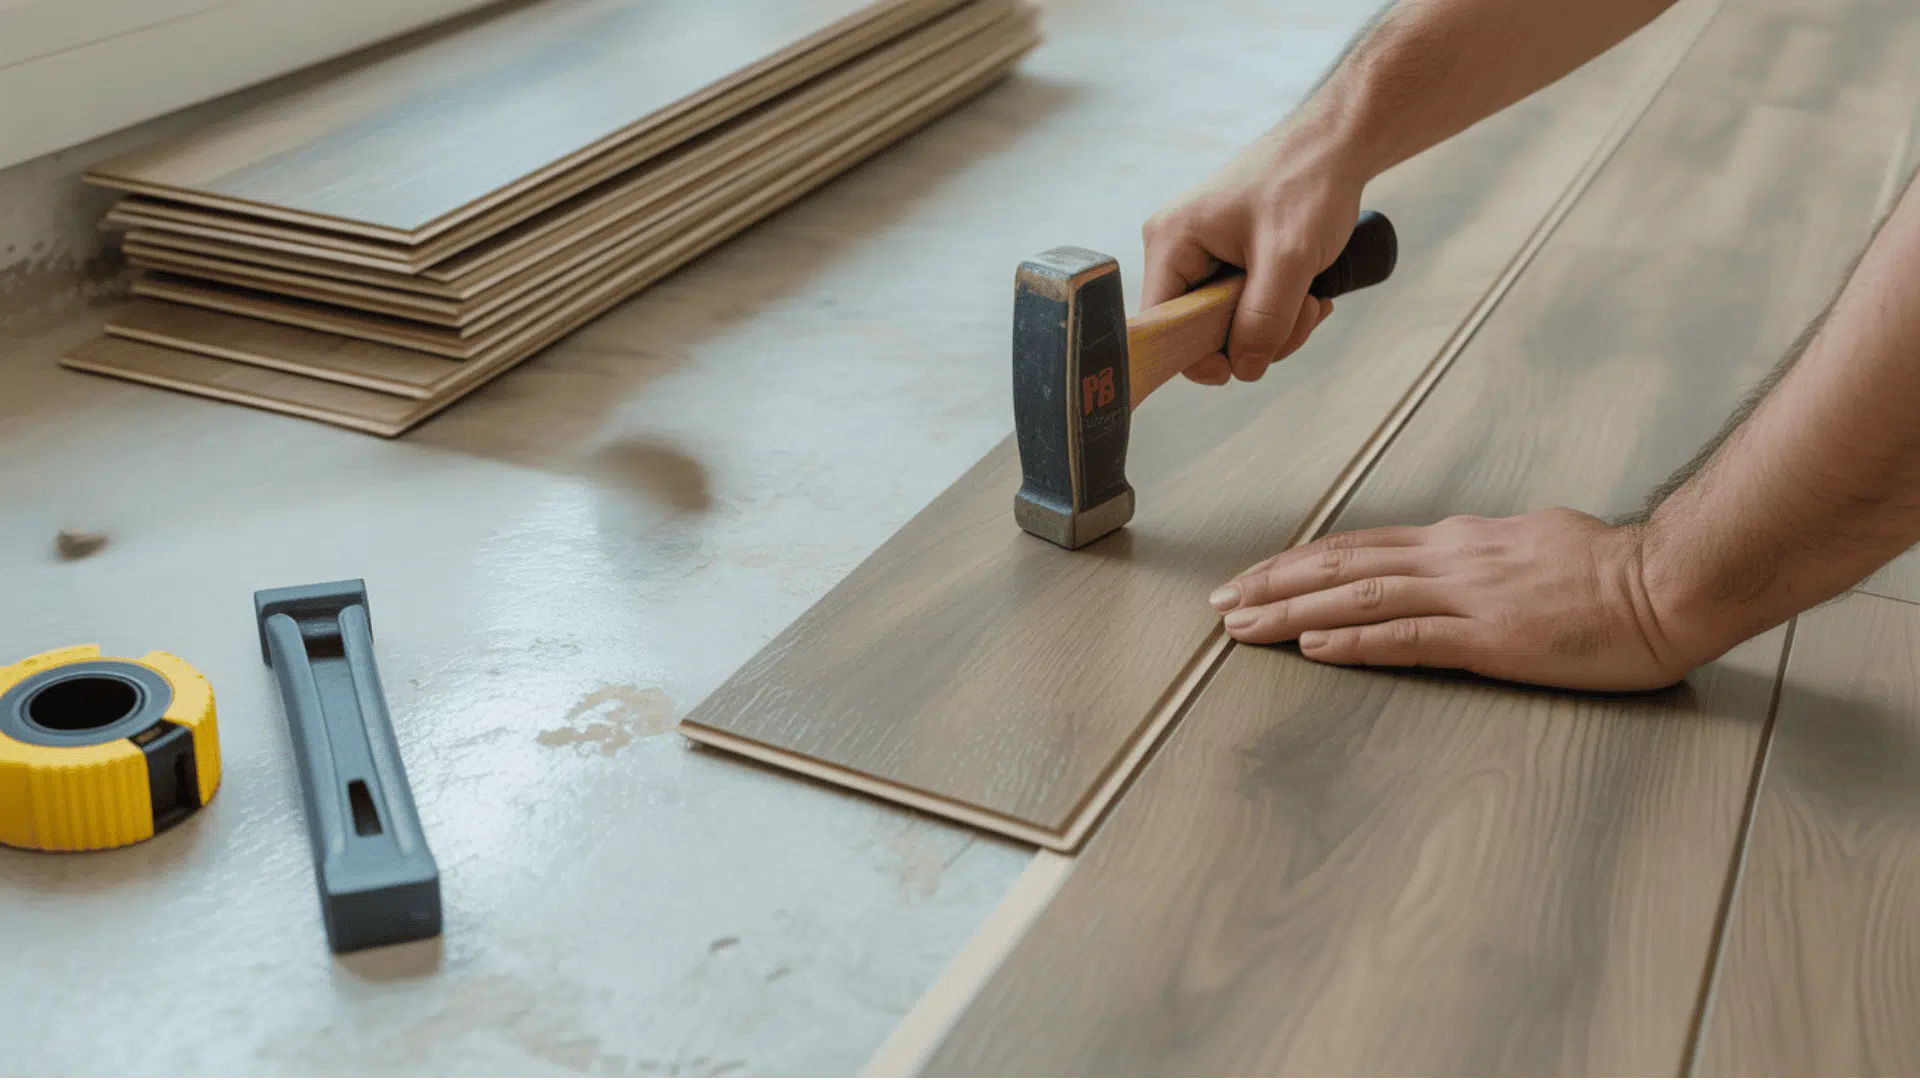
9. Not Locking Planks Tightly Together
The Mistake: Clicking planks together loosely or unevenly without proper pressure.
Why It Matters: Gaps can grow over time, causing edges to lift and dirt to collect in seams.
The Solution:
- Use a tapping block and a rubber mallet, gently but firmly
- Check every seam before moving on to the next row
- Make sure you hear or feel the click that confirms a tight lock
10. Installing Over Problematic Surfaces
The Mistake: Installing vinyl over carpet, loose tile, or damaged floors without removing them first.
Why It Matters: The subfloor must be solid and level to support the planks properly and prevent shifting.
The Solution:
- Remove soft surfaces like carpet and padding completely
- Repair or replace unstable flooring layers
- Test for loose tiles or weak spots before you start
11. Rushing the Installation
The Mistake: Not reading instructions, skipping steps, or following fast online shortcuts.
Why It Matters: Quick shortcuts often lead to long-term issues like warping, gaps, and voided warranties.
The Solution:
- Follow the manufacturer’s guide step by step
- Work slowly and check your progress row by row
- Take breaks to avoid fatigue and careless mistakes
Step-by-Step: How to Install Vinyl Plank Flooring
Ready to install your vinyl plank flooring the right way? Follow this simple guide to go from subfloor prep to finished floor without the guesswork.
Tools and Materials Checklist
| Tool/Material | Purpose |
|---|---|
| Vinyl plank flooring | The flooring material itself |
| Spacers | Maintain expansion gaps along walls |
| Measuring tape | Measure room dimensions and plank cuts |
| Utility knife | Score and snap planks for straight cuts |
| Pull bar | Pull planks tight in tight spaces |
| Tapping block | Protect plank edges while locking them together |
| Rubber mallet | Gently tap planks into place |
| Underlayment | Adds cushion and sound dampening (if required) |
| Moisture barrier | Protects against moisture from concrete slabs |
| Fine-tooth saw | Make angled or complex cuts cleanly |
| Level | Check subfloor flatness before installation |
| Safety gloves & goggles | Protect hands and eyes during cutting |
Having all these tools ready before you start saves time and prevents frustrating trips to the hardware store mid-project.
- Prepare the subfloor – Clean, level, and dry the entire surface before starting.
- Acclimate the planks – Let the flooring rest in the installation room for 48 hours.
- Add a moisture barrier or underlayment – Install only if your flooring type requires it.
- Measure and plan your layout – mark starting points and avoid thin-slice cuts near walls.
- Install the first row with spacers – Place spacers to maintain a ¼-inch expansion gap.
- Cut planks to fit – Score and snap with a utility knife or use a saw for angled cuts.
- Lock the planks tightly – Stagger seams and click each plank securely into place.
- Add transitions and trims – Install threshold pieces where flooring meets other surfaces.
- Remove spacers and install molding – Finish the perimeter after the floor is fully in place.
When to Call a Professional?
If you’re dealing with a severely uneven subfloor, high moisture levels, complex room layouts, or large open spaces that require precise alignment, calling a flooring professional is a smart move.
A pro can handle tricky transitions, moisture mitigation, and precise cutting, especially around doorways or odd angles.
It not only saves time but also ensures a polished, durable finish that lasts for years without the stress of figuring out complicated fixes on your own.
Wrapping It Up
Avoiding the most common mistakes when installing vinyl plank flooring is the key to a smooth, stable, and long-lasting floor.
With the right preparation, good tools, and a bit of patience, you can achieve a professional-looking result even as a DIYer.
Plan ahead, follow the steps, and check your progress as you go, and you’ll enjoy a beautiful new floor that holds up to daily life.
Ready to get started? Grab your tools, take your time, and install with confidence. And if you found this guide helpful, share it with someone tackling their own flooring project.