Tired of your front yard looking drab? You don’t need to spend thousands to create a stunning outdoor space.
With just a little planning, creativity, and DIY spirit, you can transform your yard into a welcoming, beautiful space for a fraction of the cost.
This guide takes you through a budget-friendly front yard makeover that costs under $800 and is full of simple, smart ideas anyone can do.
From selecting plants to laying a gravel path, we’ll walk through everything you need to turn your curb appeal dreams into reality!
Plus, we’ll share more budget-friendly ideas to add character and charm to your front yard.
Why Choose a Cheap DIY Front Yard Idea?
This front yard makeover shows how patience, planning, and simple DIY work can completely change curb appeal.
Strategic timing and clear budget boundaries made this project achievable without overwhelming finances or causing exhaustion.
- Interior projects took priority: Finishing indoor renovations first prevented financial strain from overlapping commitments.
- Seasonal timing mattered: Spring and fall temperatures allowed comfortable outdoor work without weather extremes.
- The phased approach worked better: Breaking work across multiple weekends made physical labor sustainable in the long term.
- Budget discipline guided decisions: Setting a $1,000 limit forced smart shopping and prevented impulse purchases.
- Tracking expenses revealed value: Monitoring spending identified which materials delivered maximum visual impact at an affordable cost.
These planning decisions turned an ambitious project into manageable weekend work that stayed within budget limits.
Step-by-Step Front Yard Makeover Process
This section breaks down the entire renovation into manageable DIY steps that beginners can complete successfully.
Tools and Materials:
Having the right equipment and materials ready before starting ensures smooth progress without frustrating delays or trips.
| Tools | Materials |
|---|---|
| Shovel and spade | Spray paint |
| Rake | Bricks |
| Wheelbarrow or yard cart | Juvenile plants and shrubs |
| Gloves | Mulch |
| sunscreen | Cardboard |
| protective gear | Solar lights |
These basic supplies and simple tools can complete entire front-yard makeovers without expensive rentals or professional help.
Step 1: Planning the Layout with Spray Paint
Visualizing shapes and borders helped guide the entire project before removing any existing grass or plants.
Spray paint the proposed garden bed edges directly on the grass so families can visualize the layouts before digging starts.
Walking around marked areas reveals spacing issues and traffic flow problems that get fixed before work begins.
Step 2: Removing Existing Sod and Grass by Hand
The physical process of sod removal requires pacing work across multiple days to prevent exhaustion and injury.
Cut the grass into manageable squares with sharp spades, then lift each section carefully, leaving the roots intact.
Working two to three hours per session prevents back strain while building familiarity with underlying soil conditions.
Step 3: Shaping Garden Beds and Seating Areas
Defining spaces while working around tree roots and irrigation lines requires flexibility and careful observation.
Existing roots restrict digging near trunks, and shallow irrigation lines need protection from shovels. Curved bed edges soften lines, while stacked bricks offer casual seating without concrete.
Step 4: Shopping for Plants, Bricks, and Supplies in Phases
Multiple store trips helped control costs and improve layout by spreading purchases out. Gradually buying materials prevents large expenses that exceed monthly cash flow.
Visiting nurseries multiple times lets families catch clearance sales and observe plant health before making commitments.
Step 5: Laying Out Plants Before Planting
Spacing, future growth, texture variety, and low-maintenance planning guide placement decisions before digging any holes.
Arranging potted plants in proposed locations shows how mature sizes affect spacing and helps identify crowding early.
Leaving generous space between young plants allows them the grow without needing to be transplanted later.
Step 6: Installing Bricks and Leveling the Seating Area
Creating a casual patio without professional equipment or pressure to be perfect keeps costs low and expectations realistic.
Stacking bricks in simple patterns creates functional seating areas without requiring mortar or specialized masonry skills.
Leveling the ground beneath bricks with sand or gravel prevents wobbling and extends their lifespan without requiring expensive preparations.
Step 7: Using Cardboard as a Weed Barrier
Cardboard saved money while reducing long-term weeding by blocking grass regrowth underneath mulch layers.
Flattened cardboard boxes cover bare soil completely before mulch application and decompose naturally over twelve months.
Overlapping cardboard edges by six inches prevents gaps where weeds emerge after settling and material breakdown.
Step 8: Adding Mulch, Rocks, and Finishing Touches
Tying everything together visually while keeping maintenance simple completes projects without ongoing, high-effort upkeep.
Spreading three-inch mulch layers covers cardboard completely and creates a uniform appearance across all planting beds.
Solar pathway lights define borders and improve nighttime safety without electrical work or increasing monthly utility bills.
Video Tutorial
I would like to give credit to Livingwithcambriea for their informative video, which served as a reference for this guide.
Beyond the core makeover steps, homeowners can enhance curb appeal further with targeted projects that address specific yard features and problem areas.
11 Budget-Friendly Ideas to Enhance Your Front Yard
These cheap landscaping ideas for the front of your house add character and functionality without hiring contractors. Mix and match based on your yard’s needs and your weekend availability.
Idea 1: Create a River Rock Dry Stream Bed
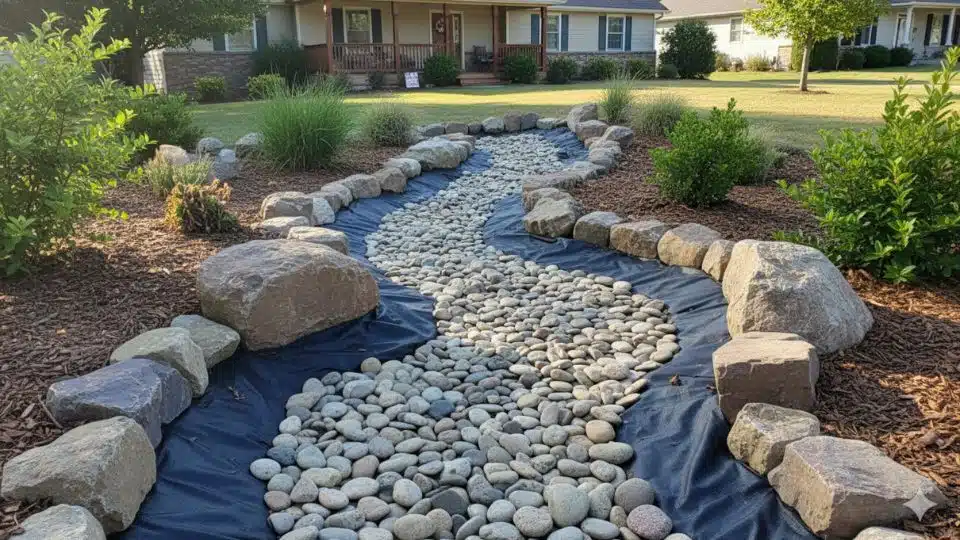
If you’ve got a low spot that turns into a swamp after every rain, stop fighting it. Work with it instead.
A dry stream bed handles drainage naturally while looking like an intentional design feature. When it rains, water flows through the rocks. When it’s dry, you’ve got a sculptural element that adds texture to flat yards.
You’ll need:
- Landscape fabric (prevents weeds, lets water through)
- Large river rocks for edges (6–10 inch diameter)
- Medium cobbles for the middle (3–5 inches)
- Small pebbles to fill gaps (1–2 inches)
Start by digging a shallow, winding trench following where water naturally flows. Line with fabric. Place large rocks along the edges first—they’re your “banks.” Fill the center with progressively smaller stones. The variation in rock size is what makes it look natural rather than like a pile of gravel.
Pro tip: Visit a landscape supply yard instead of buying bagged rocks. You’ll pay by the ton instead of by the bag and save 50% or more.
Cost: $50–$150 depending on length
Idea 2: Build a Simple Wooden Planter Box
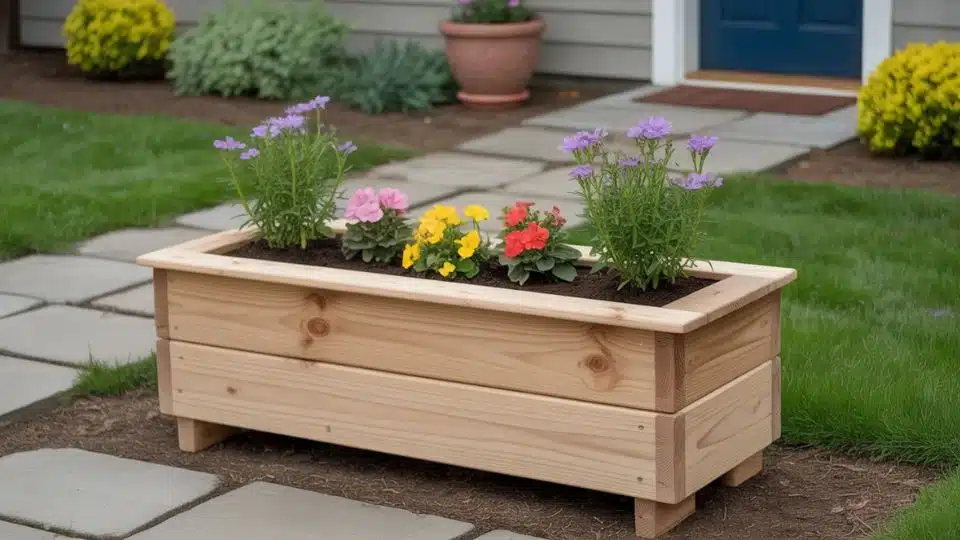
Raised planters solve problems: they protect plants from foot traffic, add height to flat yards, improve drainage in clay soil, and let you control soil quality completely.
Materials for one 2×2-foot planter:
- (4) 2×8 cedar boards, 24 inches long: $20–$25
- Exterior wood screws: $5
- Drill with driver bit (you probably own this)
Assembly takes 30 minutes:
Cut boards to length. Stand two boards on edge to form an “L” and drive three screws through one board into the end of the other.
Repeat for all four corners. That’s your box. Drill 4–6 drainage holes in the bottom or leave the bottom open and set directly on landscape fabric.
Why cedar? It resists rot naturally without chemical treatment. Pine works too, but needs sealing, or it’ll decompose within 2–3 years.
Fill with bagged potting mix (not garden soil; it’s too dense), plant flowers or herbs, and set it near your front entrance.
Cost: $25–$40 per planter
Idea 3: Install a Gravel Pathway
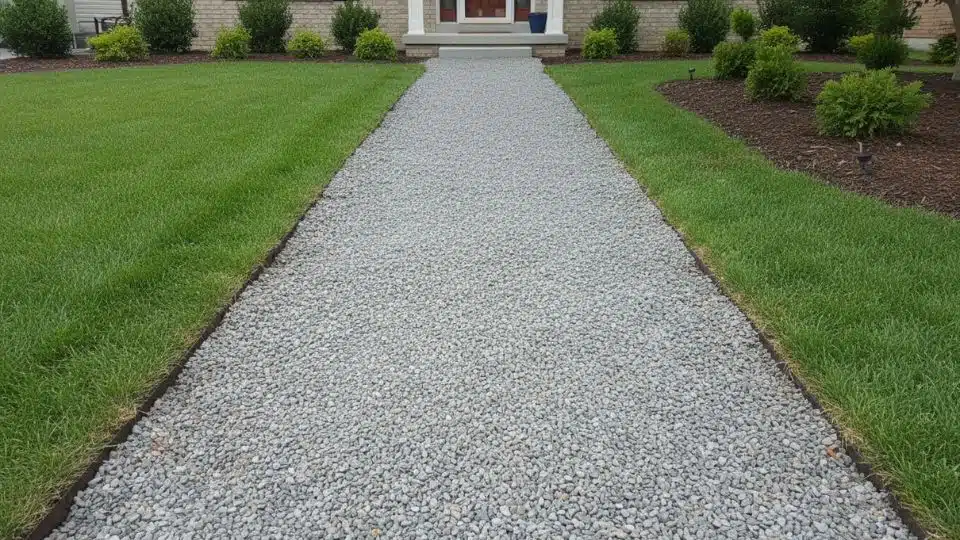
This one takes more effort but delivers serious impact. Gravel paths define traffic flow, eliminate muddy shortcuts across your lawn, and give your lawn a professionally landscaped look.
Why gravel over pavers?
| Factor | Gravel Path | Paver Path |
|---|---|---|
| Cost per sq ft | $1–$3 (DIY) | $10–$20 (pro) |
| Installation time | One afternoon | Full weekend+ |
| Skill required | Beginner | Intermediate |
| Drainage | Excellent | Requires planning |
| Maintenance | Occasional raking | Weed removal between pavers |
The process in plain terms:
Mark your path with spray paint or a garden hose—make it 3–4 feet wide so two people can walk side by side. Dig out 3–4 inches of soil. Compact the base by walking on it repeatedly or using a hand tamper. Pour gravel, rake smooth, done.
The secret to gravel that stays put? Compact the base thoroughly and use angular crushed stone, not round pea gravel that migrates everywhere.
Budget: $50–$150, depending on path length
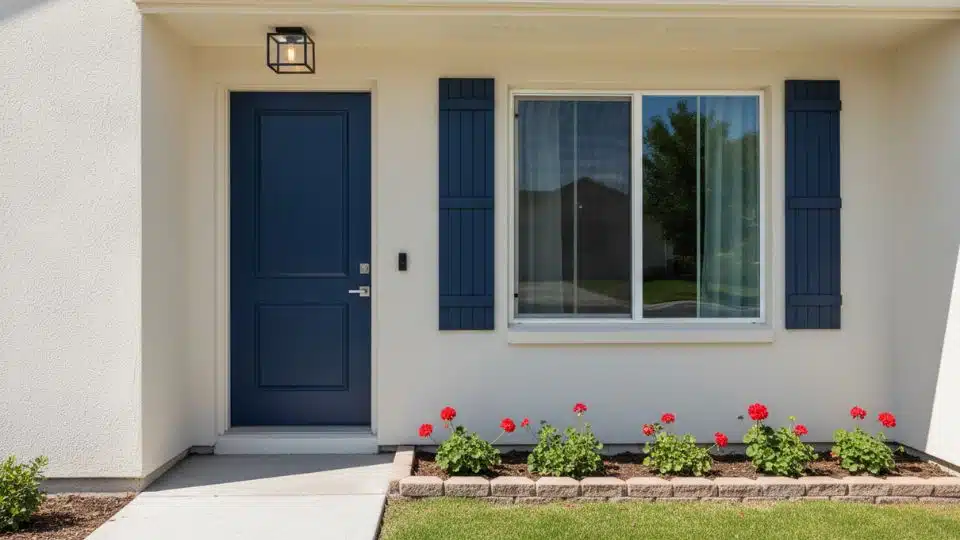
Idea 4: Paint Your Front Door and Shutters
Cost: $35–$60 | Time: 4–5 hours
A faded, peeling front door tells visitors the house is neglected before they even knock. A bold, fresh door says someone cares.
Here’s the thing most tutorials won’t tell you: color choice matters more than technique. A perfectly painted beige door does nothing. A slightly imperfect navy, red, or forest-green door completely transforms curb appeal.
The simple process:
- Morning: Remove hardware, clean with TSP, light sand, and apply primer
- Afternoon: Two coats of exterior paint, 2 hours apart
- Evening: Reattach hardware, admire your work
Paint in the morning so the door can stay open while drying. Close it by evening when temperatures drop.
Colors that photograph well for resale: Black, navy, deep red, charcoal, forest green. Avoid trendy colors that date quickly
Idea 5: Add Window Boxes Below Front Windows
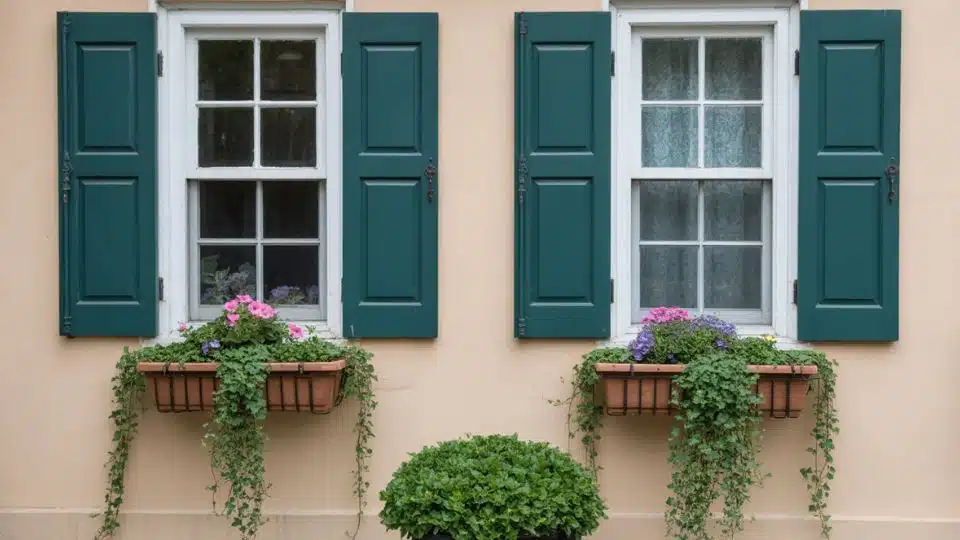
Window boxes work magic on plain facades. They add color at eye level, break up large expanses of siding, and make even basic houses look cottage-charming.
Three approaches based on your commitment level:
Low-effort: Buy pre-made plastic boxes ($15–$25 each), fill with trailing petunias or ivy, and mount them with L-brackets. Done in an hour.
Medium effort: Build simple cedar boxes from 1×6 boards ($30–$40 in materials), stain them to match the trim, and plant seasonal flowers. Half-day project.
Set-and-forget: Fill boxes with drought-tolerant succulents or evergreen herbs like rosemary. Water once a week, look good year-round.
Sizing rule: Boxes should be 6–12 inches shorter than the window width. Anything wider looks awkward.
Cost: $20–$60 per window
Idea 6: Create Defined Edging with Pavers

Nothing separates amateur landscaping from professional-looking yards like clean edges. That blurry line where grass meets mulch? It screams, “no one maintains this.”
Your edging options compared:
| Material | Cost | Durability | Look | Installation |
|---|---|---|---|---|
| Spade-cut edge | Free | Needs redoing 2x/year | Natural | Just slice a clean line with a spade |
| Steel edging | $2–$4/ft | 15+ years | Modern, clean | Hammer stakes into ground |
| Brick pavers | $0.50–$2 each | 20+ years | Classic | Dig trench, set in soil |
| Plastic edging | $0.50–$1/ft | 3–5 years | Hidden | Easy but looks cheap if visible |
| Natural stone | $3–$8/ft | Lifetime | Organic | Heavy but no installation needed |
My recommendation: Brick pavers for a defined look that lasts. Spade-cut edges if you want a free, natural look. Skip plastic; it always works its way out of the ground and looks terrible.
Idea 7: Hang House Numbers on a Painted Board
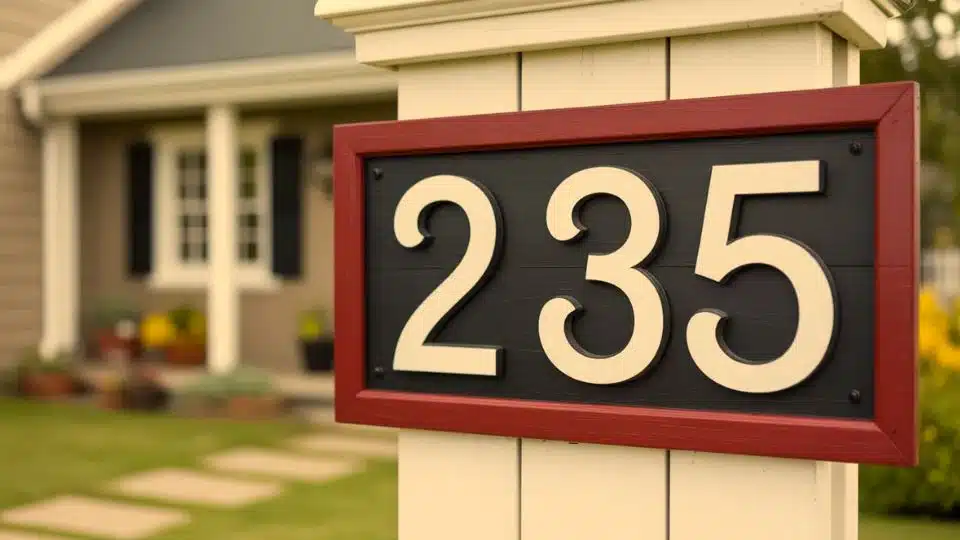
Here’s a $15 project that takes 30 minutes and solves a real problem: no one can find your house.
Faded, tiny, or poorly placed house numbers frustrate delivery drivers, confuse guests, and slow down emergency responders. Fix it this weekend.
The simple approach:
- Buy 4–5 inch metal numbers in black or brushed nickel ($2–$4 each)
- Mount directly on siding near the front door or on a porch post
- Make sure they’re visible from the street, not just the sidewalk
The upgraded approach:
- Cut a 1×8 board to 18–24 inches
- Paint a contrasting background color
- Mount numbers on the board, hang near the entrance
Dark numbers on light backgrounds (or vice versa) read clearly from moving cars. Avoid script fonts—they’re impossible to read quickly.
Cost: $10–$25
Idea 8: Plant a Small Tree for Vertical Interest
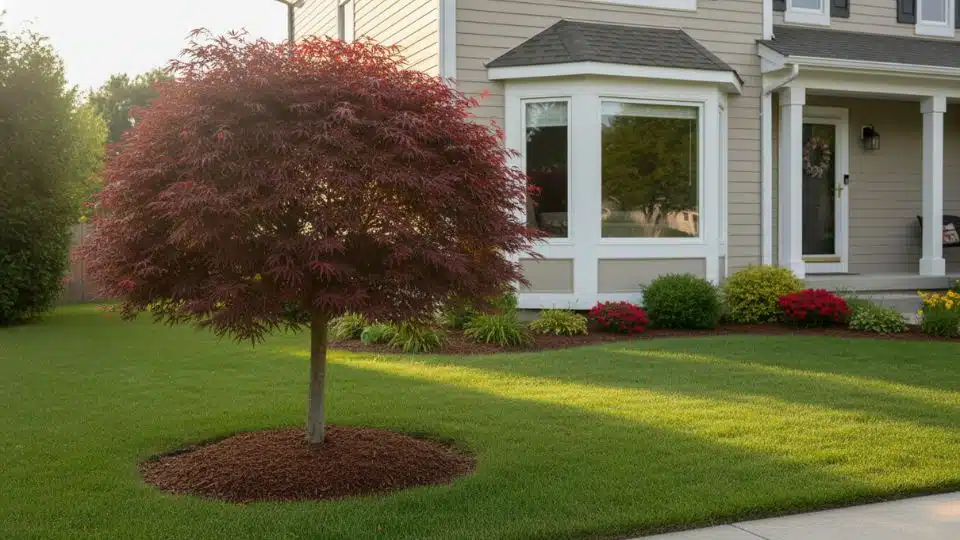
A single well-placed tree anchors your entire front yard. It adds height, seasonal interest, shade, and perceived property value that far exceeds the $50 you’ll spend.
Best budget-friendly trees under $80:
Crape Myrtle: Summer blooms in pink, purple, red, or white. Peeling bark adds winter interest. Grows 15–25 feet. Loves heat.
Japanese Maple: Stunning fall color, architectural shape. Stays under 20 feet. Needs afternoon shade in hot climates.
Redbud: Pink spring flowers before leaves emerge. Native to the eastern US. Heart-shaped leaves. Grows 20–30 feet.
Flowering Dogwood: White or pink spring blooms, red fall berries. An understory tree that tolerates some shade. 15–25 feet.
Planting takes one hour: Dig a hole twice as wide as the root ball but no deeper. Set the tree so the root flare sits at soil level. Water deeply, add 3 inches of mulch (keep it off the trunk), water weekly for the first year.
Cost: $30–$80
Idea 9: Build a Simple Mailbox Post Garden
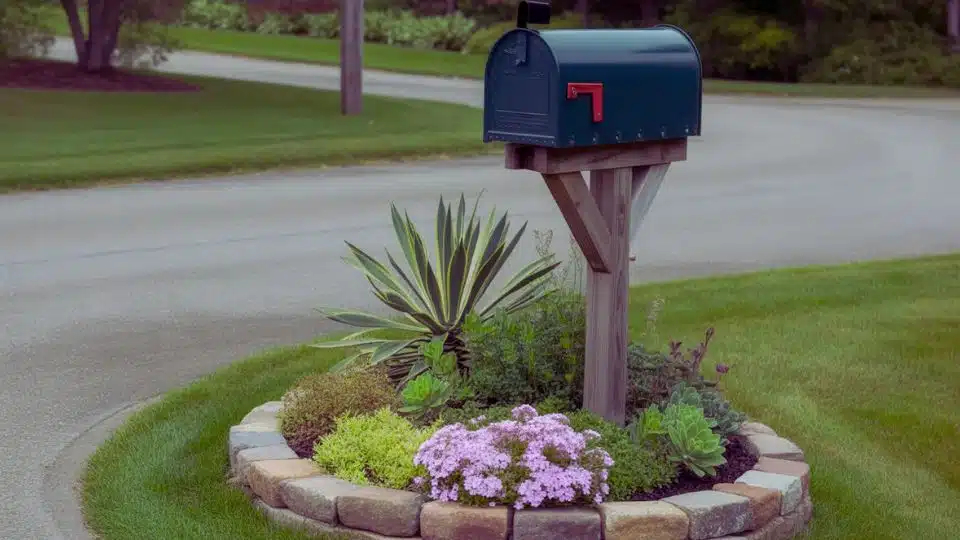
That lonely post surrounded by patchy grass? It’s the first thing people see when approaching your house.
Quick fix (30 minutes): Clear a 3-foot circle around the post. Pull grass and weeds. Add landscape fabric. Cover with 2 inches of mulch or decorative gravel. Place 3–5 small rocks around the edge. Plant nothing—just clean it up.
Weekend upgrade: Same clearing process, but add 3–5 low-growing perennials that won’t block the mailbox or obstruct driver visibility. Best picks: sedum, creeping phlox, dianthus, or ornamental grasses under 18 inches tall.
Important: Keep plantings low. Mail carriers need access, and drivers need to see around the box. Nothing taller than knee-height within 3 feet.
Cost: $20–$40
Idea 10: Refresh Existing Mulch with Fresh Top Layer
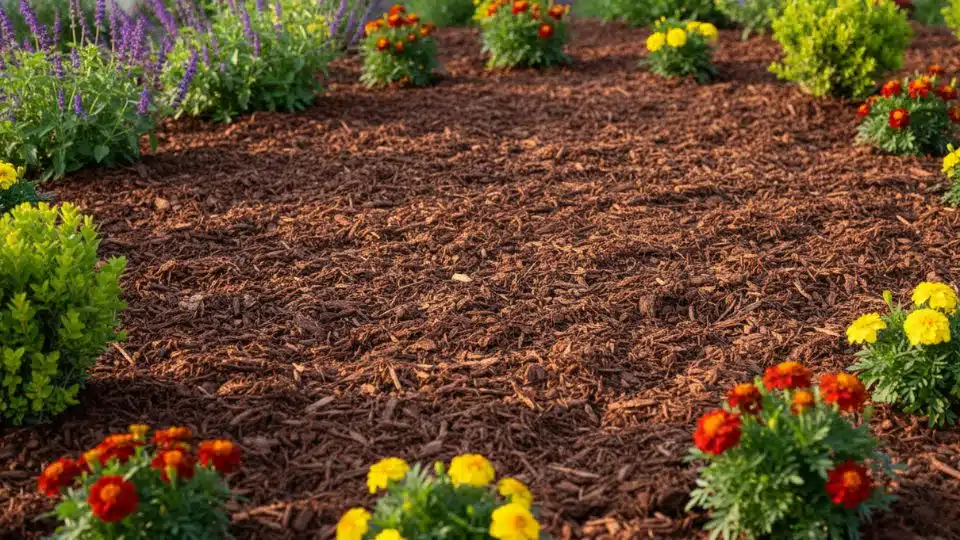
Cost: $30–$50 | Time: 1–2 hours
This is the single fastest way to transform a tired front yard. Fresh mulch makes everything look intentional and well-maintained—even if your plants are struggling.
Don’t overthink it. Pull visible weeds, rake the old stuff smooth, and dump 1–2 inches of fresh mulch on top. That’s it. The color contrast alone makes beds pop from the street.
One cubic yard covers roughly 100 square feet. Most front yards need 2–3 bags from the home improvement store or one bulk delivery if you’re covering larger areas.
Best times to buy: Spring and fall sales knock 30–50% off regular prices. Set a phone reminder for April and September.
Idea 11: Install a Rain Barrel System
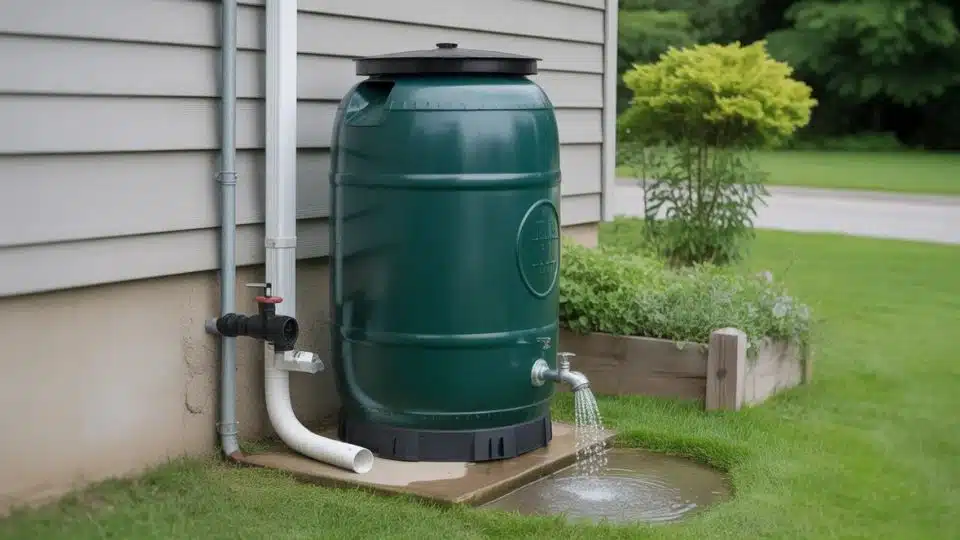
This one’s for the long game. A rain barrel won’t transform your curb appeal overnight, but it will:
- Cut your summer water bills by $30–$50
- Provide chemical-free water your plants actually prefer
- Keep 1,300+ gallons out of storm drains annually
- Give you something to talk about with environmentally-minded neighbors
The simple setup:
Position a 50-gallon barrel on concrete blocks beneath a downspout. The elevation lets gravity feed a hose.
Install a downspout diverter ($15–$25) that directs water into the barrel when it’s raining and bypasses it when the barrel is full. Attach a spigot near the bottom and an overflow hose that directs excess water away from your foundation.
Where to buy: Home improvement stores carry basic barrels for $80–$120. Check your local municipality first; many offer free or subsidized rain barrels to reduce stormwater runoff.
One caution: In winter, disconnect the diverter and drain the barrel completely. Frozen water cracks plastic barrels.
Cost: $50–$150
Budget Breakdown and Cost Saving Tips
Real project expenses and innovative shopping strategies helped keep this front yard makeover under budget limits.
| Cost Category | Amount/Savings |
|---|---|
| Total Project Cost | Final spending came to approximately $750, well under the $1,000 budget goal. |
| Plant Savings | Juvenile shrubs cost 60 to 70 percent less than mature specimens at nurseries. |
| Mulch Discounts | Spring and fall sales reduce mulch costs by 30 to 50 percent off regular prices. |
| Military Benefits | Veterans save 10% at major home improvement stores like Home Depot and Lowe’s. |
| Labor Savings | DIY work eliminated $2,000 to $3,000 in professional landscape contractor fees. |
These strategic choices made professional-quality results achievable on tight budgets without compromising final appearance or durability.
Mistakes to Avoid in Cheap DIY Front Yard Projects
Learning from typical errors saves time, money, and frustration when completing front-yard makeovers on tight budgets.
- Buying mature plants instead of juveniles: Spending $30 to $50 per plant quickly drains budgets, while $5 to $15 juvenile plants grow beautifully within one season.
- Skipping layout planning with spray paint: Starting work without marking borders can lead to spacing mistakes that require expensive material corrections and additional labor hours.
- Purchasing all materials at once: Overwhelming budgets with single large purchases prevents catching sales and limits design flexibility based on progress observations.
- Ignoring weed barriers underneath mulch: Skipping free cardboard creates ongoing maintenance battles with grass regrowth that landscape fabric, costing $50 to $100, prevents.
- Working too many hours per session: Pushing through exhaustion causes injuries and burnout that delay projects for weeks while bodies recover from overexertion.
Avoiding these common pitfalls keeps projects on schedule and within budget while preventing frustration that derails completion goals.
Final Thoughts
Changing your front yard on a budget is not only possible but also rewarding.
With a bit of patience, planning, and creativity, you can create a welcoming space that enhances your home’s curb appeal without breaking the bank.
From simple DIY steps to clever budget-friendly ideas, this guide has everything you need to get started.
Ready to roll up your sleeves and bring your front yard vision to life? Start with a spray-painted layout and shop for juvenile plants during seasonal sales.
Your dream yard is just a weekend project away. Let’s get started today!
Remember, small changes can make a big impact, and the satisfaction of doing it yourself is priceless!