Is your window tint bubbling, peeling, or turning purple? It’s probably time for a fresh start.
What if I told you removing old tint yourself is easier than you think and can save you $150 to $350 at a shop?
With a few basic tools and the right method, you can strip off old film cleanly without damaging your glass or defroster lines.
In this guide, you’ll learn which tint types are easiest to remove, the professional trash bag method that actually works, alternative techniques for stubborn film, common mistakes that ruin your windows, and insider tips from professional tinters.
Let’s get started.
What Types of Window Tint Are There?
Knowing which type of tint is on your windows makes removal much easier. Each kind has different adhesive strength and peeling behavior.
Some come off in one clean sheet, while others need more heat or patience. Let’s break down the most common types you’ll find.
| Tint Type | What It Is | Removal Notes |
|---|---|---|
| Dyed Window Tint | Most common and budget-friendly option | Fades to purple over time; becomes brittle and easier to peel |
| Metalized Window Tint | More durable with a reflective, shiny finish | Stronger adhesive; needs more heat to soften before peeling |
| Ceramic Window Tint | Premium film that blocks heat effectively | Peels cleanly but may take longer; requires steady heat |
| Factory Tint | Color is built into the glass during manufacturing | It cannot be removed; it’s part of the glass itself |
| Aftermarket Tint | Film is applied to glass after production | Fully removable with the right method |
Factory vs. Aftermarket Tint: Factory tint is baked into the glass. You can’t peel it off. Aftermarket tint is a film stuck to your window. This is what you can remove at home.
Older dyed tint gets brittle and breaks apart easily. Metalized films have double layers that sometimes separate while peeling.
Ceramic tint holds together well but needs consistent heat for a smooth removal. Knowing what you’re working with saves time and prevents damage to your glass.
Reasons to Remove Old Window Tint
Old tint does more than look bad. It can make driving harder and even unsafe. Here are the top reasons people decide to strip off their old film.
- Bubbling or Peeling Film: Heat breaks down the adhesive over time, creating bubbles that block your view and make the window look worn out.
- Purple or Faded Tint: The dye layer degrades with sun exposure, turning purple and losing its ability to block UV rays or provide privacy.
- Blurry or Hazy Night Visibility: Aged adhesive scatters headlights and streetlights, creating glare that makes night driving difficult and risky.
- Failed State Inspections: Some states have strict VLT (visible light transmission) laws, and an old or dark tint can prevent your car from passing registration.
- Upgrading to New, Higher-Performance Tint: Removing old film lets you install better tint with improved UV protection, clearer views, and stronger heat rejection.
How to Remove Tint in Simple Steps: Trash Bag Method
This method is based on real professional techniques. It works best in warm, sunny weather and saves you money on shopping costs.
Tools and Materials You’ll Need
| Item | Purpose |
|---|---|
| Spray bottle (95% water + baby shampoo) | Lubricates glass and helps the trash bag stick |
| Black trash bags | Traps heat and softens adhesive |
| Utility knife or box cutter | Trims bags around edges |
| Credit card or hard card | Tucks edges and lifts corners |
| Plastic scraper | Helps with adhesive removal |
| Degreaser (optional) | Removes leftover glue |
| Steamer (optional) | For old or brittle tint |
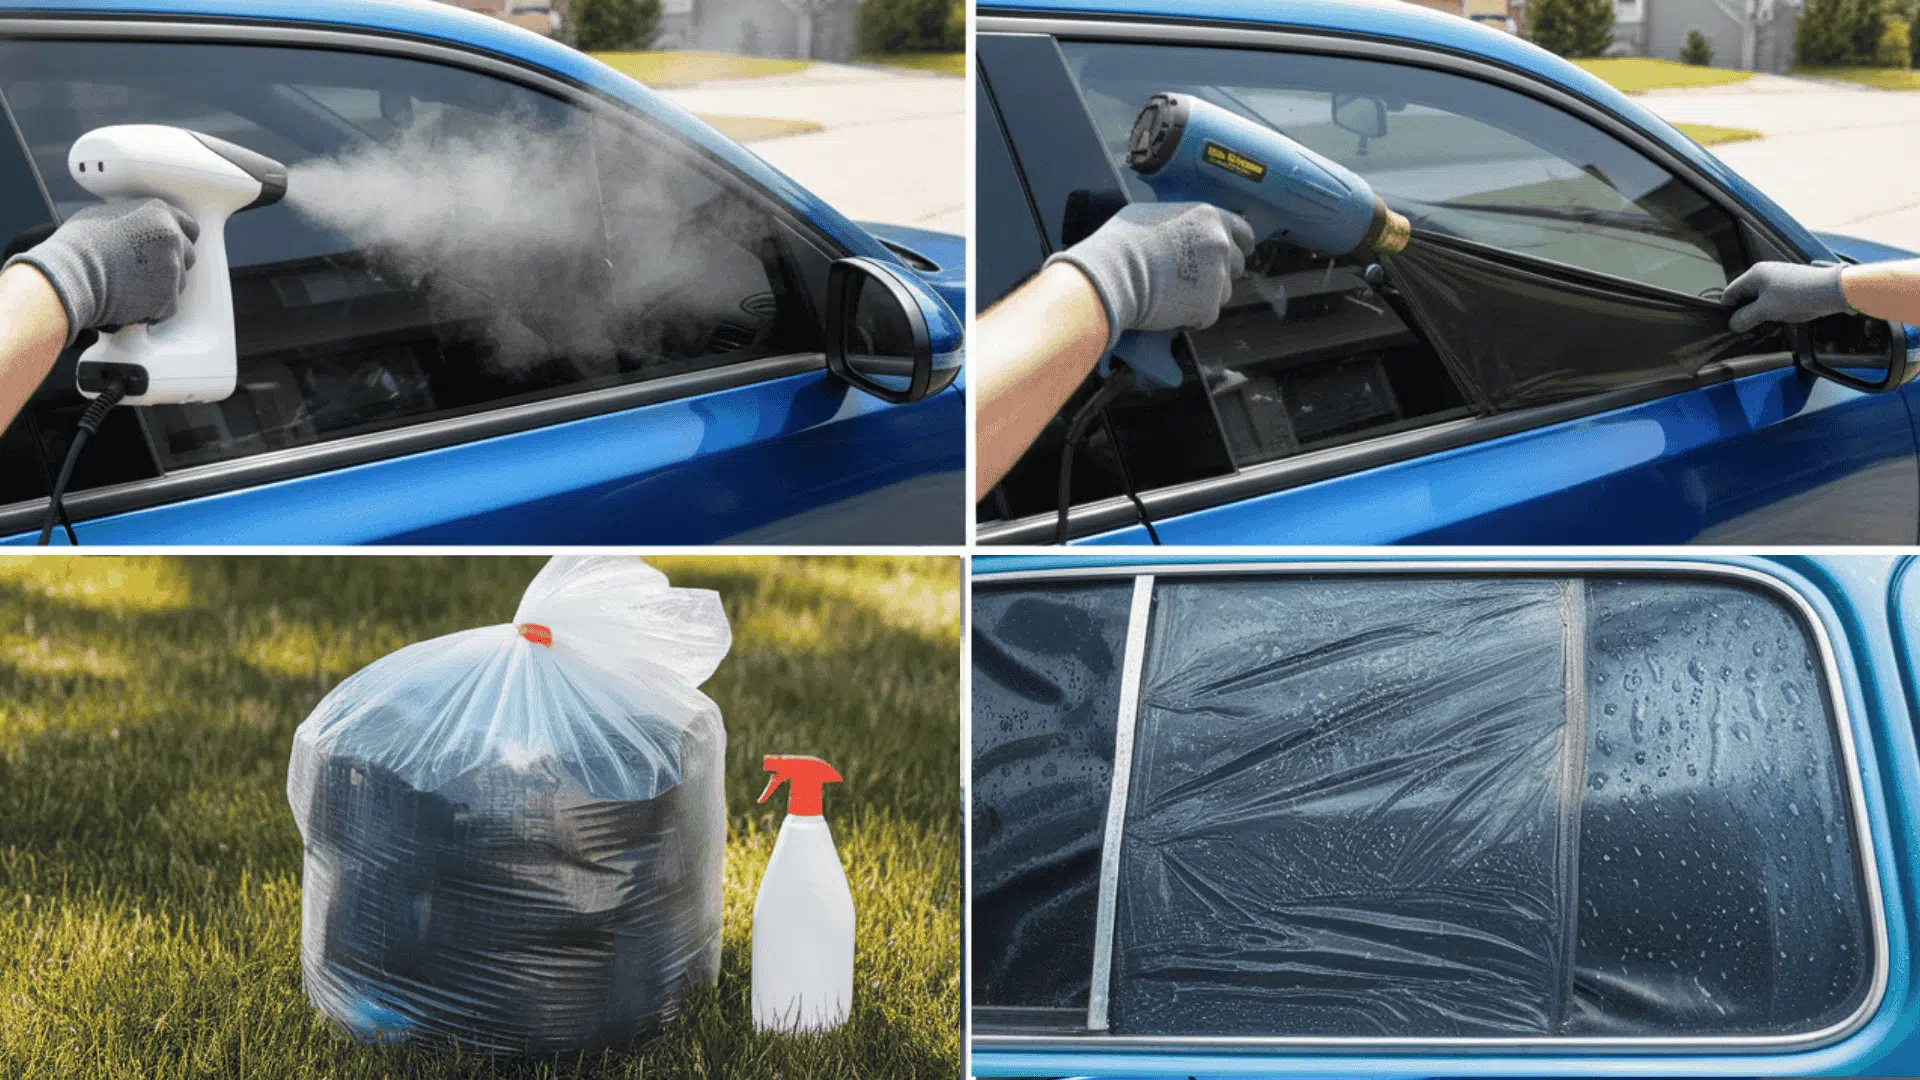
Step 1: Wet the Window and Apply the Trash Bag
Spray the inside of the window generously with soapy water. Press a trash bag flat against the wet glass to make it stick. Smooth it out completely until the entire surface is covered.
Roughly trim the edges with a utility knife to ensure full contact. This layer traps heat, helping the adhesive soften faster.
Materials Needed: Spray bottle with soapy water, Black trash bag, Utility knife
Step 2: Create Full Edge Overlap
Slide the trash bag upward so it overlaps the top edge by about 2 inches. Make sure both sides overlap as well for complete coverage.
Use a credit card or a hard card to push the edges firmly against the glass. Repeat this process for all side windows and quarter panels. Good edge contact keeps heat trapped inside.
Materials Needed: Credit card or hard card
Step 3: Let the Sun Heat the Adhesive
Move your car into direct sunlight and let the windows sit for 15 to 20 minutes. When the glass feels hot to the touch, the adhesive is soft and ready. This heat makes the film peel off cleanly in one sheet instead of tearing into small pieces.
Materials Needed: Direct sunlight, 15 to 20 minutes of time
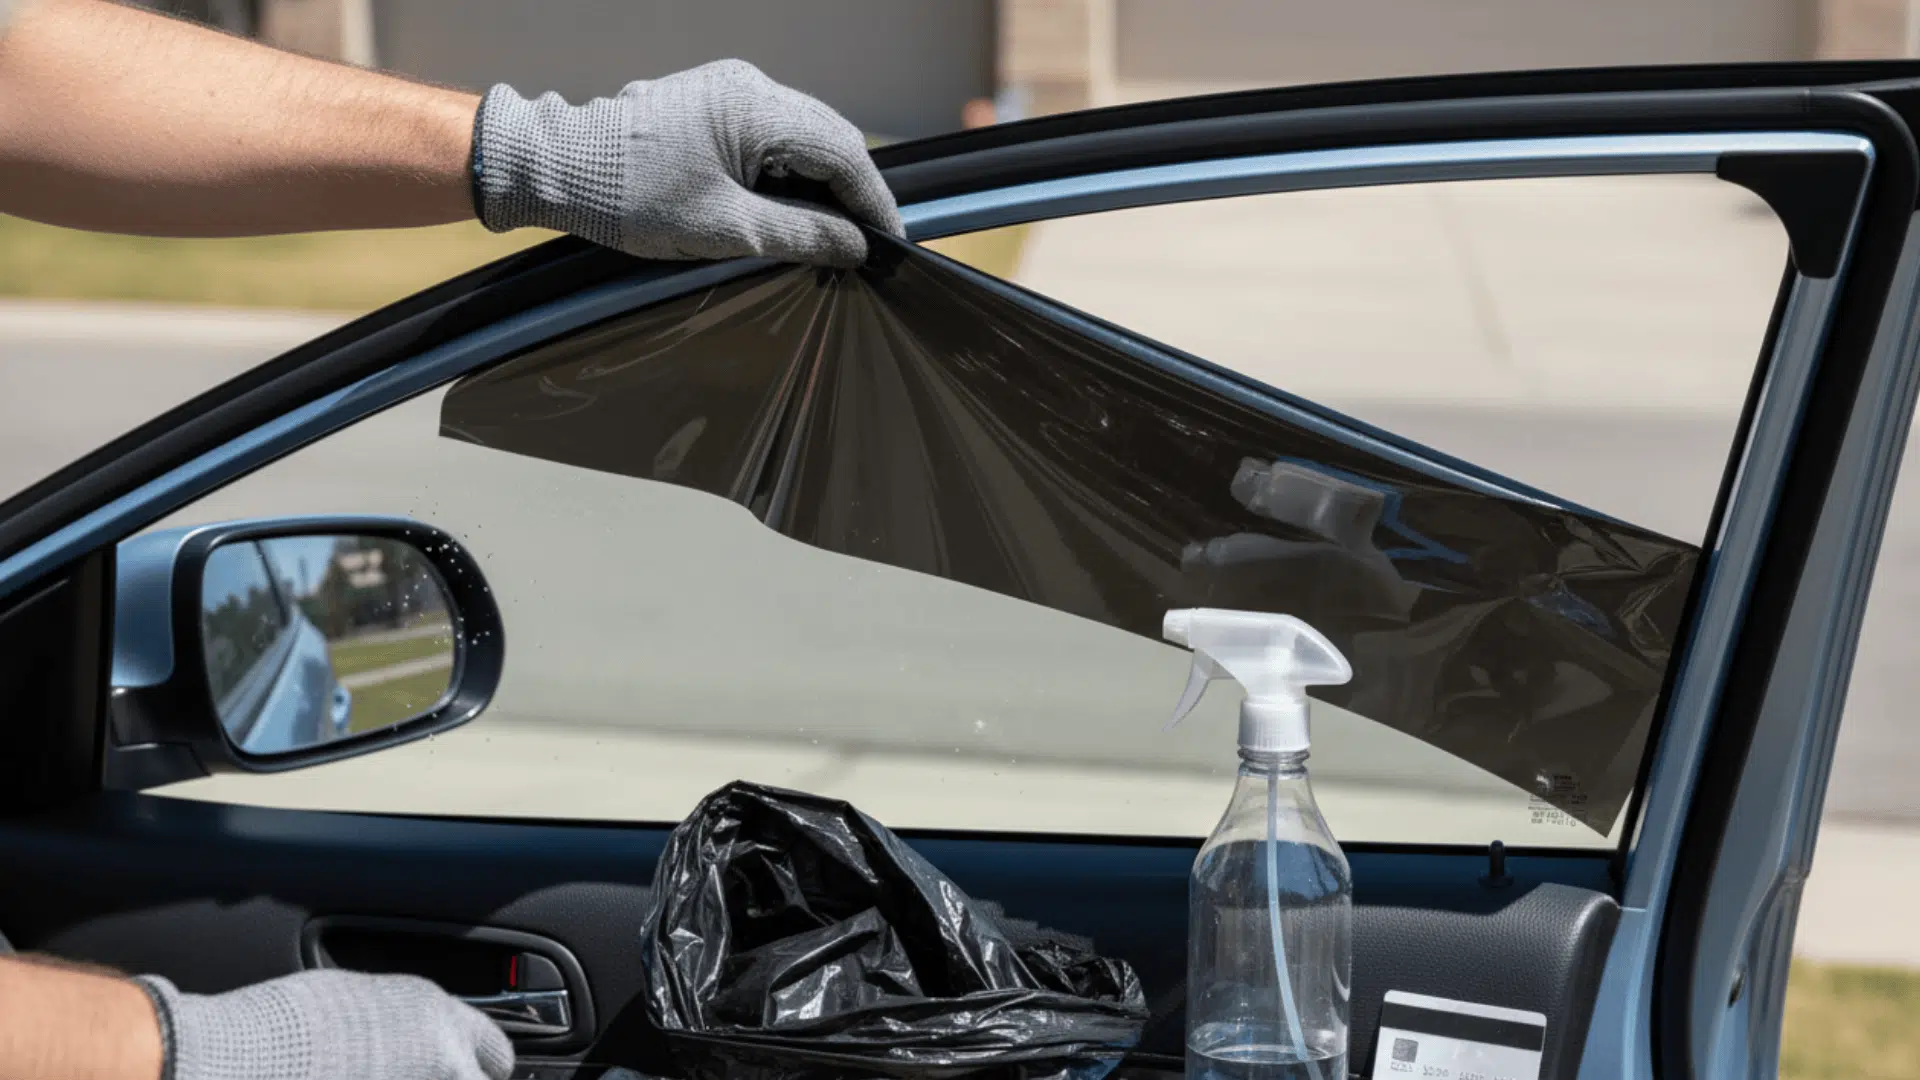
Step 4: Lift a Corner and Peel Slowly
Use a plastic tool or card to lift a small corner at the top of the tint. Make sure you’re grabbing both layers of film, not just the top one. Pull down slowly at a slight angle rather than straight back to prevent tearing.
Back Window Tip: Work carefully around the third brake light and defroster lines. Never scrape with a razor here, or you’ll damage the defrost grid.
Materials Needed: Plastic tool or credit card
Step 5: Remove Any Remaining Adhesive
If adhesive is left behind, move the car into the shade to cool the glass. Spray the sticky spots with degreaser and let it sit for 5 minutes. Wipe it away with a microfiber cloth.
You can use a razor blade on side windows, but never on the back defroster, or it will break the heating lines. Your glass should now be completely clear and ready for a new tint if needed.
Materials Needed: Degreaser, Microfiber cloth, Razor blade (side windows only)
Video Tutorial
Special thanks to Window Tinting Business for providing valuable insights in their video, which I referenced while creating this guide.
Tips from Professional Tinters
Here are insider tricks that make the job easier and help you avoid the frustrations that beginners face.
- Keep the film wet while positioning the trash bag: Soapy water helps the bag stick flat and improves heat transfer between the plastic and the tint.
- Pull the tint toward you, not straight out: Pulling at a downward angle keeps the film from tearing and removes it in one clean sheet.
- Work in small sections if the film keeps tearing: Breaking the window into smaller areas gives you more control and prevents large sections from ripping apart.
- Always test for both layers before peeling: Make sure you’re grabbing the tint and adhesive layer together, or you’ll have to remove the sticky layer separately.
- Protect fabric and door panels from overspray: Cover seats and interior trim with towels or plastic to prevent water and degreaser stains.
- Heat is your best friend; use it generously: The more heat you apply, the softer the adhesive gets, and the easier the tint peels off without breaking.
Alternative Methods for Removing Window Tint
If the trash bag method doesn’t work or you’re dealing with older, stubborn tint, try one of these backup techniques. Each method targets specific problems, such as brittle film, strong adhesion, or cracked layers.
1. Steamer Method
Hold a garment steamer 2 to 3 inches from the tint and slowly heat the film. The steam loosens the adhesive without damaging the glass. Lift a corner and peel gently once the film feels soft.
Best For: Tint older than 7 years
Materials Needed:
- Garment steamer
- Plastic scraper or credit card
- Microfiber cloth
2. Heat Gun and Razor (Side Windows Only)
Heat the tint in small sections using a heat gun. Lift a corner and peel while applying gentle, continuous heat. Use a razor blade to scrape off any remaining glue after the film is removed.
Best For: Tint with strong adhesive on side windows
Materials Needed:
- Heat gun
- Razor blade
- Plastic scraper
- Degreaser
Warning: Never use a razor on rear defrost lines. The heat strips break easily and are expensive to repair.
3. Ammonia Wrap Method
Spray ammonia on the inside of the tint and cover it with a trash bag to trap the fumes. Leave the window in the sun for 20 to 30 minutes, then peel once the adhesive softens.
Best For: Extremely stubborn tint that won’t budge
Materials Needed:
- Ammonia spray
- Black trash bag
- Gloves
- Plastic scraper
Tip: Keep your car doors open while using ammonia. The fumes are strong and need proper ventilation.
4. Overnight Soak + Steam
Wet the tint thoroughly with soapy water, then place a trash bag over it. Leave it overnight to let the moisture soak into the adhesive. Steam the window the next morning for easier, cleaner removal.
Best For: Cracked, flaky, or separating tint
Materials Needed:
- Spray bottle with soapy water
- Black trash bag
- Garment steamer
- Plastic scraper
What NOT to Do When Removing Window Tint
Removing tint is simple unless you rush it. Here are the most common errors people make and how they can damage your windows or make the job harder.
| Mistake | Why It’s a Problem | What to Do Instead |
|---|---|---|
| Pulling the tint too fast | Film tears into small pieces and leaves adhesive everywhere | Peel slowly and steadily at a consistent speed |
| Letting the layers separate | The top layer comes off while the adhesive layer stays stuck | Check that you’re grabbing both layers before pulling |
| Using a razor on the rear window | Damages defroster lines and third brake light wiring | Use only plastic scrapers on back windows |
| Leaving the degreaser in direct sunlight | Heat bakes the chemical into the glass and makes it sticky | Move the car to the shade before applying the degreaser |
| Not heating the tint long enough | The adhesive stays hard, and the film rips during removal | Wait until the glass is hot to the touch before peeling |
| Yanking at sharp angles | Tint tears and leaves jagged edges stuck to the glass | Pull at a slight downward angle, not straight back |
Taking your time helps prevent adhesive smearing and glass damage. A few extra minutes of patience save hours of scraping later.
Wrapping It Up
Removing window tint doesn’t have to be frustrating or expensive.
With the trash bag method, some patience, and a few common household tools, most people can handle the entire job themselves in an afternoon.
Your tint is bubbling, fading, or making it difficult to see at night; these steps help you remove it safely and cleanly while saving a big chunk of money.
If you’re upgrading to a new tint afterward, your freshly cleaned glass is the perfect starting point for a much clearer, more comfortable drive.
Have questions or tips of your own? Drop them in the comments below. We’d love to hear how your tint removal went!