A backyard fire changes everything. Learning how to build an outdoor fireplace is one of the most rewarding DIY projects you can take on. But most beginners stall before they even start. They worry about permits, costs, or choosing the wrong materials.
That’s fair. A fireplace isn’t a weekend shelf project. It’s a real structure that needs planning, the right tools, and solid technique. Get it wrong, and you’re looking at wasted money or a safety risk.
The good news? You don’t need professional masonry skills to do this well. This guide walks you through every stage, from picking your spot and pouring the foundation to stacking the last brick. By the end, you’ll have a clear plan and the confidence to start building.
What to Know Before Building an Outdoor Fireplace
Before you pick up a single brick, you need to plan. Skipping the basics can cost you time, money, and even legal trouble. Here’s what to sort out first.
Check Local Permits and Regulations: Most cities and counties require a permit for outdoor fireplaces. Building codes control how close you can build to your home or fence line. Call your local building department before you start. Some areas also restrict wood-burning structures due to air quality rules. Ignoring this step can lead to fines or forced removal.
Pick the Right Location: Place your fireplace on flat, stable ground. Keep it at least 10 to 20 feet away from your house, trees, and wooden fences. Think about wind direction, too. You don’t want smoke blowing into your living room or your neighbor’s yard.
Wood-Burning vs Gas Fireplaces: Wood-burning fireplaces produce more heat and a more natural feel. Gas fireplaces are easier to start and need less cleanup. Your local codes and budget will help decide which option works best.
Set a Realistic Budget: Material costs vary based on size, design, and finish. Set your budget early so you can plan around it.
Test Your Soil and Ground: Soft or uneven soil can cause your fireplace to shift over time. Compact the ground well before pouring your foundation. If the soil feels too loose, add a gravel base for extra support.
Materials and Tools Needed
Having the right materials and tools before you start prevents delays. Here’s a full list of what you’ll need for a standard outdoor fireplace build.
| Type | Item | Purpose |
|---|---|---|
| Core Material | Fire bricks | Heat-rated bricks are used to line the inside of your firebox |
| Core Material | Refractory mortar | A heat-resistant bonding agent for fire bricks |
| Core Material | Concrete blocks or standard bricks | Form the outer walls and base, adding weight and structure |
| Core Material | Gravel and cement | Base layer materials for your foundation slab |
| Core Material | Flue liner, chimney cap, spark arrestor | Control the smoke flow and prevent debris from entering |
| Core Material | Firebox insert (optional) | A prefab metal insert that makes firebox construction easier |
| Essential Tool | Brick trowel, jointer, masonry hammer | Lay and shape bricks with control |
| Essential Tool | Tape measure, spirit level, square | Keep your build straight and even |
| Essential Tool | Mixing a tub or wheelbarrow and a hoe | Mix small batches of mortar and cement |
| Essential Tool | Gloves, safety glasses, steel-toe boots, dust mask | Protect hands, eyes, and feet during construction |
How Long Does It Take to Build an Outdoor Fireplace?
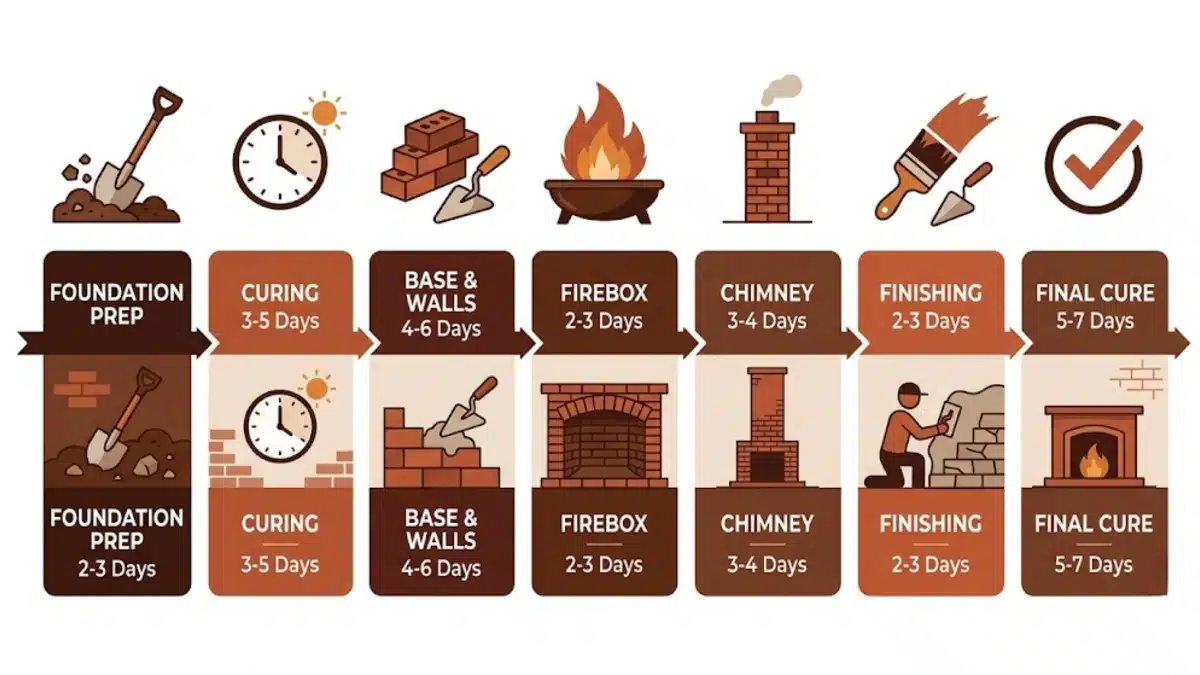
Alt Text: Infographic showing the timeline for building a DIY outdoor fireplace
Most DIY outdoor fireplaces take 2 to 4 weekends to complete. Your skill level, weather, and fireplace size all affect the total time.
Here’s a rough breakdown by stage:
- Foundation prep and pouring: 1–2 days (plus 48 hours curing time)
- Base and wall construction: 2–3 days
- Firebox building: 1–2 days
- Chimney installation: 1–2 days
- Finishing and curing: 1–2 days (plus 5–7 days final cure)
Rain and cold weather can slow mortar drying. First-time builders should add extra time for learning and adjustments. Don’t rush the curing stages. Wet mortar under heavy weight leads to cracks and weak joints.
Plan for a full month from start to first fire if you’re working only on weekends.
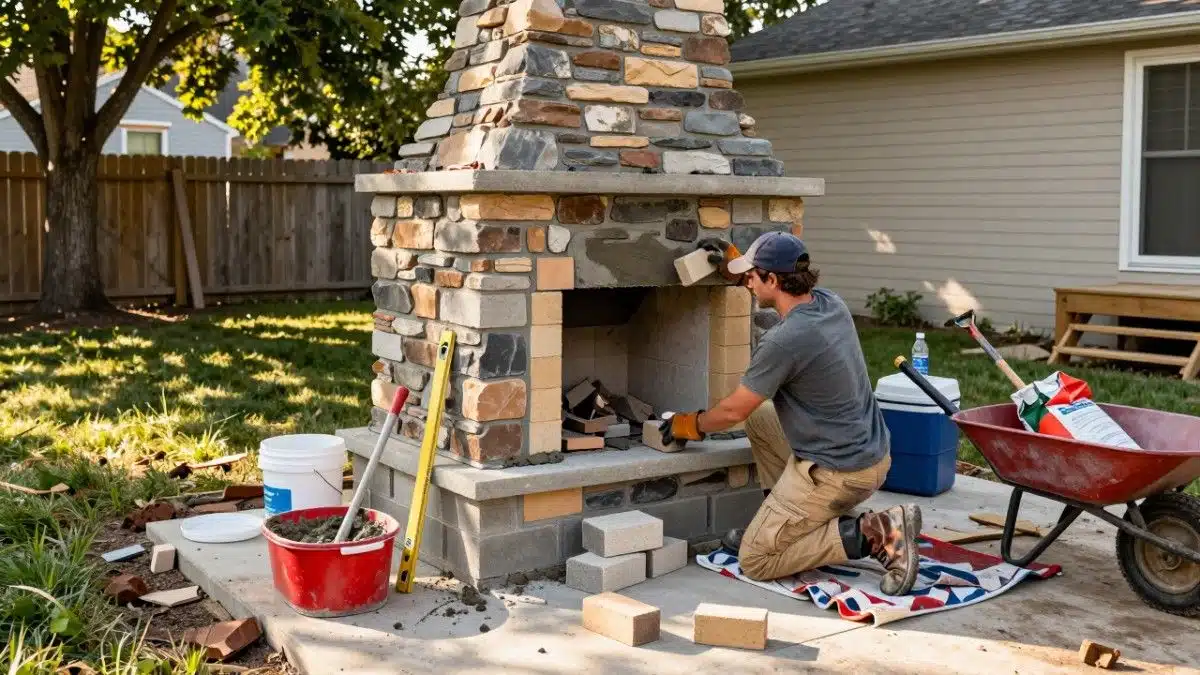
Step-by-Step Instructions to Build an Outdoor Fireplace
Now it’s time to start building. Follow these seven steps in order. Each one builds on the last, so don’t skip ahead. Take your time and check your work at every stage.
Step 1: Prepare the Foundation
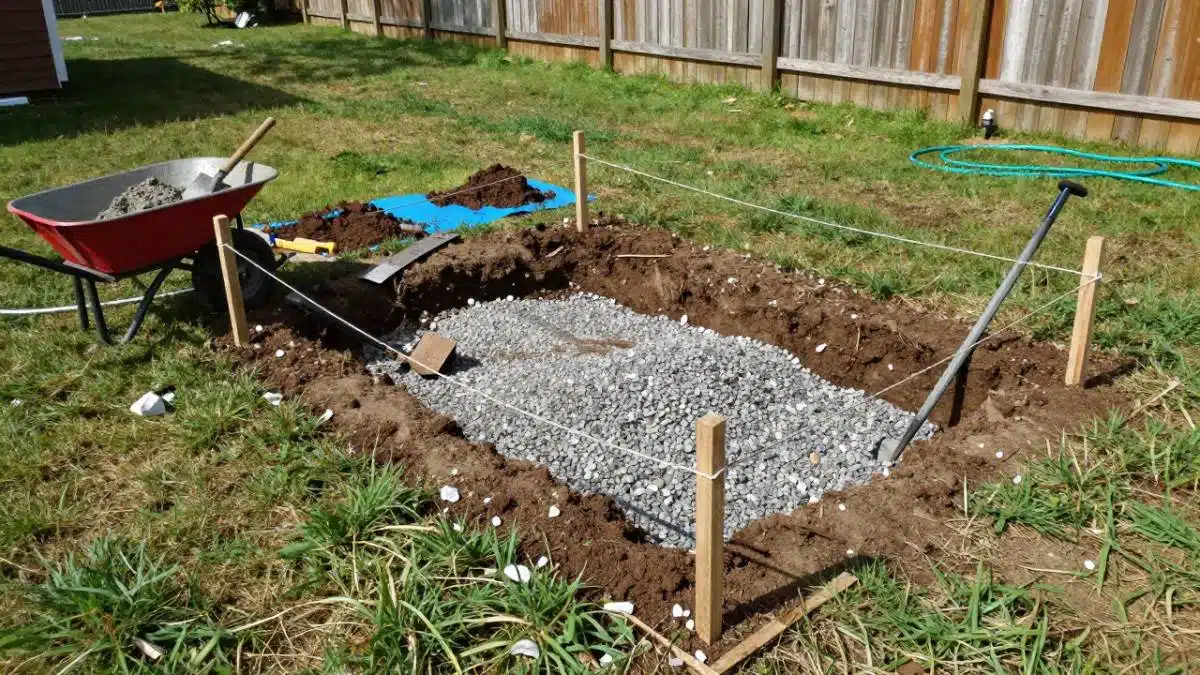
Alt Text: Dug foundation area with gravel base and string markers for outdoor fireplace build.
A strong foundation keeps your entire fireplace stable for years. This is the most important step.
Mark the footprint on the ground using stakes and string. The foundation should extend at least 6 inches beyond the fireplace walls on all sides. Dig down 6 to 8 inches and remove any roots, rocks, or loose debris.
Pour a 4-inch layer of gravel into the hole. Compact it with a hand tamper. This layer helps with drainage and stops water from pooling under the slab.
Mix your concrete and pour it over the gravel. Aim for a slab thickness of 4 to 6 inches. Smooth the surface with a screed board and use a level to confirm the slab is flat.
Let the concrete cure for at least 48 hours before moving on.
Step 2: Build the Base Structure
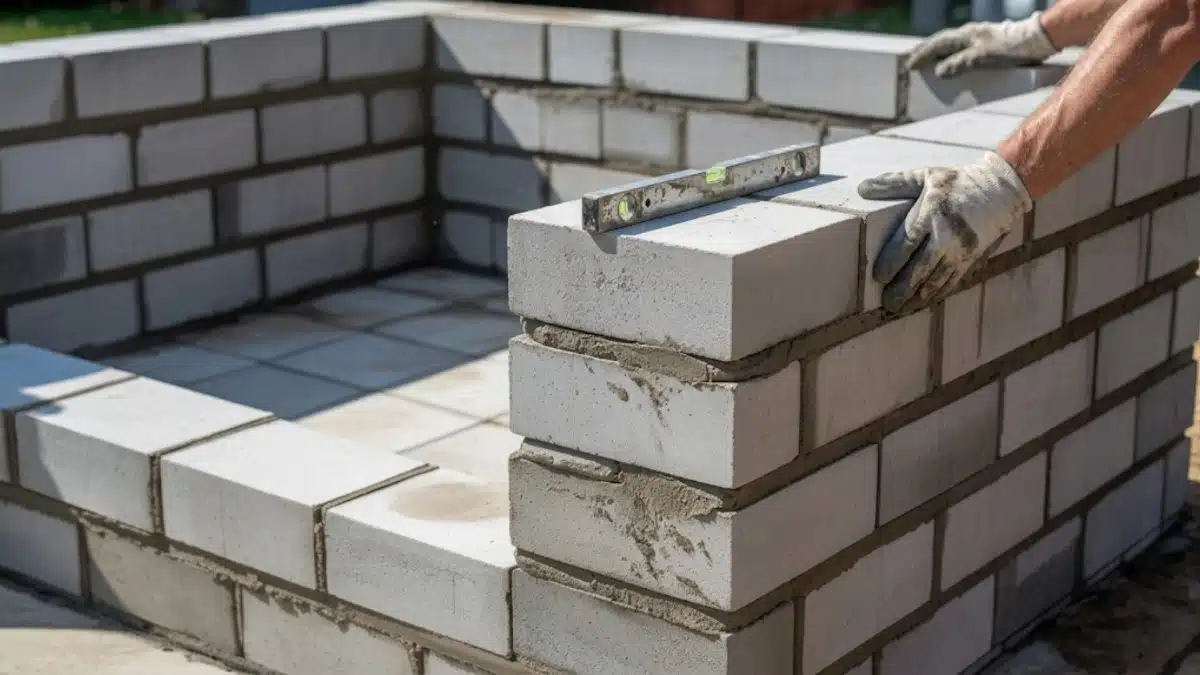
Alt Text: Concrete block base structure for outdoor fireplace with level check during construction.
Lay your first row of blocks along the slab edges. Apply a thin layer of mortar between each block. Press them firmly into place.
Check every row with a spirit level. Even a small tilt here creates bigger problems higher up. Adjust blocks while the mortar is still wet.
Build the base two to three rows high, depending on your design. Leave the center open if your plan calls for a wood storage area below the firebox.
Step 3: Construct the Firebox
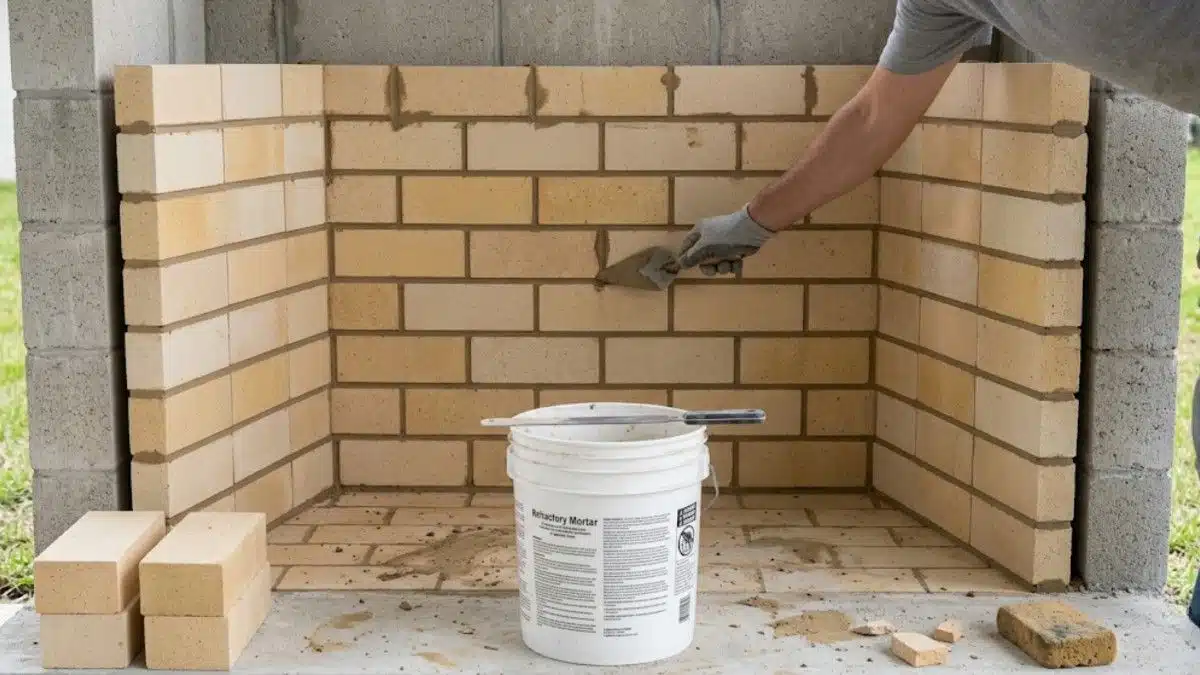
Alt Text: Firebox construction with fire bricks and refractory mortar for the fireplace
Line the inside walls with fire bricks. These resist temperatures above 1,800°F. Standard bricks will crack under that heat. Use refractory mortar to bond them together, and apply a consistent ⅜-inch layer between each brick. Scrape off excess before it dries.
Leave a small air gap between the fire bricks and the outer wall. This allows heat to spread evenly and reduces stress on the outer structure.
The firebox opening should be wider than it is tall. A 3:2 width-to-height ratio improves airflow and pushes smoke upward toward the chimney. Make sure all fire bricks sit level and flush. Uneven bricks create weak spots that heat attacks first.
Step 4: Build the Walls and Structure
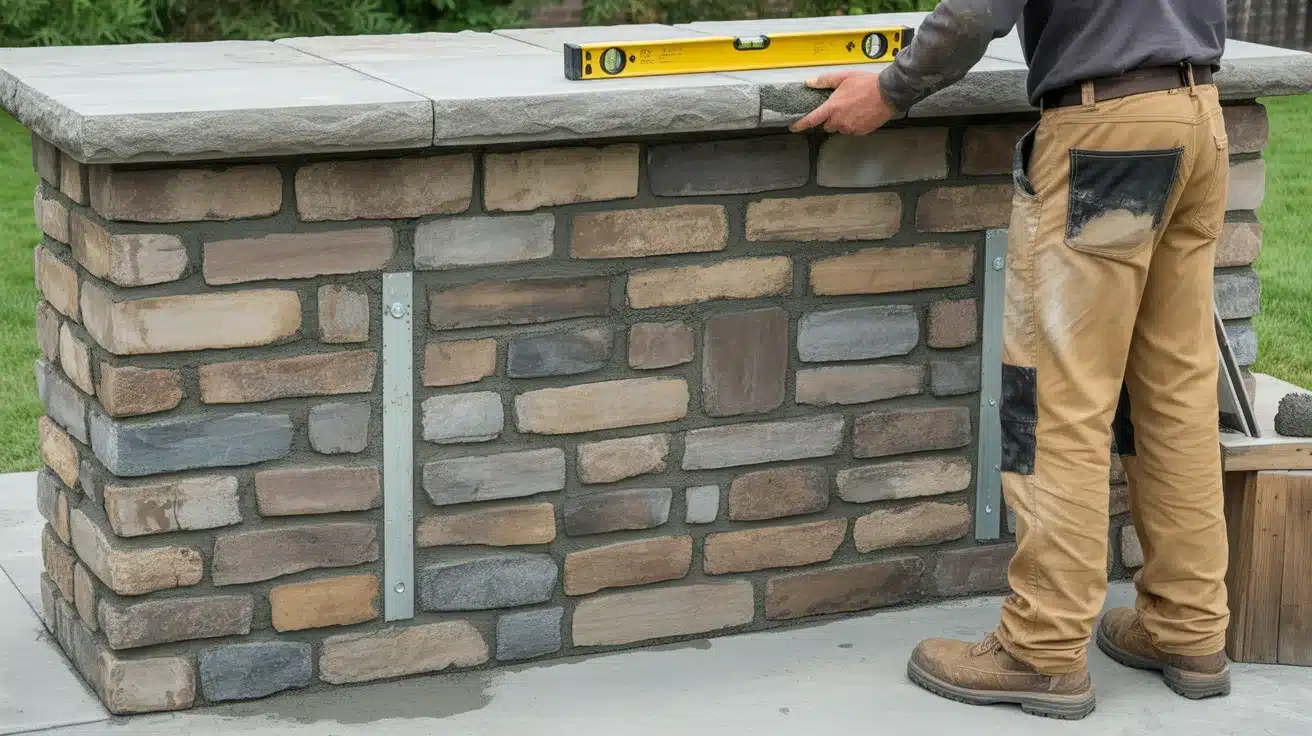
Alt Text: Natural stone outer wall construction of an outdoor fireplace
Continue building the outer walls upward from the firebox. Stagger each row so the joints don’t line up. This pattern, called a running bond, adds strength. Apply mortar evenly between all joints.
Add metal ties or anchors every few rows. These connect the outer wall to the inner structure and prevent separation over time. Keep checking your level as you build higher. A leaning wall is a safety risk.
Step 5: Install the Chimney
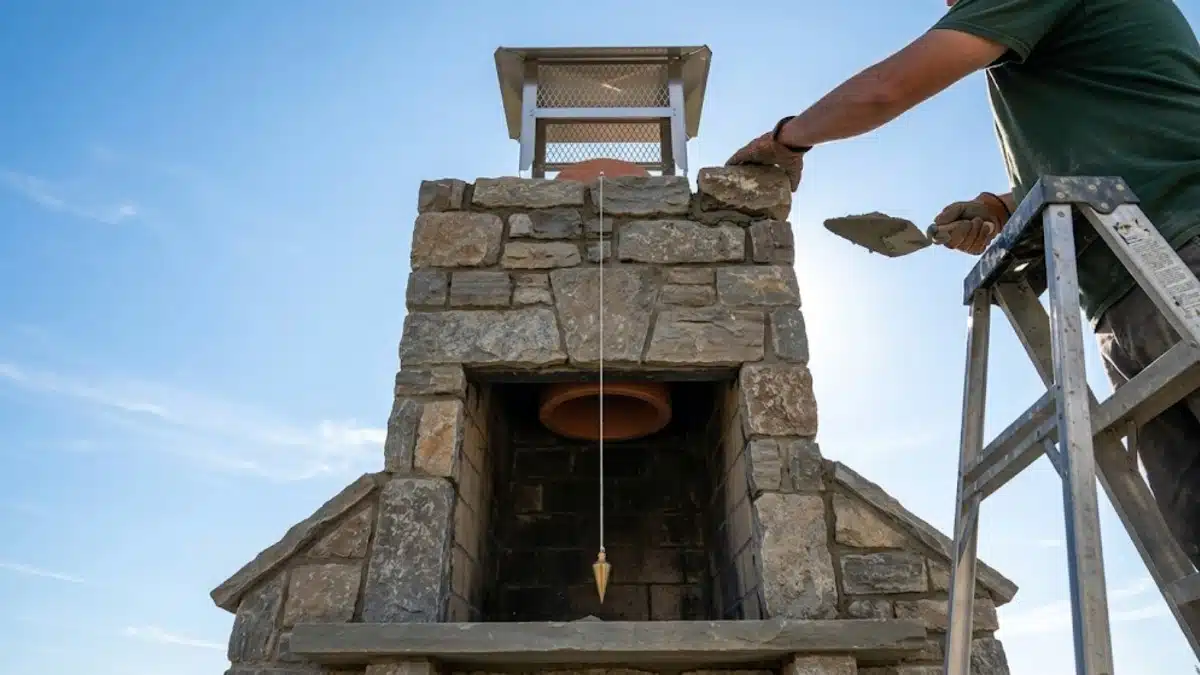
Alt Text: Low-angle view of chimney installation on outdoor fireplace
The chimney controls smoke flow and keeps your seating area clear.
Install a flue liner inside the chimney. It protects the bricks from heat and improves draft. It also makes cleaning easier later.
Keep the chimney perfectly vertical. Use a plumb bob or long level to check alignment as you build. Even a slight lean reduces the upward draft.
The chimney should rise at least 2 to 3 feet above the firebox opening. Add a chimney cap at the top to block rain, leaves, and animals. Install a spark arrestor under the cap to stop burning embers from flying out.
Step 6: Add Finishing Touches

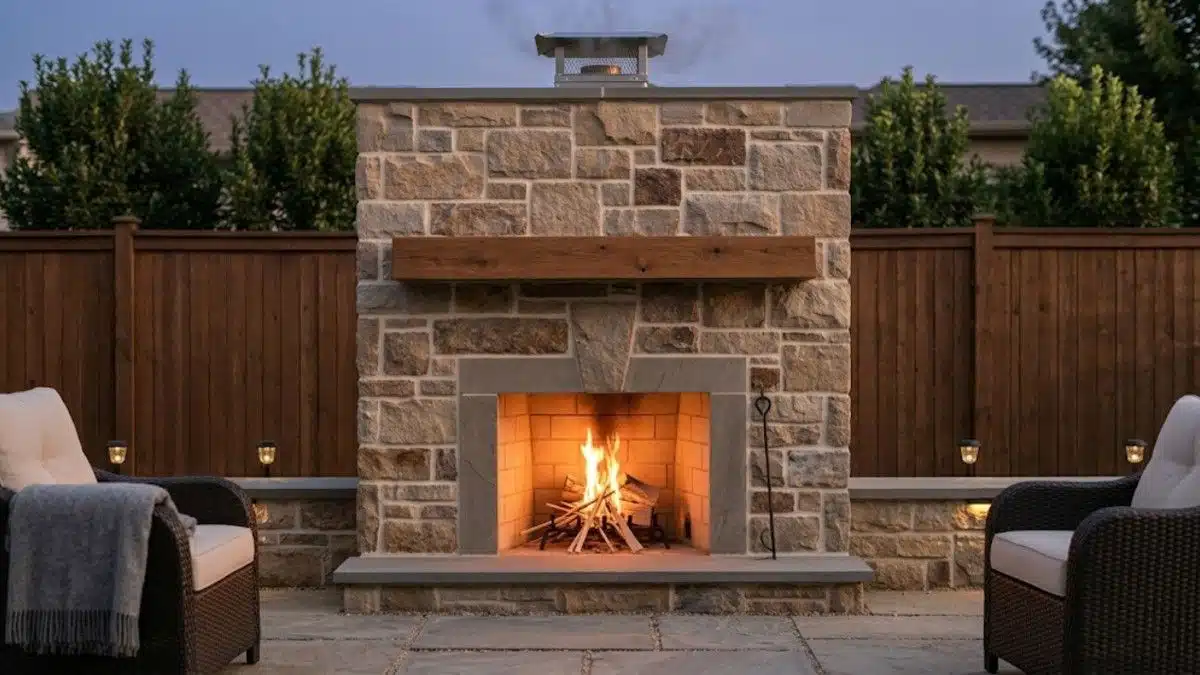
Alt Text: Completed outdoor fireplace
Apply a stone veneer to the outer walls using outdoor-rated adhesive. Press each piece firmly and fill gaps with grout. This gives a natural, rustic feel without the cost of solid stone.
Add a mantel shelf above the firebox opening if your design allows it. A concrete or wood beam works well here. You can also add a stone hearth at the base for a finished look.
Step 7: Curing and First Fire Test
Alt Text: First small test fire burning inside a newly built outdoor fireplace
Don’t light a full fire right away. Your fireplace needs time to dry and settle.
Let all mortar and concrete cure for at least 5 to 7 days after the final build. Keep the structure dry during this period. Cover it if rain is expected.
For your first fire, start small. Burn a few pieces of kindling for 15 to 20 minutes. This gentle heat helps the mortar cure without cracking. Increase the fire size slowly over three to four uses before running a full fire.
Safety Precautions to Follow When Using an Outdoor Fireplace
An outdoor fireplace involves real fire. One mistake can damage your property or put your family at risk. Follow these precautions every time you build and use your fireplace.
- Never Build on a Wooden Surface: Do not place your fireplace on a wooden deck, porch, or platform. Wood surfaces can catch fire from falling embers or radiant heat. Always build on a concrete slab, stone patio, or bare ground.
- Supervise Every Fire: Never walk away from a burning fireplace. Unattended fires cause most backyard fire accidents. Assign one person to watch the fire at all times. Keep children and pets at least 5 feet from the opening.
- Store Firewood at a Safe Distance: Stack firewood at least 10 feet away from the fireplace. Loose sparks can land on dry wood and start an unplanned fire. Never store fuel inside or directly beside the firebox.
- Keep Fire Control Tools Nearby: Place a fire extinguisher or a connected garden hose within arm’s reach. Use a fireplace screen to block flying embers. A metal poker and tongs help you manage burning logs safely without reaching into the fire.
- Let Ashes Cool Before Disposal: Wait at least 24 hours before handling ashes. Dump cooled ashes into a metal bucket with a tight lid. Never use a plastic bag or cardboard box. Place the bucket on a non-flammable surface away from walls or dry plants.
Cost Breakdown of Building an Outdoor Fireplace
Knowing the costs upfront helps you plan better and avoid surprises halfway through the build. Here’s a step-by-step cost breakdown for a DIY outdoor fireplace project.
| Build Stage | Materials Needed | Estimated Cost |
|---|---|---|
| Foundation | Gravel, Portland cement, rebar (optional) | $150 – $400 |
| Base Structure | Concrete blocks or standard bricks, mortar | $200 – $500 |
| Firebox | Fire bricks, refractory mortar | $300 – $800 |
| Walls & Structure | Natural stone, bricks, or concrete blocks, and metal ties | $250 – $1,500 |
| Chimney | Flue liner, chimney cap, spark arrestor | $200 – $600 |
| Finishing | Stone veneer or stucco, grout, adhesive, mantel (optional) | $200 – $1,200 |
| Tools & Safety Gear | Trowel, level, mixing tub, gloves, glasses, dust mask | $100 – $300 |
| Total DIY Cost | $1,400 – $5,300 |
Note:
- Costs vary based on your region, material quality, and fireplace size. Stone and custom finishes push the total toward the higher end.
- A DIY build can cut your total expense by 40 to 50 percent compared to hiring a pro. Professional labor alone ranges from $1,000 to $5,000, depending on the project complexity. However, gas line hookups should always be handled by a licensed professional.
Outdoor Fireplace Maintenance Tips for Long-Term Use
A well-maintained outdoor fireplace lasts for years without major repairs. Follow these simple care steps after every season.
1. Clean Ash and Soot Regularly
Remove ash from the firebox after each use. Built-up ash blocks airflow and reduces burn quality. Use a metal scoop and a fireproof bucket for safe disposal. Scrub soot off the fire bricks with a stiff wire brush and warm soapy water. Heavy soot buildup can weaken brick surfaces over time.
2. Check for Cracks After Each Season
Inspect the firebox, mortar joints, and chimney after winter. Heat and cold cycles cause small cracks to form. Fill minor cracks with fresh refractory mortar right away. Ignoring them allows water and heat to cause bigger damage later.
3. Protect Your Fireplace from Moisture
Rain and snow are the biggest threats to an outdoor fireplace. Cover the chimney top with a fitted cap to prevent water from entering. Use a weatherproof cover over the entire structure during the months you don’t use it. Apply a masonry sealer to the outer walls once a year. This keeps moisture from soaking into the bricks and causing cracks during freezing weather.
Conclusion
You now have everything you need to build an outdoor fireplace on your own. This is not a project that demands professional skills. It demands patience, planning, and the right materials.
Start with a solid foundation. Use fire-rated materials where heat is highest. Give the mortar enough time to cure before lighting your first fire. These three things alone prevent the most common failures.
Check your local codes before breaking ground. Set a clear budget and stick to a simple design if this is your first build.
The reward is worth the work. A fireplace you built with your own hands changes how you use your backyard, not just in summer, but all year long.
Frequently Asked Questions
Are DIY Fire Pits Legal?
Most areas allow DIY fire pits, but rules vary by city and county. Many require permits, safe distances from structures, and compliance with burn bans. Always check local fire codes first.
What Can I Mix with Cement to Make it Fireproof?
Mix calcium aluminate cement with crushed fire brick (grog), sand, and hydrated lime. A common ratio is 3 parts grog, 2 parts sand, 2 parts refractory cement, and half a part lime.
Does Having a Fire Pit Increase Your Insurance?
Yes, a fire pit can slightly raise your homeowner’s insurance premium. Wood-burning types carry a higher risk than gas options. Notify your insurance provider before building to avoid coverage issues.