Here’s the truth nobody tells you: your home’s exterior windows are silently asking for attention. They’re the first thing people notice, yet most residents leave them plain and unfinished.
A small weekend project can change that. Installing simple exterior window trim instantly boosts curb appeal, frames your windows beautifully, and shields your home from weather damage.
In this blog, you’ll learn what exterior window trim is, the easy installation steps anyone can follow, and the most common mistakes to avoid.
You’ll also find creative outdoor window trim ideas for inspiration, all based on proven, professional home-improvement techniques.
Ready to start your changeation? Grab your tape measure, clear a Saturday, and let’s give your home the upgrade it deserves.
What Is Exterior Window Trim?
Exterior window trim is the material that frames the outside of your windows, covering the gap between the window frame and the wall.
It serves both functional and aesthetic purposes, protecting against weather, water, and air leaks while enhancing the overall appearance of your home’s exterior.
Key reasons window casing matters:
- Looks good: Enhances your home’s overall appearance and adds instant curb appeal to any property
- Protects your home: Blocks weather from entering completely and shields your walls from damage
- Prevents water damage: Stops water from seeping behind walls and protects structural integrity
- Seals air leaks: Eliminates drafts around windows and improves energy efficiency significantly
- Extends window life: Proper trim keeps windows functional for decades with minimal problems
Still, choosing the right material matters. Each option works well for simple designs. You should choose based on your budget, maintenance preference, and long-term goals.
Professional builders recommend pressure-treated wood for budget-conscious DIYers who don’t mind occasional maintenance.
Benefits of Exterior Window Trim
Adding simple exterior window trim instantly improves both the appearance and performance of your home. Here are seven key reasons residents choose this affordable upgrade:
- Enhanced Curb Appeal: Defines each window with clean lines, giving your home a polished, finished appearance that stands out from the street.
- Added Character: Introduces visual depth and personality, especially when using simple outdoor window trim ideas that complement your home’s architecture.
- Weather Protection: Keeps rain and moisture from seeping into wall cavities, preventing rot, mold, and long-term structural damage.
- Energy Efficiency: Seals air leaks around windows, helping regulate indoor temperatures and lower heating and cooling costs.
- Increased Home Value: Improves first impressions for potential buyers and signals a well-maintained property.
- Low Maintenance: Simplifies upkeep by minimizing water exposure and paint deterioration, reducing repair frequency over time.
- Long-Term Investment: Delivers lasting returns through better protection, improved aesthetics, and measurable boosts in overall home value.
Installing simple exterior window trim is an innovative, budget-friendly project that offers both immediate and lasting benefits for any occupant.
DIY Steps to Install Simple Exterior Window Trim
Installing simple exterior window trim doesn’t require expensive tools or advanced carpentry skills. With patience and basic materials, you can achieve professional-looking results that protect your home from weather damage and improve curb appeal.
Tools and Materials You’ll Need
| Materials | Tools |
|---|---|
| Pressure-treated 1×4 boards (weather-resistant casing) | Tape measure (25 feet minimum for accuracy) |
| Pressure-treated 2×4 boards (durable window sills) | Handsaw or miter saw (makes angled cuts clean) |
| Galvanized finish nails (won’t rust in rain) | Level (ensures trim sits perfectly straight) |
| Exterior-grade caulk (seals gaps permanently) | Hammer (for driving galvanized nails) |
| Primer (required for pressure-treated wood) | Caulk gun (applies sealant along edges) |
| Exterior paint (protects wood from UV damage) | Paintbrush or roller (for primer and paint) |
| Drip cap flashing (diverts water away) | Pencil (marks measurements and cut lines) |
| House wrap (adds a weatherproofing layer) | Safety glasses (protect your eyes always) |
Step 1: Cut and Prepare the Window Sill
Start by cutting a pressure-treated 2×4 board for the sill. Angle the top edge slightly so water sheds away from the window.
Chisel a small lip on the back to tuck neatly under the window frame. Add a shallow groove underneath the sill to serve as a drip channel. This helps water fall directly to the ground instead of running down your siding.
Step 2: Shape and Install the Vertical Casings
Cut two 1×4 boards for the sides, angling their bottoms to match the sill’s slope. Use a router or saw to notch the top of each side piece.
This creates a tongue that fits behind the top header board, preventing water from sneaking behind the trim later.
Step 3: Cut and Fit the Header Board
Measure and cut the top header board to match the sill’s width. Use your router again to notch the back edges so the side tongues slide in securely. This interlocking setup helps shed rainwater forward instead of behind the trim.
Step 4: Prime and Paint Before Assembly
Seal all cut edges with primer. This step is crucial for pressure-treated wood, as it prevents peeling and protects against moisture. Apply one coat of exterior primer, then paint, before fastening the boards. You’ll get better coverage and longer-lasting results.
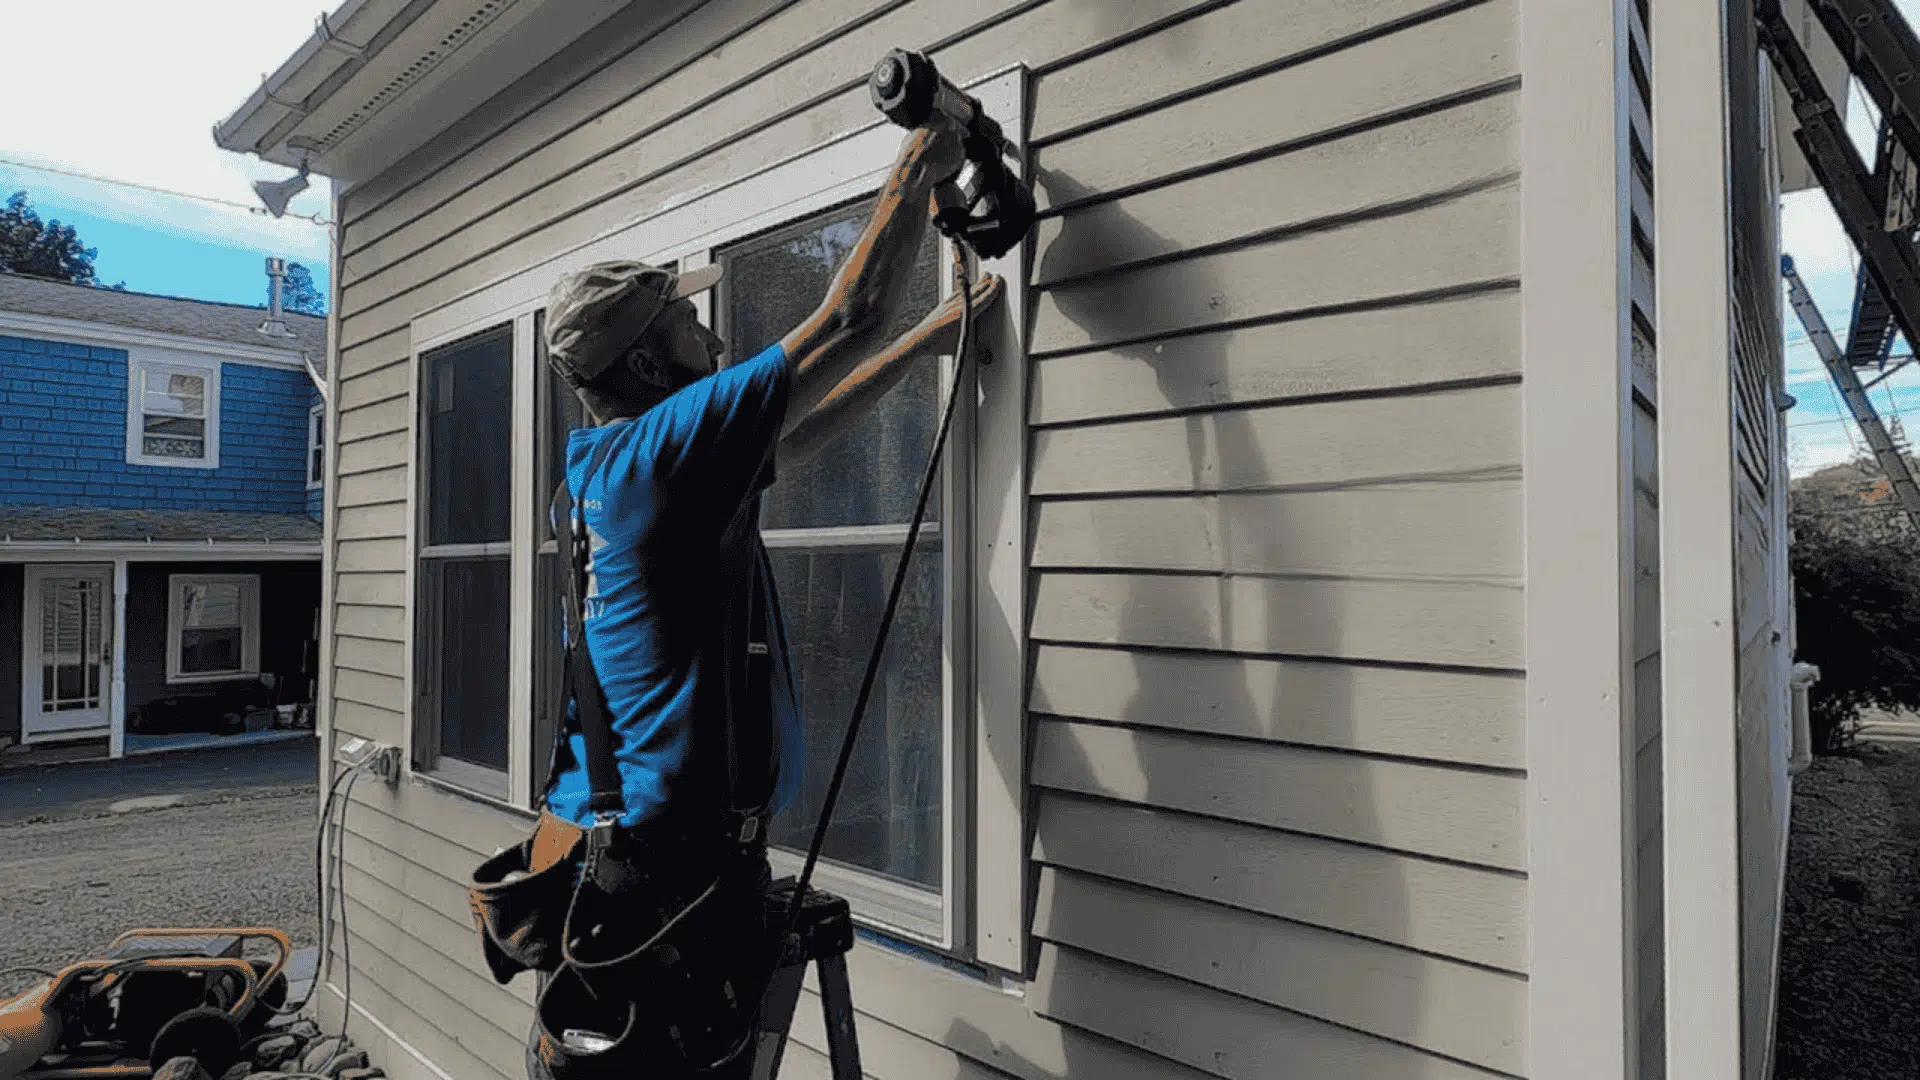
Step 5: Attach the Trim to the Building
Fasten each piece with galvanized finish nails. Blunt the nail tips before hammering to reduce splitting. Check with a level to make sure everything sits straight. Once all boards are attached, touch up any scuffed paint or exposed edges.
Step 6: Apply Caulk and Add a Drip Cap
Run a thin bead of exterior-grade caulk around the outer and inner edges of the trim, as well as across the top of the header and sill. Leave the underside of both open so trapped water can escape.
Finally, install a metal drip cap above the header, tucking it beneath your house wrap. This directs rainwater away from the trim and siding.
Step 7: Inspect and Repeat
Repeat the process for each window. Check for gaps or misalignment before sealing everything up. With practice, each window takes less time, and the total cost stays under $20.
Video Tutorial
I’d like to give credit to Every Other Karl for their informative video, which served as a reference for this guide.
Pros and Cons of Exterior Window Trim
Installing simple exterior window trim comes with clear advantages and a few manageable challenges. Understanding both helps you plan your project wisely and choose materials suited for long-term results.
| Pros | Cons |
|---|---|
| Enhances curb appeal and boosts home appearance instantly | Requires regular maintenance, especially for wood trim |
| Adds insulation and weather protection | It can warp if installed poorly or with low-quality materials |
| Customizable styles match any home design | Takes time investment for DIY completion |
| DIY-friendly and suitable for beginners | Paint needs refreshing periodically |
| Affordable compared to major exterior upgrades | Mistakes may lead to costly corrections |
| Increases measurable resale value | Weather exposure demands durable, exterior-grade materials |
Weighing these factors helps set realistic expectations and make smart choices. For most residents, simple outdoor window trim ideas deliver lasting value, improved aesthetics, and protection worth every bit of effort.
Styling Ideas for Exterior Window Trim
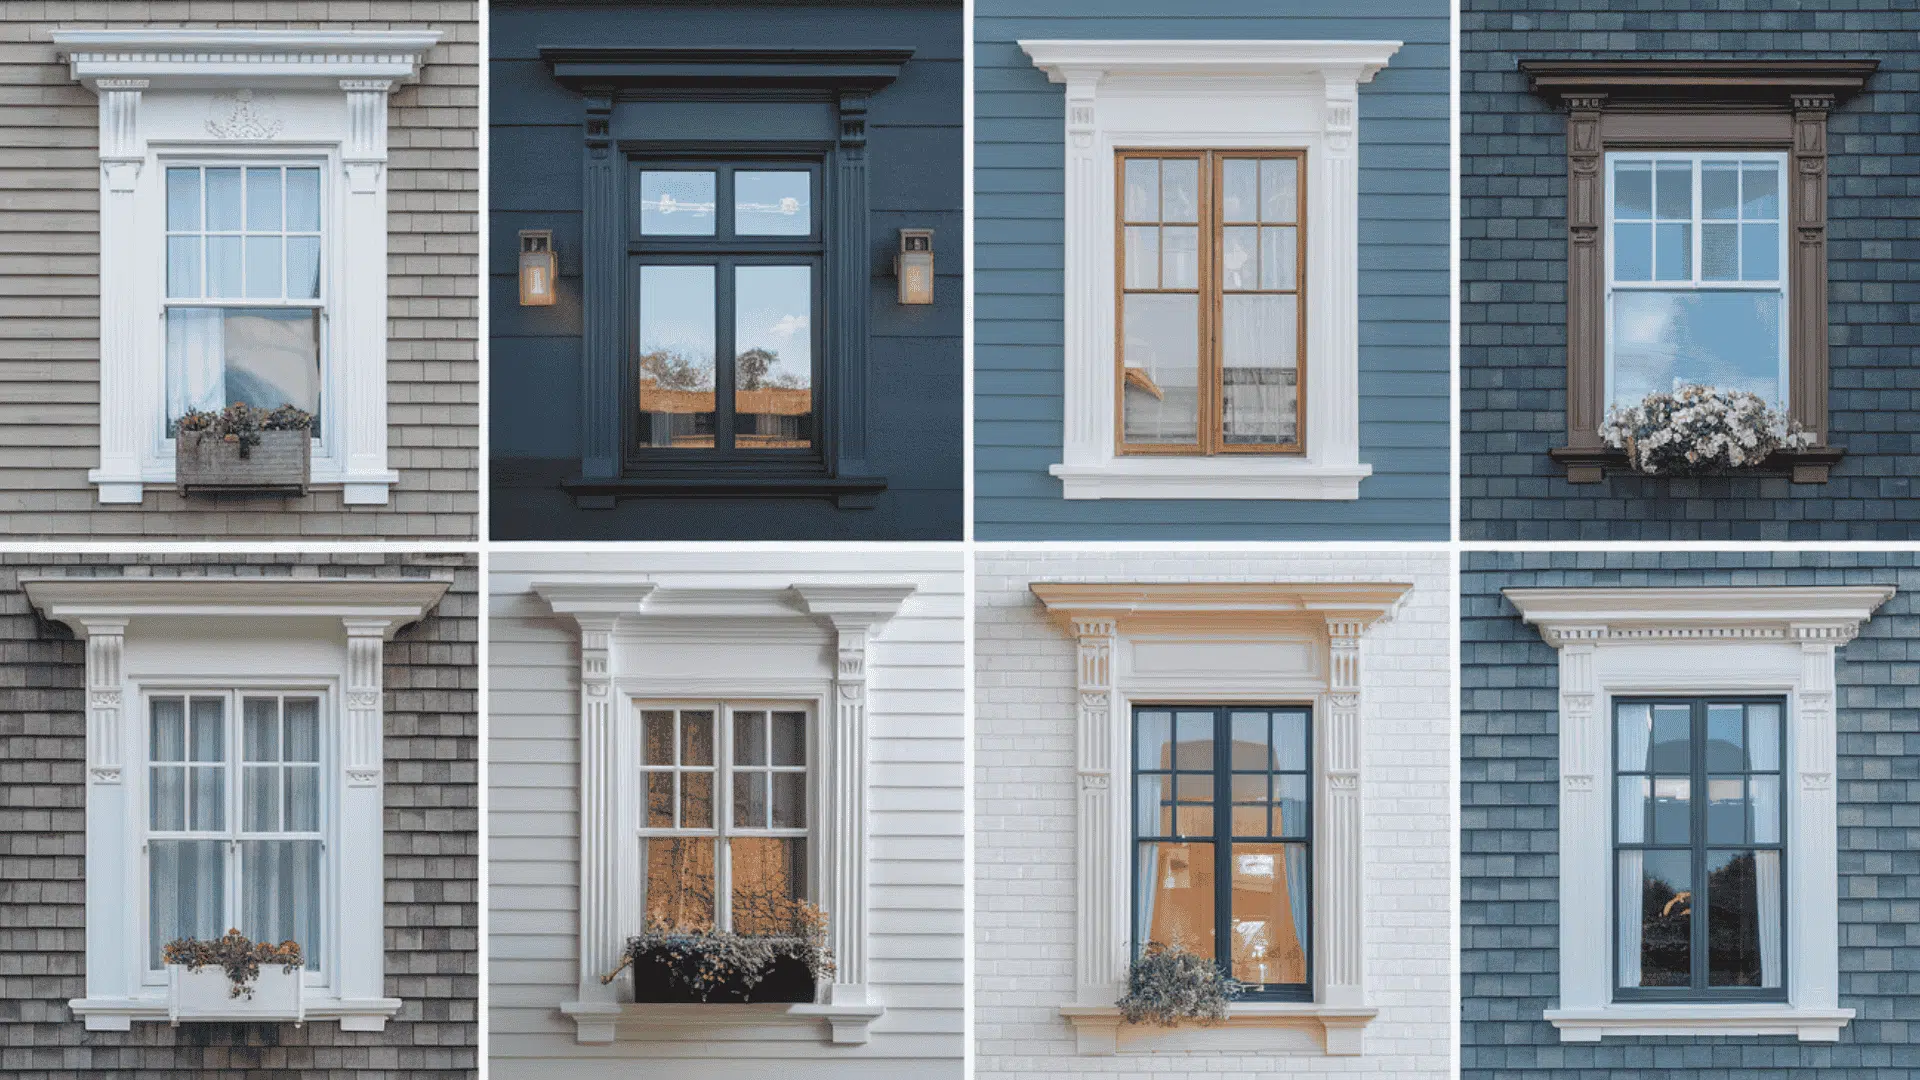
Once you’ve mastered installation, it’s time to add personality. Simple exterior window trim doesn’t mean boring; small design choices make a huge difference. Here are styling ideas to inspire your next project:
- Classic White Trim: Timeless and crisp, white trim contrasts beautifully with darker siding. It works for traditional, cottage, and colonial styles.
- Modern Black Edges: Black trim adds bold definition and looks stunning against light-colored exteriors. It’s sleek, smooth, and swings across the U.S.
- Natural Wood Finish: Leave your trim stained instead of painted for a rustic or craftsman look. It highlights wood grain and warmth.
- Two-Tone Contrast: Use one color for the trim and another for sills or headers to add subtle visual layers.
- Wide Framing: Slightly wider boards make smaller windows appear more substantial.
- Decorative Headers: Add a small cap molding or drip edge above windows for a custom, built-in look.
- Coordinated Accents: Match the trim color to the doors or shutters to tie your exterior design together.
Styling tip: Keep proportion in mind. The best outdoor window trim ideas balance simplicity with enough contrast to stand out without overpowering your siding.
Mistakes to Avoid & Maintenance Tips for Simple Window Trim
Even simple exterior window trim projects can go wrong if small details are overlooked. Knowing common DIY mistakes and following smart maintenance habits ensures your trim lasts beautifully for years.
Mistakes to Skip:
- Using indoor caulk instead of exterior grade (fails in weather).
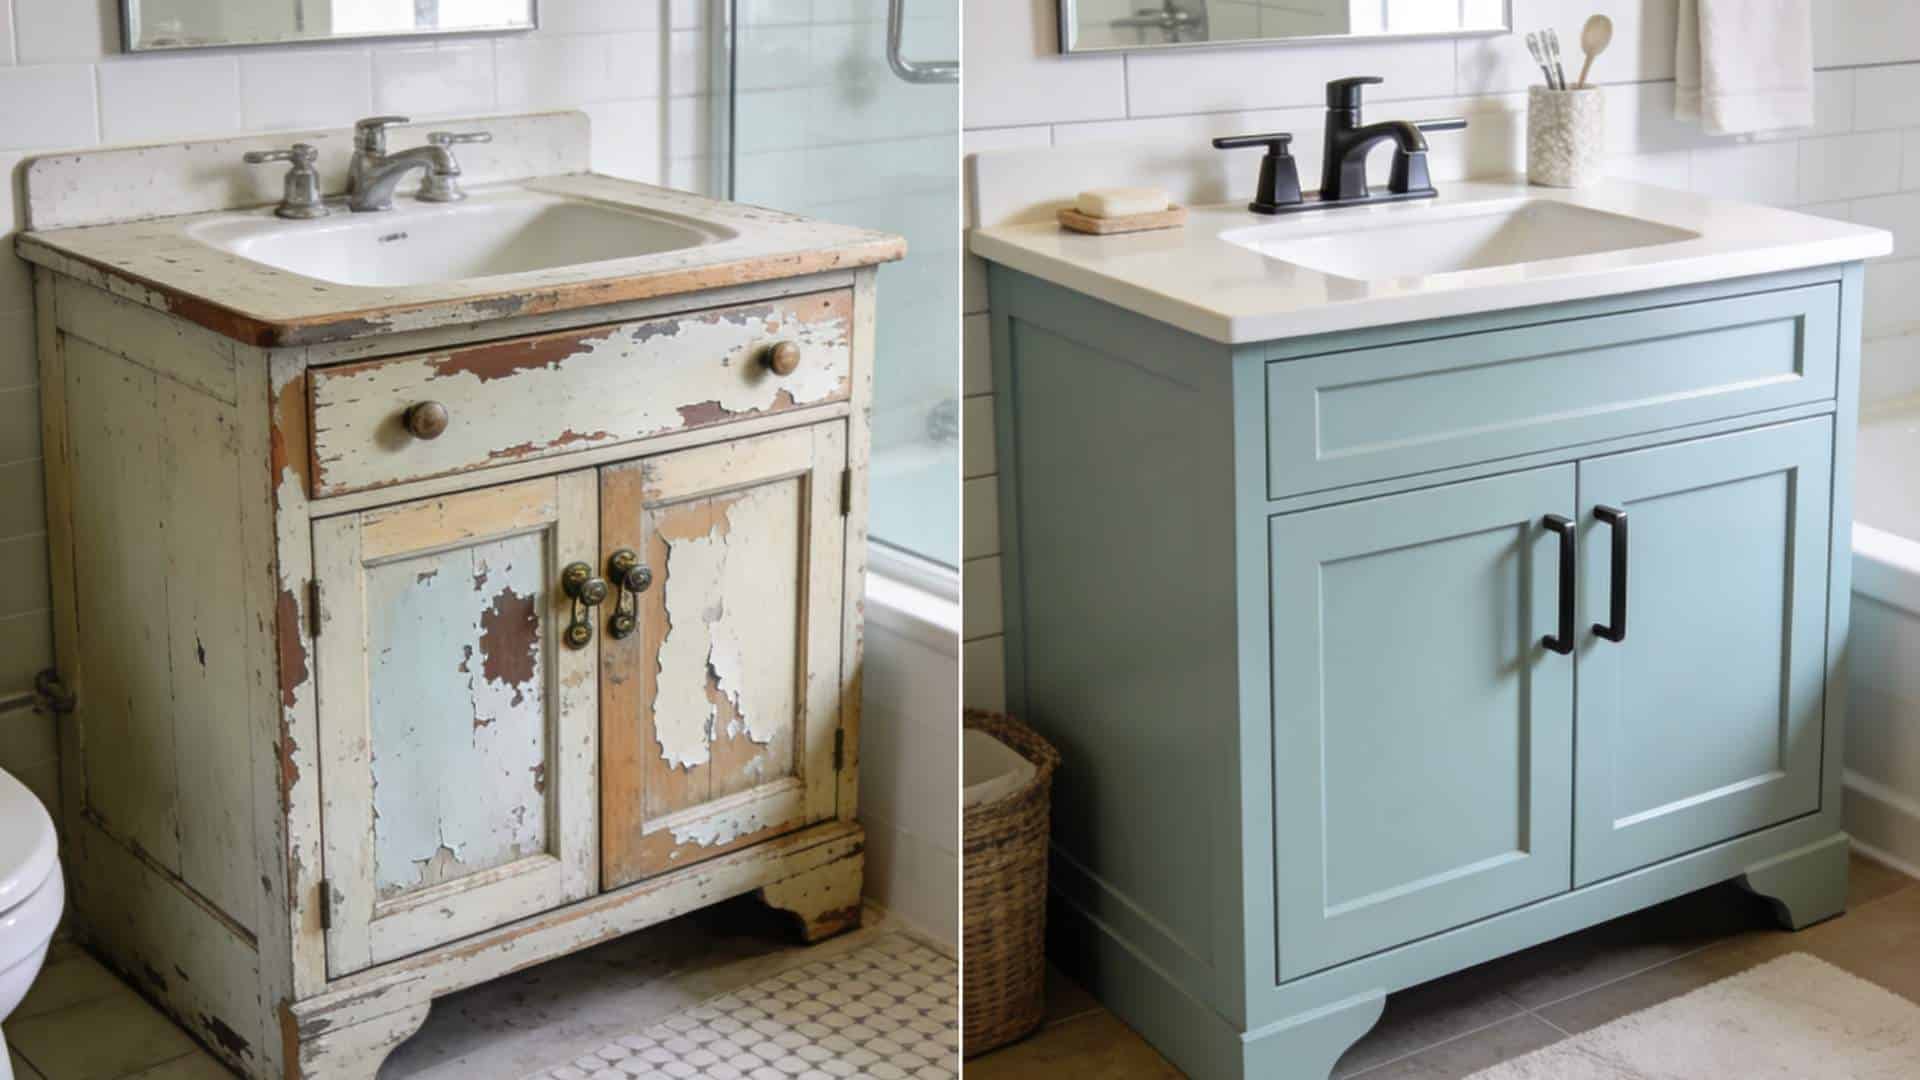
- Skipping primer on pressure-treated wood (paint peels quickly).
- Ignoring water management (rot develops behind the trim).
- Uneven measurements (trim looks crooked and unprofessional).
- Forgetting to check for square windows (gaps appear at corners).
Maintenance Tips for Long-Term Success:
- Inspect annually for gaps or separation.
- Check for rot or discoloration.
- Repaint every 5-7 years, depending on the weather.
- Clean trim regularly to prevent algae buildup.
- Caulk any new gaps that appear.
- Touch up paint chips immediately.
Proper care and attention ensure lasting results. Avoiding small mistakes and following regular maintenance keeps your simple exterior window trim strong, beautiful, and protected from weather damage for years.
Conclusion
Simple exterior window trim changes your home’s look and adds lasting protection. You now know what it is, how to install it, and how to avoid common mistakes. With the right tools and care, you can upgrade any window with confidence.
Whether you’re after hands-on DIY guidance or outdoor window trim ideas for design inspiration, this project delivers both style and function.
Start small, trim one window this weekend. Head to your local Home Depot or Lowe’s for materials. Follow each step carefully, and take pride in your progress.
Ready to begin? Your home’s next big improvement starts with a single trim board. Pick a window and make it happen today.