No-till gardening is a way to grow healthier plants without ever turning over your soil.
Instead of digging each season, you build fertility from the surface down by layering compost, mulch, and organic matter so that soil life, moisture, and structure improve year after year.
Starting a no-till garden means picking the right spot, prepping the surface, choosing a method like sheet mulching or Back to Eden, and adding the right layers.
This blog covers no-till gardening methods, setup steps, and real benefits to expect.
What Is No-Till Gardening?
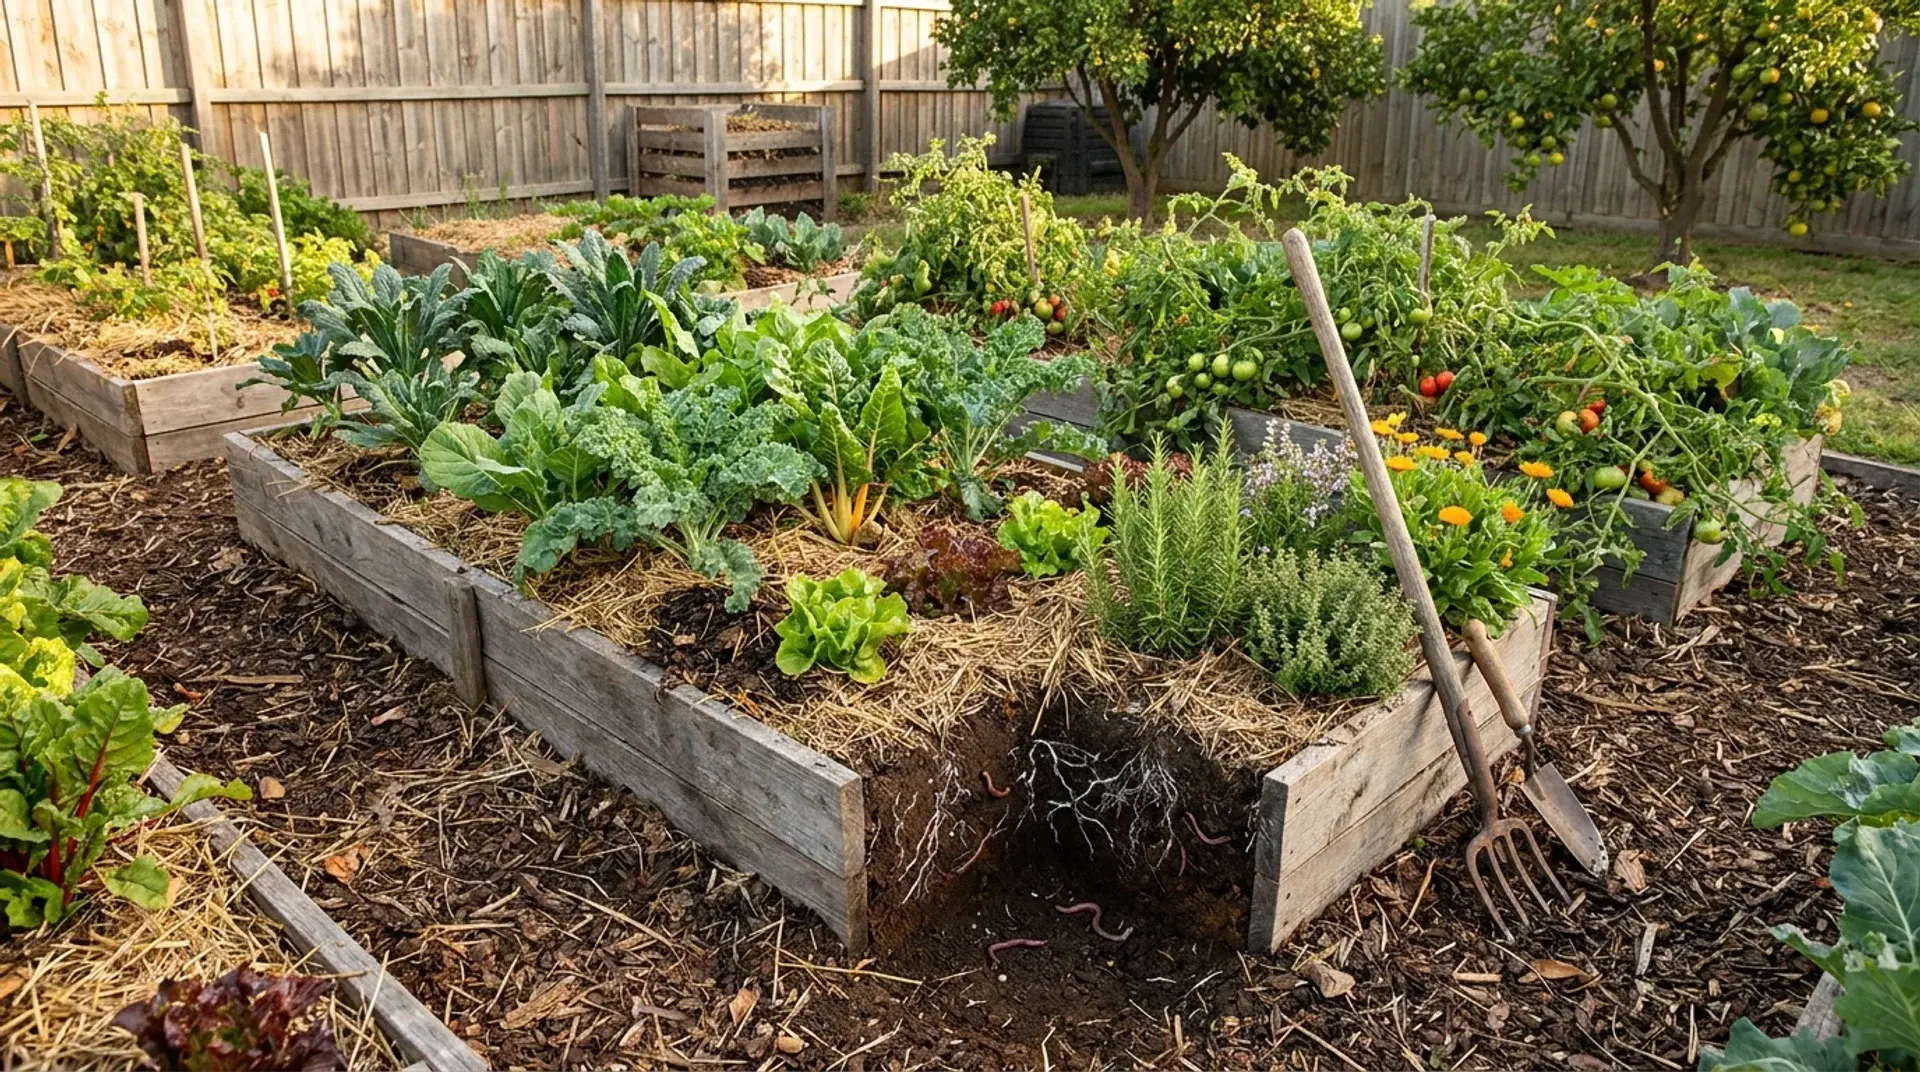
No-till gardening is a system where you stop turning or digging the soil. Instead, you layer organic matter on the surface and let natural processes break it down.
Think about how a forest floor works. Leaves fall. Plants decompose. Nobody digs. Yet the soil is dark, rich, and full of life. No-till gardening copies that process in your backyard.
The three core principles are simple:
- Disturb the soil as little as possible.
- Keep the soil covered at all times.
- Keep the soil planted as much as possible.
No-dig and no-till gardening both avoid disturbing the soil. No-dig is common in home gardens, while no-till is mainly used on farms.
No-till farming has been used on over 35 percent of major crop acreage in the United States, according to USDA’s Economic Research Service. Home gardeners are now catching up fast.
Why Tilling Damages Your Garden
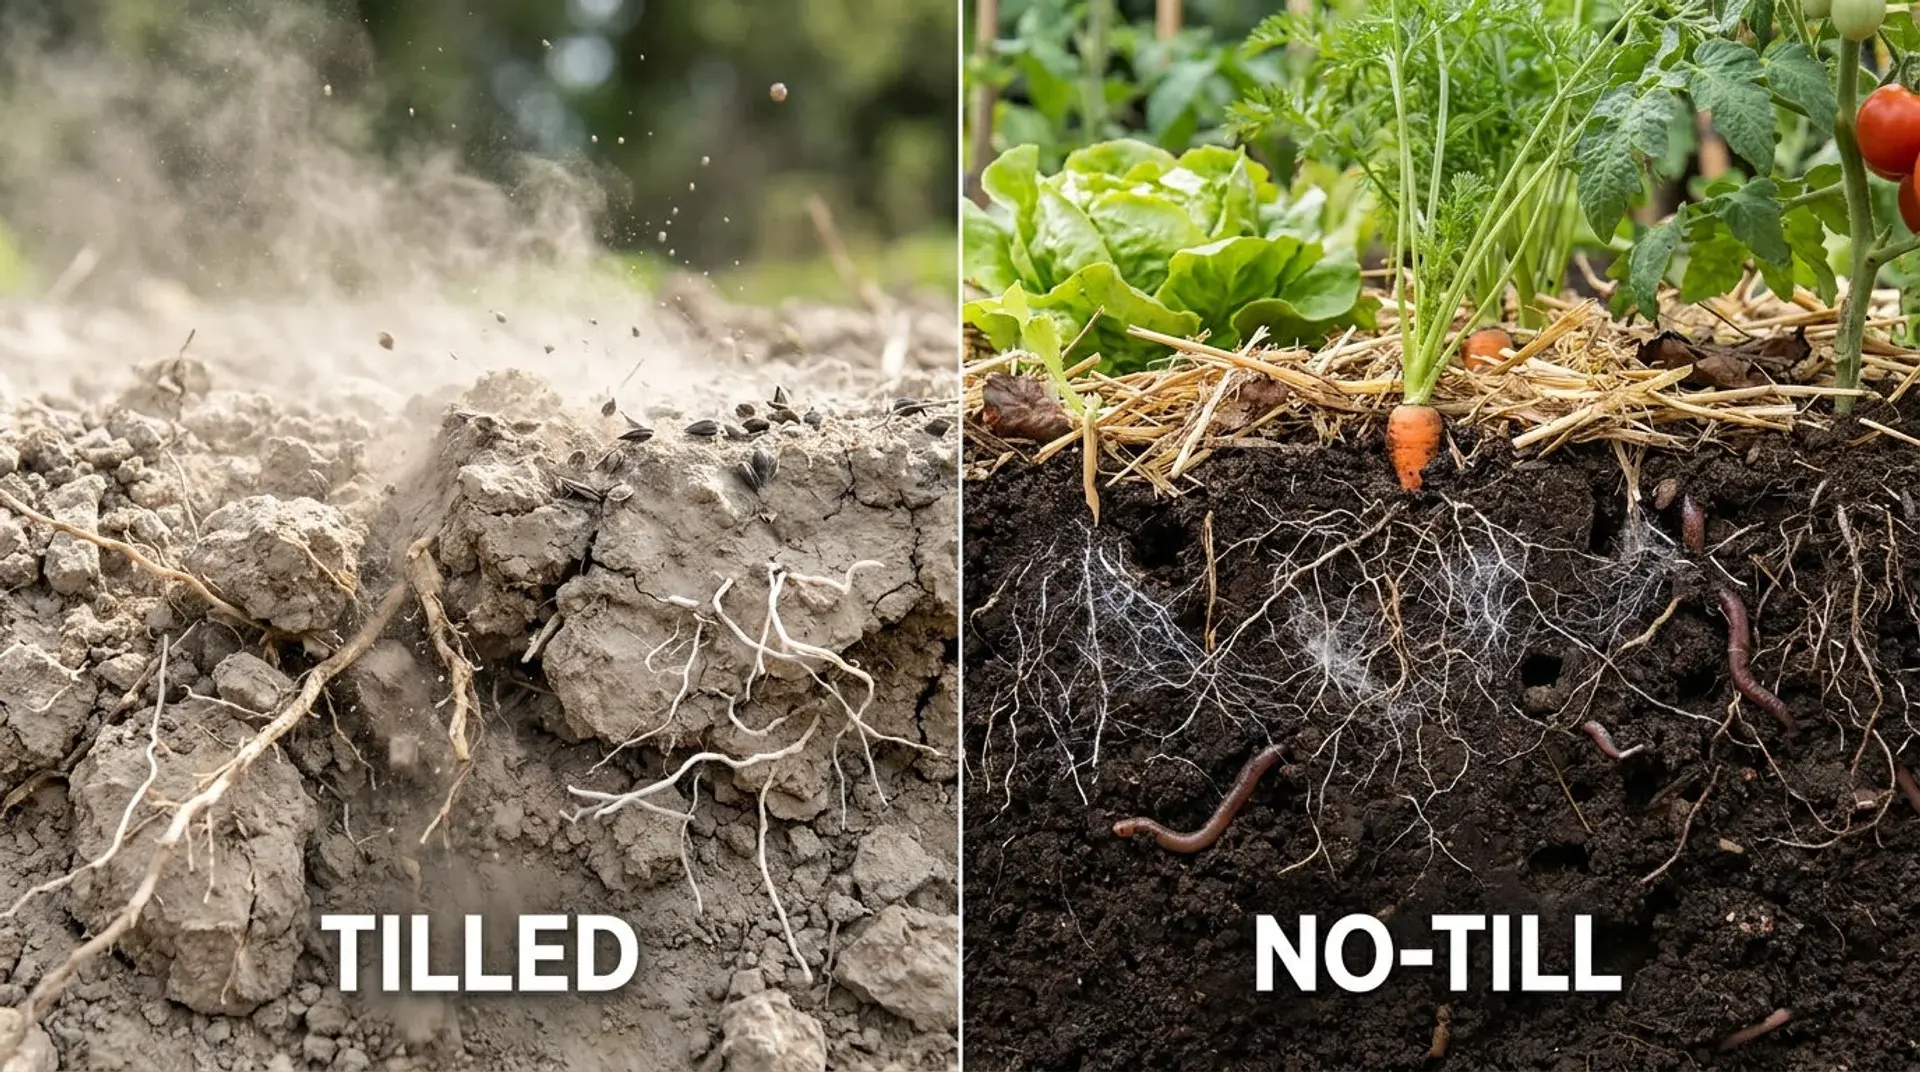
Tilling looks like a fresh start. In practice, it sets your soil back in several important ways.
- It destroys soil structure: When you run a rototiller through your beds, it pulverizes the natural aggregates that keep soil loose and airy. Those aggregates took years to form. One pass erases them.
- It kills beneficial fungi: Mycorrhizal fungi form networks around plant roots, helping them absorb water and nutrients. Tilling breaks those networks completely.
- It brings weed seeds to the surface: Your soil holds thousands of dormant weed seeds at every depth. When you dig, you pull those seeds into the light zone where they germinate fast. Tilling actually creates more of them.
- It releases stored carbon: Healthy soil holds carbon inside stable aggregates. When you break the soil open, that carbon escapes into the air as carbon dioxide. Over time, this depletes the organic matter.
- It burns out organic matter too quickly: Tilling speeds up decomposition by introducing oxygen. That releases nutrients fast in the short term but leaves the soil depleted within a few seasons.
The 1930s Dust Bowl in the American plains was a direct result of mass tilling on bare soil. Wind erosion followed drought, and millions of acres were lost.
That history shaped modern soil science and pushed researchers toward low-disturbance farming.
Key Benefits of No-Till Gardening
As a landscape designer, I’ve seen the payoffs from no-till gardening build over time in client yards and my own beds. Here is what you can expect.
- Fewer weeds each season: Weed seeds stay buried when you stop digging. Wind and birds will still bring in some seeds, but the seed bank in your soil remains dormant.
- Better moisture retention: Mulch on the surface slows evaporation. Soil under a mulch layer stays moist longer, which means less watering during dry spells.
- Richer, more stable nutrients: Organic matter breaks down slowly on the surface. Nutrients enter the soil at a steady pace, which suits plant growth far better than a fast, short burst.
- More soil life: Earthworms, bacteria, and fungi multiply when the soil is left alone. Their activity aerates the soil naturally, builds structure, and makes nutrients available to roots.
- More stable soil temperatures: Mulch acts as insulation. It keeps roots cooler in summer heat and protects them from sudden cold snaps in fall.
- Less physical effort: No digging means no back strain. Once the system is set up, your main seasonal task is adding a fresh layer of compost or mulch on top.
No-Till Gardening Methods Explained
There is no single no-till method that works for everyone. The right choice depends on your soil quality, available materials, and garden size.
1. Sheet Mulching (Lasagna Gardening)
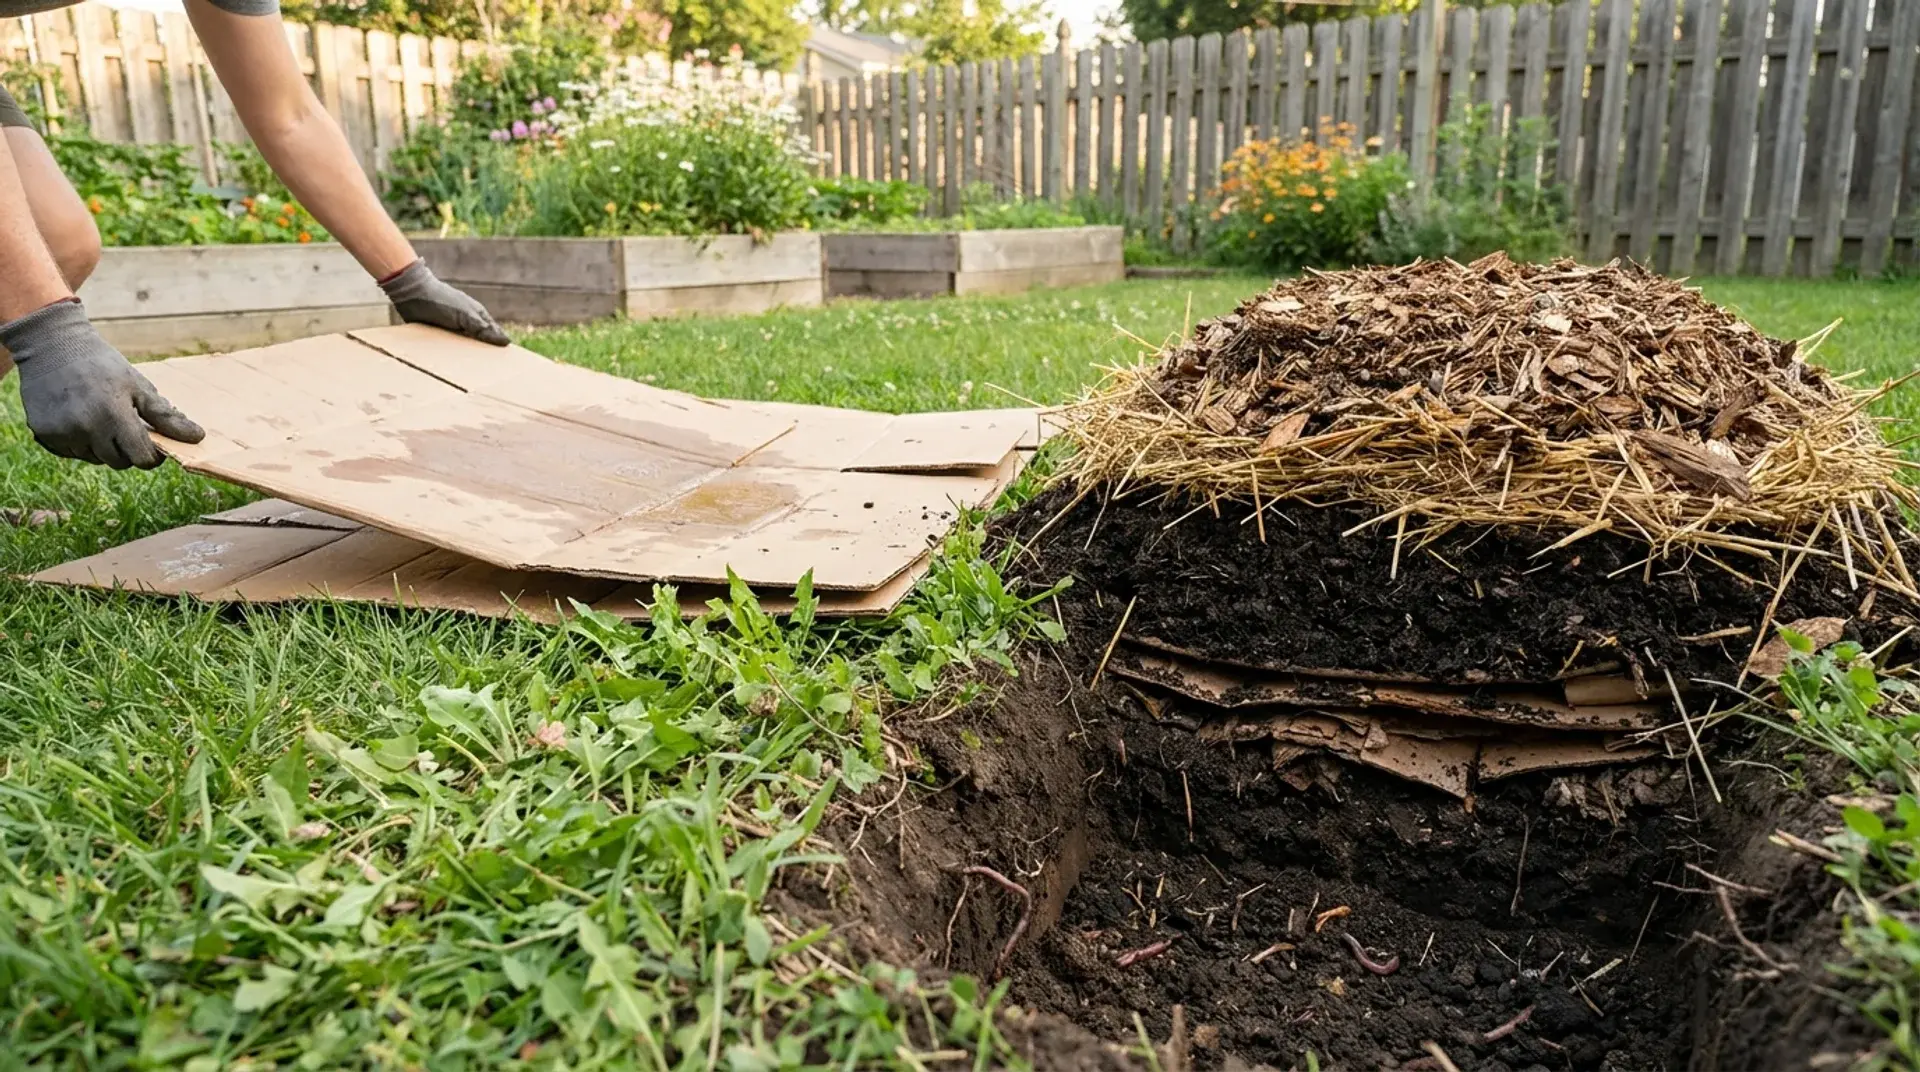
Sheet mulching is the most popular method for starting a brand-new garden bed. You lay cardboard directly on top of grass or weeds, then pile on layers of compost and straw or wood chips.
The cardboard smothers what is underneath and breaks down within a few months. Worms move in quickly. This method works on almost any surface, including rocky, sandy, or clay-heavy ground.
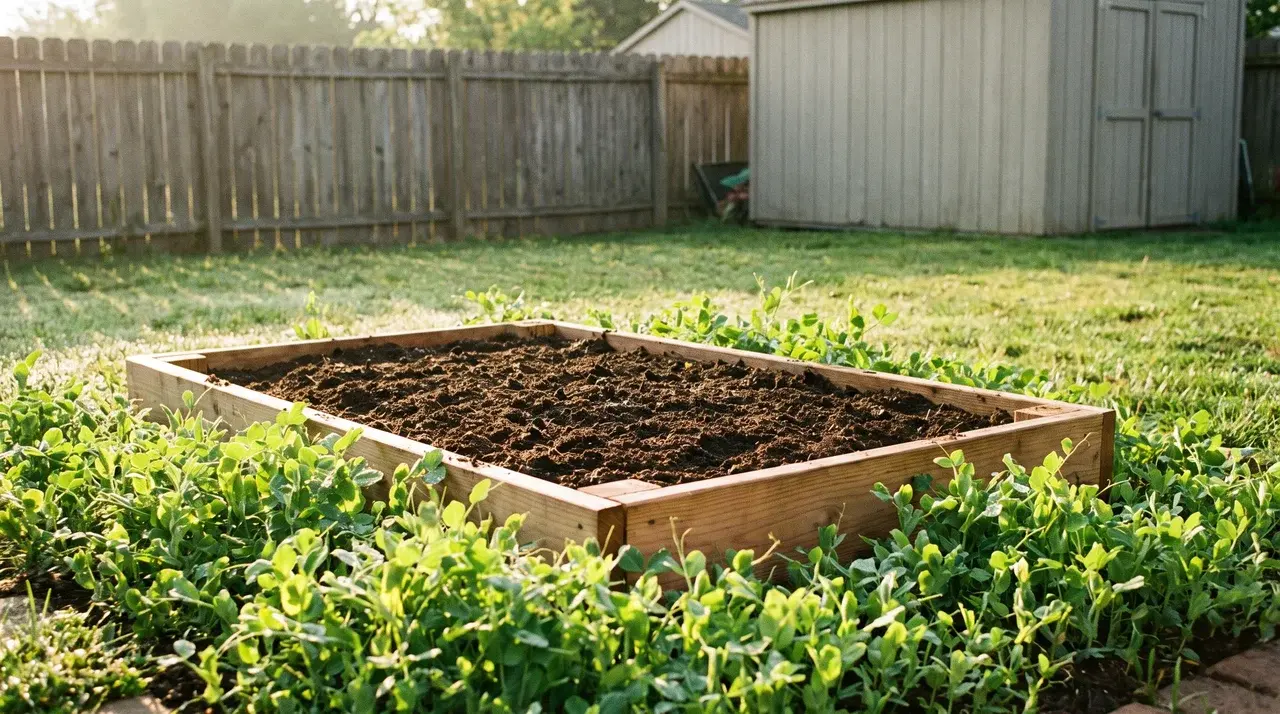
The same layering approach works inside a frame, too, which is why many gardeners build raised garden bed layers on a budget instead of digging straight into the ground.
Best for: Converting a lawn or weedy patch into a productive bed fast.
2. Back to Eden Method
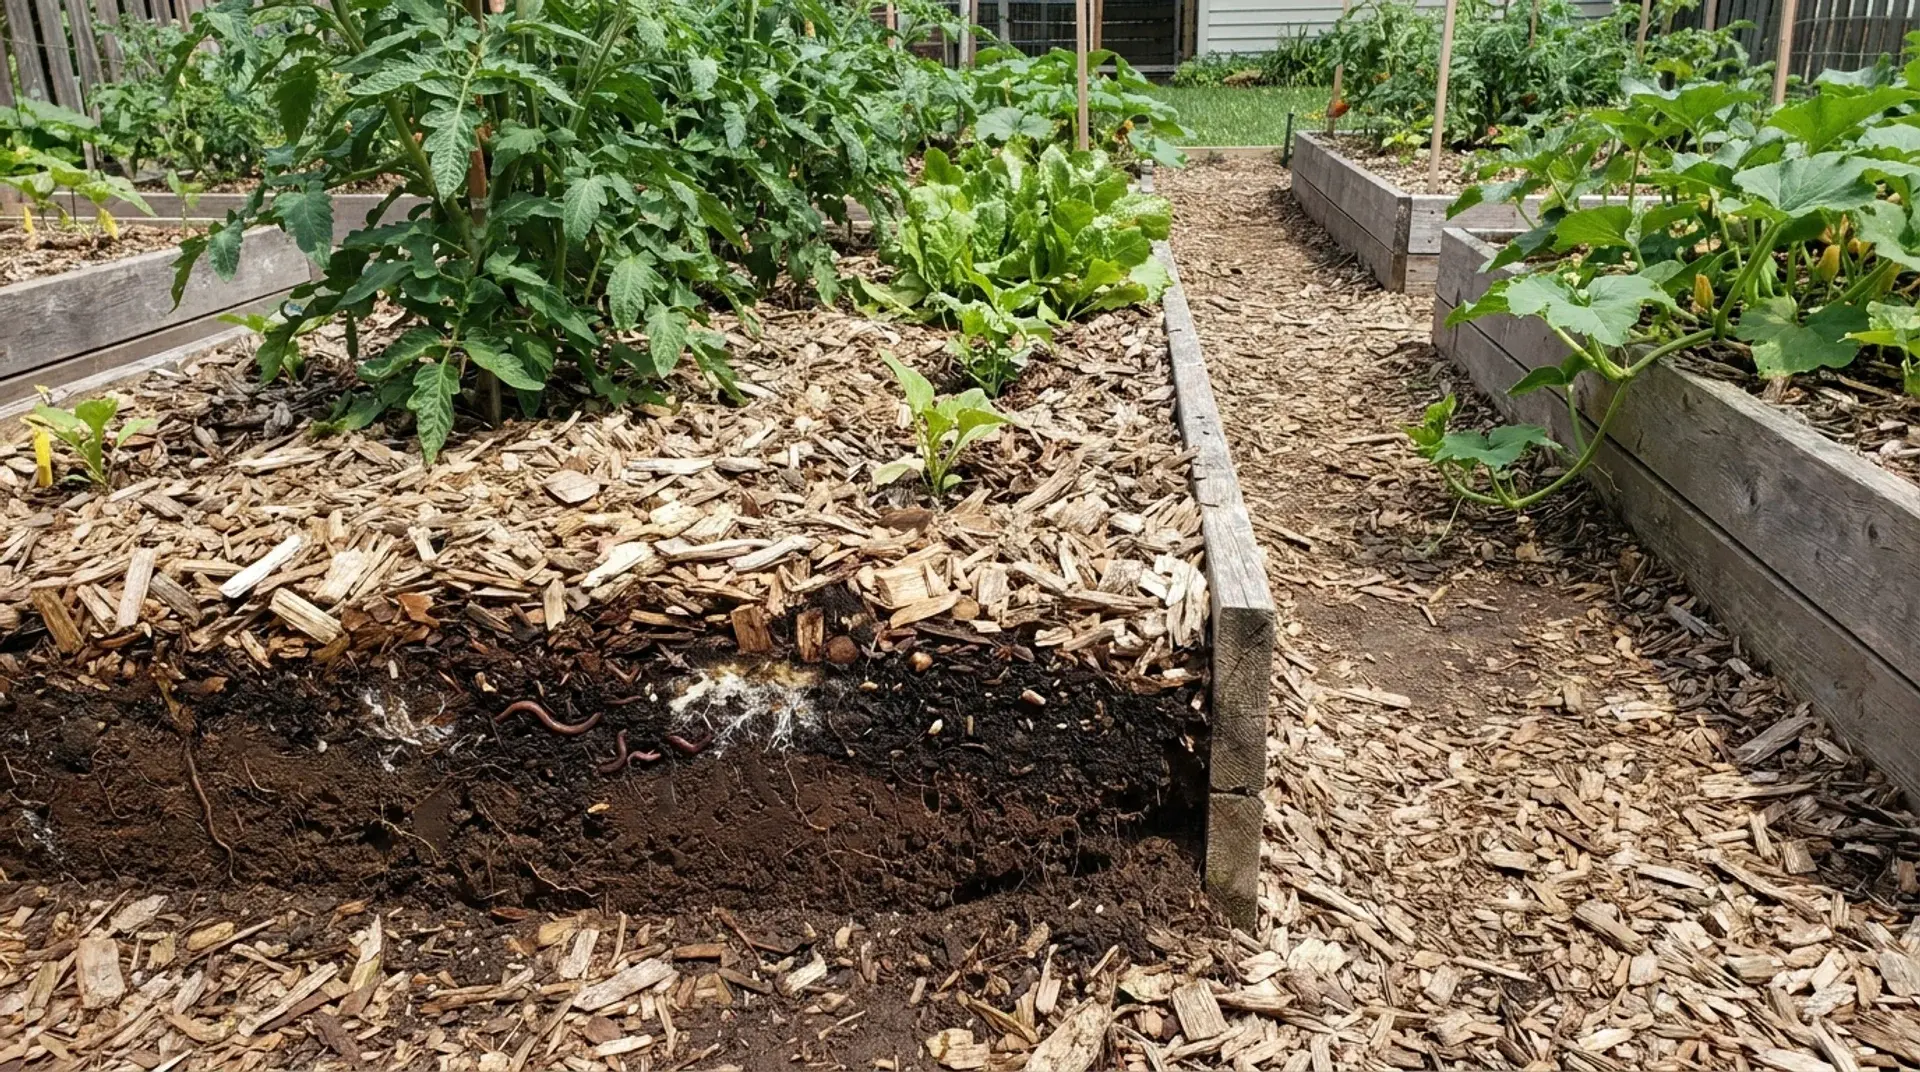
This method mimics the forest floor by covering the soil with a deep layer of wood chips, typically four to six inches. The chips break down slowly, feed soil organisms, and hold moisture through summer heat.
The Back to Eden method works best on soil that already has decent structure. It is not the best choice for brand-new ground where the underlying soil is heavily compacted.
Best for: Established gardens looking to reduce watering and weeding in the long term.
3. Ruth Stout No-Work System
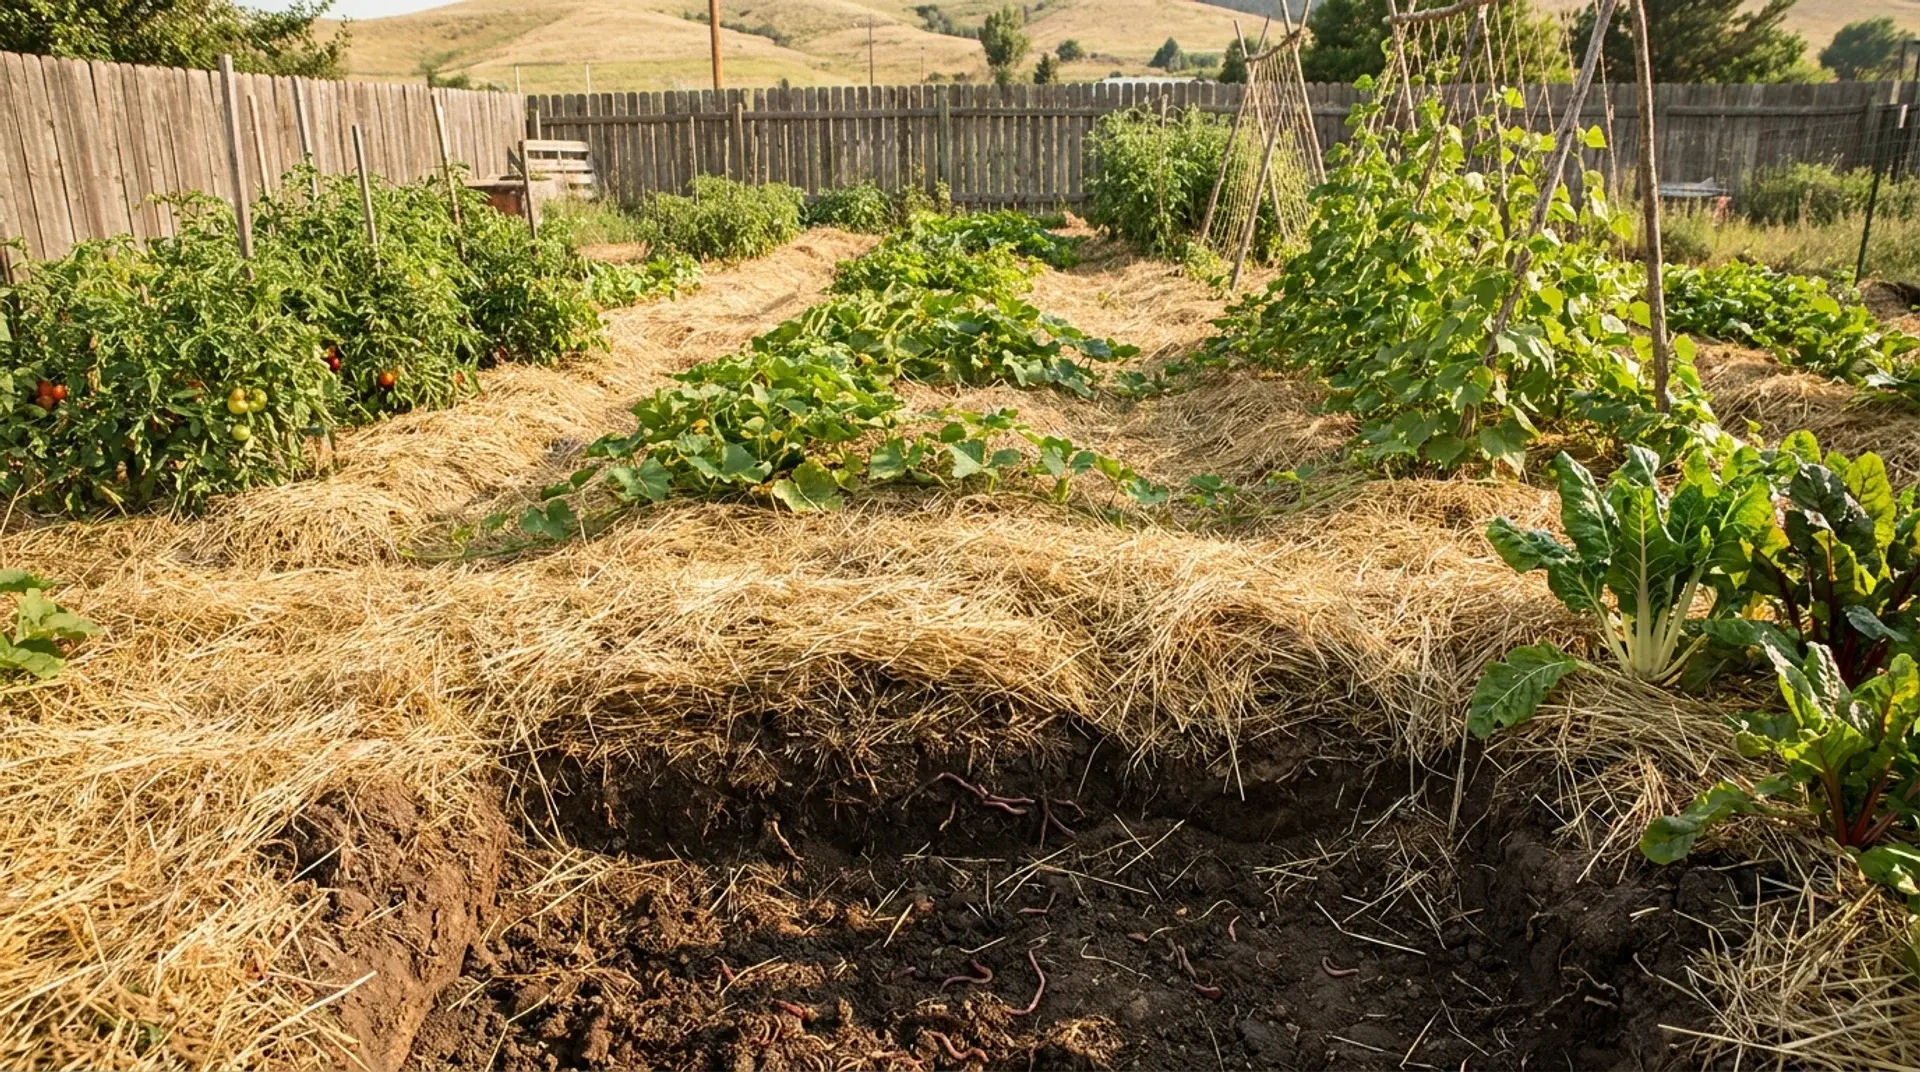
Ruth Stout, a pioneering organic gardener, used a permanent deep layer of hay to mulch her entire garden year-round. She never tilled and rarely watered.
The hay fed the soil, suppressed weeds, and kept the beds productive for decades.
This method works well only when the soil underneath is already healthy. On poor or compacted ground, soil improvement will be slow.
Best for: Large plots with easy access to hay.
4. No Dig with Compost (Charles Dowding Method)
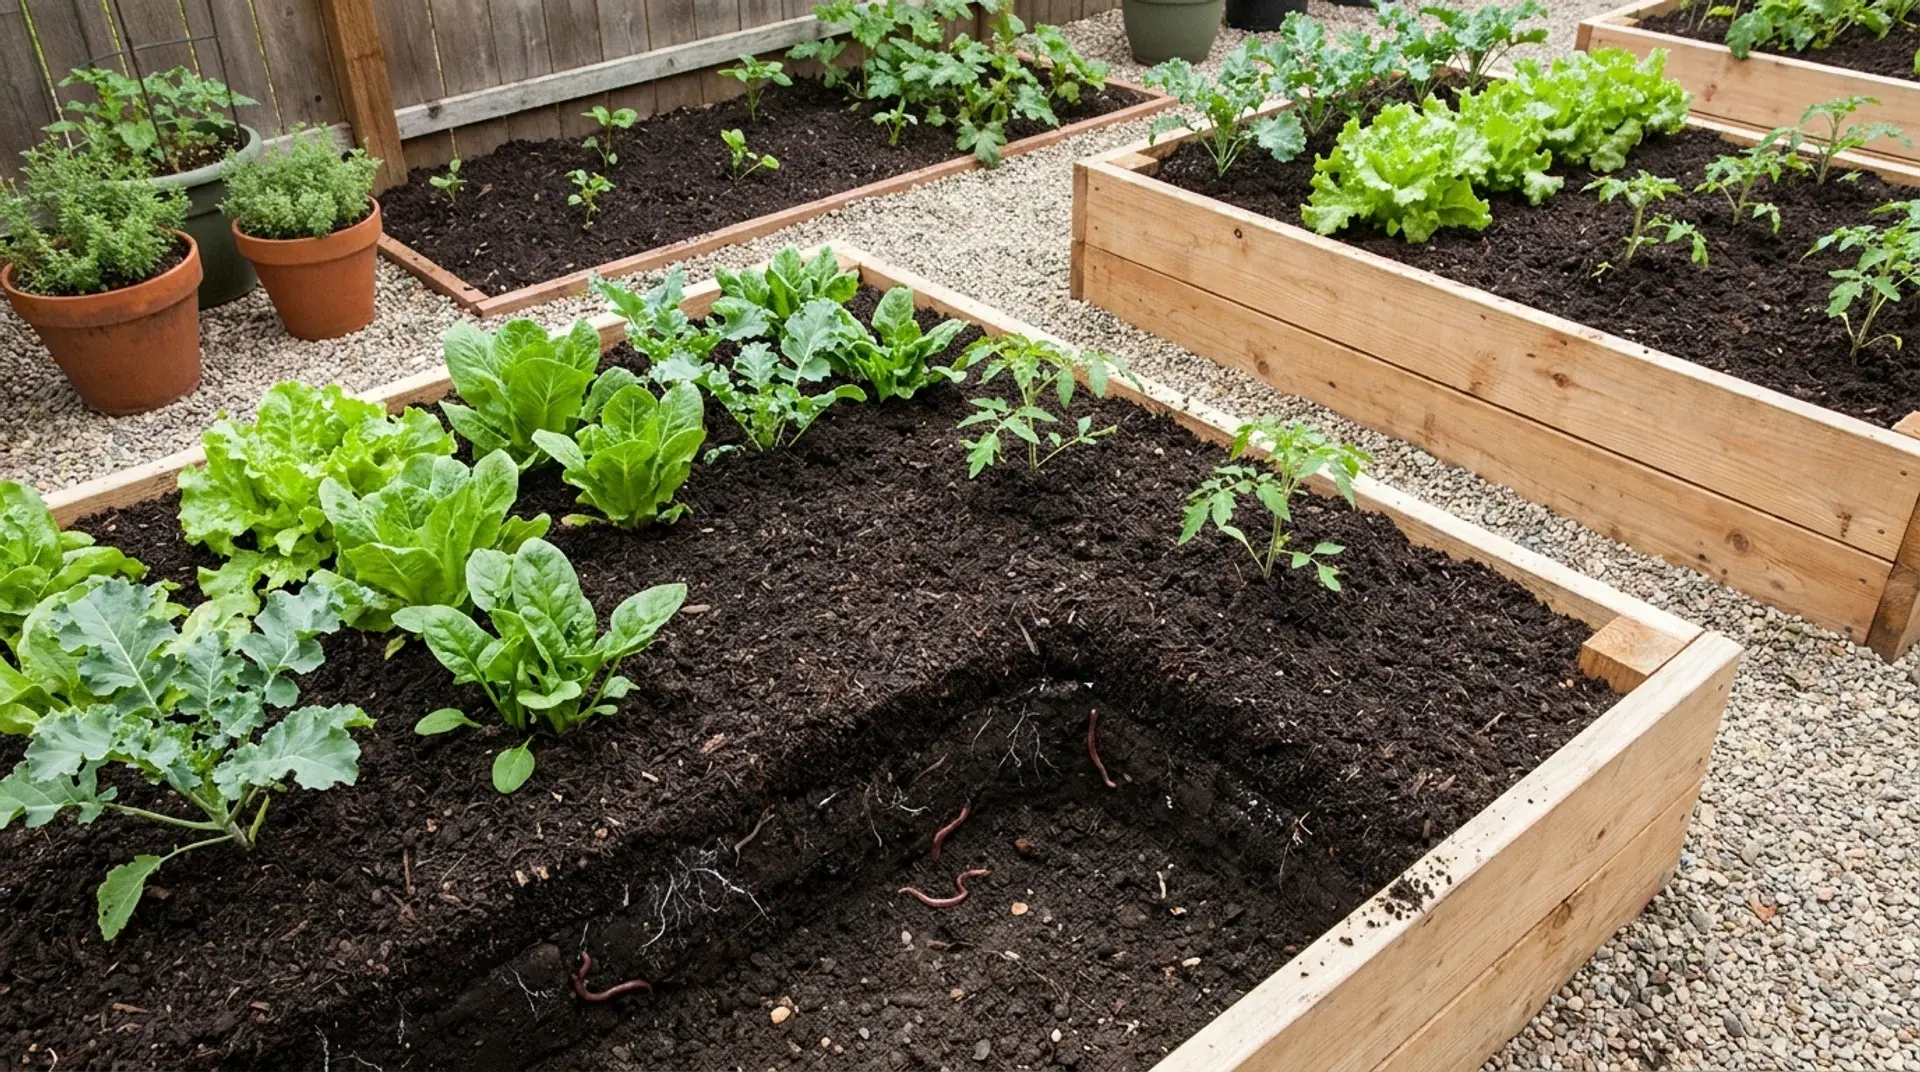
Market gardener Charles Dowding popularized this approach: add two to four inches of well-finished compost directly on top of the bed at the start of each season. No mixing. No turning. Just top-dress and plant.
This is the most beginner-friendly no-till method available. It works in raised beds, in-ground beds, and even on previously tilled soil that you are converting.
Best for: Urban and suburban gardeners wanting a simple, reliable system.
5. Hugelkultur
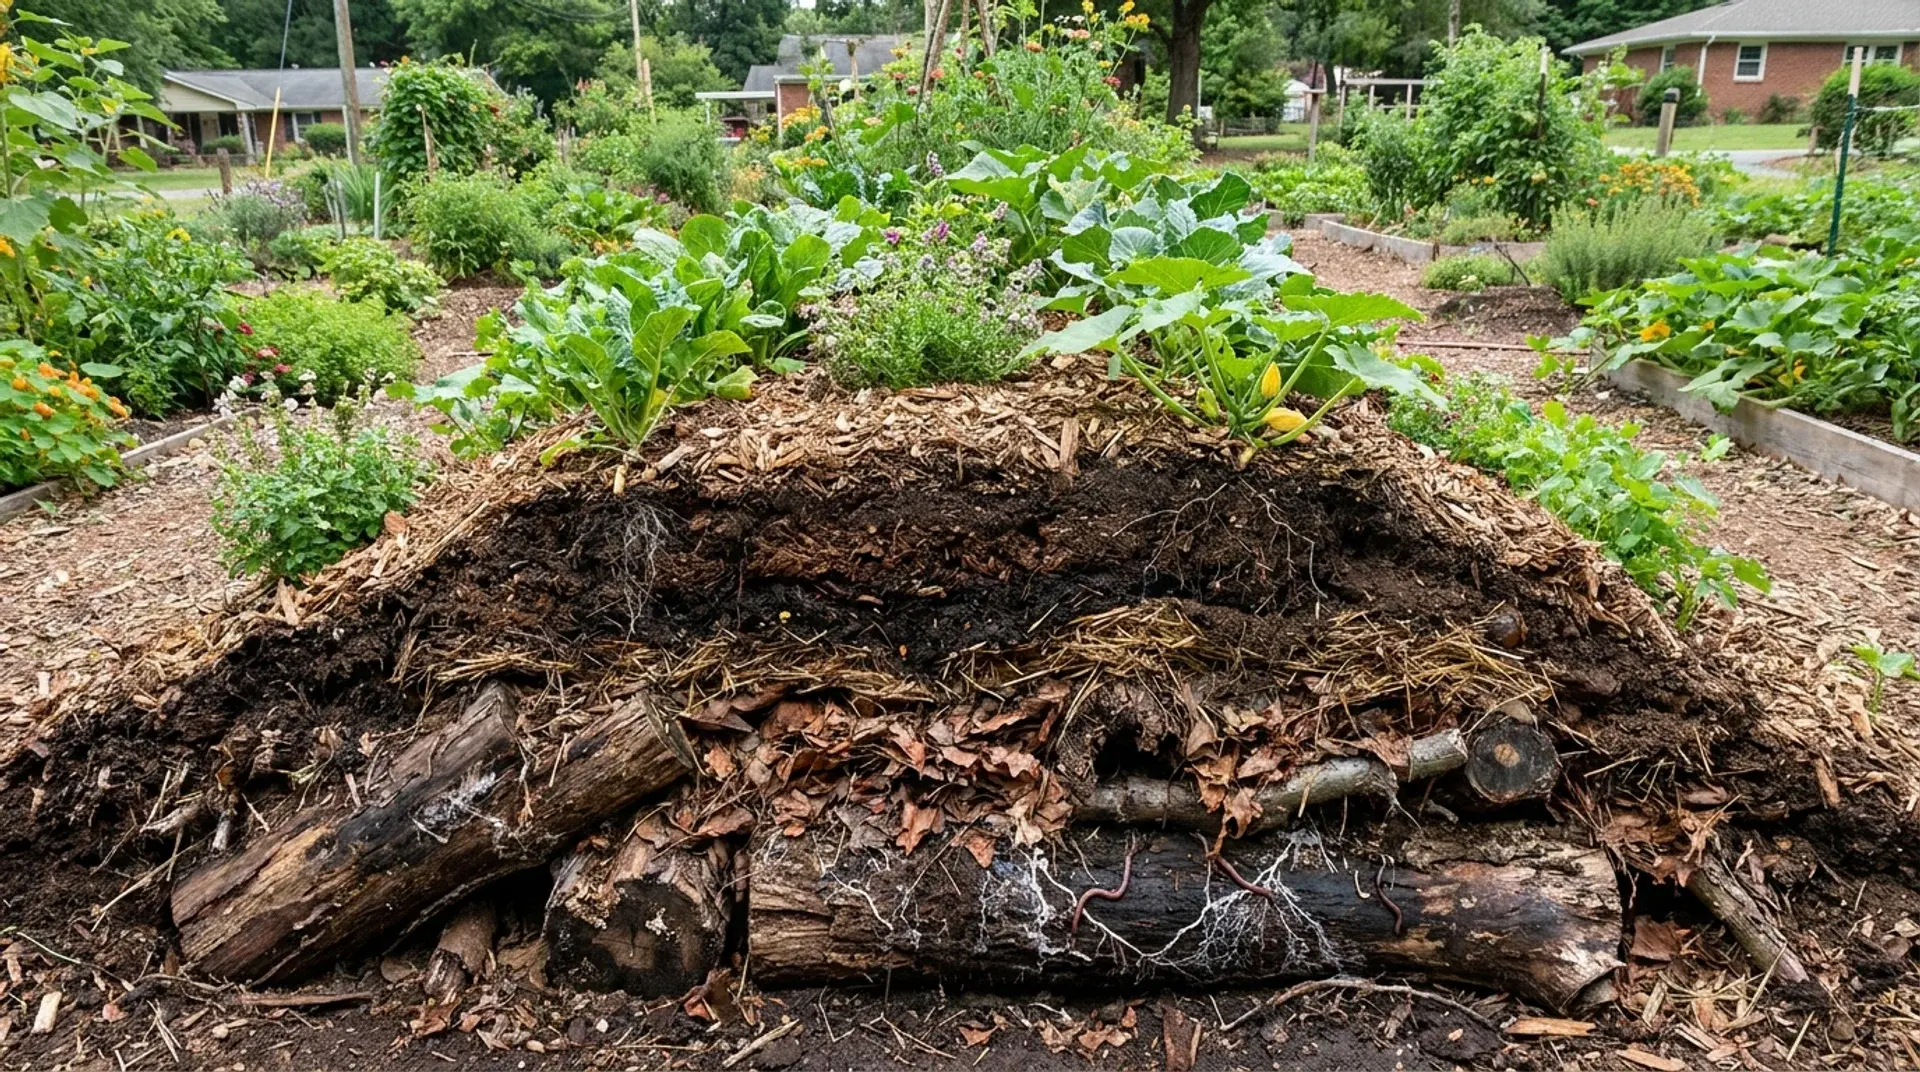
Hugelkultur involves building a raised mound over rotting logs, branches, and organic debris. As the wood decomposes underground, it holds water and releases nutrients for years.
The setup requires more initial work and patience; beds may take a full season to settle. But once established, a hugelkultur bed is largely self-sustaining.
Best for: Gardeners with access to rotting wood who are planning long-term beds.
No Till Gardening Tools You Actually Need
No-till gardening does not require expensive machinery or heavy digging equipment. The right tools help you loosen soil, manage weeds, and add nutrients while keeping the soil structure intact.
| Tool | Purpose |
|---|---|
| Broadfork | Loosens and aerates soil without turning it over. Helps roots grow deeper while keeping weed seeds buried. |
| Garden Fork | Useful for initial setup or compacted soil. Lift and loosen the soil instead of flipping it. |
| Hand Trowel | Helps transplant seedlings with minimal soil disturbance. Choose a comfortable model for regular use. |
| Silage Tarps | Cover garden beds to suppress weeds and speed up decomposition without digging. |
| Flame Weeder | Controls surface weeds with heat while keeping the soil undisturbed. |
| Compost Fork Or Spreader | Makes annual compost top-dressing easier and helps distribute nutrients evenly. |
These simple tools are enough to maintain a productive no-till garden. The goal is not to work the soil harder, but to support the natural processes already happening beneath the surface.
How to Start a No-Till Garden Step by Step
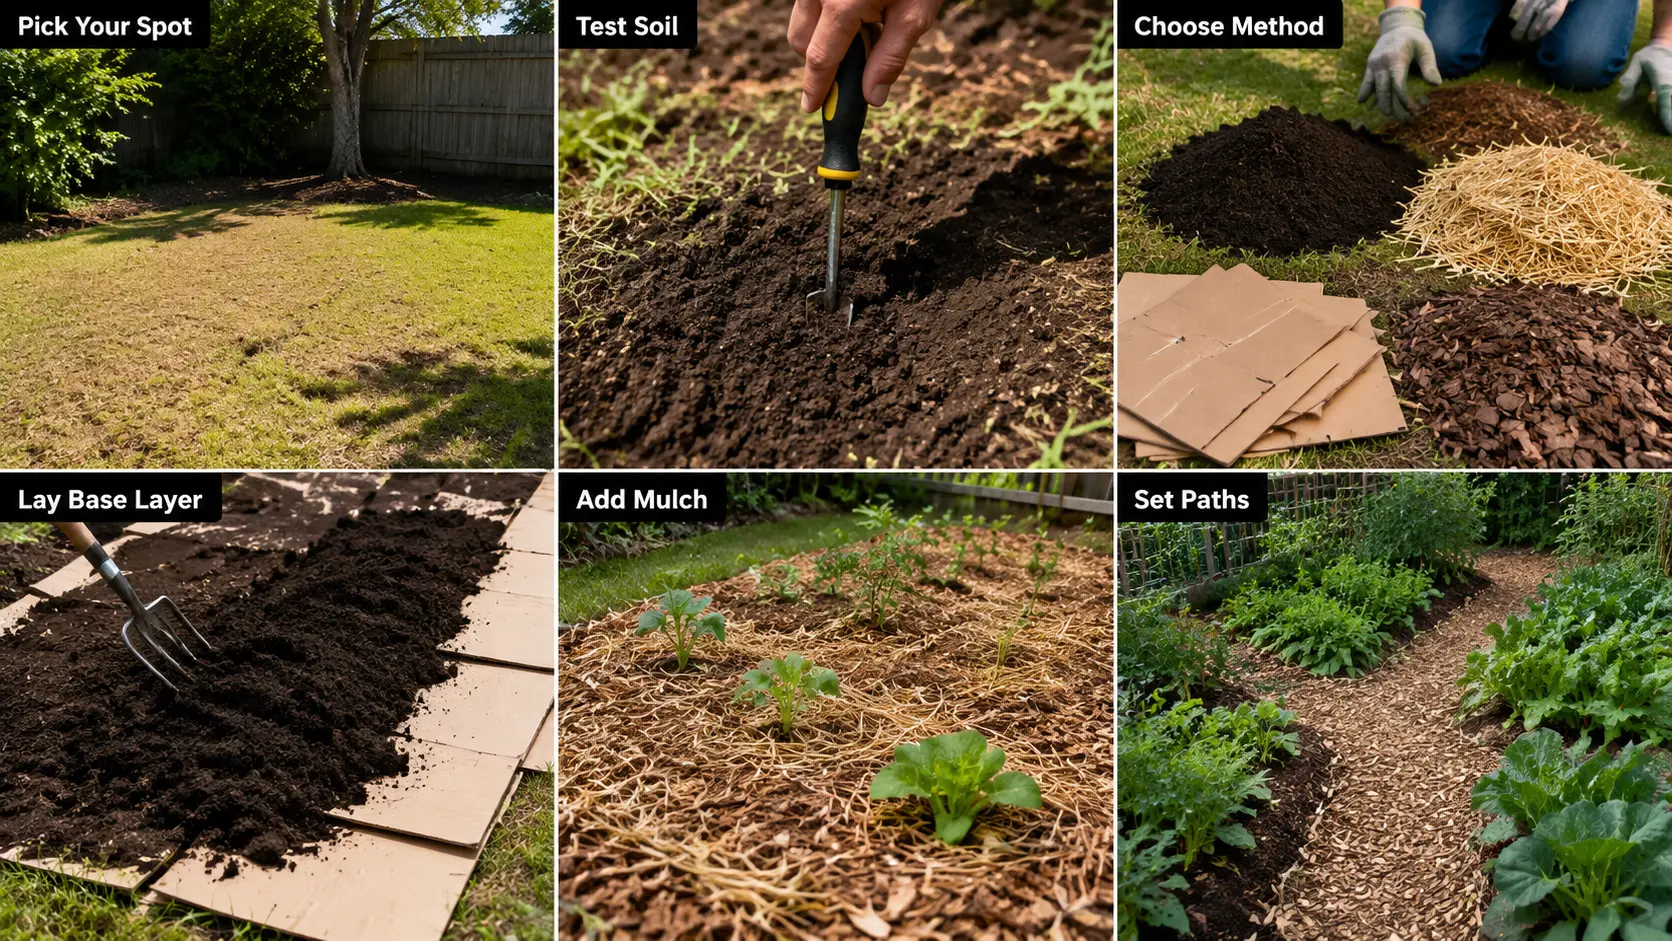
Starting a no-till garden does not require expensive equipment or hours of digging.
By following a few simple steps, you can create a healthy, growing space while protecting the natural structure and life of your soil.
Step 1: Pick Your Spot
Choose a location that receives at least six hours of direct sunlight every day. A relatively flat area with good drainage makes watering easier and helps plants grow more evenly.
Avoid areas where water collects after rain, as overly wet soil can slow root growth. Also consider placing your garden near a water source to make regular care more convenient.
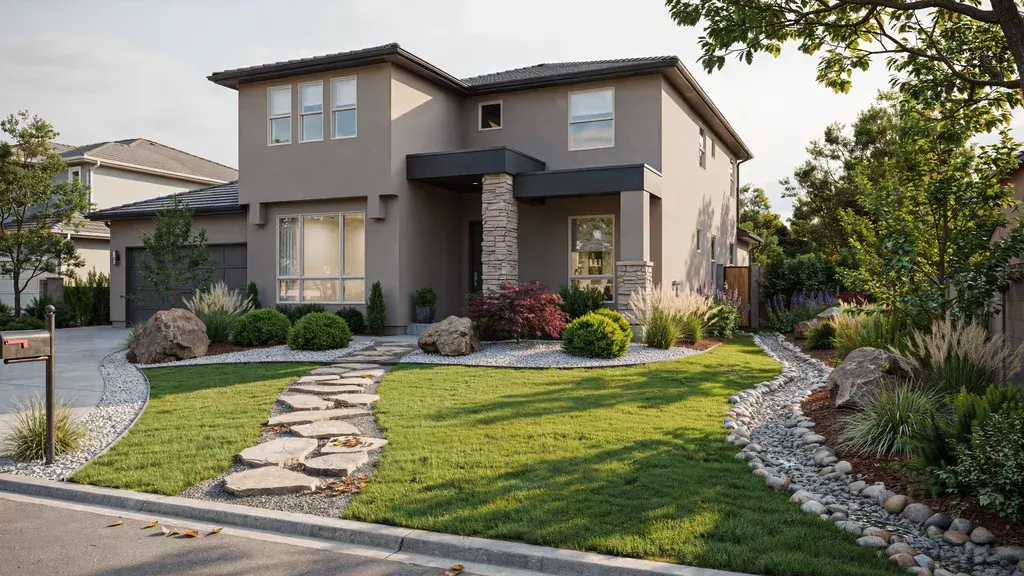
It also helps to walk the yard first and think about how the new bed fits into your wider hardscape and landscape plan, since paths, patios, and beds all compete for the same square footage.
Step 2: Test Your Soil
Check your soil condition before starting by testing for compaction and drainage. Understanding your soil helps you choose the right no-till method and identify whether any preparation is needed.
You can test compacted soil by pushing a screwdriver into the ground. If it is difficult to insert, you may need a method that focuses on improving soil structure over time.
Step 3: Choose Your Method
Select a no-till approach based on your starting point, such as sheet mulching, no-dig compost, Back to Eden, or Hugelkultur. The best method depends on your space, materials, and gardening goals.
For example, sheet mulching works well for converting lawns, while no-dig compost is ideal for improving existing beds. Choosing the right method saves time and prevents unnecessary work.
Step 4: Lay Your Base Layer
Prepare the garden bed by adding your foundation layer, such as overlapping cardboard for sheet mulching or a thick layer of compost for no-dig gardening. This creates a weed barrier and improves soil fertility.
Make sure cardboard layers overlap to prevent weeds from growing through gaps. For compost-based beds, use mature compost free of chemicals and weed seeds.
Step 5: Add Mulch On Top
Cover the bed with straw, wood chips, leaves, or additional compost to protect the soil surface. Mulch helps retain moisture, reduce weeds, regulate temperature, and support beneficial soil organisms.
Keep the mulch layer thick enough to provide protection, but leave space around plant stems to prevent excess moisture buildup. Over time, the mulch will break down and add organic matter back into the soil.
Step 6: Set Permanent Paths
Create dedicated walking paths around your growing areas instead of stepping on garden beds. This prevents soil compaction and allows roots, worms, and microorganisms to thrive.
Once your no-till garden is set up, regular mulching and compost additions will continue improving the soil, making each growing season easier and more productive.
Common Challenges and Honest Fixes
No-till gardening is not without friction, especially in the first two seasons.
- Slow spring soil warming: Mulch insulates the soil, so it warms up later than bare soil. The fix: plant slightly later than your usual date, or use black plastic or row covers for a few weeks before planting.
- Messy appearance: Straw and wood chips can look untidy in a tidy front garden. Arborist wood chips are finer and look much neater. Once plants establish, the mulch becomes invisible beneath the canopy anyway.
- Perennial weeds pushing through: A standard four-inch mulch layer reliably stops annual weeds. Perennial weeds with deep roots may push through. The solution is a thicker initial layer, at least 12 inches deep.
- Results take time: Year one in a no-till garden may not look dramatically different from your old setup. In years two and three, the gap becomes obvious. Soil structure improves. Weed pressure drops. Yields go up.
- Heavy clay or damaged soil: Do not ignore it. Add four inches of compost on top and leave it alone. The soil biology will start working from the surface down. Improvement takes one to two seasons.
Best Crops for No-Till Gardens
No-till gardens support many vegetables, especially crops that benefit from moisture-rich soil, compost, and protective mulch.
| Crop Type | Best Choices | No-Till Growing Tip |
|---|---|---|
| Fruiting crops | Tomatoes, squash, cucumbers, beans, corn | Plant in compost-rich, mulched beds. |
| Leafy greens | Lettuce, kale, spinach, arugula | Keep soil evenly moist. |
| Bulbs | Garlic | Plant cloves in compost and cover with mulch. |
| Brassicas | Broccoli, cabbage, Brussels sprouts | Add nutrient-rich compost. |
| Root crops | Carrots, parsnips | Loosen soil gently with a broadfork. |
Which No-Till Method Is Right for You?
The best no-till method depends on your garden space, available materials, and gardening goals.
- Sheet Mulching: Best if you’re turning a lawn or weedy patch into a new garden bed without digging.
- No-Dig Compost Method: Best if you already have garden beds and want healthier soil so you can plant right away.
- Back to Eden Method: Best if the soil is in good condition and you prefer a low-maintenance garden.
- Ruth Stout No-Work System: Best if you have easy access to hay and want a permanent, thick mulch you rarely have to touch.
- Hugelkultur: Best if you have rotting logs or branches and want raised beds that retain moisture naturally.
No matter which method you choose, you’ll improve soil health while reducing the need to dig year after year.
Conclusion
No-till gardening truly works with your soil, not against it. Stop digging, start layering, and let soil organisms do the work no rototiller can match.
The payoff is real: fewer weeds, better harvests, less watering, and soil that keeps improving, the same low-impact thinking behind sustainable home design.
The shift won’t happen overnight, but every season with no-till gets easier.
Ready to start? Pick one method from this guide, build your first bed this weekend, and tell us how it goes in the comments below.
Frequently Asked Questions
Is a No-Till Garden Better Than a Tilled Garden?
Yes, for typical vegetable beds. No-till builds healthier soil and holds moisture longer, though tilled beds establish faster.
Can You Plant Directly Into a No-Till Garden?
Yes. Add a layer of compost, then sow seeds or transplant seedlings straight into it without disturbing the soil below.
Should You Till Once Before Starting a No-Till Garden?
Only if soil is heavily compacted. A one-time till loosens the ground, then you switch to layering mulch and compost.
Can You Use Cover Crops in a No-Till Garden?
Yes. Winter-kill crops like oats or radish die back naturally and leave mulch, while hardy crops like rye need mowing.