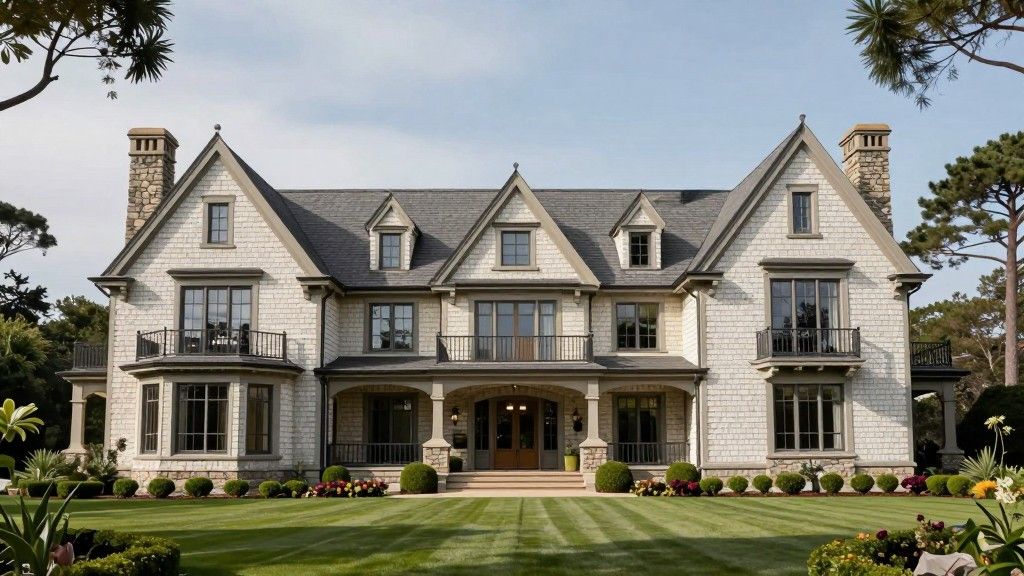
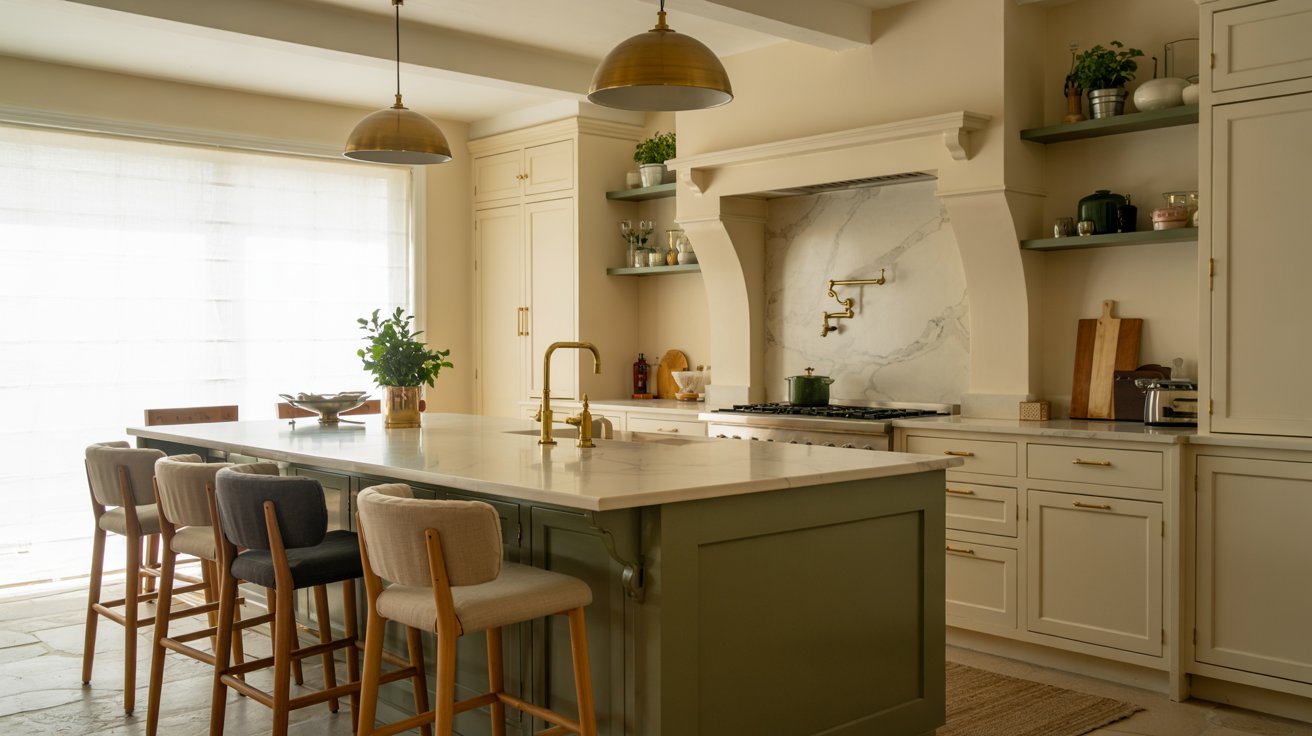
Your kitchen island handles breakfast, homework, and dinner parties, often all in the same week. When the finish looks worn, or the layout stops working, a kitchen island remodel is worth planning carefully.
This article covers real design ideas, current cost ranges, and permit rules. You’ll find everything you need to plan a remodel that holds up long after the first week.
Should You Remodel or Replace Your Kitchen Island?
Not every tired-looking island needs to come out. If the cabinet structure is solid and the location works, surface updates can make a real difference. Fresh paint, new hardware, and better storage cost far less than a full replacement. Use this comparison to decide.
| Remodel the Existing Island | Replace the Island |
|---|---|
| Cabinet boxes are in good condition | Cabinets are cracked, warped, or rotting |
| The location already works well | The island blocks appliance doors or foot traffic |
| You need new finishes or countertops | You need a completely different size |
| Storage needs an upgrade | Plumbing or appliances need major rerouting |
| Hardware and lighting feel dated | The current design no longer fits the kitchen |
Kitchen Island Size: Check Your Clearances First
The most common planning mistake is adding an island that blocks movement or closes off appliance doors. A larger island is not always better. Measure these clearances before ordering anything.
Standard guidelines from the National Kitchen & Bath Association(NKBA):
- Minimum walkway: 36 inches on all sides
- Comfortable work aisle: 42 inches for one cook
- Two-cook kitchens: 48 inches between island and perimeter cabinets
- Refrigerator door clearance: 36 inches in front
- Dishwasher clearance: 42 inches minimum
- Oven door fully open: 48 inches
Tape out the new island footprint on your floor before committing to a size. It takes five minutes and prevents costly corrections later.
Set the Island’s Main Purpose Before You Plan
The island’s primary job shapes every material and feature decision. A cooking island needs deep drawers and prep space. A family island needs seating, power outlets, and surfaces that wipe down fast. Decide on the purpose first, then build the plan around it.
Kitchen Island Remodels for a Stronger Visual Impact
Small changes in color, material, and shape can create a completely different look without a full rebuild.
1. Two-Tone Contrasts for Visual Depth
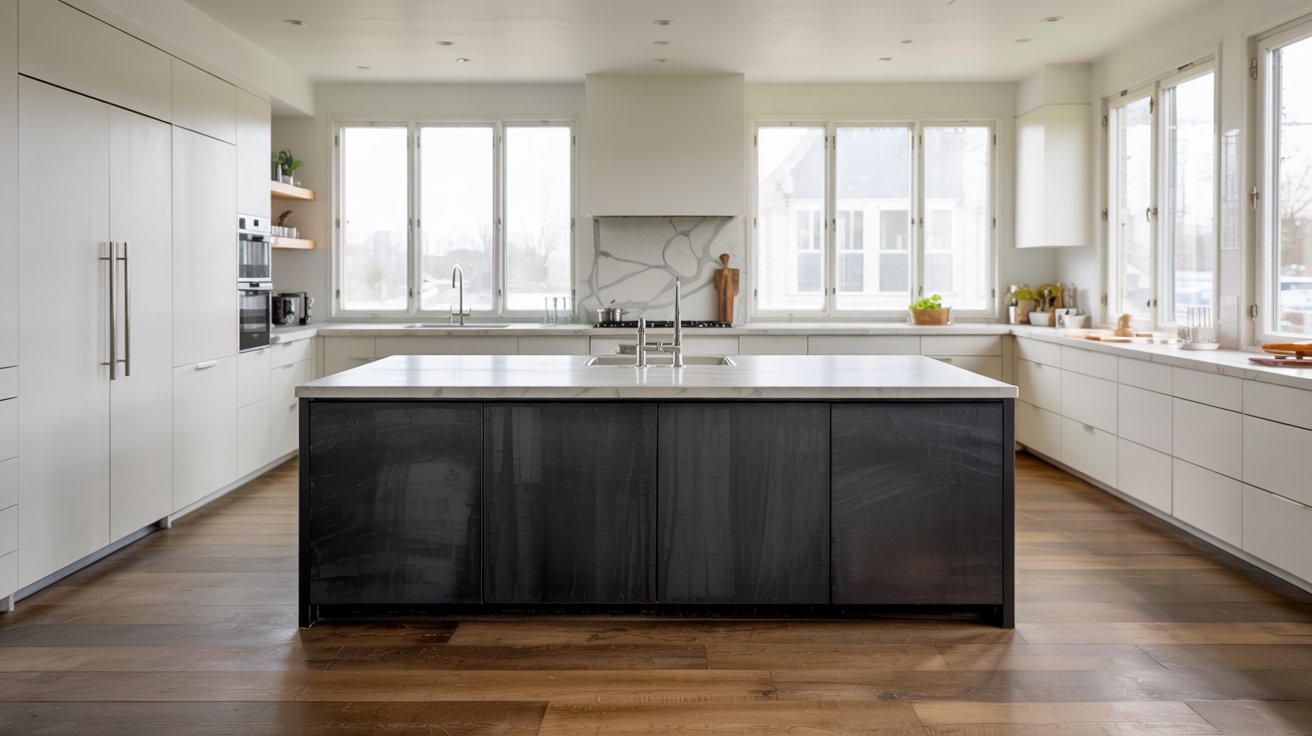
Pairing a dark island with lighter perimeter cabinets creates instant contrast. This adds depth to your kitchen without major construction. The color split draws attention to the island and turns it into a natural gathering point.
Popular combinations:
- Charcoal grey island with white upper cabinets
- Black base with natural wood surrounds
- Deep blue island with cream walls
The island color works best when it appears somewhere else in the room, such as stools, a backsplash tile, or a light fixture, so the contrast reads as planned rather than isolated.
2. Waterfall Edge Countertops
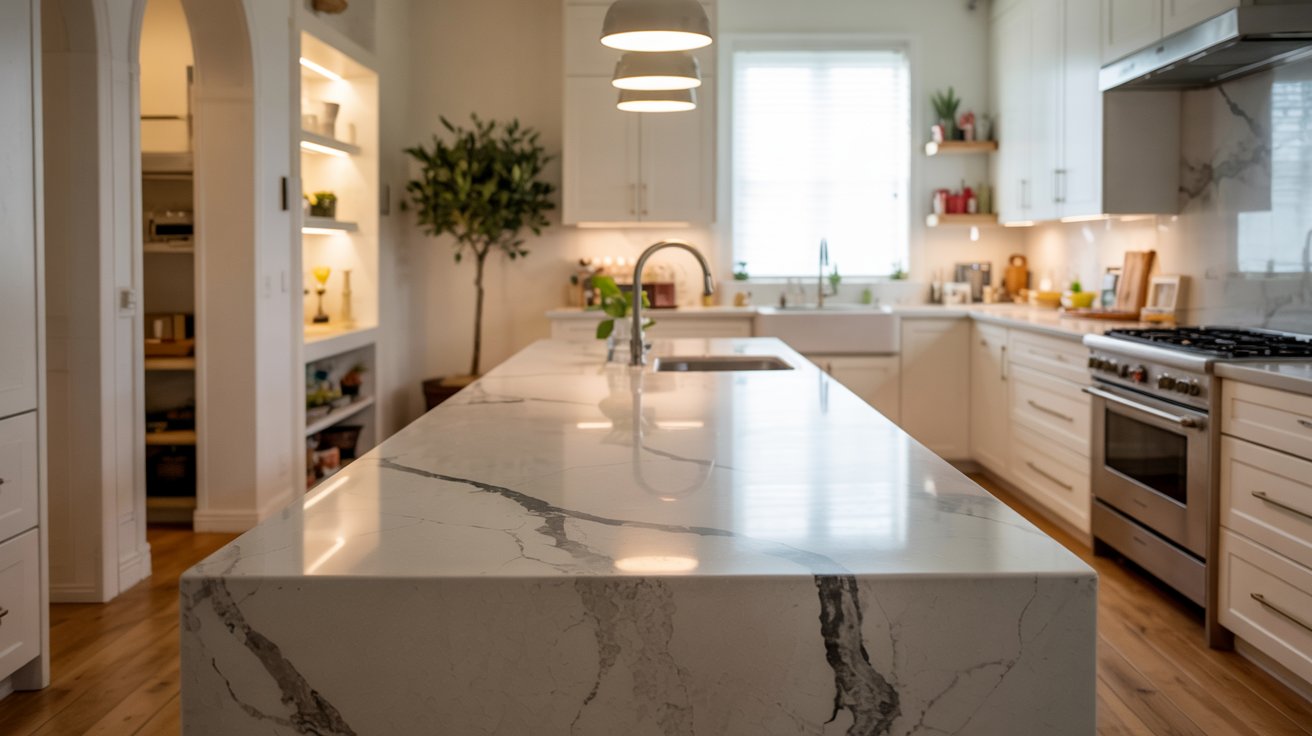
A waterfall edge means your countertop material flows down the sides of the island. It creates a clean, continuous look and gives the island a furniture-like quality.
Best materials for waterfall edges:
- Quartz: durable and low maintenance
- Marble: bold veining and a luxury feel
- Quartzite: marble appearance with better scratch resistance
- Exotic granite: unique patterns and color variation
Installation requires precise stone alignment at the seam where the horizontal and vertical sections meet. Work with a fabricator who has done waterfall edges before; a poor seam is hard to fix after the fact.
3. Navy & Forest Green Islands
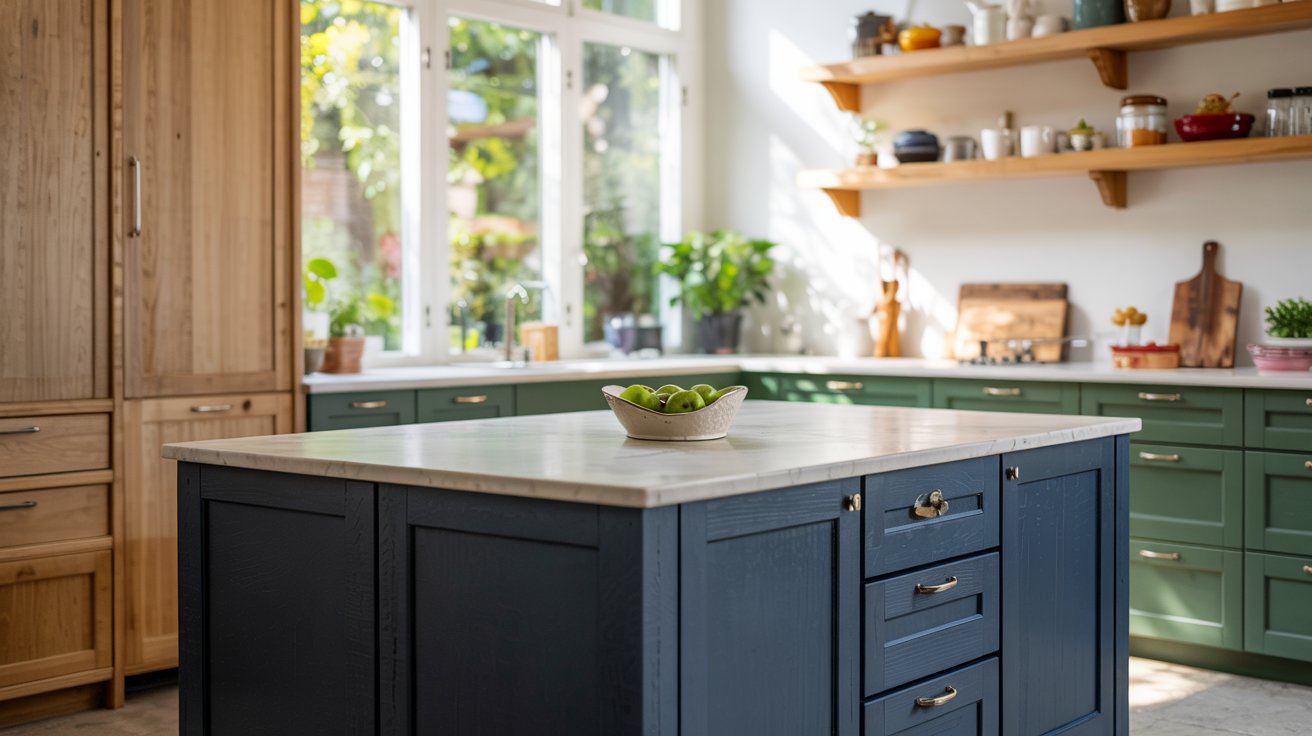
Bold color islands are replacing all-white kitchens. Navy and forest green lead the trend. Balanced tones offer lasting appeal, conceal wear, and complement a variety of hardware finishes.
Styling tips:
- Use a matte finish for a modern feel
- Try glossy lacquer for traditional spaces
- Add open shelving in natural wood to soften the look
Both colors hide wear and fingerprints far better than white paint, which makes them a practical choice for high-traffic kitchens.
4. Natural Wood Finishes
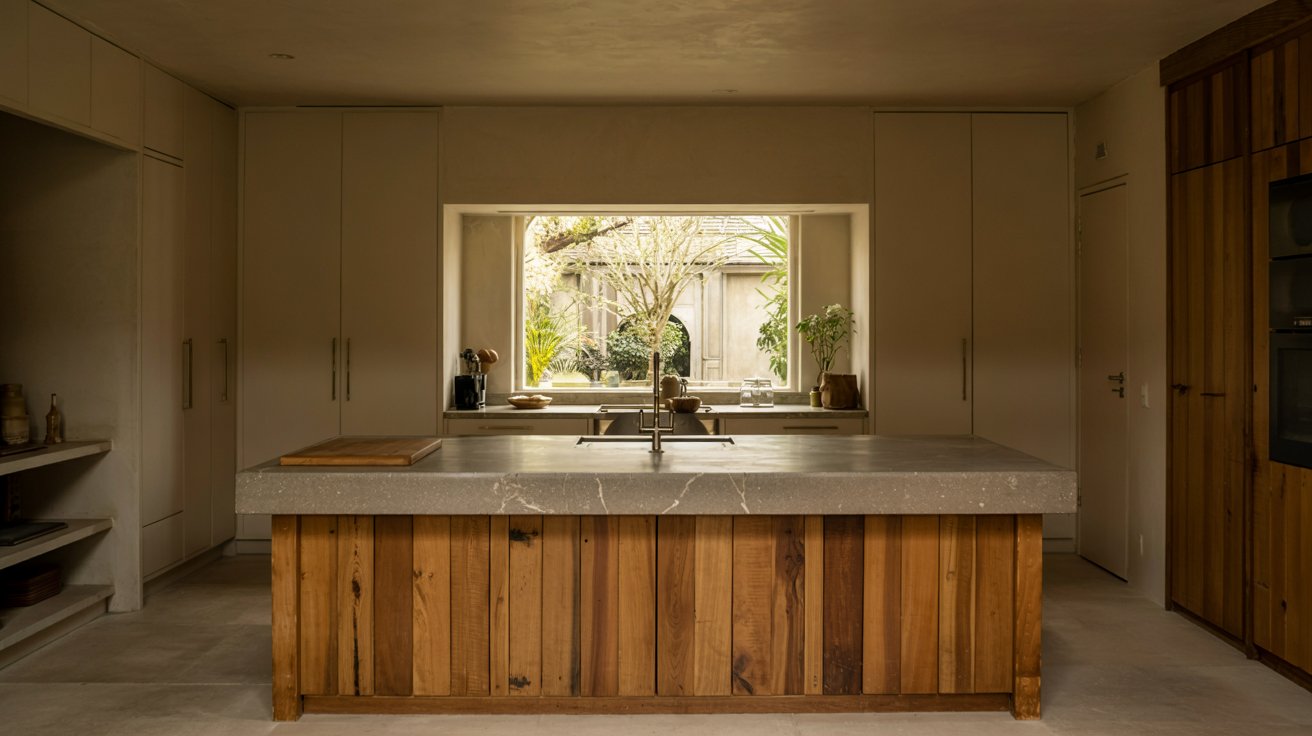
Wood brings warmth that stone and paint can’t match. A wooden island base or top creates balance in kitchens with lots of hard surfaces. Popular wood choices include oak, teak, and reclaimed wood.
Ways to incorporate wood:
- Full wood base with stone countertop
- Wood countertop with painted base
- Wood shelving on the ends of a stone island
Wood softens modern kitchens. It adds texture and makes the space feel lived-in.
5. Mixed Materials Magic
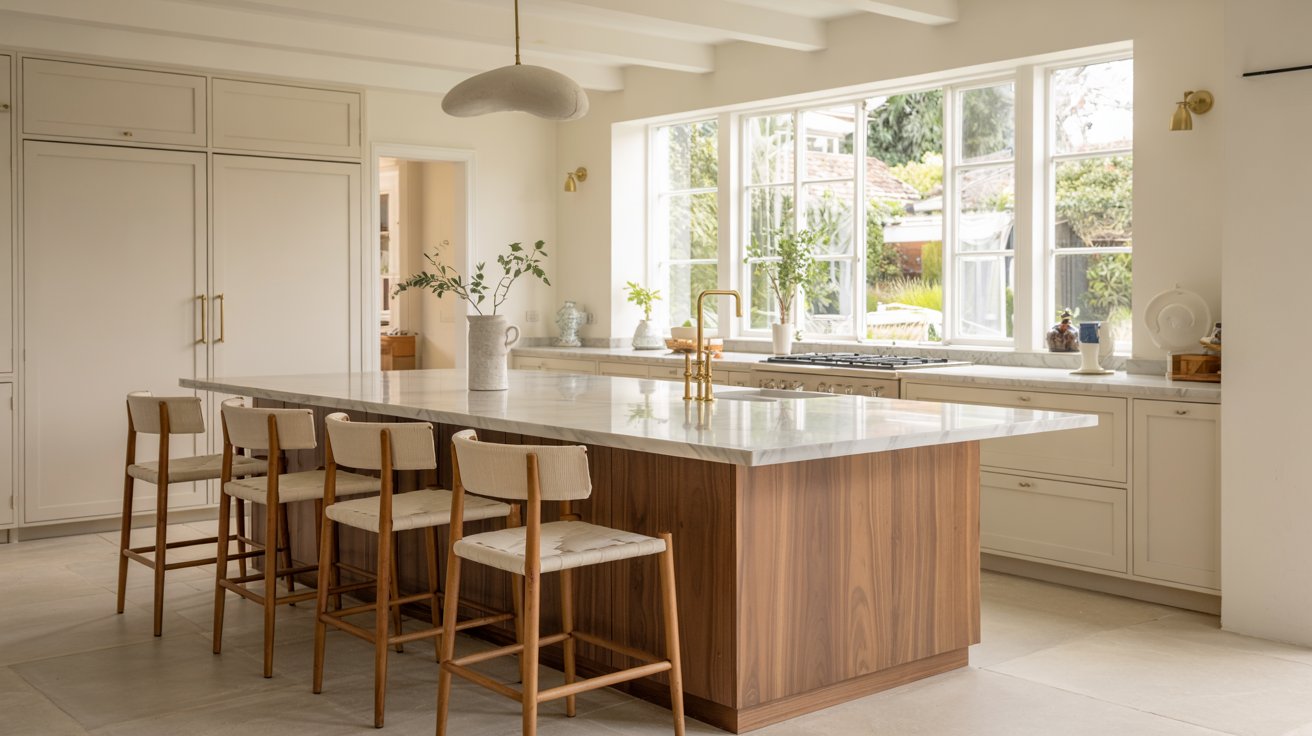
Why choose one material when you can combine them? Mixing materials adds visual interest and breaks up large surfaces.
Successful combinations:
- Marble countertop + wood base + metal stools
- Concrete top + steel frame + wood shelving
- Butcher block top + painted base + brass accents
Pick one dominant material (usually the countertop). Add a secondary material for contrast (often the base). Use metal as an accent (hardware, legs, or light fixtures).
After seeing striking kitchen island designs, let’s look at ideas that improve both practicality and appeal. These suggestions show how islands can be useful and stylish.
Functional Upgrades That Make the Island Work Harder
A good-looking island that does not function well is expensive furniture. These upgrades combine appearance with daily use.
6. Built-In Storage Drawers
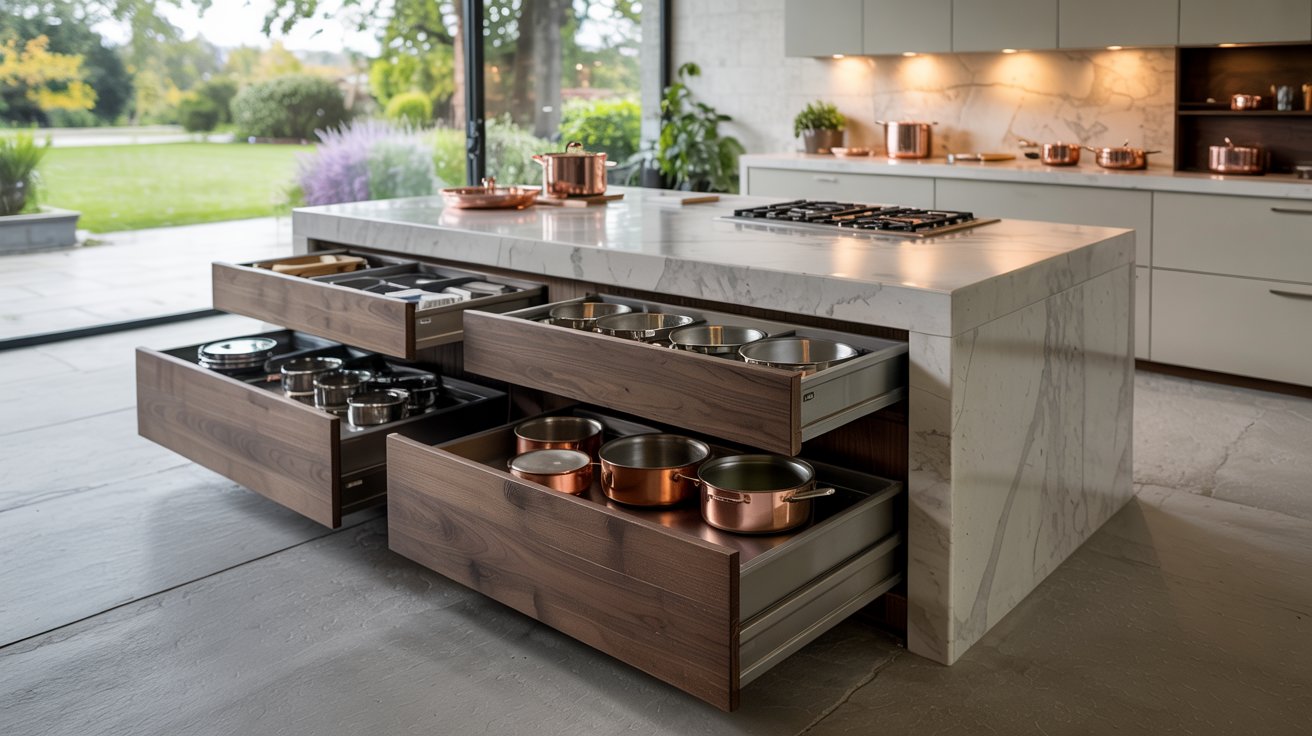
Kitchen islands offer valuable storage space. Deep drawers beat lower cabinets every time.
What to include:
- Deep drawers for pots and pans (at least 10 inches)
- Shallow drawers for utensils and tools
- Pull-out trash and recycling bins
- Vertical dividers for baking sheets
7. Hidden Power Outlets & USB Ports
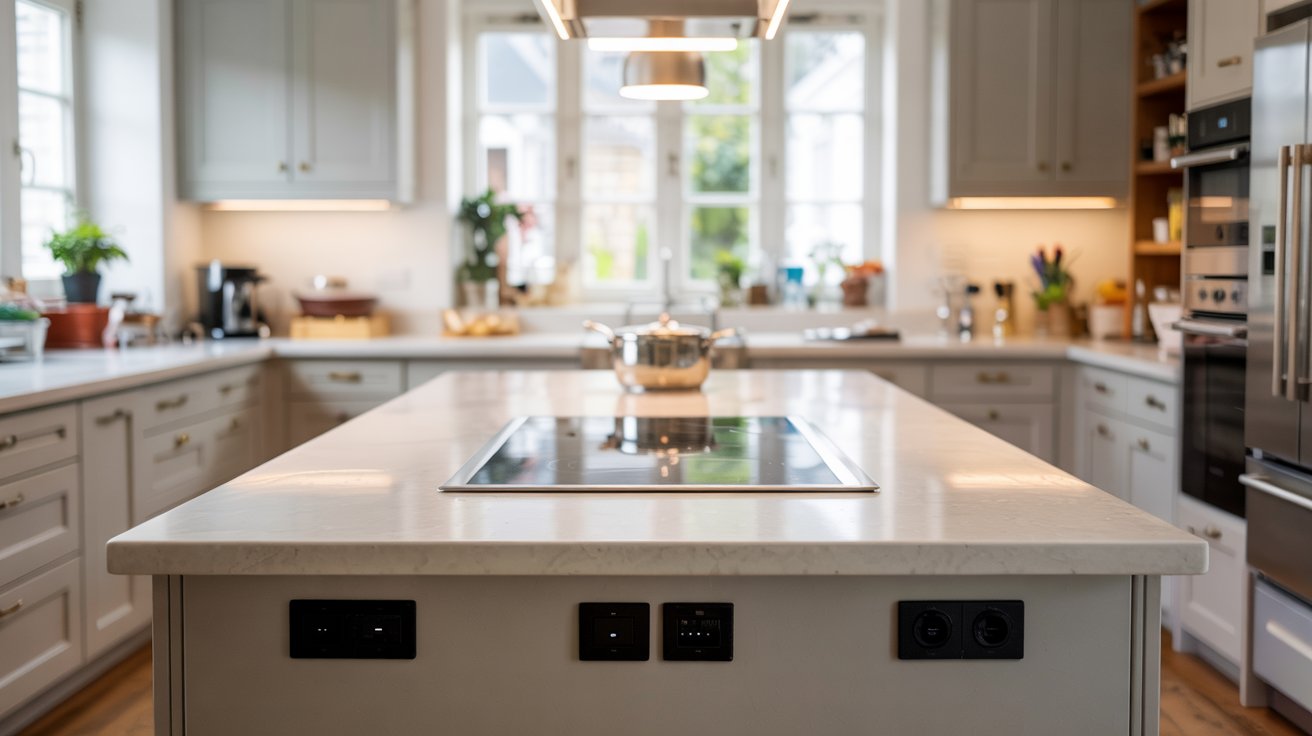
Charging phones, running mixers, and plugging in laptops at the island is normal now. Plan for it.
Smart outlet placement:
- Pop-up outlets in the countertop (flush when not in use)
- Outlets on the side overhang (visible but accessible)
- Under-counter outlets for appliances
All electrical additions require a licensed electrician. Electrician rates run roughly $165 to $535 per project depending on complexity (Angi, 2026). Budget for this before finalizing your island plan. Hiring without a permit for electrical work can create problems at resale.
8. Dual-Level Islands
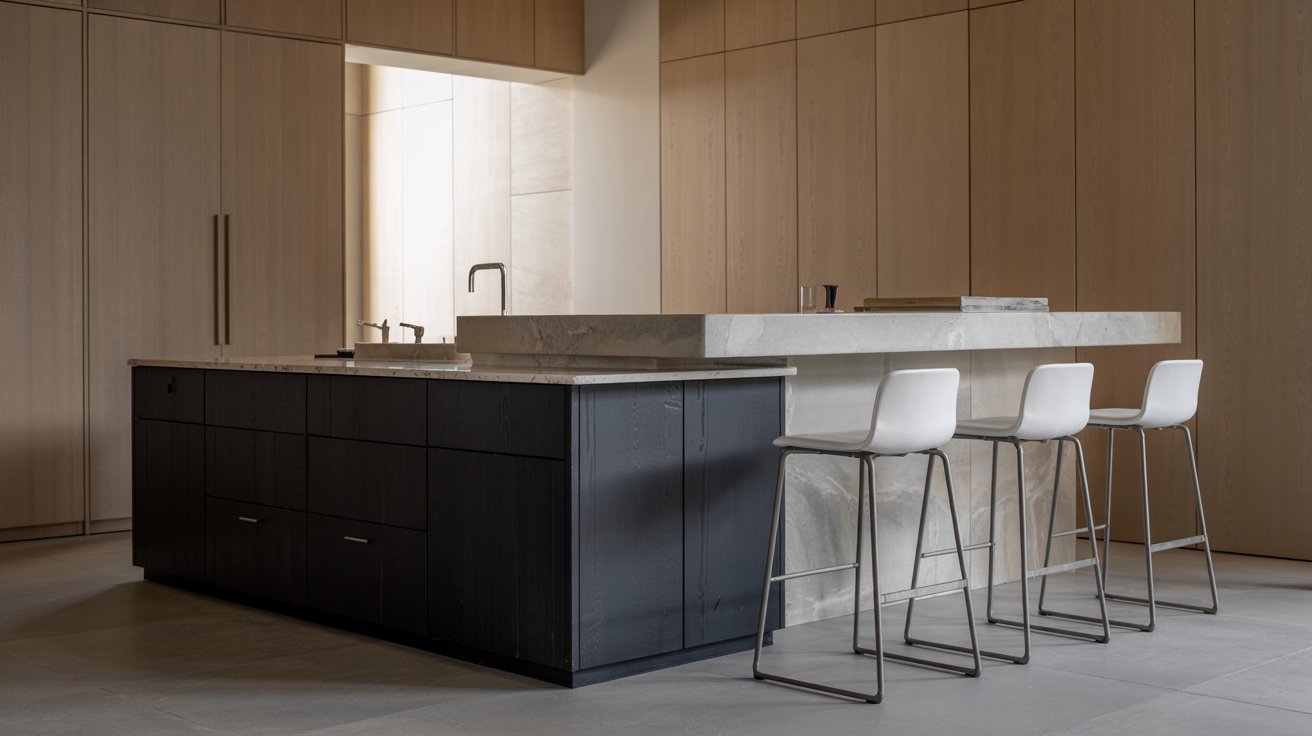
Two heights serve two purposes. The lower section works for food prep. The higher section creates a dining bar.
Standard heights:
- Prep surface: 36 inches (standard counter height)
- Dining bar: 42 inches (bar height)
Benefits:
- Hides kitchen mess from guests
- Creates defined zones
- Allows comfortable seating on one side
This setup works great for open kitchens. The raised section screens dirty dishes while you cook.
9. Integrated Appliances
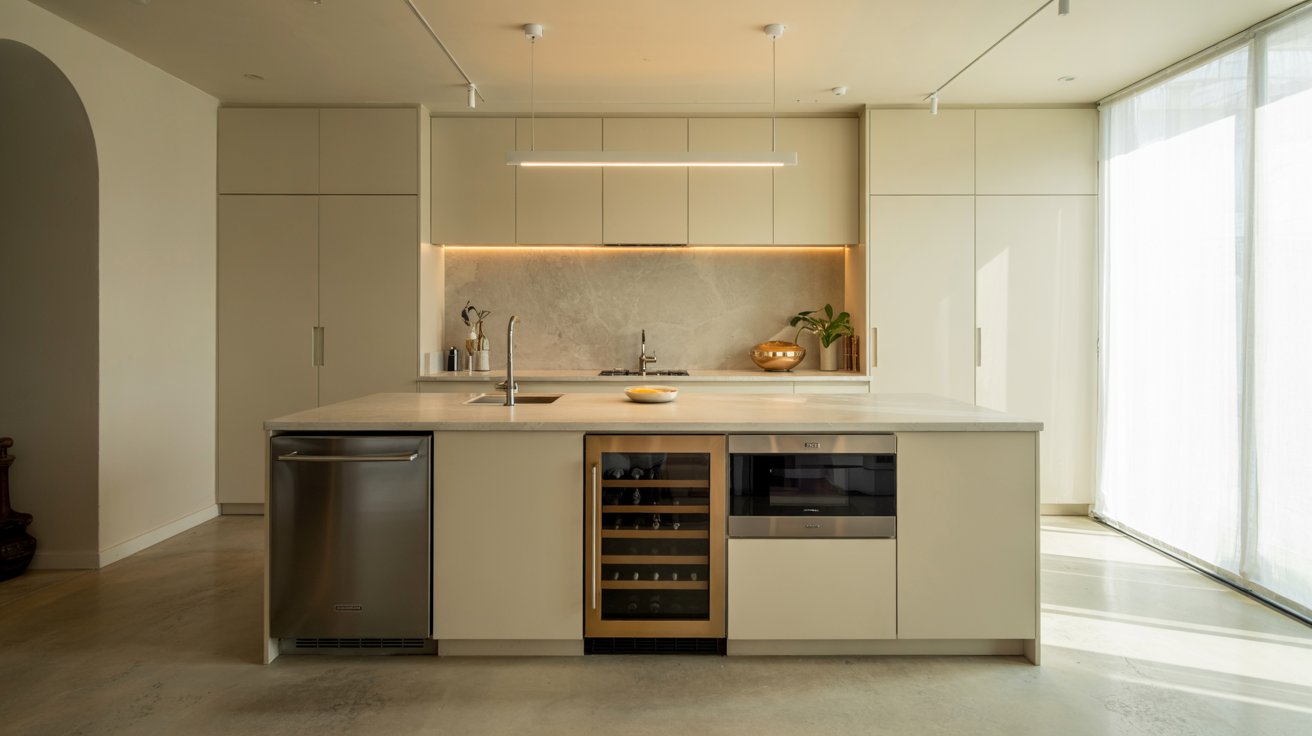
Free up wall and counter space by building appliances into your island. This moves the function to the center of the room.
Popular island appliances:
- Dishwasher (great for loading while you cook)
- Wine cooler or beverage fridge
- Microwave drawer (keeps counters clear)
- Warming drawer for entertaining
10. Expandable or Movable Islands
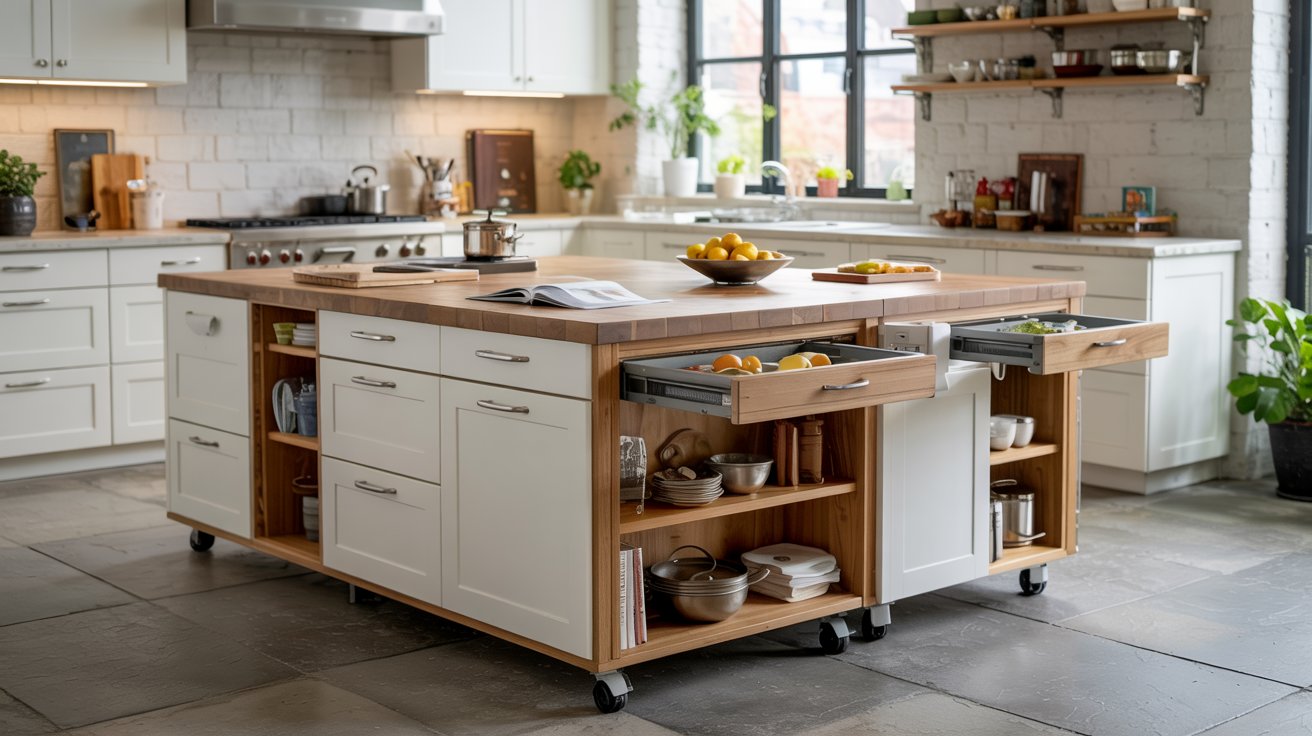
Not every kitchen has room for a permanent island. Movable or expandable options give you flexibility.
Types to consider:
- Rolling carts with locking wheels
- Drop-leaf extensions that fold down
- Sliding sections that tuck away
What to look for:
- Solid construction (avoid wobbly frames)
- Locking wheels for stability
- Storage underneath
- Durable work surface
Next, let’s check approaches to give your kitchen island a fresh, unique look. These styles add personality while keeping the space practical.
Creative Styles for Kitchen Island Remodel
Your kitchen island should match your home’s overall style. Here are five popular approaches, each with distinct characteristics.
11. Modern Minimalist
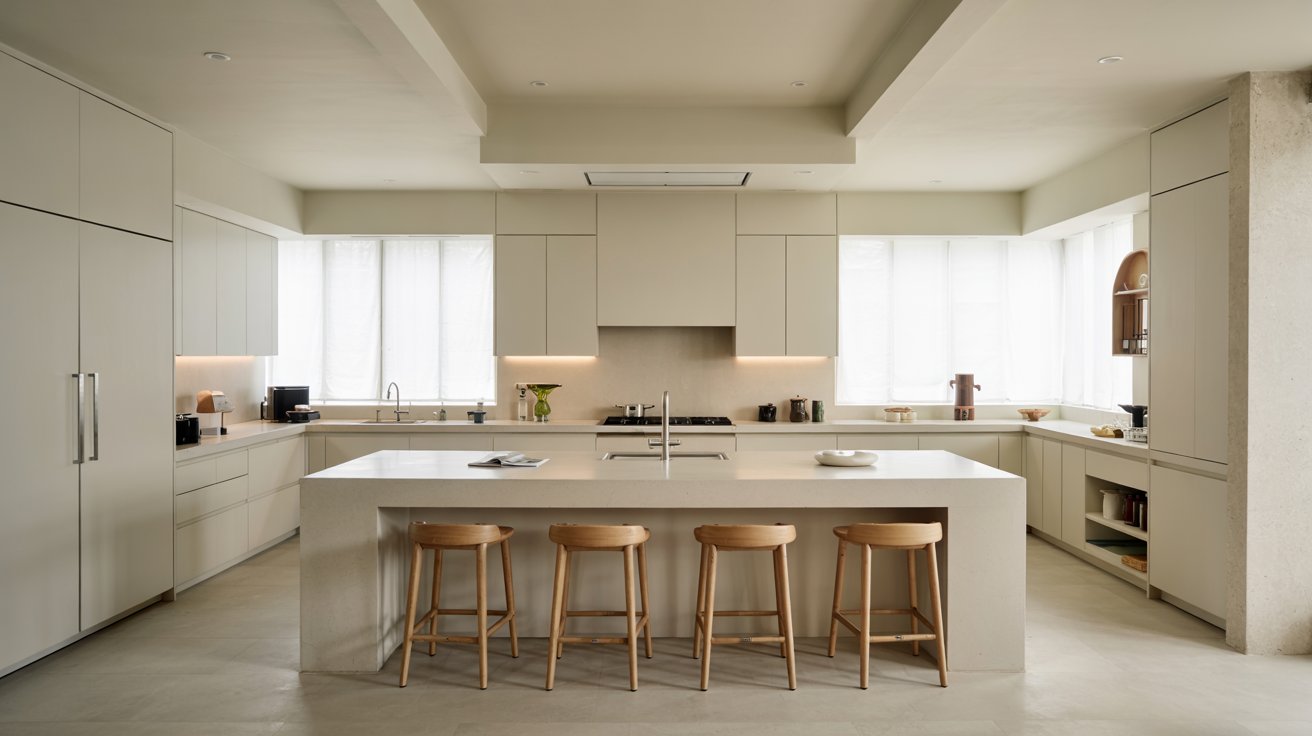
Less is more in minimalist kitchens. The island becomes a simple, functional sculpture. Key features include flat-panel cabinets with hidden hardware, push-to-open drawers, neutral tones, and clear countertops.
Materials that fit:
- Smooth quartz or solid surface countertops
- Matte painted finishes
- Integrated sinks with no visible rim
The goal: Create a calm, uncluttered workspace. Every element serves a purpose.
12. Farmhouse Chic
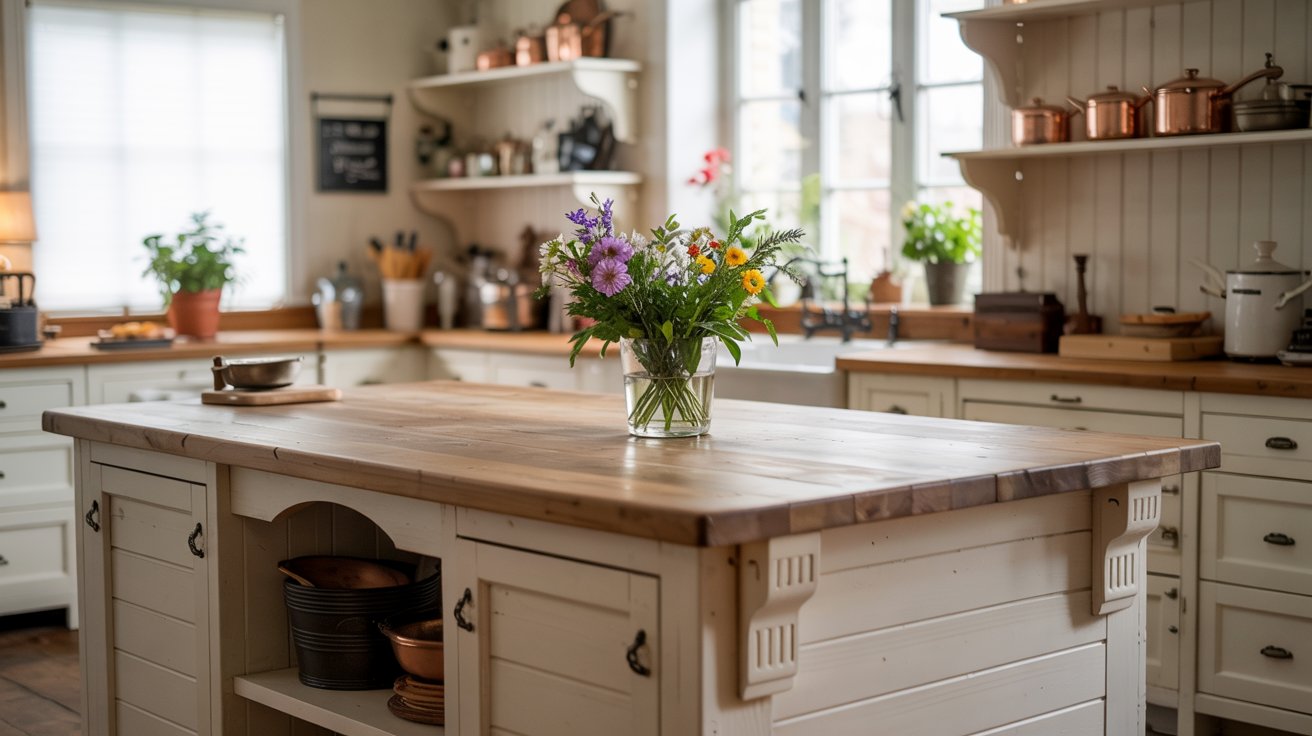
Farmhouse style brings cozy, casual comfort to the kitchen. The island becomes the heart of a welcoming space.
Signature elements:
- Shiplap or beadboard panels on the island base
- Butcher block or natural wood tops
- X-detail or decorative corbels
- Open shelving on the ends
Color palette includes whites, creams, soft greys, and natural wood tones.
13. Industrial Edge
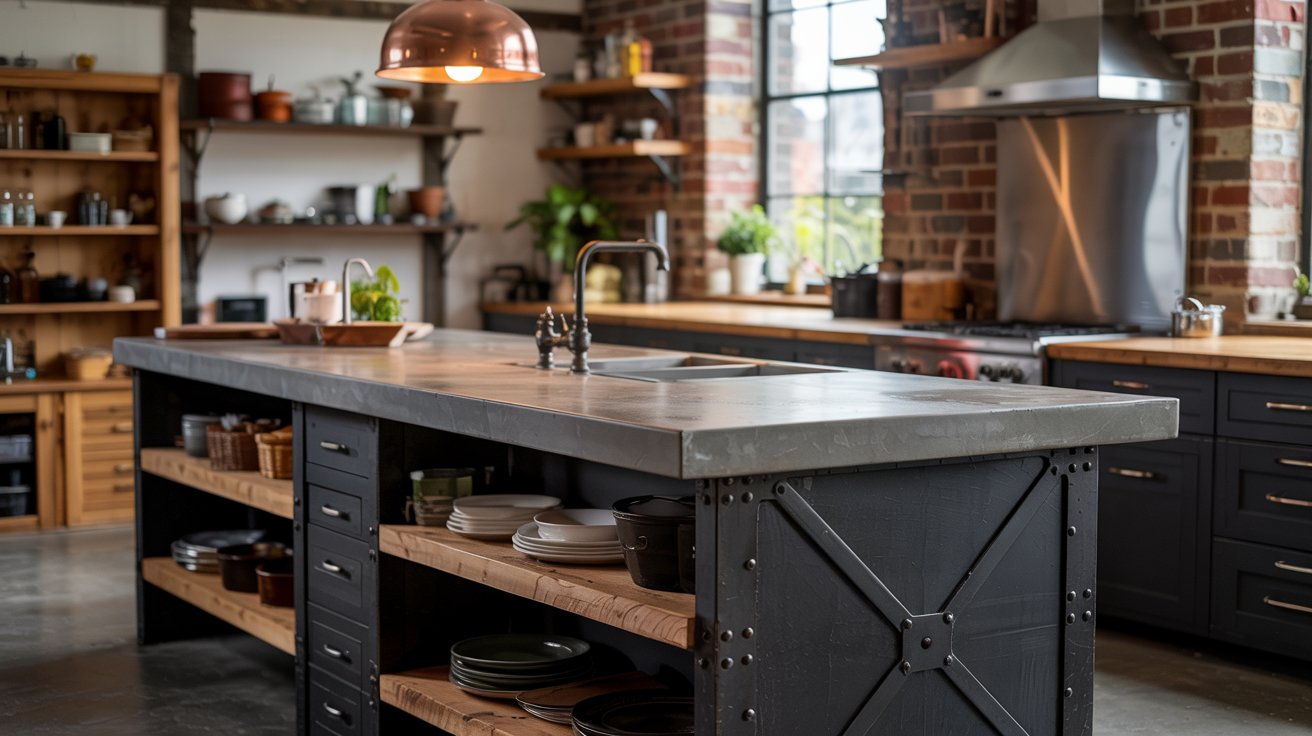
Industrial style turns raw materials into design features. It’s urban, edgy, and practical.
Defining features:
- Concrete or butcher block countertops
- Metal base or legs (often black steel)
- Exposed hardware and brackets
- Open shelving instead of closed cabinets
Stick to blacks, greys, and natural wood. Add warmth with copper or brass accents.
14. Coastal Calm
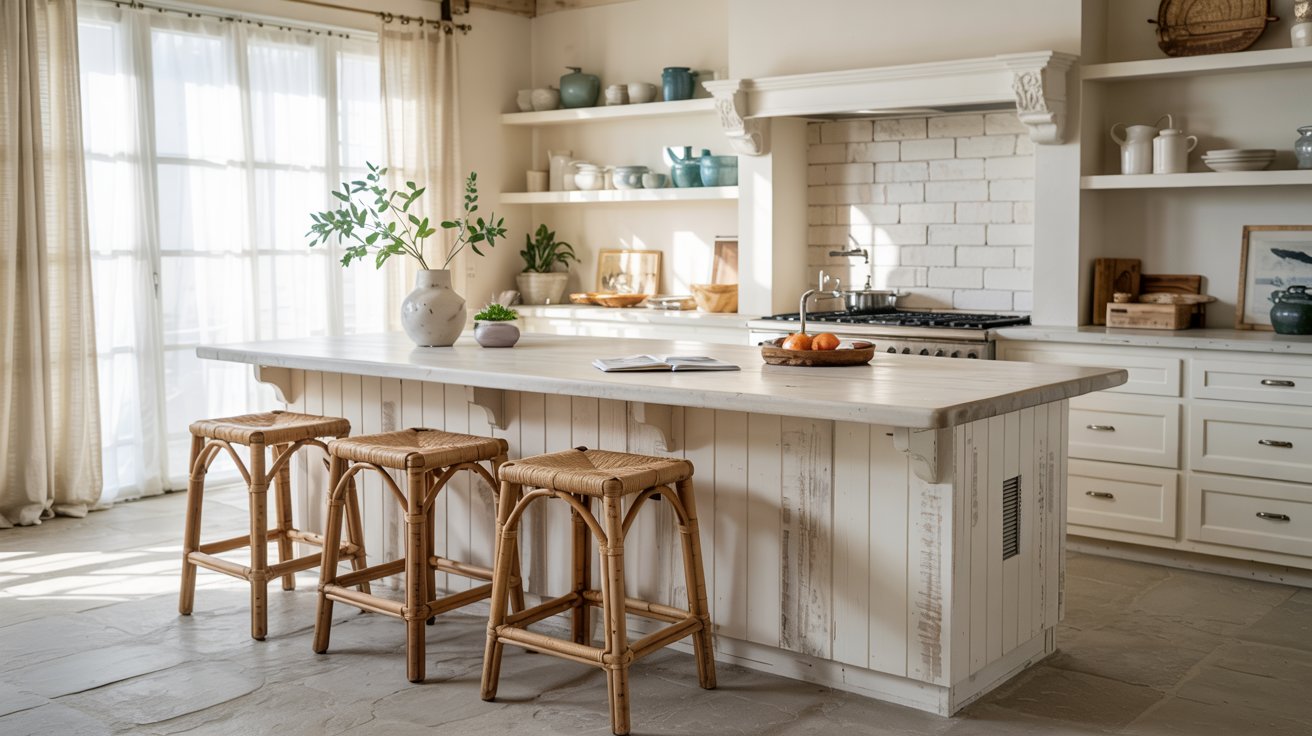
Coastal kitchens feel relaxed and breezy. The island sets a vacation-home mood. Color palette includes whites and soft blues, sandy beiges, and weathered grey
Textures to include:
- Painted wood (can look slightly distressed)
- Natural fiber stools (rattan or wicker)
- Light-colored stone countertops
Details that matter:
- Glass pendants or rope-wrapped lighting
- Cup pulls in brushed nickel
- Open shelving with beachy decor
Avoid heavy, dark woods or ornate details. Keep it light and simple.
15. Classic Transitional
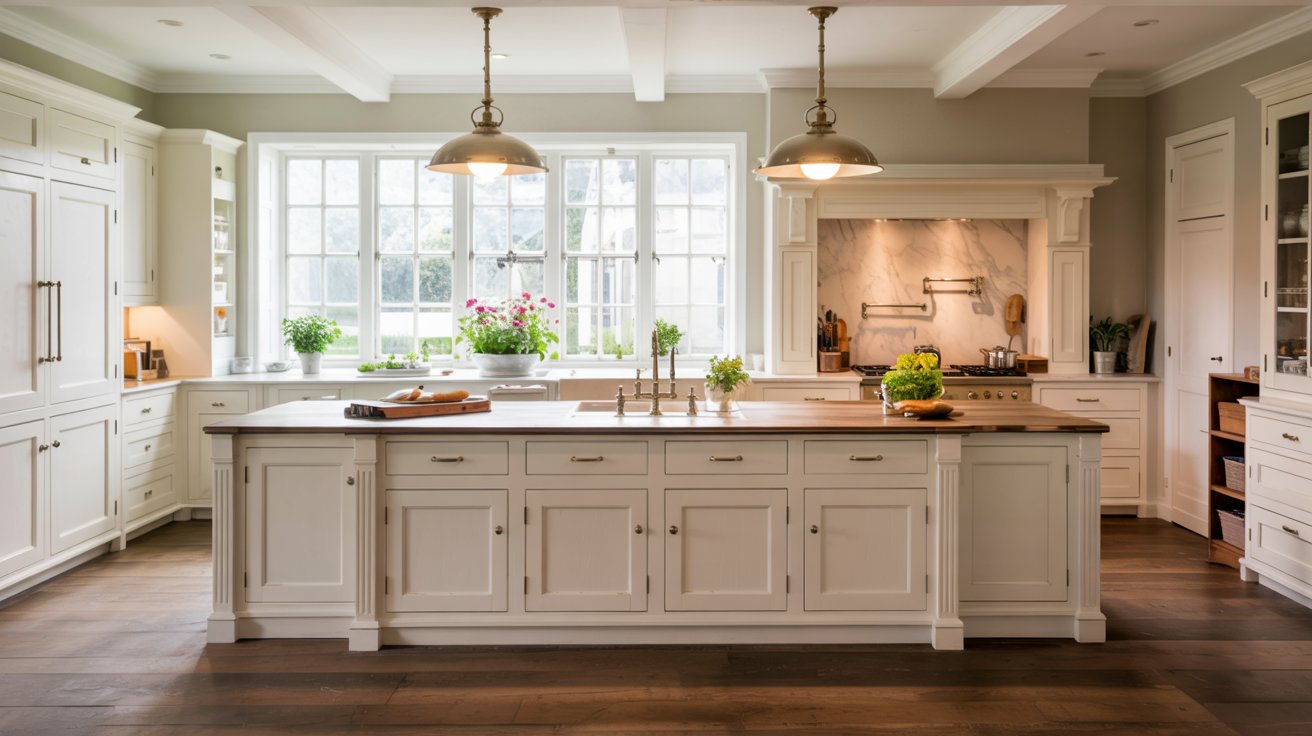
Transitional style bridges the gap between traditional and contemporary. It’s timeless and versatile.
Characteristics:
- Raised panel or shaker-style doors
- Modern hardware (sleek pulls or knobs)
- Mix of finishes (painted base + wood or stone top)
- Subtle decorative details (no excessive ornamentation)
Best for people who want a kitchen that won’t feel dated in 10 years.
Now, let’s see ways to add upscale details that make a kitchen island feel classy and high-end. These touches enhance both style and function.
Luxury Touches for Dream Kitchen Island
When budget isn’t the primary concern, these five upgrades take your island from nice to extraordinary.
16. Statement Pendants
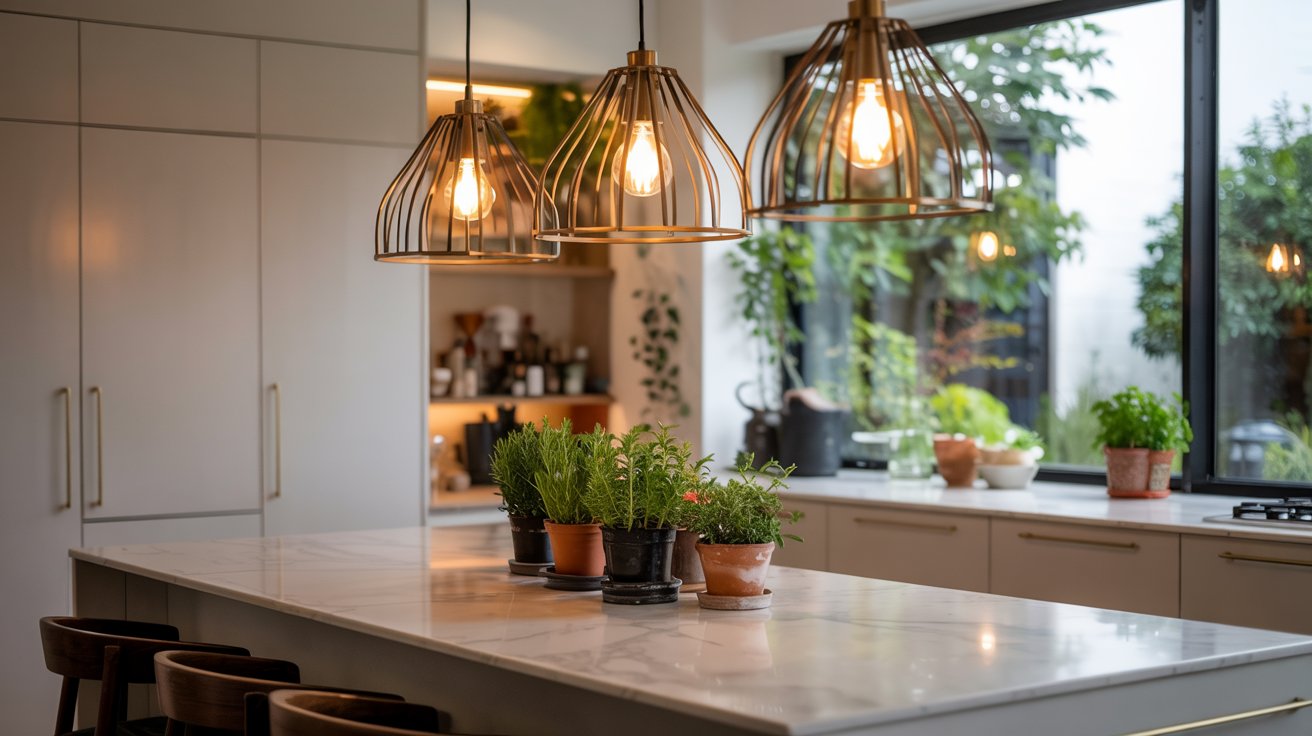
The right lighting makes your island the room’s focal point. Think of pendants as functional art.
Its unusual shape or scale, quality materials (blown glass, brass, copper), designer or artisan-made pieces, and dramatic finish or texture make it statement-worthy.
Sizing guidelines:
- Single large pendant: 20-25 inches wide
- Multiple pendants: 12-18 inches wide each, spaced 24-30 inches apart
- Hang 30-36 inches above the countertop
Styles to consider:
- Oversized globe pendants
- Multi-bulb chandeliers
- Geometric metal cages
- Hand-blown glass in unique colors
17. Waterfall Marble or Quartzite
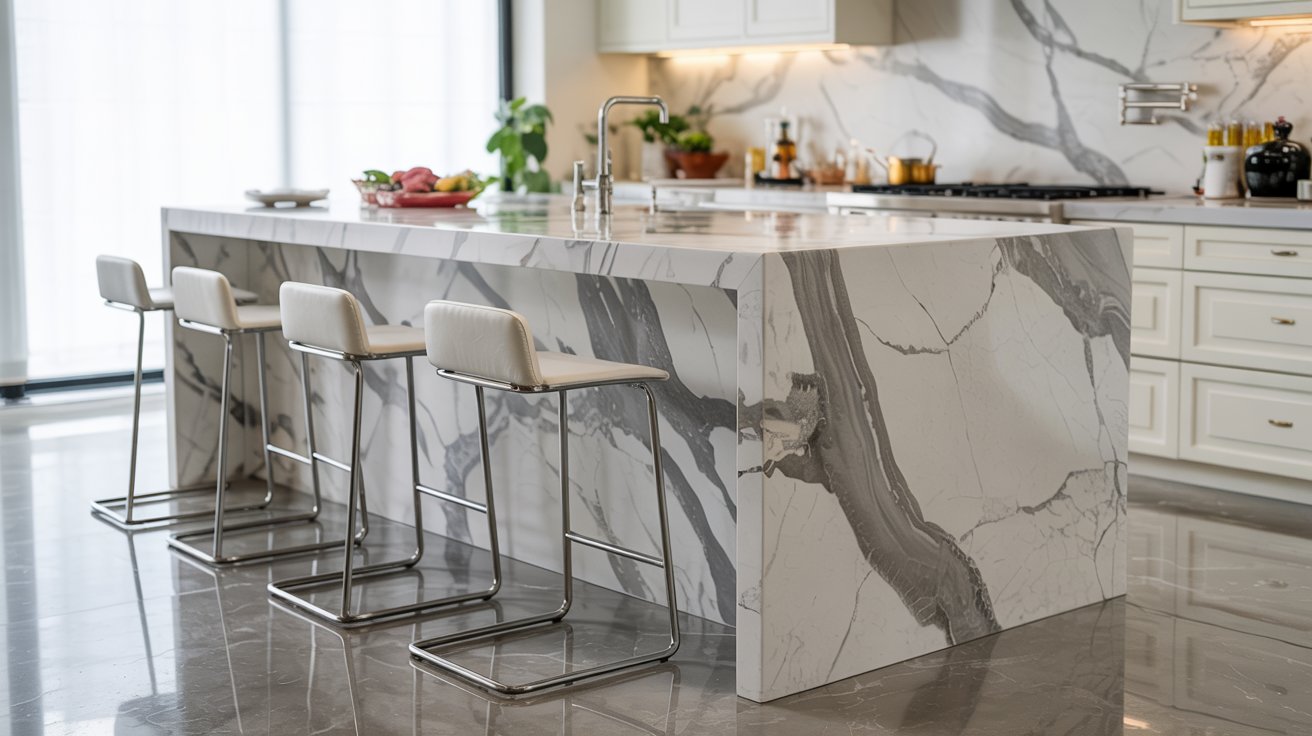
Dramatic natural stone in a waterfall configuration is the ultimate luxury move.
Why it’s special:
- Shows off the stone’s veining and pattern
- Creates a furniture-like quality
- Becomes the room’s main design feature
Premium stone options:
- Calacatta marble: Bold, dramatic veining (most expensive)
- Statuario marble: Grey and white with fine veins
- Quartzite: Marble look with better durability
- Exotic granite: Unique colors and patterns
18. Custom Seating Integration
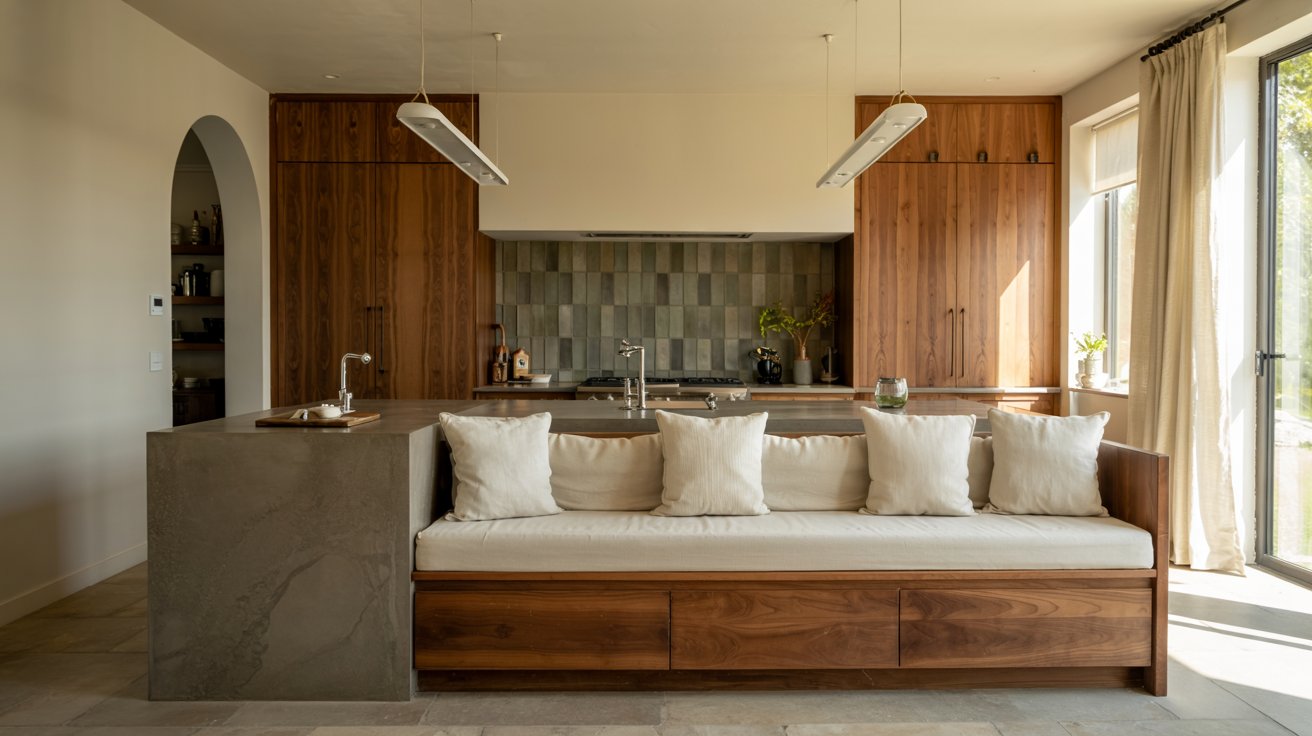
Custom seating makes your island feel like a designed piece rather than just a cabinet.
Options:
- Built-in banquette: Upholstered seating on one side
- Curved overhang: Follows the island’s shape for organic flow
- Integrated bench: Wood or upholstered bench tucked under
Benefits:
- Creates a true gathering spot
- Maximizes seating in a limited space
- Looks intentional and high-end
19. Texture Play
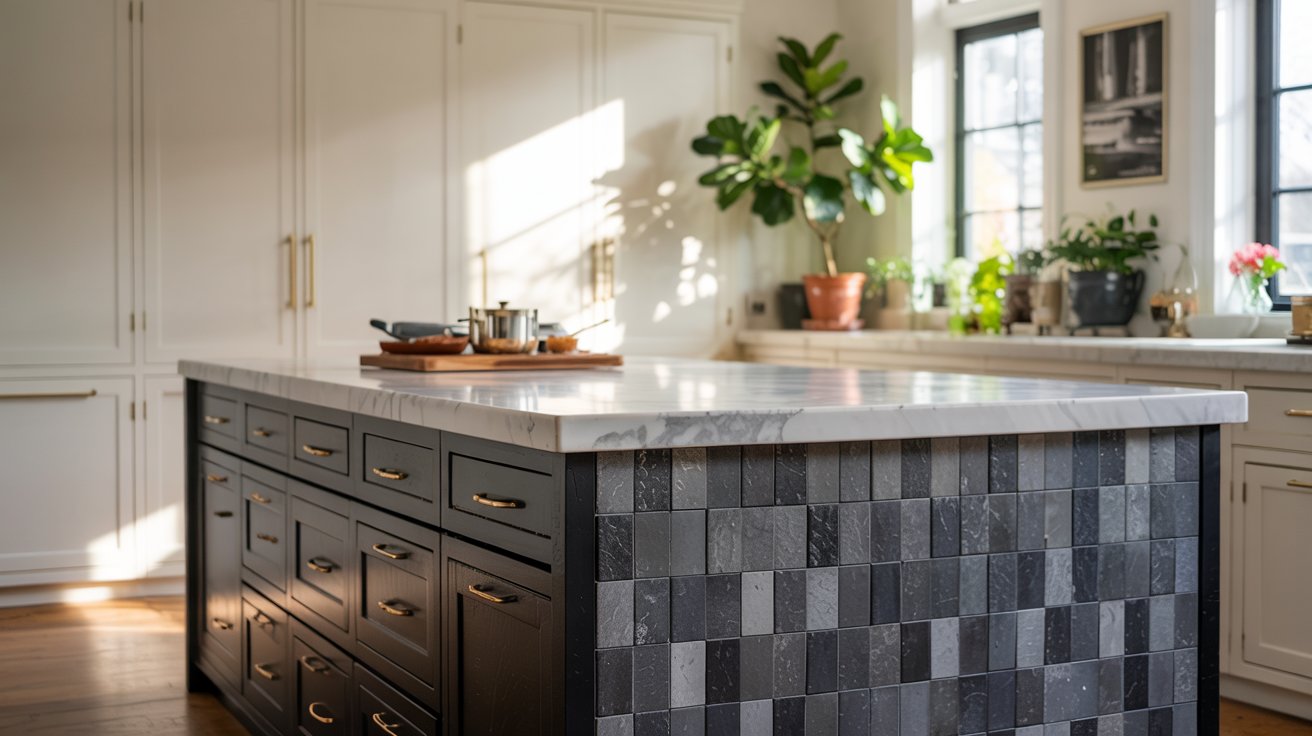
Luxury design layers different textures for visual and tactile interest.
Texture combinations:
- Honed (matte) marble top + high-gloss painted base
- Smooth stone + rough-hewn wood accents
- Brushed metal hardware + stone
- Textured tile sides + smooth countertop
Why it works:
- Creates depth
- Engages multiple senses
- Shows attention to detail
20. Smart Islands
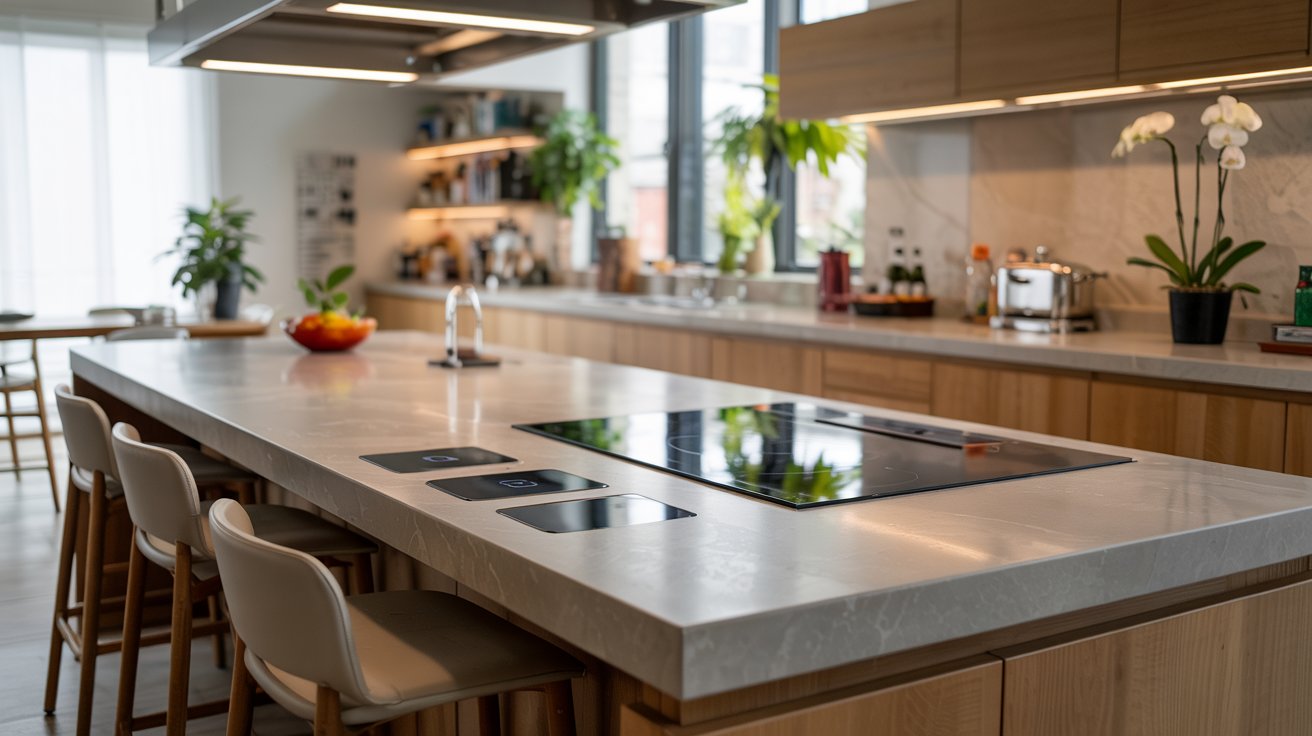
Technology integration turns your island into a modern workspace.
Smart features to consider:
- Built-in wireless charging: Hidden charging pads in the countertop
- Induction cooktop: Flush-mounted burners for prep and cooking
- Sensor lighting: Motion-activated under-counter lights
- Touch controls: For outlets, lights, or appliances
- Built-in speakers: Integrated sound system
Benefits:
- Reduces visible cords and clutter
- Adds convenience for modern life
- Increases home value
Next, we’ll cover the final details that complete a kitchen island, tying together style and usability for a clean look.
Adding Finishing Touches to Kitchen Island Remodel
The details make your island feel complete. These finishing elements bring personality and class.
21. Adding Decor Accents
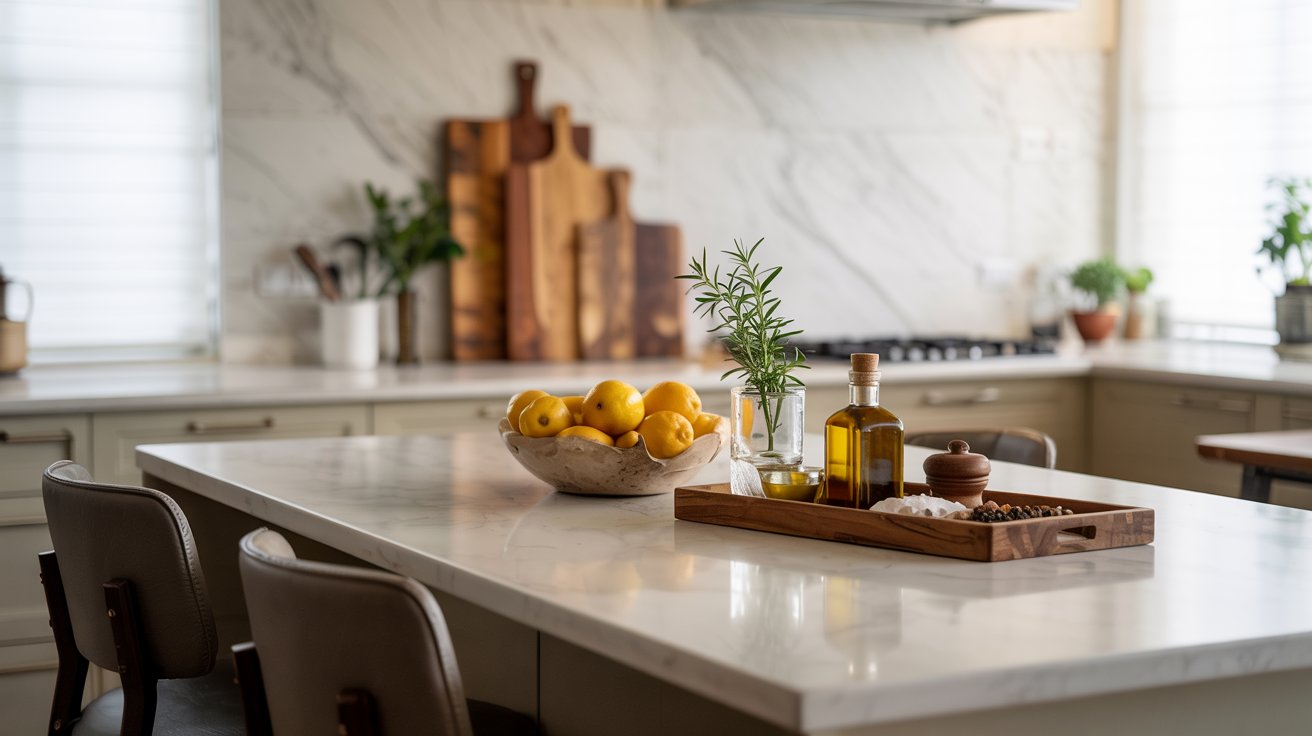
Your island is a workspace, but thoughtful styling makes it inviting.
Functional decor:
- Trays: Corral oils, salt, pepper (keeps counters organized)
- Fruit bowls: Practical and pretty
- Cutting boards: Display quality ones when not in use
Include fresh elements: small potted herbs, fresh flowers in a simple vase, and seasonal greenery
Stools as decor:
- Choose a style that complements your island
- Wood stools warm up modern spaces
- Metal stools suit an industrial look
- Upholstered seats add softness
Less is more: Don’t clutter the surface. Leave room for actual meal prep.
22. Flooring & Rug Pairing Ideas
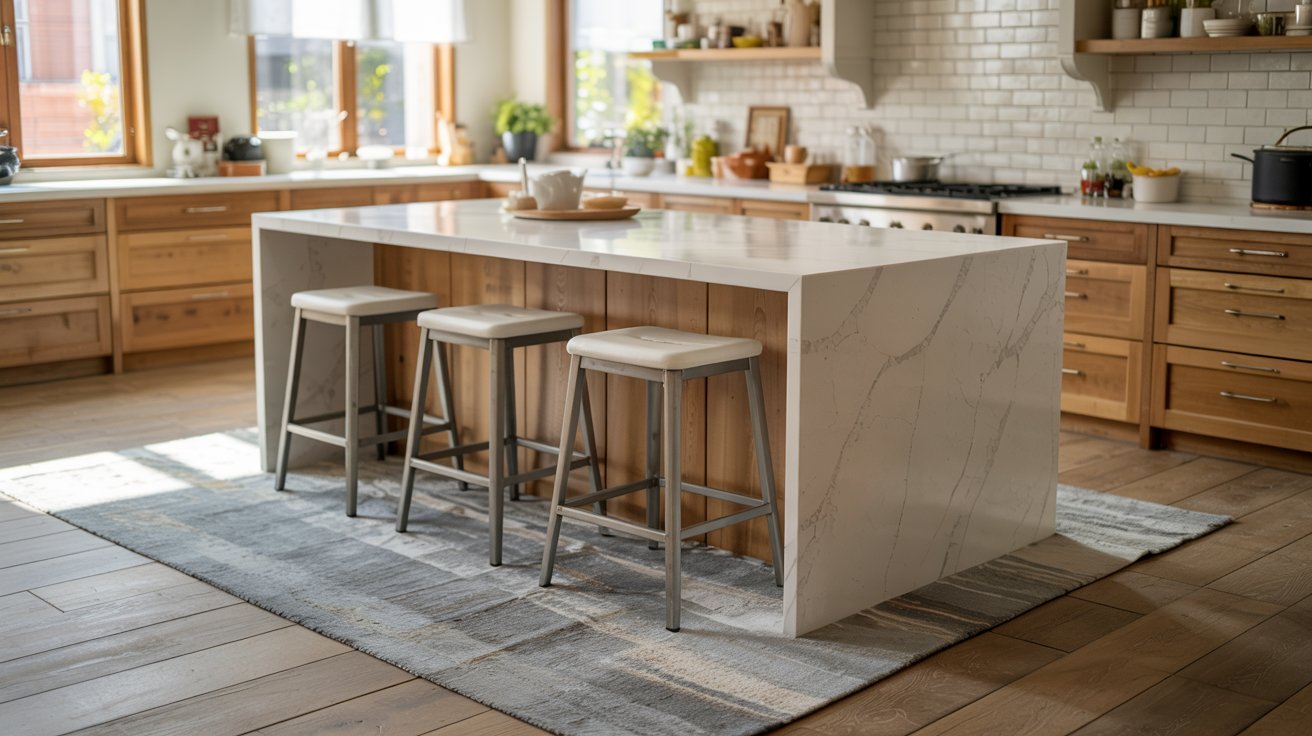
The floor under your island affects the overall look.
If you’re installing new flooring:
- Continue the same material throughout (creates flow)
- Or create a defined zone with different materials around the island
- Popular: wood everywhere except tile under the island for durability
Adding a rug:
- Use a flat-weave or indoor/outdoor rug (easier to clean)
- Size: Rug should extend 18-24 inches beyond the island on all sides with seating
- Patterns hide spills better than solid colors
23. Color Flow with Surrounding Cabinetry
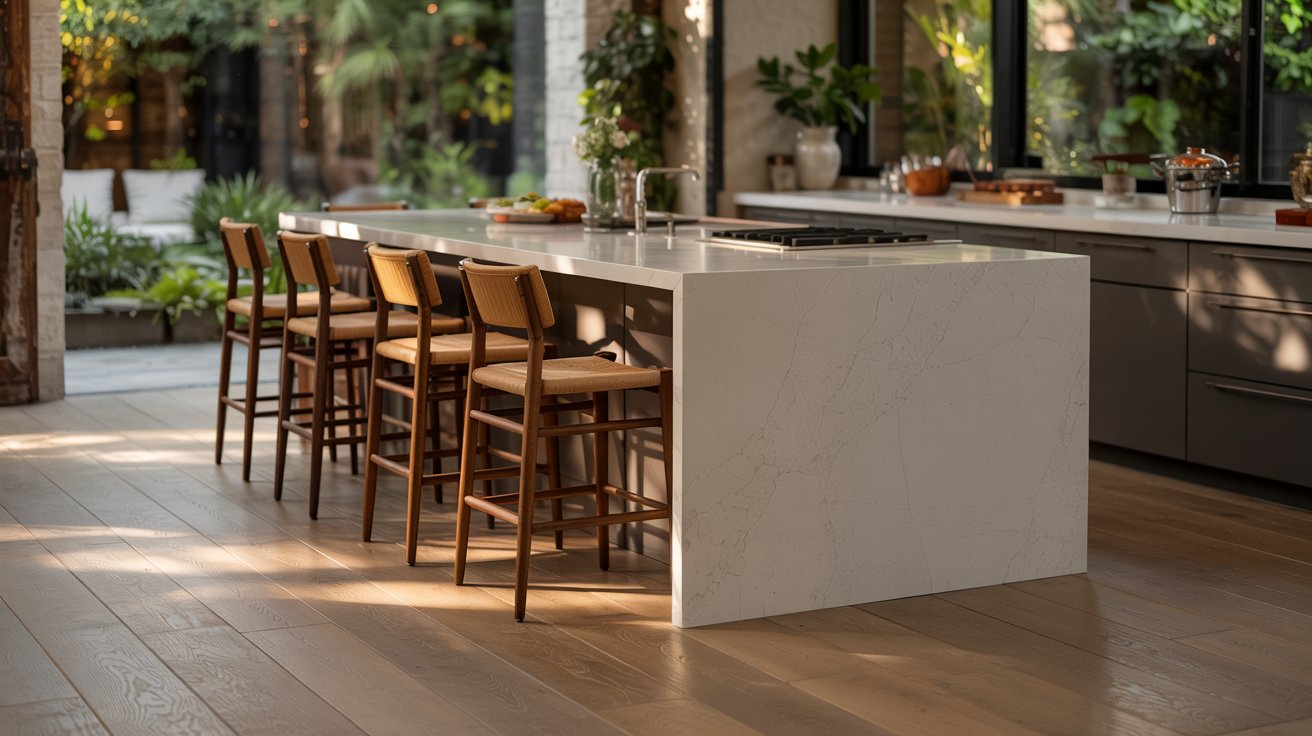
Your island should feel connected to the rest of your kitchen, even if it’s a different color.
Creating connection:
- Method 1: Match the island color to a secondary element (tile backsplash, window trim)
- Method 2: Choose a shade in the same color family as your cabinets (darker or lighter)
- Method 3: Use the same hardware throughout
When contrast works:
- The kitchen is large enough to support two distinct zones
- Perimeter cabinets are neutral (white, grey, cream)
- Island color appears elsewhere in the home
Finally, let’s look at a real-life kitchen island makeover to see how thoughtful updates can change both style and function.
How Much Does a Kitchen Island Remodel Cost?
Cost is the question most planning guides skip. Here are real ranges based on current 2025–2026 data from Angi, HomeAdvisor, and the National Kitchen & Bath Association.
| Project Type | Typical Cost Range | What It Covers |
|---|---|---|
| Minor refresh | $200 – $1,500 | Paint, hardware, stools, pendant lights, organizers |
| Prefab island (installed) | $900 – $6,500 | Pre-made unit, basic installation |
| Mid-range remodel | $3,000 – $10,000 | New countertop, drawer upgrades, electrical, lighting |
| Custom island (no appliances) | $3,325 – $10,000+ | Custom cabinetry, stone countertop, built-in seating |
| Full custom with appliances | $10,000 – $30,000+ | Plumbing, gas, electrical, premium stone, appliances |
Average cost: According to Angi’s 2026 data, the average kitchen island installation runs about $4,800. Rolling carts start at $100. Luxury custom builds with appliances and stone can exceed $30,000.
Countertop costs vary significantly by material:
- Laminate: $200 – $500
- Butcher block or solid surface: $500 – $1,500
- Quartz: $1,500 – $3,000
- Granite or natural stone: $3,325 – $7,450+
- Calacatta marble (waterfall): $200+ per square foot
Always build a 10–15% contingency into your budget. Unexpected electrical, plumbing, or structural surprises are common once walls and floors are opened up.
Do You Need a Permit for a Kitchen Island Remodel?
Important: Permit requirements vary by city and county. Always confirm with your local building department before work begins. Unpermitted electrical or plumbing work can cause issues at resale and may void homeowner’s insurance coverage for related damages.
The general rule: cosmetic updates do not require a permit. Work that touches utilities or structure usually does.
| Work Type | Permit Typically Required? |
|---|---|
| Painting, hardware, stools, lighting (fixture swap) | No |
| New countertop on existing cabinets | No |
| Adding electrical outlets or wiring | Yes |
| Adding a sink or dishwasher (plumbing) | Yes |
| Installing a gas cooktop | Yes |
| Moving or removing a wall | Yes |
| Adding a permanent island to a kitchen that had none | Depends on local code – check first |
Permit requirements are set at the local municipality level, not statewide. Requirements in Houston, Dallas, Austin, and San Antonio can differ. Your contractor should pull the permits if they ask you to; that is a red flag.
Plan Your Kitchen Island Remodel from the Right Starting Point
A kitchen island remodel that holds up over time starts with an honest look at how you actually use the space. Set the main purpose first: storage, seating, workflow, or a visual refresh. Then build the plan outward from that priority.
Start with paint and hardware if the budget is tight. The visual impact is real, and the risk is low. Tape out size changes on the floor before ordering anything.
Confirm permit requirements early, and build that 10–15% contingency into your number from day one.