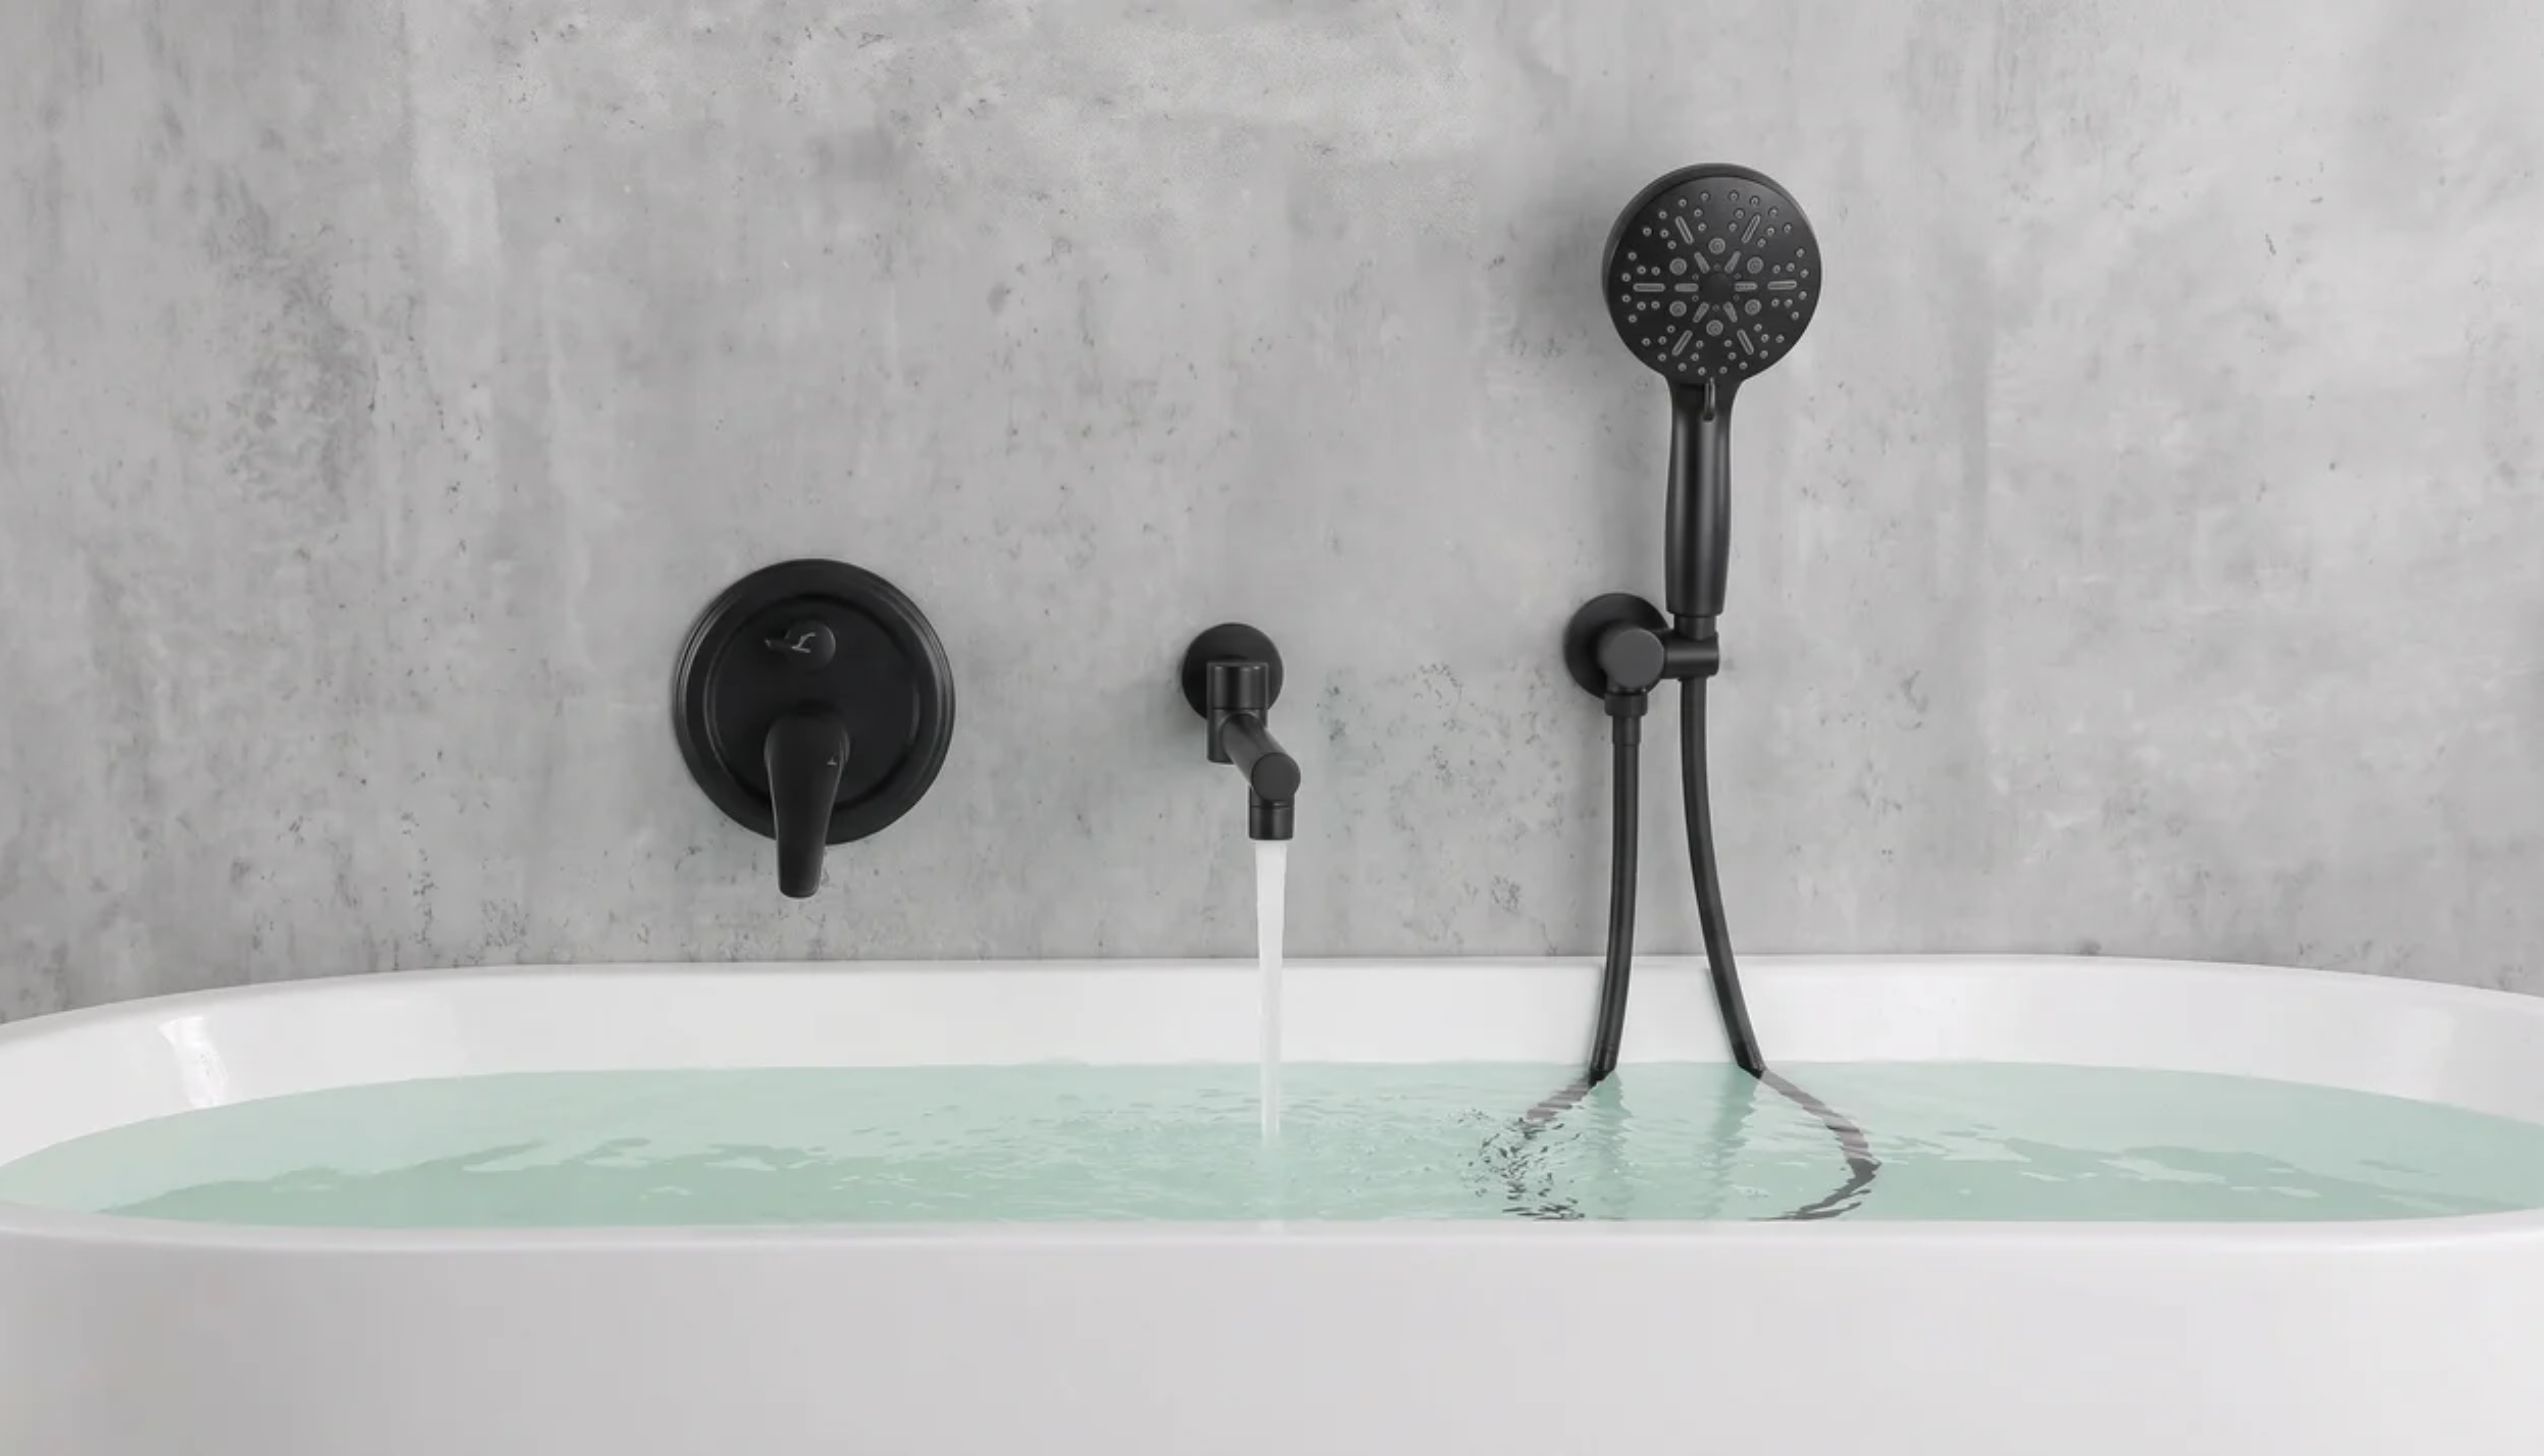
Your tub spout is a few inches off. That is all it takes. Water slams the wall. The tub fills slowly. Every bath feels slightly wrong, and you cannot figure out why.
Tub spout height is the one measurement renovators skip during planning. Then they pay for it during every single use.
The fix is simple math. The right tub spout height keeps water flowing cleanly into the basin. It cuts splash and makes the tub feel right.
This article gives you the exact numbers, the formula, and the mistakes to skip for every tub type.
What Is the Standard Tub Spout Height?
Recommended Height Above the Bathtub Rim
The standard tub spout height is 4 to 6 inches above the tub rim. For most standard built-in tubs, 5 inches above the rim is the sweet spot. This range keeps water flowing cleanly into the basin without hitting the tub wall or splashing over the sides.
For freestanding tubs and deep soaking tubs, the clearance goes higher. Six to 10 inches above the rim is the standard for those setups.
Standard Distance Between Tub Spout and Tub Surface
Tub spout height is always measured from the finished floor to the centerline of the spout outlet. Not the top edge. Not the bottom edge. The center of the outlet opening.
The centerline is where water exits. That point controls where water lands in the basin and how far it spreads.
For most standard tubs, the spout centerline sits 24 to 30 inches from the finished floor.
Here is how the numbers look with a 5-inch clearance above the rim:
| Rim Height | Clearance Above Rim | Spout Height from Finished Floor |
|---|---|---|
| 18 inches | 5 inches | 23 inches |
| 20 inches | 5 inches | 25 inches |
| 22 inches | 5 inches | 27 inches |
| 24 inches | 5 inches | 29 inches |
Why Correct Tub Spout Height Matters
Set the spout too low and water hits the tub wall at a sharp angle. Flow slows. Testing the temperature before stepping in becomes awkward. A spout too close to the flood rim also fails the air gap check required by most plumbing codes.
Set it too high, and you get loud splashing. Water misses the center of the basin. On shallow tubs, overflow risk goes up.
Getting it right means:
- Water flows cleanly into the tub center
- Splash on walls and floor stays minimal
- Reaching the controls is easy and comfortable
- The installation meets plumbing code air gap rules
Plumbing rough-in decisions like this one fit naturally into broader bathroom layout decisions you make before walls go up. Getting these numbers settled early prevents expensive fixes later.
How High Should a Tub Spout Be Above a Bathtub?
For a standard built-in tub, the spout should sit 4 to 6 inches above the rim. For a freestanding or deep soaking tub, plan for 6 to 10 inches above the rim.
Measuring Tub Spout Height Correctly
Always measure from the finished floor, not the subfloor. Tile and mortar add height after rough-in. If you set the stub-out before tiling, add the tile thickness to your measurement. Standard tile installation adds roughly 3/8 to 1/2 inch.
Measure to the centerline of the spout outlet. This is the point that controls water direction. Use this formula:
Spout height from floor = Tub rim height + desired clearance
Example:
- Tub rim height: 22 inches
- Desired clearance above rim: 6 inches
- Spout centerline height: 28 inches from finished floor
Pro Tip: Always use the finished floor as your baseline. Tile and mortar add height. Rough-in before tiling without accounting for that means the spout ends up too low.
Standard Tub Spout Height Recommendations
These are the numbers that plumbers and manufacturers work from. Use them as your starting point, then adjust for your specific tub type and user needs.
1. Wall-Mounted Tub Spout Height
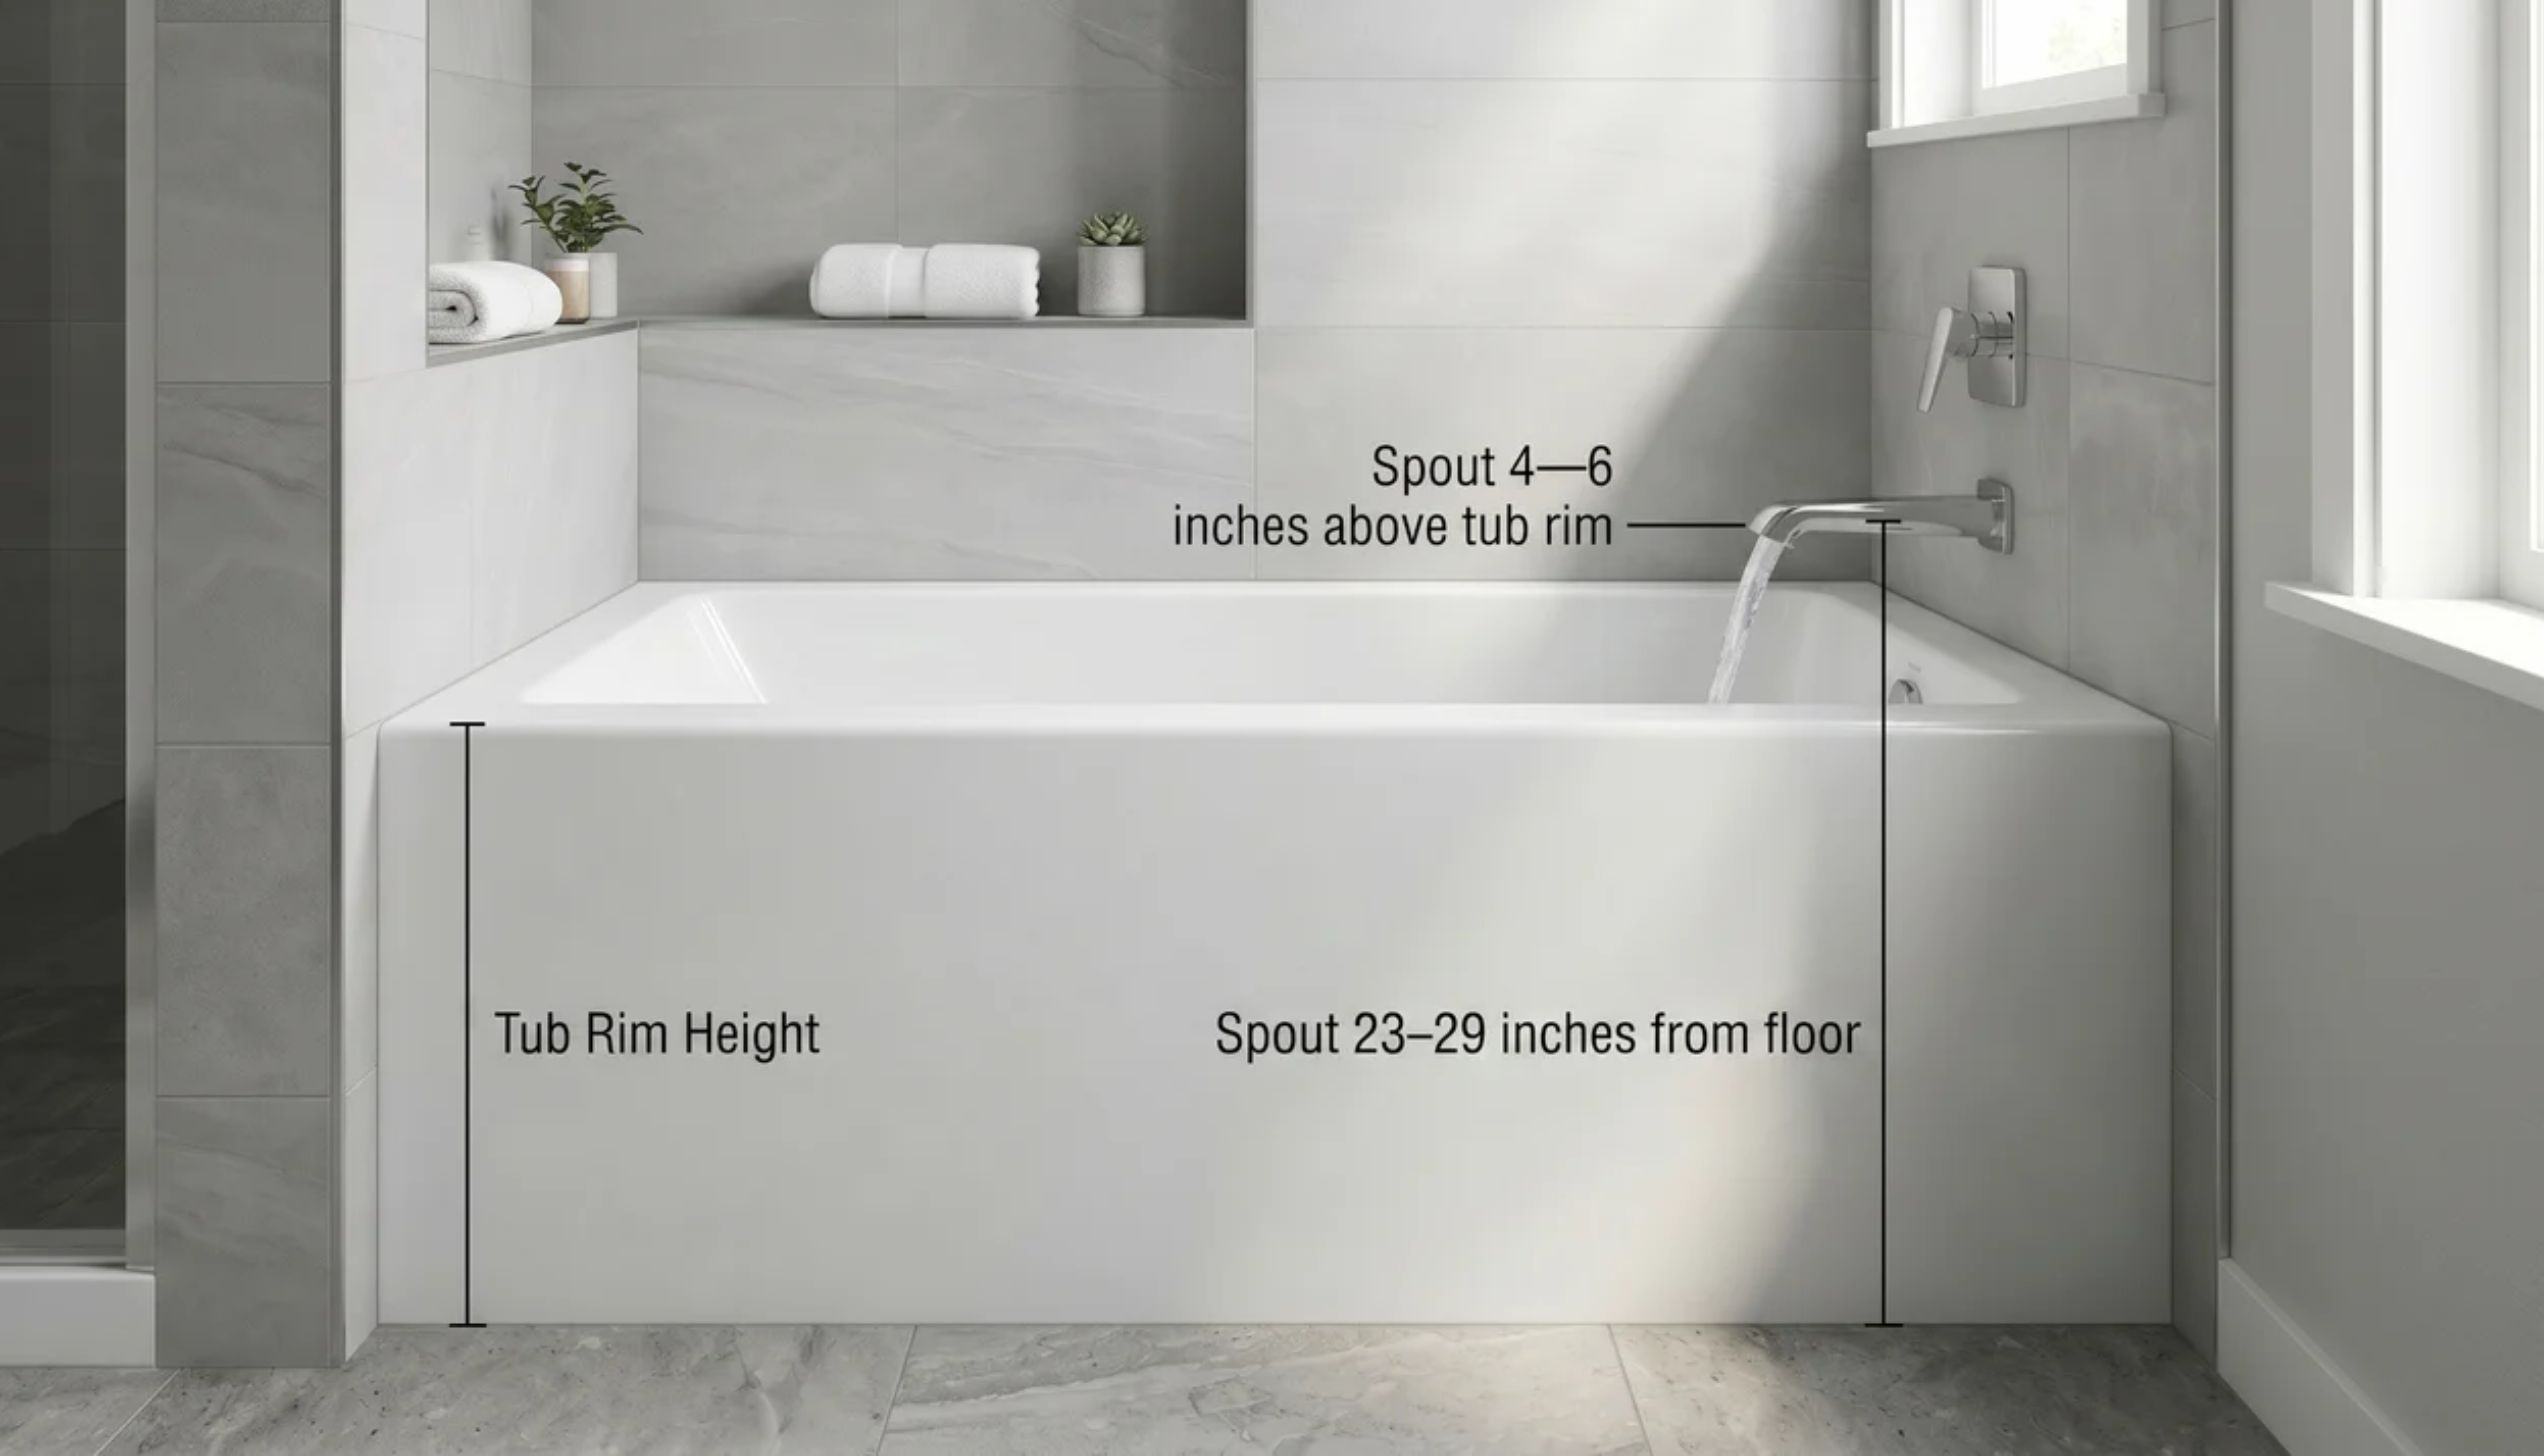
For most typical bathrooms or built-in tubs, the wall-mounted tub spout height is 4 to 6 inches above the tub rim, with 5 inches above the rim being the sweet spot.
When measured from the finished floor, here is how the numbers typically work out:
- 18-inch rim + 5 inches clearance = 23 inches from floor
- 20-inch rim + 5 inches clearance = 25 inches from floor
- 22-inch rim + 5 inches clearance = 27 inches from floor
- 24-inch rim + 5 inches clearance = 29 inches from floor
Pro Tip: The standard range from finished floor sits between 24 and 30 inches, depending on your tub depth and rim height.
2. Freestanding Tub Spout Height
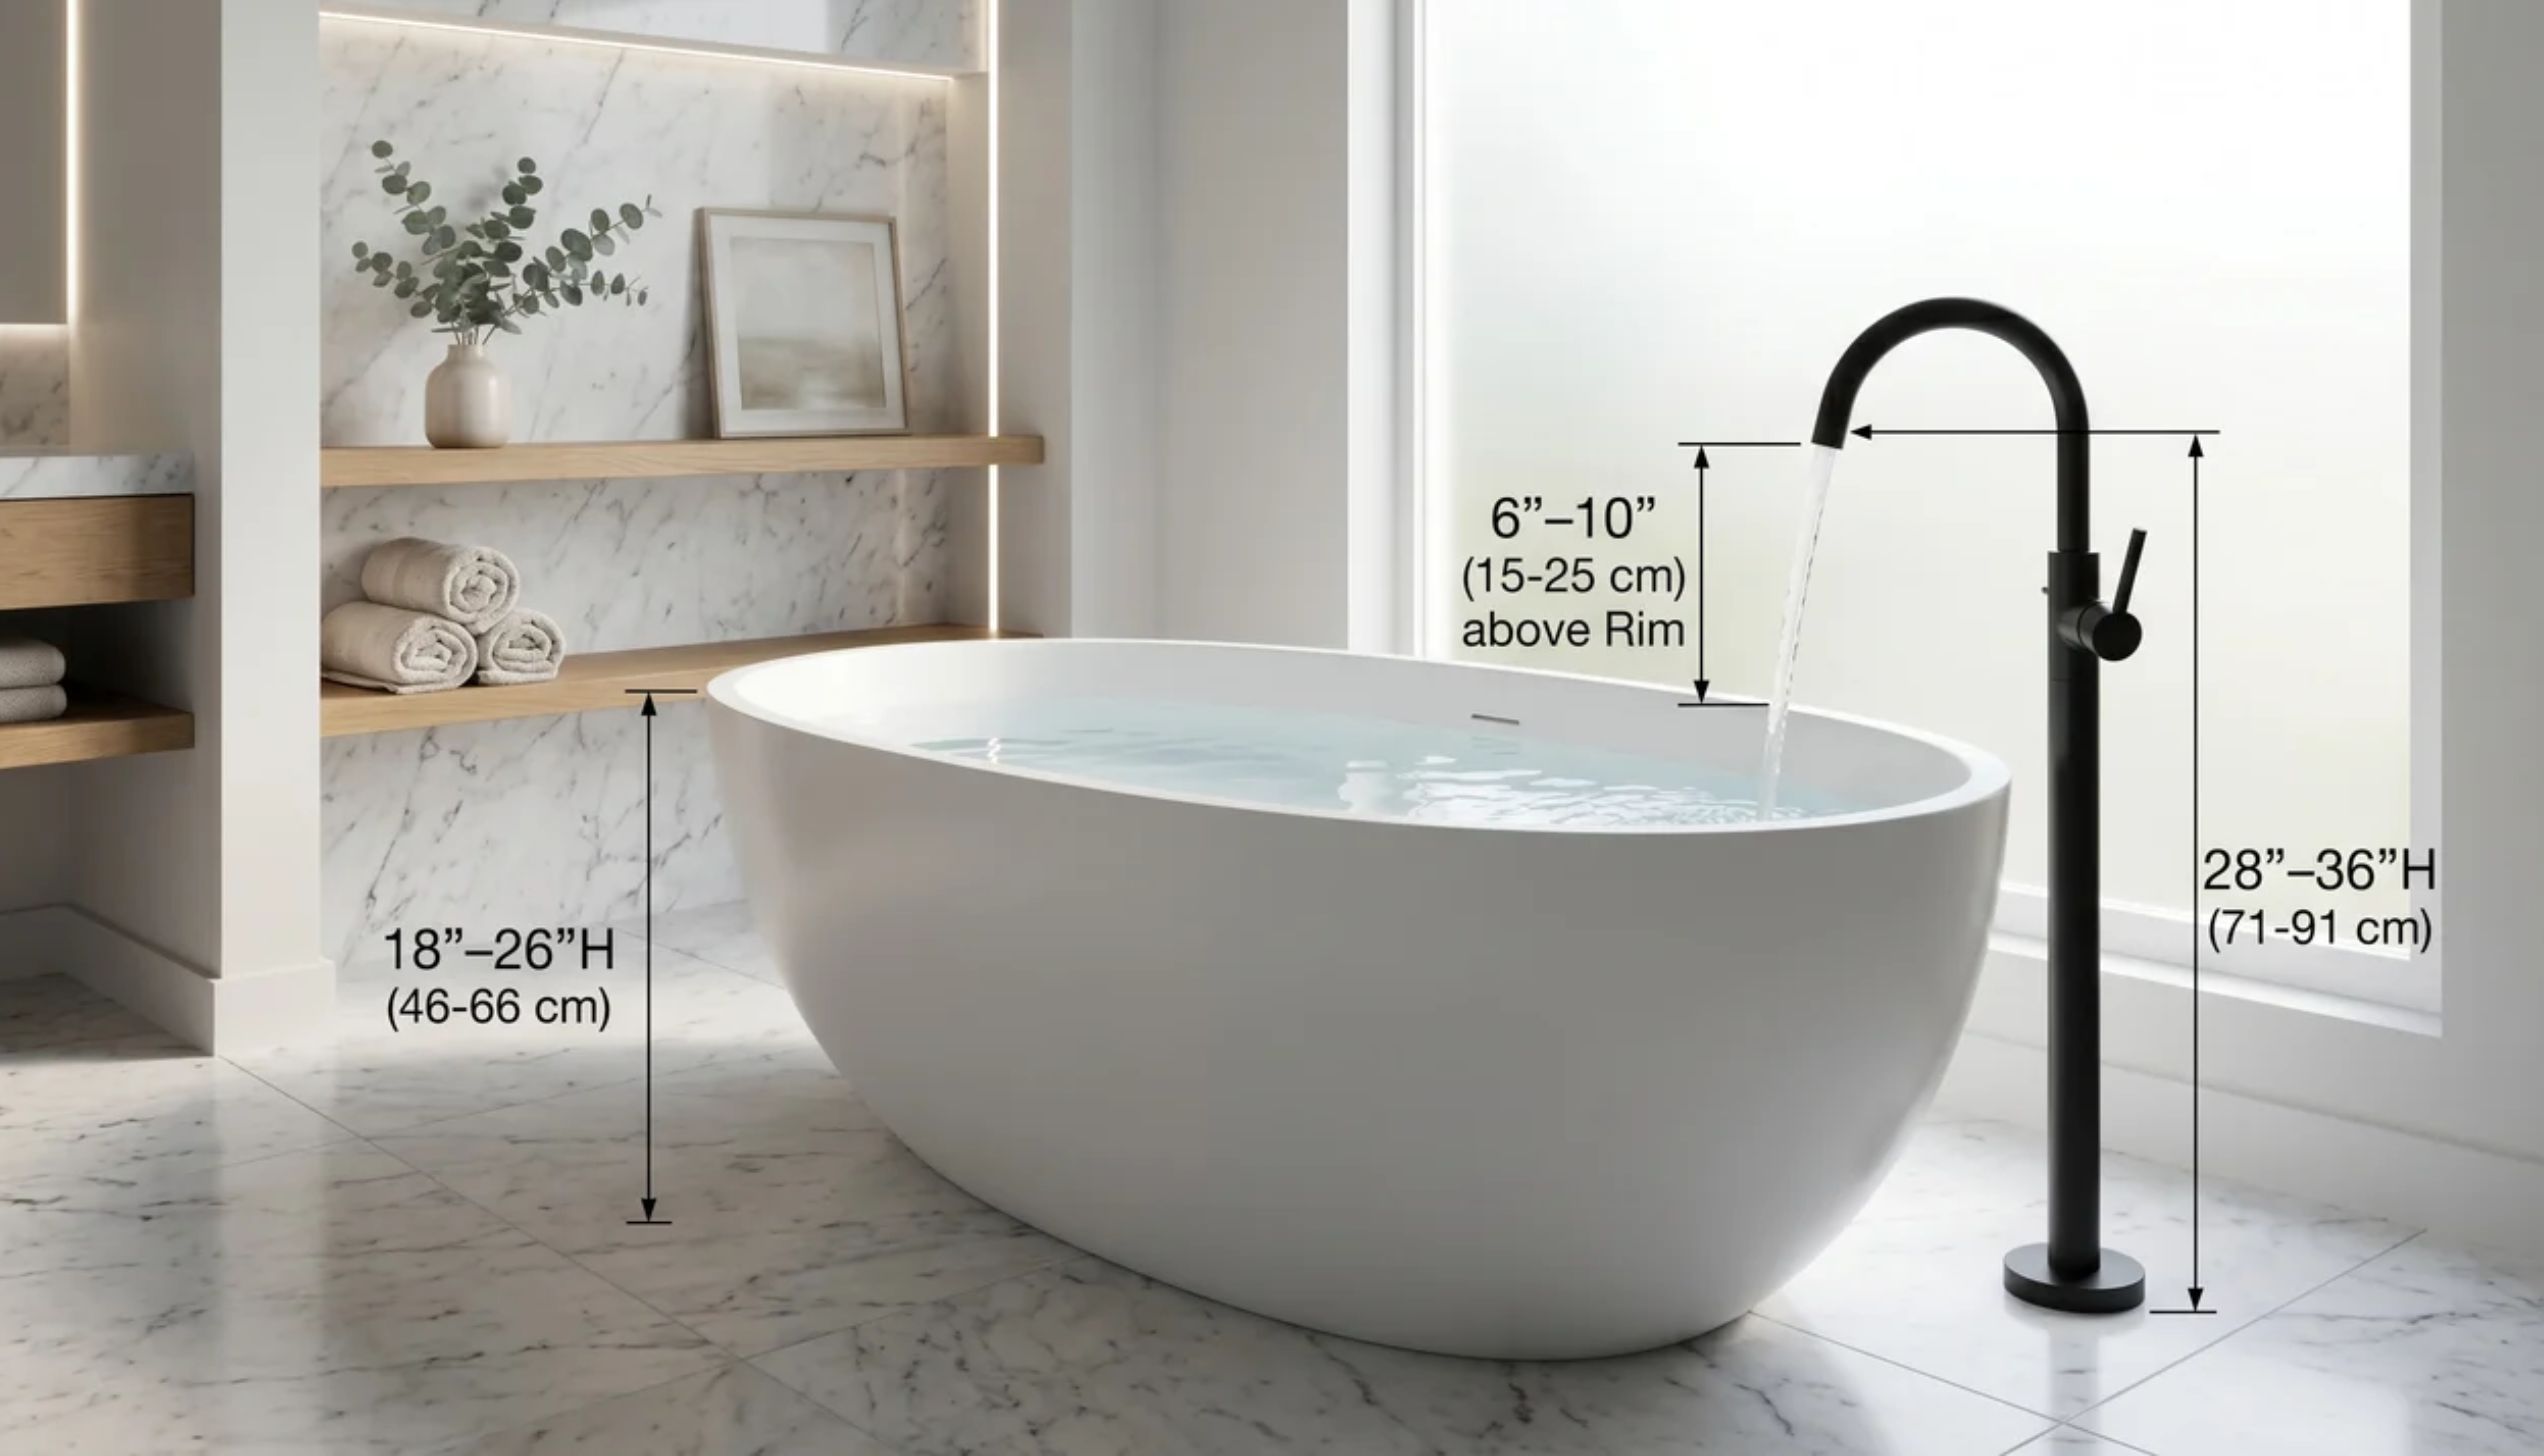
Freestanding tubs sit higher off the floor and have deeper basins. That changes the math.
The standard freestanding tub spout height is 6 to 10 inches above the rim, with the floor-to-spout centerline typically falling between 28 and 36 inches.
- Rim height on most freestanding tubs: 18–26 inches
- Add 6–10 inches of clearance above that rim
- The deeper basin needs higher clearance to avoid splash
3. Deck-Mounted Spout Heights
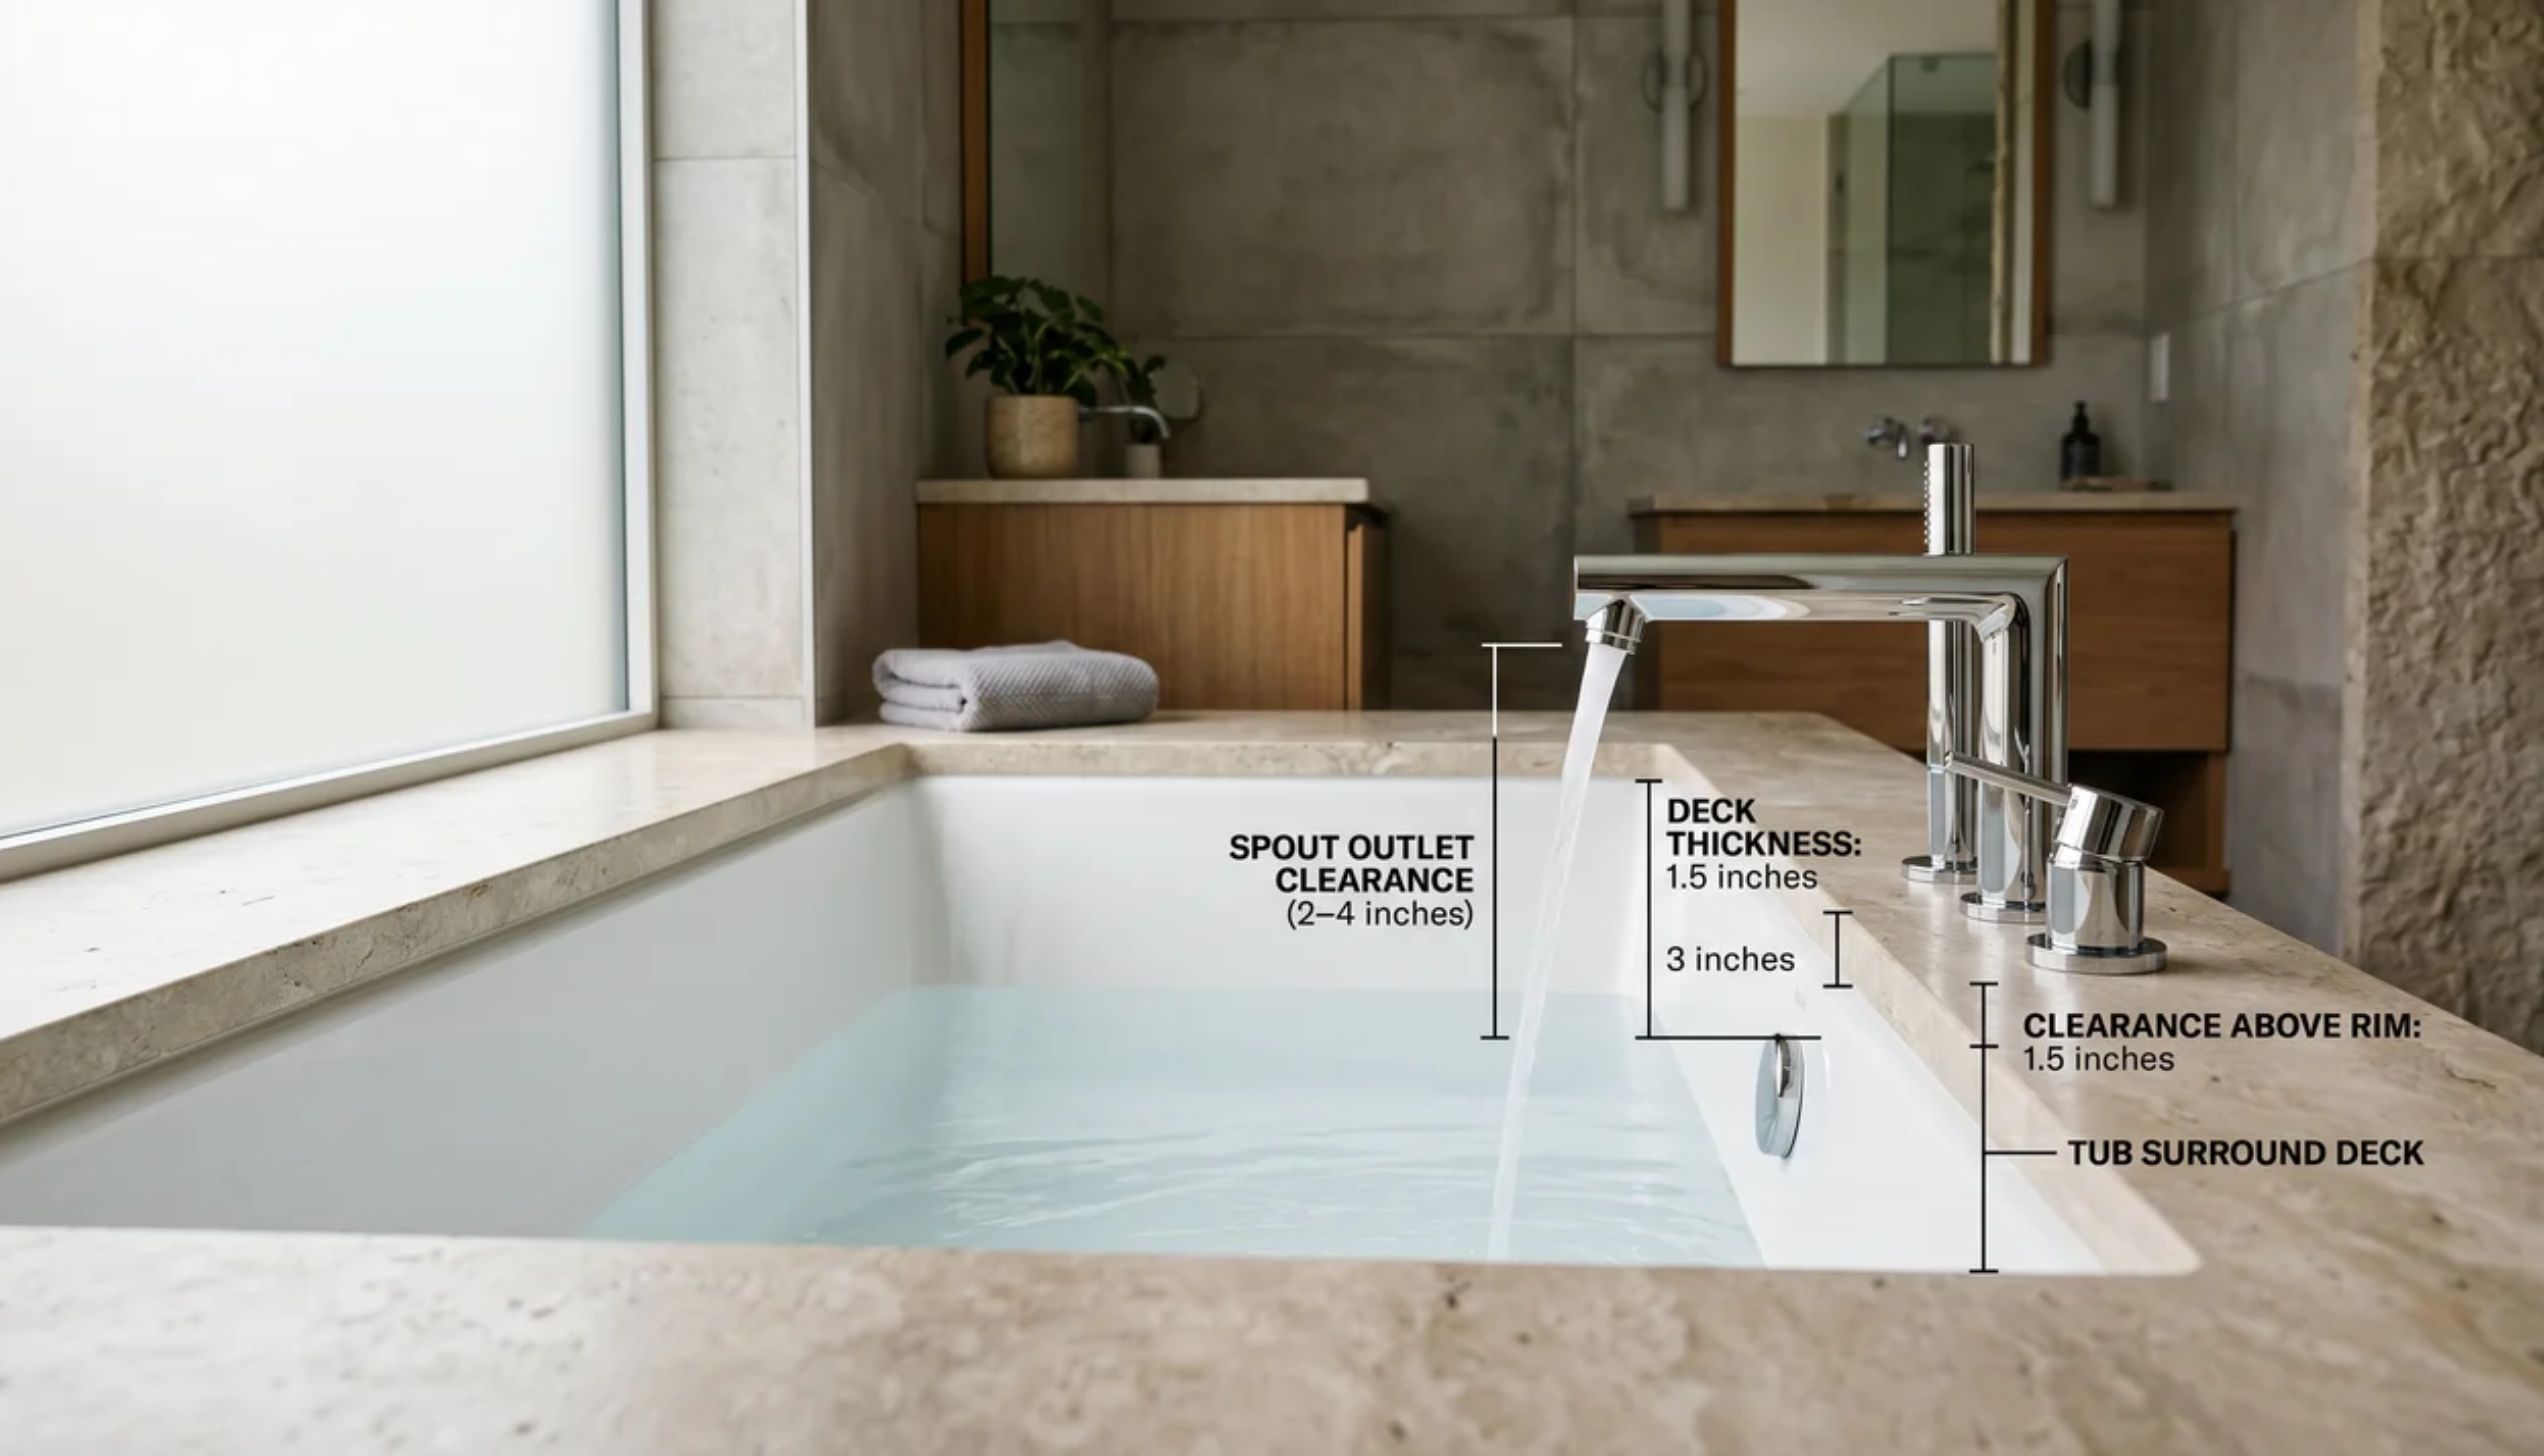
Deck-mounted spouts sit directly on the tub surround or rim deck. The height here is less about floor measurement and more about clearance above the deck surface.
- Aim for the spout outlet to clear the rim by at least 2–4 inches
- This keeps water from entering the tub cleanly, not splashing off the rim edge
- Deck thickness is a factor in the full finished deck height, not just the raw structure
4. Clawfoot Tub Spout Height
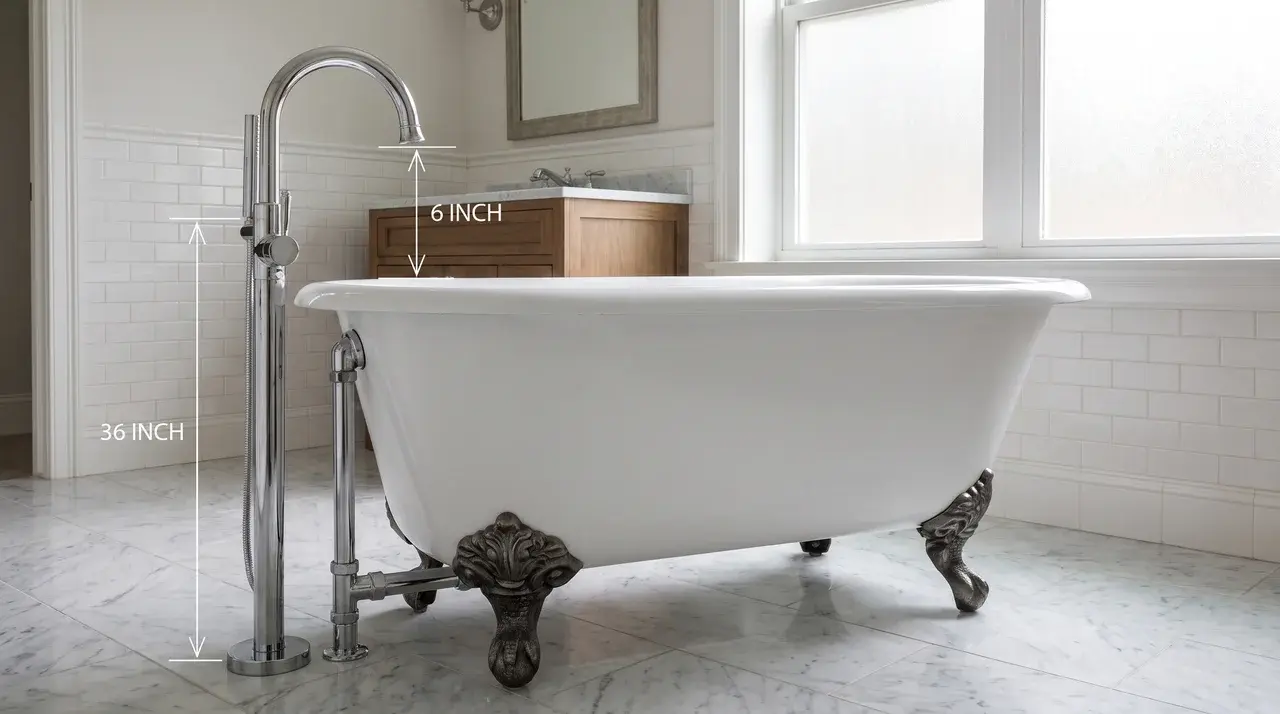
Clawfoot tubs sit on cast iron feet that raise the basin off the floor. That higher starting point shifts every measurement up compared to a standard built-in tub.
The standard clawfoot tub spout height is 6 to 8 inches above the rim, with the floor-to-spout centerline typically falling between 30 and 38 inches.
- Rim height on most clawfoot tubs: 24–28 inches (legs add 6–8 inches to the basin height).
- Add 6–8 inches of clearance above the rim.
- Always measure with the tub sitting on its feet on the finished floor, not the basin dimension alone.
- For floor-mount faucets, confirm the manufacturer’s minimum clearance spec matches your actual rim height before purchasing.
If you are still deciding which tub style fits your space, the tub style and dimensions you choose will determine your baseline rim height before any spout height planning starts.
Factors That Affect Tub Spout Placement
Several variables shift where your spout should sit.
- Bathtub size and depth. A deeper basin calls for more clearance above the rim. A shallower tub needs less. Water should always land near the center of the basin floor, not against the near wall.
- Wall thickness and tile installation. Tile added after rough-in changes the final spout position. Measure to the finished wall surface, not the raw framing.
- Plumbing layout. The supply stub-out height locks in the spout position. Get this right before tile goes up. Changes after tiling require wall removal.
- Spout design and reach. Spouts vary in how far they extend from the wall. Water should land 5 to 10 inches inside the tub from the near wall. Check the spout’s projection spec before purchasing.
How to Install a Tub Spout at the Correct Height
These steps apply to a standard wall-mounted spout on an alcove or built-in tub. If this is part of a full bathroom renovation plan, settle fixture heights and rough-ins before any walls close up.
Step 1: Prepare the Plumbing Connection
Set the supply stub-out before any tile or wall finish goes up. This is the step that locks in your spout height permanently.
The stub-out should sit at your calculated spout centerline height. Use a 1/2-inch supply pipe for proper water pressure and flow.
Confirm the stub-out extends the right distance from the wall framing to allow for the finished wall thickness, including backer board, tile, and mortar.
Do not finalize the rough-in position until you know that full finished wall depth.
Step 2: Mark and Install the Spout Position
Before threading anything on, mark the centerline height on the finished wall so you can confirm placement visually before committing.
Use painter’s tape to mark the height. Check it with a level. Install the wall adapter or drop-ear elbow at the marked height.
Thread the spout on and confirm it sits level and faces straight out from the wall without any tilt to the left or right.
Step 3: Test Water Flow and Check for Leaks
Turn the water on before the tile goes up. This is your only chance to catch a placement error without opening the wall.
Turn the supply on slowly and watch where water lands inside the tub. It should flow toward the center of the basin, not hit the near wall.
Check all connection points for leaks. Tighten any fittings that drip. Do not tile until the line holds pressure cleanly at every connection.
Expert Tips for Perfect Tub Spout Placement
- Mock up before you commit. Use painter’s tape to mark the spout position on the wall. Run a quick water test if the supply line is accessible. This single step catches placement errors before they become permanent.
- Always measure from the finished floor. Subfloor measurements lead to errors after tile. Tile, mortar, and leveling materials all add to the final finished floor height.
- Measure to the centerline. The centerline of the outlet opening is the measurement point that controls water direction. Not the top of the spout body. Not the bottom. The center of the outlet.
- Check the spout reach before buying. Look at the projection spec on the product sheet. A longer spout is not always better. Match the reach to your tub width so water lands where it should.
- Account for tile early. Tell your plumber the full finished wall thickness before rough-in. This prevents a common post-tile plumbing error. The spout stays at the correct height once the wall is finished.
Spout height is one of several fixture decisions that work together in a master bathroom upgrade. Coordinating tub hardware, showerhead, and control heights from the start makes the whole room feel planned rather than patched together.
Frequently Asked Questions
How far should the valve be from the tub spout?
The valve centerline should sit 8 to 18 inches above the spout centerline. Delta and Moen both specify this range for diverter function.
Can I adjust tub spout height after tile is installed?
No, not without cutting into the wall. The supply stub-out is set during rough-in behind the tile. Any height change after tile installation requires opening the wall.
What is the minimum clearance above the tub flood rim?
Plumbing codes require at least 1 inch of clearance between the spout outlet and the tub’s flood rim (the top of the overflow opening).
Does spout height matter for a clawfoot tub?
Yes. Clawfoot legs raise the basin 6 to 8 inches off the floor, which significantly shifts the effective rim height.
What faucets do plumbers prefer?
Wall-mounted spouts for standard tubs. They are easier to install, service, and align with standard rough-in heights.
Final Thoughts
Getting tub spout height right comes down to one formula. Tub rim height plus the right clearance equals your spout centerline from the finished floor.
For standard alcove tubs, that is 4 to 6 inches above the rim. For freestanding and soaking tubs, plan for 6 to 10 inches. Always measure from the finished floor. Always measure to the centerline. Account for tile thickness before locking in the rough-in.
Use the painter’s tape mock-up. Run the water test before the tile goes up. Getting this one measurement right today saves you a full wall tear-out tomorrow.
Have a freestanding tub or an unusual rough-in situation? Use the formula in this guide and confirm the final position with your plumber before any walls close up.