Resealing windows is one of those jobs that looks like a chore until you actually do it. Materials cost $5 to $20. It takes a Saturday afternoon.
The payoff shows up on your energy bill the same month, which is more than you can say for most home improvement projects.
The catch is that not every window problem works the same way. Cracked caulk around the frame is a quick fix. Fog trapped between double panes is a different situation entirely, and no amount of fresh exterior caulk will touch it.
Knowing which one you have before you buy anything saves you an afternoon of work that solves nothing.
I’ve resealed windows on hundreds of homes over 20 years, from 1950s ranch houses with original single-pane wood frames to newer builds with vinyl and aluminum.
The core process doesn’t change much between them. This guide walks through the whole thing, start to finish.
Two Types of Window Seal Failure (Know the Difference First)
Most homeowners treat all window problems as one problem. They aren’t, and mixing them up wastes time and money.
1. Perimeter seal failure is the most common one. This is when the caulk or weatherstripping around the outside of the frame cracks, shrinks, or pulls away from the wall.
You feel drafts at the frame edges and may see moisture staining along the interior trim. This is the fix this guide is built around, and it’s something any homeowner can handle in a few hours.
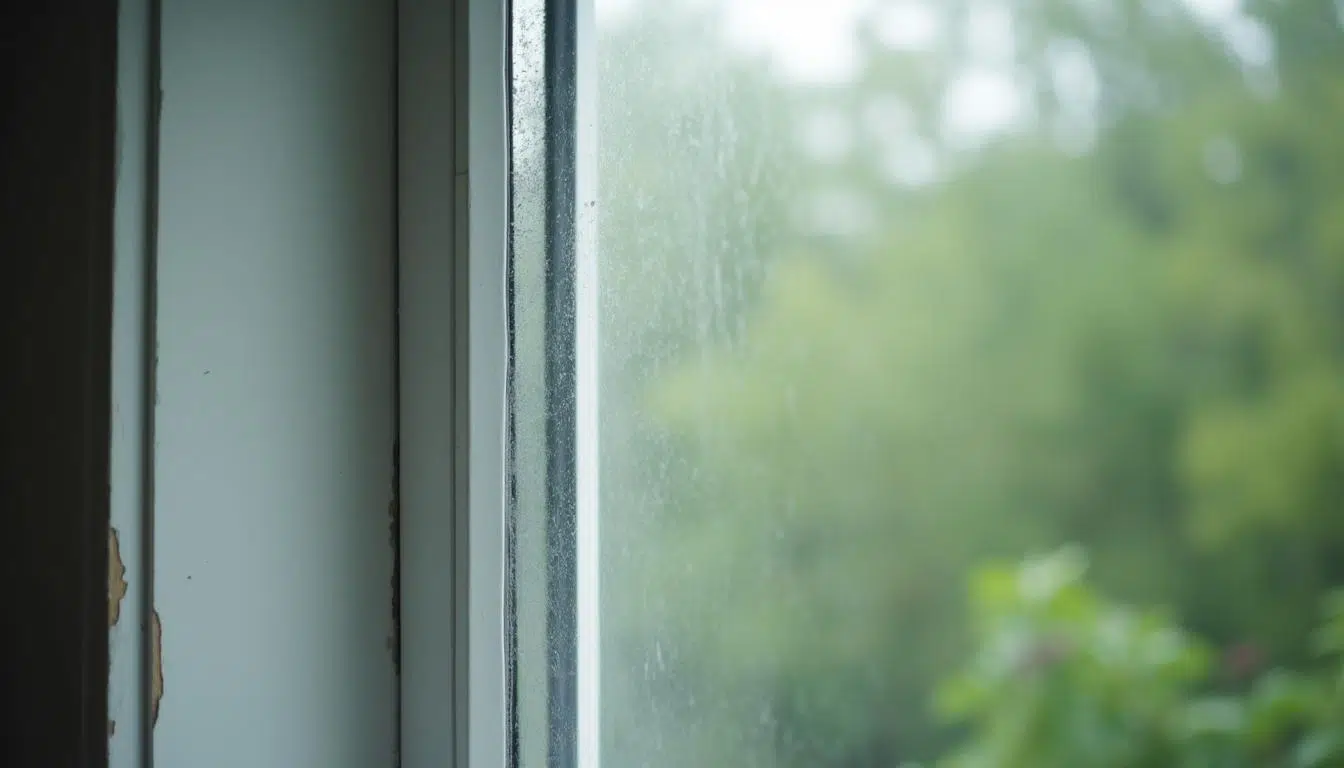
2. Insulated glass unit (IGU) seal failure is different. Double and triple-pane windows trap a layer of insulating gas between the panes.
When the internal seal goes, that gas escapes, and you get fog or condensation stuck between the panes that won’t wipe away from either side, because it isn’t sitting on the glass surface at all. Exterior caulking won’t solve it.
Here’s the quick test. If the haze or moisture sits between the panes and won’t wipe off, that’s an IGU failure. If your drafts come from the frame edges and the caulk looks cracked or missing, that’s a perimeter seal you can fix this weekend.
Signs Your Windows Need Resealing
Catching this early saves real money. Here’s what to look for during a walk-around inspection.
1. Visible cracks, gaps, or peeling caulk around the frame are the most obvious signs. Run your hand along the window edges on a cold or windy day. Any air movement, and you’ve found a problem. A lit candle works too. Hold it near the frame and watch for the flame to flicker toward the window.
2. Rising energy bills with no other explanation often point here, especially in older homes. According to the US Department of Energy, air leaks around windows and doors account for up to 30% of a typical home’s heating and cooling energy use.
3. Outside noise louder than it used to be. A properly sealed double-pane window blocks a noticeable amount of street sound. If the neighbor’s car suddenly sounds like it’s in the room with you, the seal has likely degraded even if you can’t see the crack yet.
4. Condensation or dark staining along the interior trim means moisture has already gotten past the seal. That’s the more urgent situation because moisture sitting against wood framing doesn’t stay a cosmetic problem for long.
5. Fog between the panes that won’t clear is the dead giveaway for an IGU failure, not a perimeter seal problem.
Storms and high winds are especially rough on exterior seals. If your home has sustained recent wind damage, window caulk is one of the first things to check, along with the roof and siding.
If your windows are less than 10 years old, check your manufacturer’s warranty before doing any DIY repairs. Many window warranties cover seal failure during that period, and self-repair can void coverage. Contact the installer or manufacturer first.
Tools and Materials You Will Need
Get everything together before you start. Stopping mid-job to run to the hardware store means a half-prepped surface collecting dust while you’re gone, and that’s not a good surface for new caulk.
- Utility knife (standard 18mm blade)
- Putty knife or plastic scraper
- Dripless caulking gun- the ratchet-stop trigger prevents drip when you lift the gun between joints
- Painter’s tape
- Clean rags
- Rubbing alcohol or soapy water for surface prep
- Sandpaper- 80-grit for rough wood frames, 120-grit for light smoothing
- Gloves
Choosing the Right Sealant
This is where most DIY resealing jobs go wrong. People grab the cheapest tube on the shelf. The wrong sealant for the application means you’ll be back doing this job again within a season or two.
| Sealant Type | Best For | Paintable | Lifespan | Cost Per Tube |
|---|---|---|---|---|
| Acrylic latex | Interior only, low moisture areas | Yes | 5–10 years | $3–$8 |
| Siliconized latex | Exterior frames, general purpose | Yes | 10–15 years | $5–$10 |
| 100% silicone | Glass-to-frame joints, wet areas | No | 15–20 years | $6–$14 |
| Polyurethane | Extreme temps, high-movement joints | Yes (most) | 10–20 years | $7–$16 |
For most exterior window resealing, siliconized latex is the practical choice. It bonds well, handles weather, and accepts paint.
Pure silicone lasts longer but won’t take paint, so use it where appearance isn’t a concern or the joint stays wet.
Never use interior-grade acrylic latex on an exterior joint. It breaks down quickly under UV and temperature fluctuations, often within one season.
| What to Do When the Gap Is Too Wide for Caulk Any gap wider than a quarter inch needs backer rod before caulking. Backer rod is a foam rope sold in rolls at any hardware store for around $5. You press it into the gap with a putty knife. It gives the caulk something solid to bond against and stops it from bridging an empty void, which is exactly what causes the split-down-the-middle cracking you see on older caulk jobs. Size the backer rod about 1/8 inch wider than the gap so it compresses slightly when you push it in. Then caulk over it normally. This is the step that separates a job that lasts 15 years from one you’re redoing in 3. |
How to Reseal Windows: Step by Step
This process covers exterior perimeter resealing, which is the most common DIY window resealing job. I have walked through this same sequence with hundreds of homeowners over the years, and it holds up whether you have three windows or thirty.
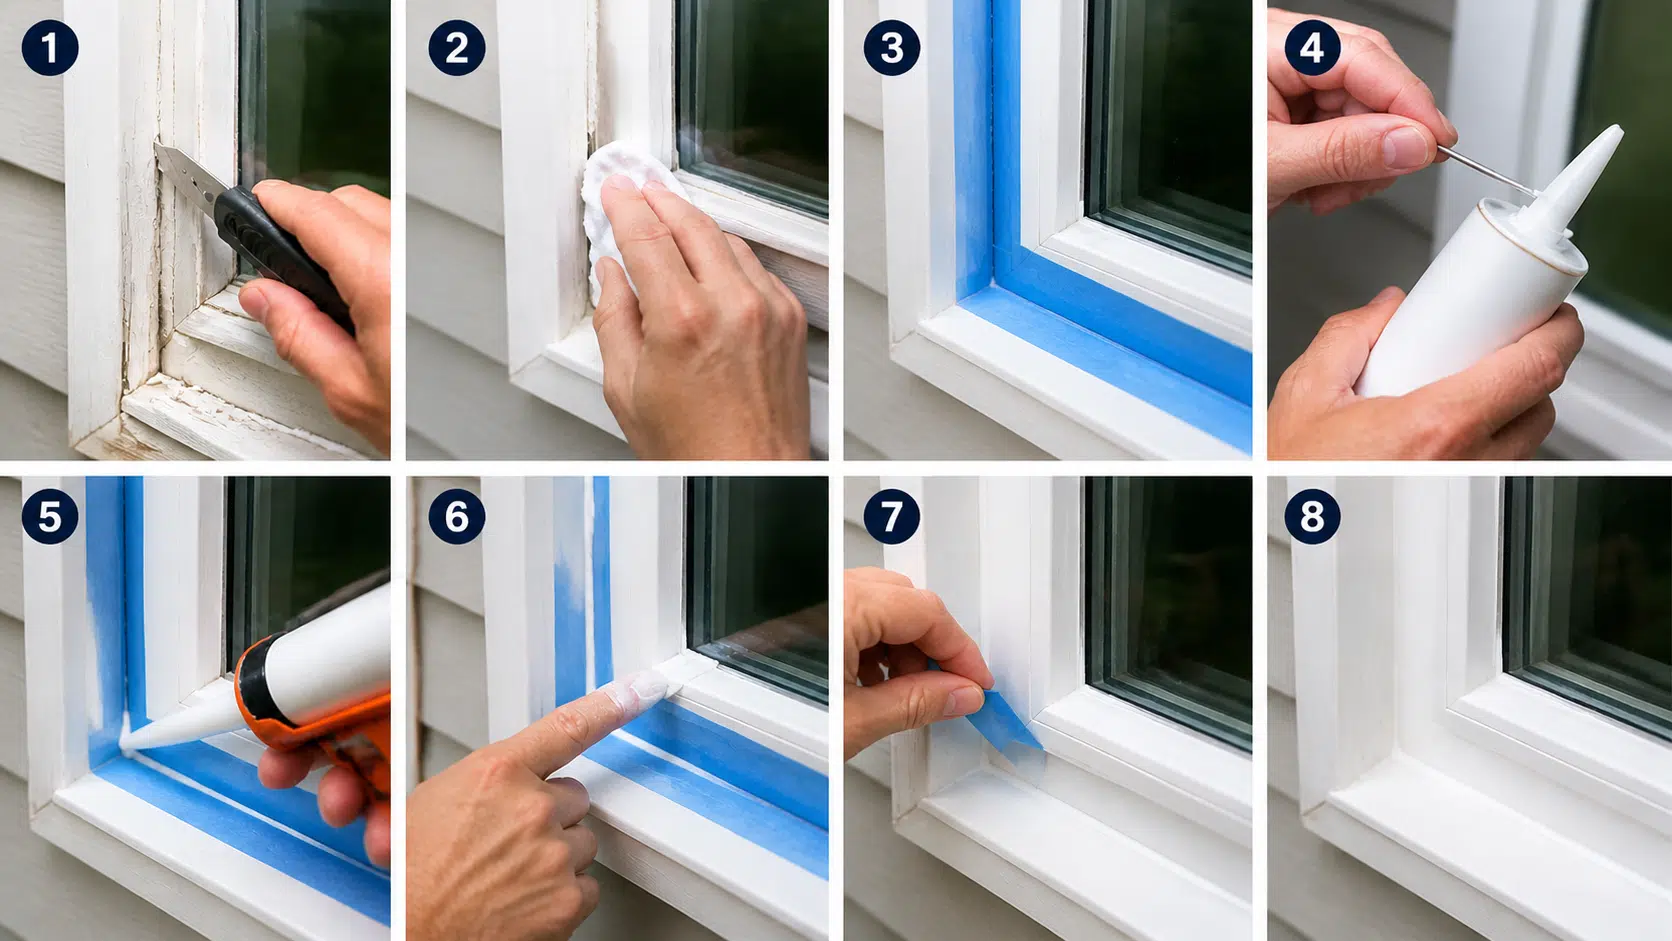
Step 1: Remove old caulk completely
Score along both edges of the old bead with a utility knife. Pull loose sections away by hand.
For stubborn caulk, apply a commercial caulk softener, let it sit for two hours, then scrape with a putty knife.
Don’t skip this. New caulk over old caulk won’t bond and will fail within months, every single time.
Step 2: Clean and dry the surface
Wipe the joint down with rubbing alcohol or soapy water to remove dust, oils, and any mold residue.
On wood frames, sand rough spots with 80-grit paper.
Wait for everything to dry completely. Applying caulk to a damp surface is one of the most reliable ways to have it fail before the year is out.
Step 3: Apply painter’s tape
Run tape along both sides of the joint. Takes five minutes and is the single step most homeowners skip.
The finished bead looks like a contractor did it rather than someone who eyeballed it.
Step 4: Cut the tube at a 45-degree angle
Start with a small opening, about 3/16 inch for standard window joints. You can always widen it but you can’t undo one that’s too large.
Puncture the inner seal with a nail or the built-in tool on your caulk gun.
Step 5: Apply a steady bead
Hold the gun at a consistent angle and move along the joint without stopping. Fill the gap completely without piling on excess.
Steady pressure matters more than speed. Jerky, stop-start motion creates air pockets in the bead.
Step 6: Smooth the bead
Wet your finger or use a plastic caulk tool and run it along the bead in one continuous pass. This pushes the sealant into the gap and pulls off the excess cleanly.
Step 7: Pull the tape while the caulk is still wet
Pull at an angle away from the joint. Wait until it dries and the tape tears the bead edge. You’ll have to redo it.
Step 8: Let it cure
Most silicone-based sealants need 24 to 48 hours. Check the product label. Don’t close storm windows over fresh caulk or paint over it early.
Don’t Forget the Interior Side
Most people do a thorough exterior job and still feel drafts because the interior side was cracked the whole time.
In older homes, especially, the joint between the window casing and the drywall is often open. That accounts for more heat loss than most people expect, and it won’t show up on an exterior inspection.
Go inside, run your hand along the trim where it meets the wall, and check the corners. Feel any air movement, and that joint needs caulk too.
Use paintable acrylic latex on interior joints, not silicone. The process is identical to the exterior steps. Cure time is shorter, usually around an hour before painting, and you don’t need to worry about UV or rain on the interior side.
Resealing Windows by Frame Type
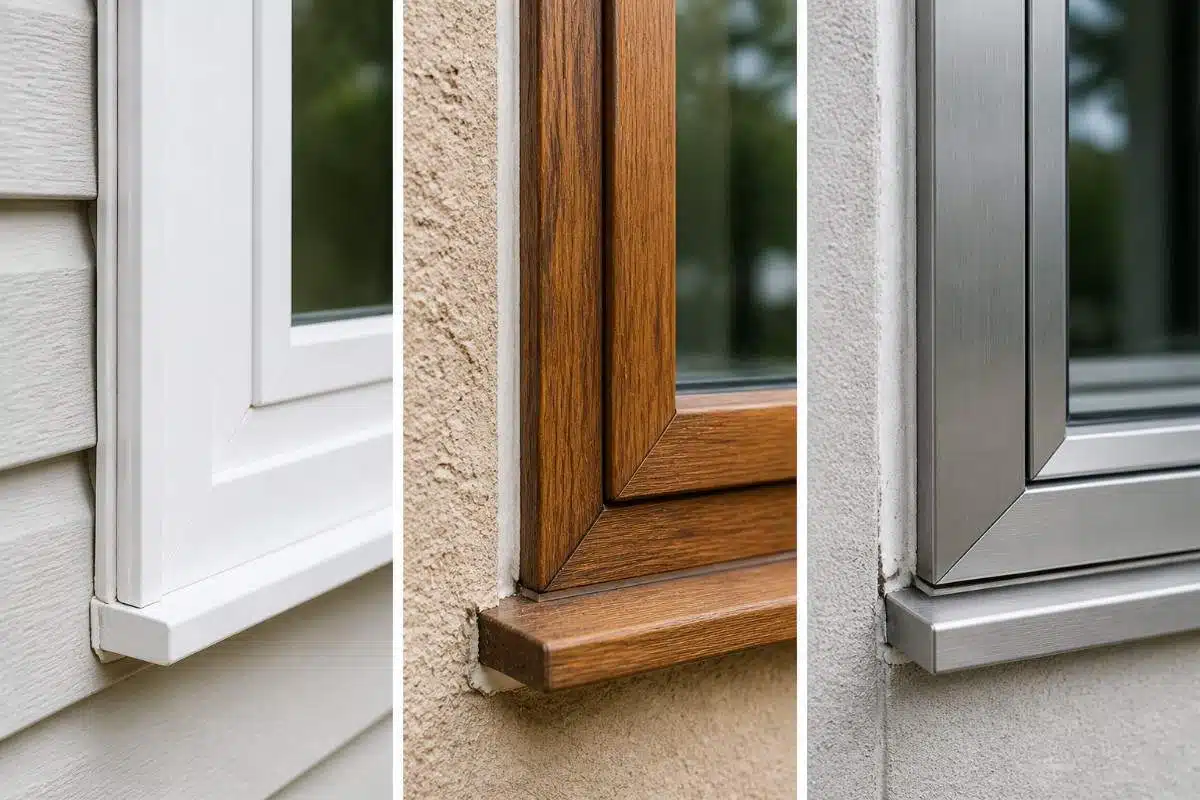
Not every window frame needs the same approach. Here is what changes depending on what your frames are made of.
1. Vinyl Windows
Easiest frame to work with. Wipe with rubbing alcohol, apply siliconized latex or silicone, and smooth.
Also, check the rubber gasket seals around the sash. If they’re brittle or completely compressed flat, they aren’t sealing much anymore.
Pull them out and press new ones into the track. Replacement gaskets cost a few dollars per window at most hardware stores.
2. Wood Windows
Wood frames need more prep than vinyl. Sand any rough or peeling areas, fill cracks with exterior wood filler, and prime bare wood before you caulk.
Skip the primer, and the caulk will peel away from the raw grain within a season, regardless of what brand you buy.
I’ve seen this on jobs where someone spent more on caulk than necessary and didn’t use primer, and the whole bead came off the following spring.
Older single-pane wood windows may also need reglazing, which is separate from resealing. That’s when the putty holding the glass in the frame has hardened and crumbled out.
Reglazing means pressing new glazing compound into that channel at a 45-degree slope. It’s a different job worth researching on its own if you’re dealing with original-era wood frames.
If the exterior trim around your windows is also showing wear at the same time as the caulk, it makes sense to handle both while the frame is already prepped and taped.
3. Aluminum Windows
Use neutral-cure silicone only on aluminum. Acid-cured silicone, the kind that smells strongly of vinegar while it cures, corrodes aluminum over time.
Replace worn EPDM or wedge gaskets as well. Aluminum expands and contracts more than wood or vinyl with temperature changes, so sealant flexibility matters more here than with any other frame type.
Can Double-Pane Windows Be Resealed?
This is the question I get most often, and the honest answer is: it depends on what you mean by resealing.
You can absolutely reseal the exterior perimeter caulk around double-pane windows yourself. That fixes frame-edge drafts and stops water intrusion at the frame. The steps above apply exactly.
What you can’t do at home is restore a failed IGU seal. The argon or krypton gas between the panes is gone once the seal breaks, and there’s no practical way to refill it outside a factory.
I’ve watched homeowners spend a weekend recaulking every exterior joint on a house and wonder for months why the fog between the glass panes never cleared. That fog isn’t on the surface. No exterior caulk touches it.
Professional defogging services do exist. A technician drills a small hole, applies a chemical to pull out moisture, and installs a small vent valve.
Cost runs roughly $70 to $200 per pane. This can reduce visible fogging, but it doesn’t restore the original insulating performance of the unit. Most homeowners who go this route still end up replacing the glass within a few years.
A new IGU typically runs $150 to $600 per pane, depending on size and glass type.
Full window replacement is $300 to over $1,000 per window, which makes more sense when frames are also damaged or the windows are more than 20 years old.
If you’re at that stage and comparing products, ProVia windows are worth considering, especially if you’re installing multiple windows at once.
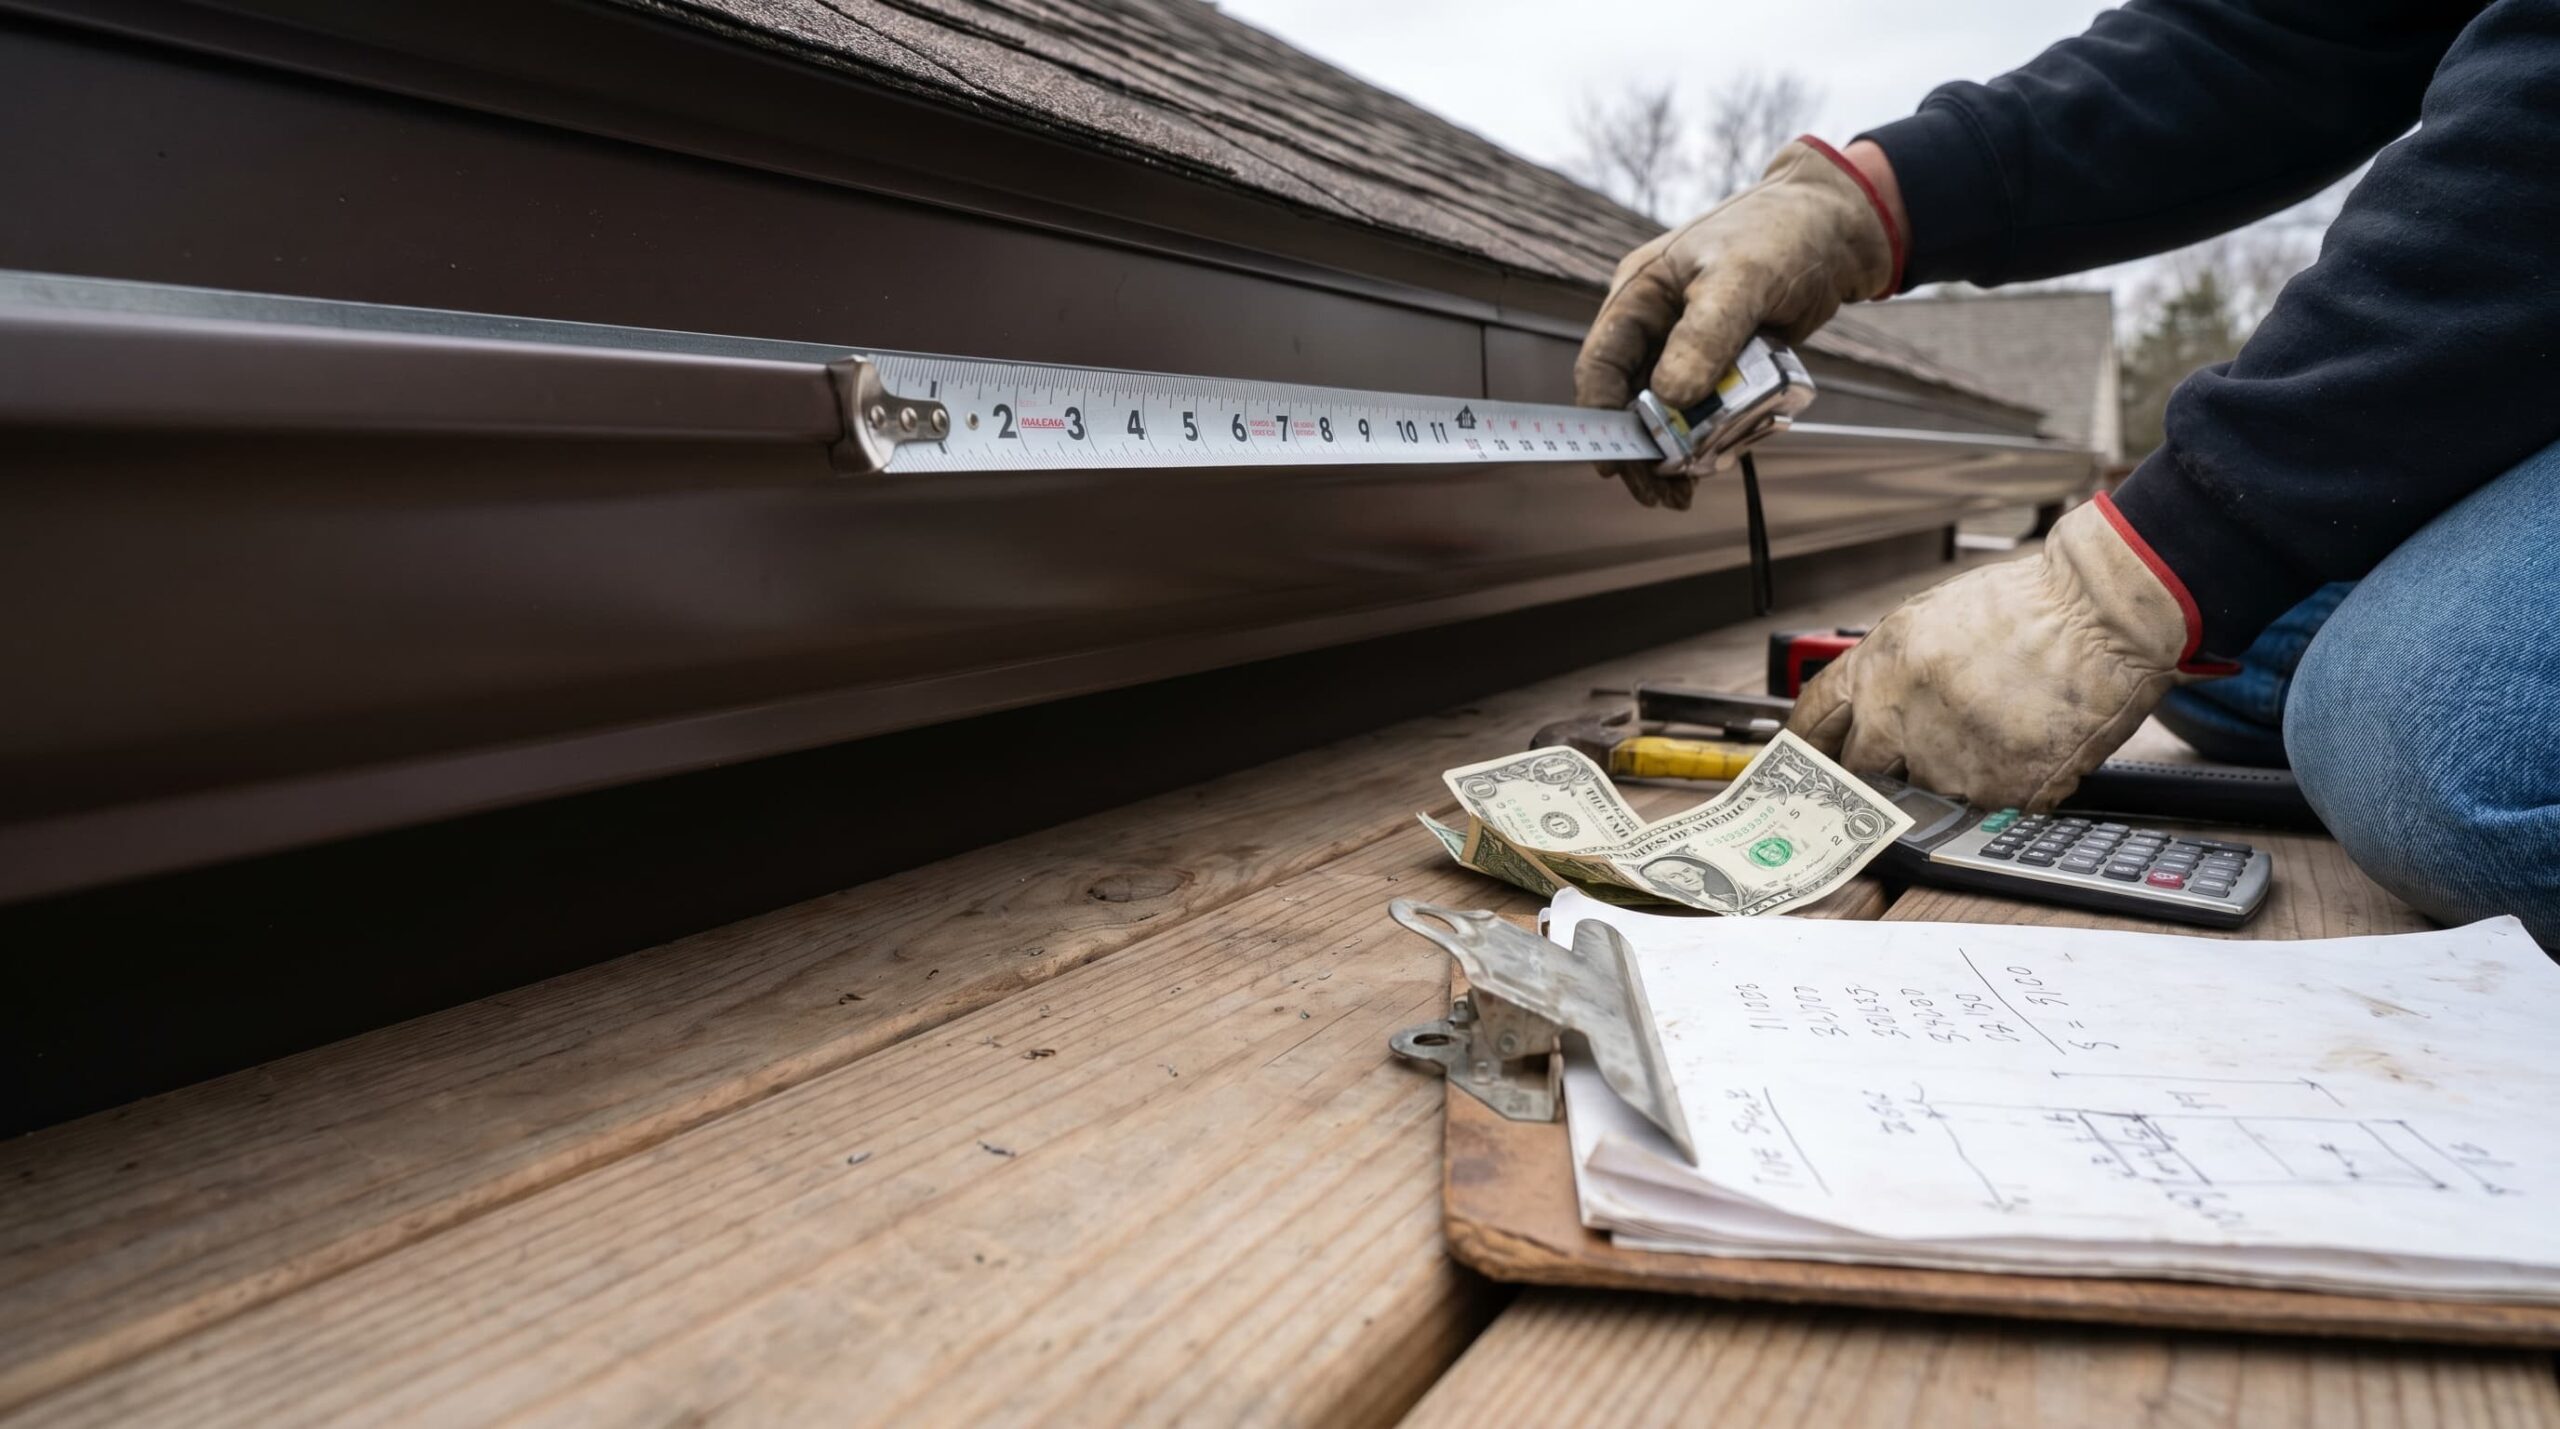
How Much Does it Cost to Reseal Windows?
Cost is usually what pushes people toward doing this themselves, and the savings are real.
| Approach | Cost per window | Notes |
|---|---|---|
| DIY exterior recaulking | $5-$20 | Materials only, one tube covers 3-5 windows |
| DIY with weatherstripping and film | $15-$50 | Adds insulation film and new gaskets |
| Professional exterior resealing | $75-$150 | Includes labor and materials |
| Professional IGU seal repair | $70-$250 | Defogging and resealing between panes |
| IGU glass replacement | $150-$600 | New sealed glass unit, keeps the existing frame |
| Full window replacement | $300-$1,000+ | New frame and glass, best for older windows |
To put the DIY cost in context: a single drafty window leaking conditioned air can add $15 to $30 per year to your heating and cooling bill. If you have eight windows that need recaulking and spend $40 total on materials, you recover that cost in energy savings within one winter.
If IGU seals are failing on several windows at once, get quotes from two or three contractors and compare them with the cost of full replacement. At that scale, replacing the windows outright often costs less than patching each unit separately.
One thing worth factoring in: if window frames are failing at the same time as your siding, it almost always makes financial sense to coordinate both projects.
Siding replacement costs already include updated flashing and trim around every window opening, so doing them separately means paying for that prep work twice.
Five Mistakes that Cause Window Resealing to Fail
After years of helping homeowners with maintenance issues, these are the five errors I see repeated the most.
- Caulking over old caulk: The new sealant will not bond to degraded material underneath. Remove it all first, every time.
- Using the wrong caulk type: Interior acrylic latex outside a window will crack and peel within one season. Match the sealant to the location and frame material.
- Sealing on a wet or dirty surface: Moisture and dust prevent adhesion. Clean the joint and wait for it to dry completely.
- Applying caulk in extreme temperatures: Most sealants need temperatures above 40°F to cure correctly. Direct sunlight can also cause the caulk to skin over too quickly. Overcast, mild days are ideal.
- Covering weep holes: The small slots or round holes along the bottom rail of a window frame drain moisture that collects inside the channel. Seal them and you trap water inside the frame, which leads to rot. Look for them before you caulk the bottom of any window. They’re easy to miss.
One thing that catches homeowners off guard: water intrusion from a failed window seal is sometimes mistaken for a roof leak, especially around upper-story windows or dormers.
Diagnosing the actual source before spending money on either repair matters. If water seems to be coming from where the roof meets the wall rather than from the frame itself, the issue may be with the roof flashing rather than the window seal.
Temporary Fix for Renters or Winter Emergencies
If you’re renting and can’t do permanent repairs, or you need something fast before a cold snap, window insulation film is worth knowing about.
It’s a thin plastic sheet that sticks to the interior frame with double-sided tape and shrinks flat with a hair dryer.
It won’t fix a failed seal, but it cuts drafts noticeably for around $5 per window and peels off cleanly in spring without leaving residue.
Several homeowners I’ve worked with use it every fall on older windows they’re not ready to replace yet.
When to Reseal versus When to Replace Your Windows
Resealing is the right call when frames are solid, and the problem is limited to worn caulk or gaskets. Most windows under 15 years old fall into that category.
Replacement makes more sense when IGU seals have failed on multiple windows, frames show rot or warping, or you’re dealing with single-pane windows in a climate with real winters.
At that point, you’re fighting the same maintenance battle every few years instead of solving it.
If your window frames are failing at the same time as your siding, plan both projects together.
Siding work includes updated exterior cladding and all the trim and flashing around window openings, anyway. Doing windows separately means paying for that prep work twice.
A practical rule for any size job: if the combined cost of resealing and IGU repairs exceeds half the cost of new windows, replacement is the smarter investment.
Window resealing isn’t glamorous work, but a $10 tube of sealant and two hours on a Saturday does more for home comfort than most projects twice the cost. The key is knowing which seal has actually failed before you start. Cracked perimeter caulk is a weekend fix. Fog between the panes is not, and treating it like one wastes your time.
Do the inspection first. Fix what needs fixing. Leave the rest alone until it does.
Summing it Up
Resealing windows is routine maintenance that pays for itself quickly. A $10 tube of sealant and an afternoon of work can cut noticeable drafts and shave real dollars off your monthly energy bills.
The key takeaway from this guide is knowing which seal has actually failed. Cracked caulk around the frame is a weekend fix. Fog trapped between double-pane glass is not, and no amount of exterior caulk will solve it.
Start with an honest inspection this fall. Walk the perimeter, feel for drafts, and check the caulk on every window.
Fix the small failures now, and you avoid expensive repairs or full replacements down the road. That is what good maintenance looks like.
Frequently asked questions
Can you reseal windows yourself?
Yes. Exterior perimeter resealing is a basic DIY job needing a caulk gun, sealant, and a few hours.
How often should windows be resealed?
Inspect annually. Exterior caulk typically lasts 5 to 10 years before needing replacement.
What is the best caulk for resealing windows?
Siliconized latex for paintable exterior use. Pure silicone for maximum durability on non-painted surfaces.
Can you reseal windows in winter?
Only on mild days above 40°F. Most sealants will not cure properly in freezing temperatures.
What is the difference between window resealing and reglazing?
Resealing replaces caulk around the frame perimeter. Reglazing replaces the putty that holds glass in wooden frames.
How long does window resealing last?
Quality exterior sealant lasts 10 to 20 years depending on type, climate, and sun exposure.