Plain hallway walls are one of those problems that paint alone never fully fixes.
Then I added a board-and-batten hallway treatment halfway up the wall. The space went from forgettable to finished in a single weekend.
It is one of those upgrades that look far more expensive than they are. A few boards, some paint, and a free Saturday are all it takes.
This post covers seven design ideas, the right height, material choices, project costs, and a full installation walkthrough. Everything I learned from doing it myself is here.
What Is Board and Batten?
Board and batten is a wall treatment made up of two parts. The “board” refers to wide, flat panels that cover the wall surface.
The “batten” refers to narrow vertical strips placed over the seams between those boards. Together, they create clean vertical lines that add texture and structure to any flat wall.
It is still used as exterior siding on many home styles today. Indoors, it works in hallways, living rooms, bedrooms, bathrooms, and entryways.
Pro Tip: Save three to five board and batten hallway photos you like before planning. It makes choosing your height, spacing, and color much faster.
How to Install Board and Batten in Your Hallway
This is the part I was most nervous about, but I promise that if I could do it, you can too. Here is the full set of tools and the step-by-step process I followed for my board-and-batten hallway.
Materials and Tools You Need
Before I started my board-and-batten hallway project, I made the mistake of heading to the store without a proper list and ended up going back twice more. It slowed everything down, and honestly, it was avoidable.
Materials:
| Item | Purpose |
|---|---|
| MDF Board 1×3 | Vertical battens |
| MDF Board 1×4 | Baseboard and top cap |
| MDF Board 1×2 | Top ledge finish |
| Construction Adhesive | Securing boards to the wall |
| Paintable Caulk | Filling seams and gaps |
| Lightweight Spackle | Filling nail holes |
| Satin or Eggshell Paint | Final coat on boards |
Tools:
| Tool | Purpose |
|---|---|
| Miter Saw | Cutting boards to size |
| Brad Nailer 18 Gauge | Nailing boards to the wall |
| Spirit Level | Keeping boards straight |
| Stud Finder | Locating wall studs |
| Measuring Tape | Measuring spacing and height |
| Putty Knife | Applying spackle |
| Paint Roller and Brush | Painting boards and edges |
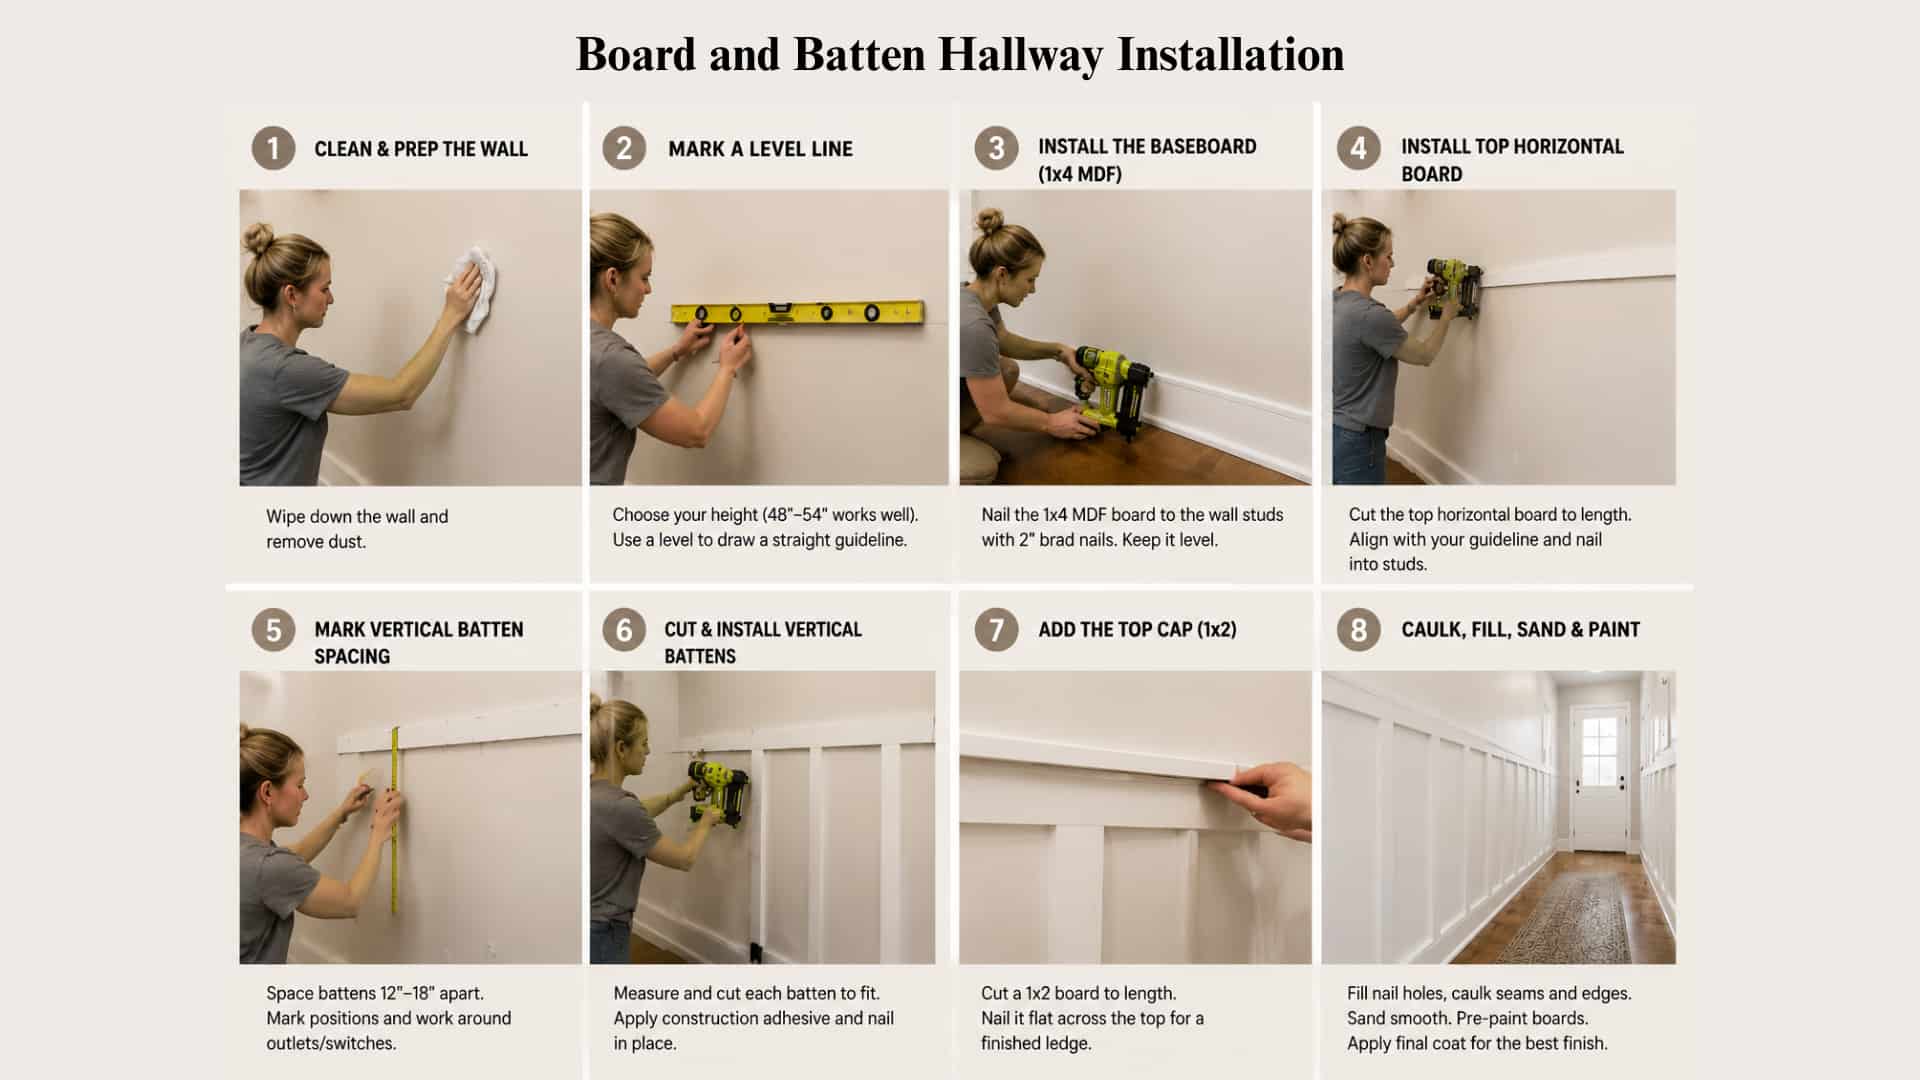
Step 1: Clean and Prep the Wall
Wipe down the wall with a damp cloth. Remove any dust or grease. If your walls are heavily textured, first attach a thin sheet of hardboard over them to create a smooth base.
Step 2: Decide on Your Height and Mark a Level Line
Choose your desired height between 48 and 54 inches. It works well for most hallways. See a level to draw a straight horizontal line across the entire wall at that height. This is your guideline.
Step 3: Install the Baseboard
If you are replacing your existing baseboard, install a 1×4 MDF board along the bottom of the wall first. Use a brad nailer and 2-inch brad nails going into the wall studs. Always use a level to make sure the baseboard sits straight.
Step 4: Install the Top Horizontal Board
Cut your top horizontal board to the length of the wall. Align it with your guideline, then nail it into the wall studs with your brad nailer.
Step 5: Plan and Mark Your Batten Spacing
Traditional board-and-batten spacing puts battens about 12 inches apart, but 12 to 18 inches is more common depending on the size of the space. Mark the position of each vertical batten on the wall before cutting anything.
Before finalizing spacing, locate and mark any outlets or light switches within the batten zone. Adjust your batten positions so no vertical board sits directly behind a plate. Working around them at the layout stage saves difficult cuts later.
Step 6: Cut and Install the Vertical Battens
Measure the exact height needed for each batten individually. Walls are rarely perfectly level, so each batten may end up a slightly different length. Apply construction adhesive to the back of each batten, then nail it into place with your brad nailer.
Step 7: Add the Top Cap
Cut a 1×2 board to the length of the wall and nail it flat across the top of your horizontal board to create a small ledge. This gives the whole treatment a finished look.
Step 8: Caulk, Fill, Sand, and Paint
Fill all nail holes with lightweight spackle. Let it dry completely. Click all seams where the boards meet the wall, and lightly click any rough edges. Paint the entire treatment in your chosen color using a roller for flat surfaces and a brush for tight corners.
Pro Tip: Pre-paint your boards before installation. Apply one final coat after everything is up. It gives a much cleaner and more even finish.
How Much Does a Board and Batten Hallway Project Cost?
Before I started, I had no clear sense of the total cost. It turned out to be far less than I expected, and much lower than hiring someone.
A typical DIY board-and-batten hallway project runs between $100 and $250 in materials for a single wall. Professional installation costs $7 to $20 per square foot. For a hallway wall with 60 to 80 square feet of coverage, that translates to $420 to $1,600 depending on design complexity and your location.
Here is a realistic breakdown of what the materials cost for a standard single-wall hallway project:
| Item | Estimated DIY Cost |
|---|---|
| MDF boards (1×3 and 1×4) | $60 to $120 |
| Construction adhesive | $10 to $15 |
| Paintable caulk | $5 to $10 |
| Spackle and sandpaper | $8 to $12 |
| Paint, one gallon, satin or eggshell | $25 to $55 |
| Total materials | ~$108 to $212 |
Tools are the main variable. A brad nailer can be rented for around $40 per day. A miter saw is similar. If you already own both, your project stays well under $200. If you need to rent them, the total still comes in under $300 for most hallways, a fraction of professional rates.
White semi-gloss or satin paint is the standard choice for board-and-batten because it cleans easily and reflects light well in a darker hallway. One gallon covers the boards and top cap for most single-wall installations.
Board and Batten Hallway Ideas
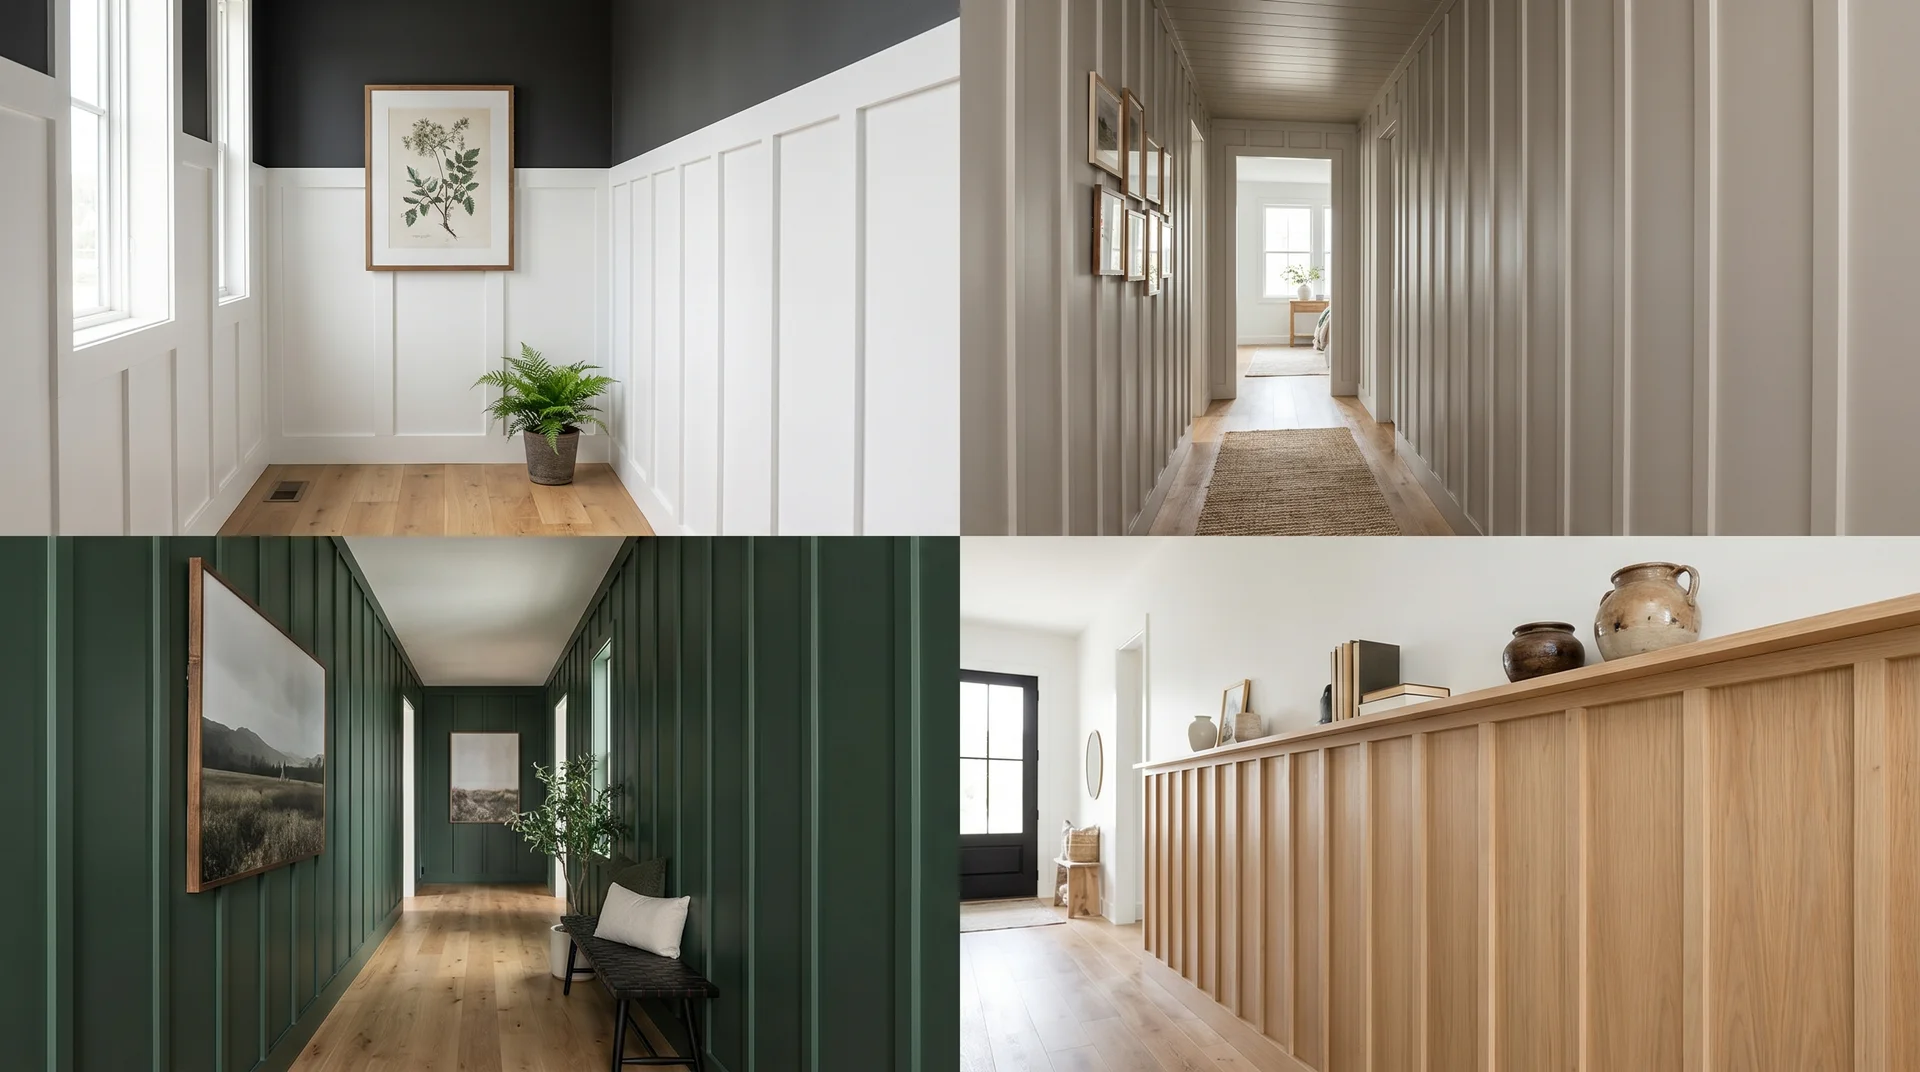
Not every hallway needs the same look. These ideas use the same installation process but produce very different results depending on color, spacing, and height.
1. Classic White Boards with a Dark Upper Wall
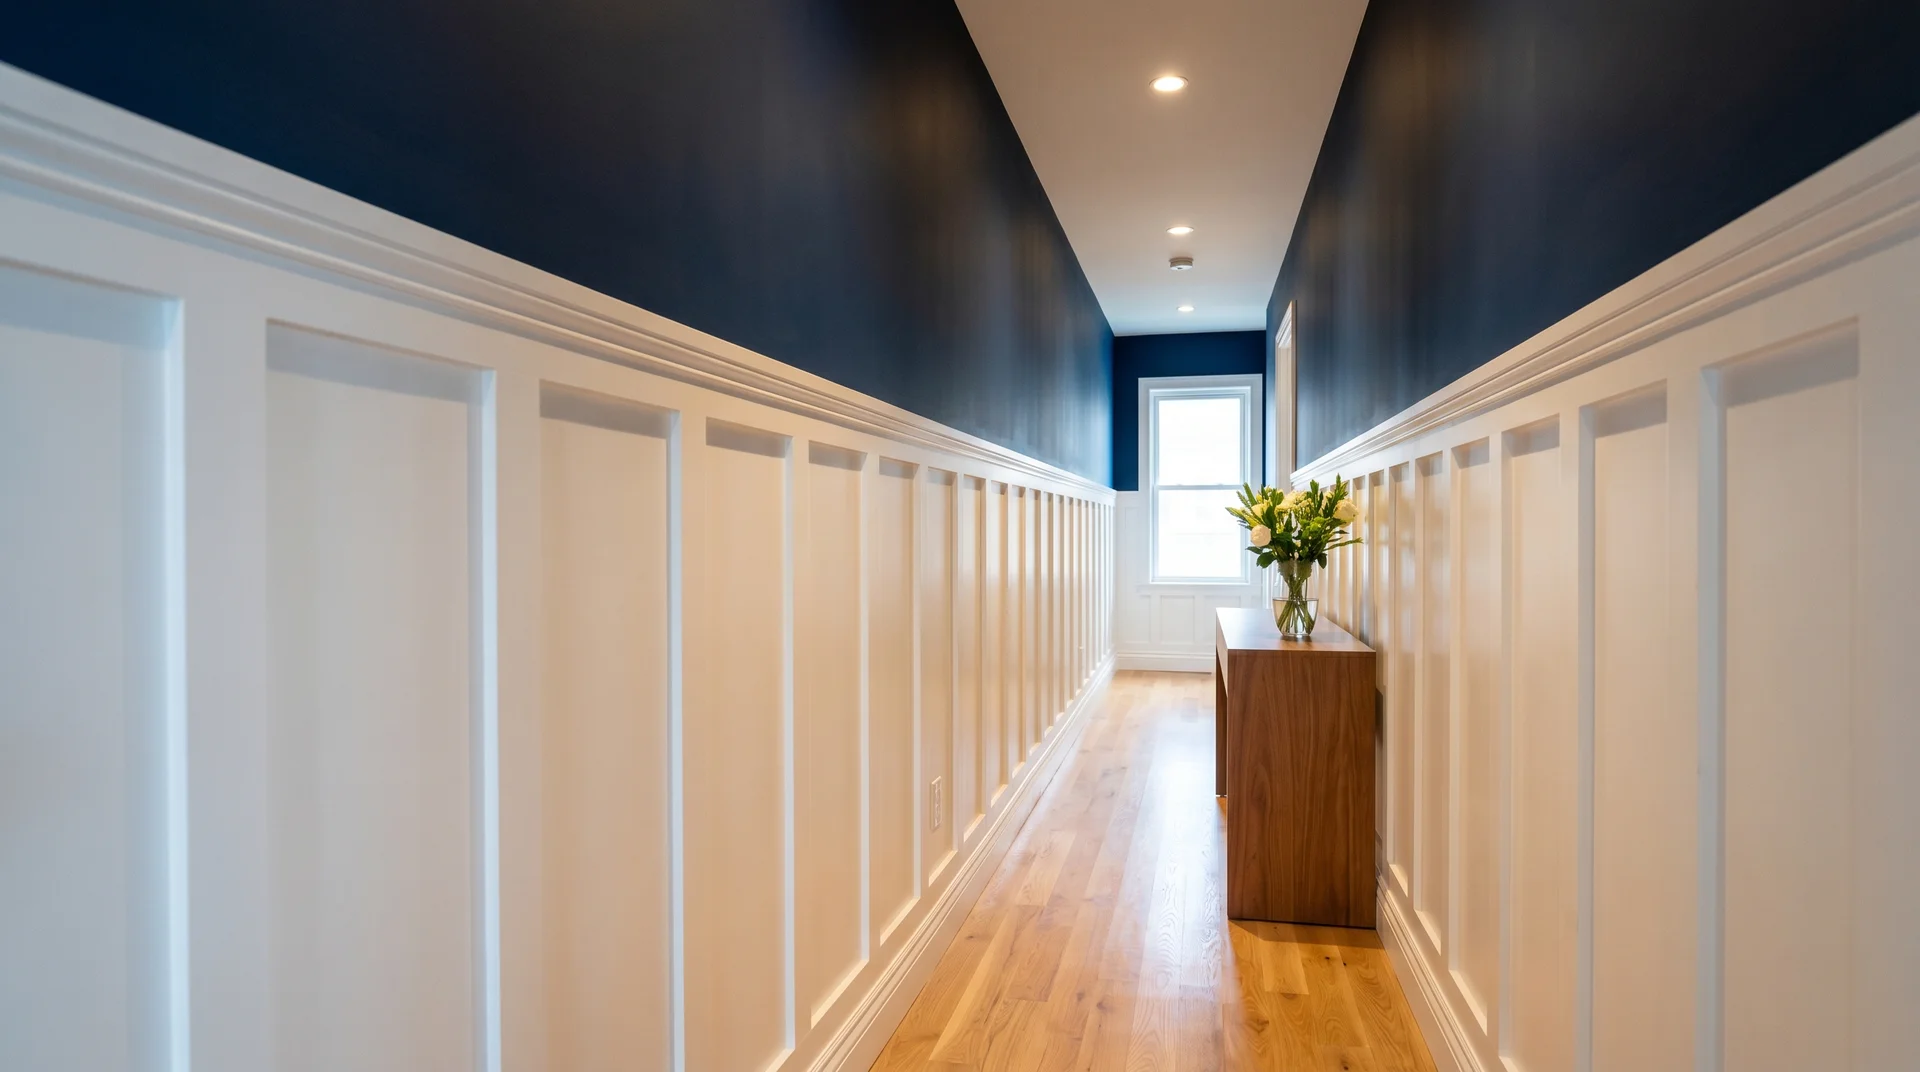
Whiteboards on the lower half, a deep color above the top cap. Navy, charcoal, and forest green are the most commonly used pairings. The top cap acts as the visual divider between the two sections. Keep it level, or the whole treatment reads as off.
- Materials Cost: $100 to $200
- Avoid if: No overhead light in the hallway
- Best For: Standard 8-foot ceilings and narrow hallways
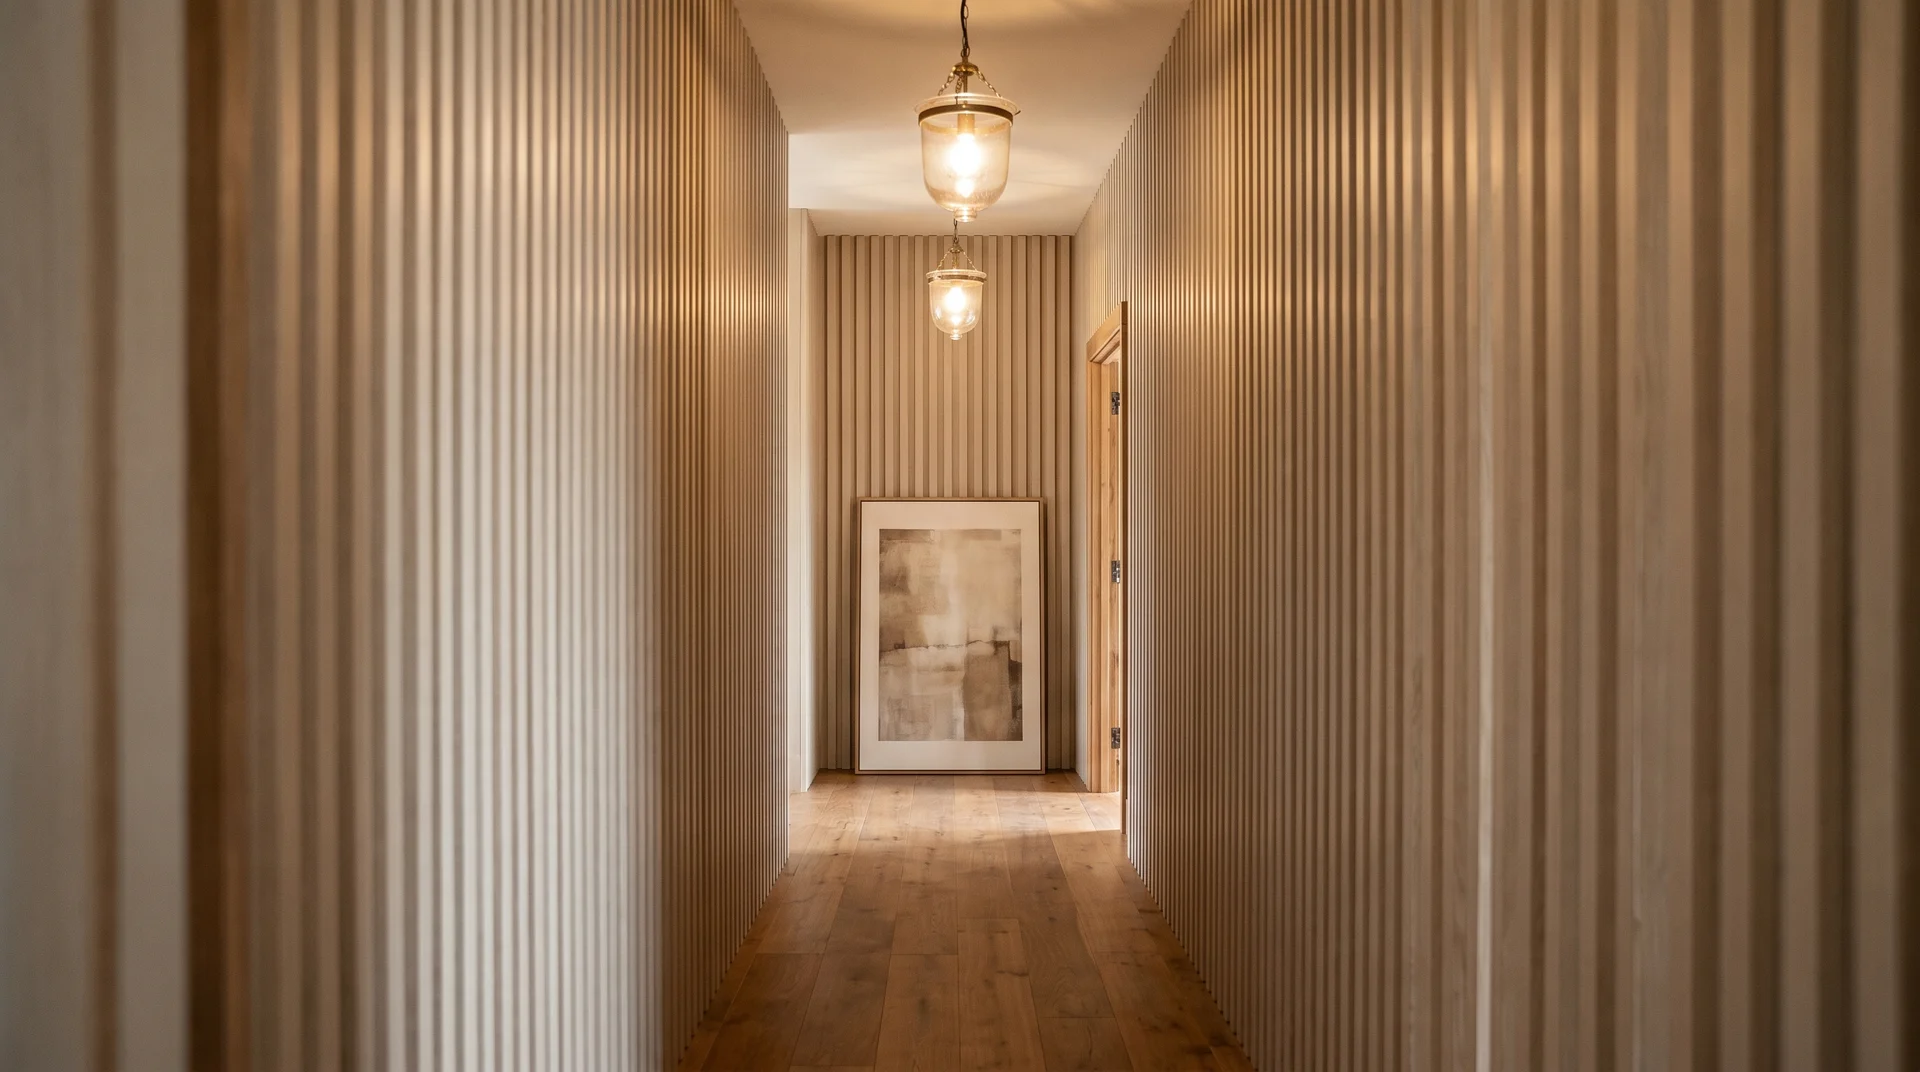
2. All One Color from Baseboard to Top Cap
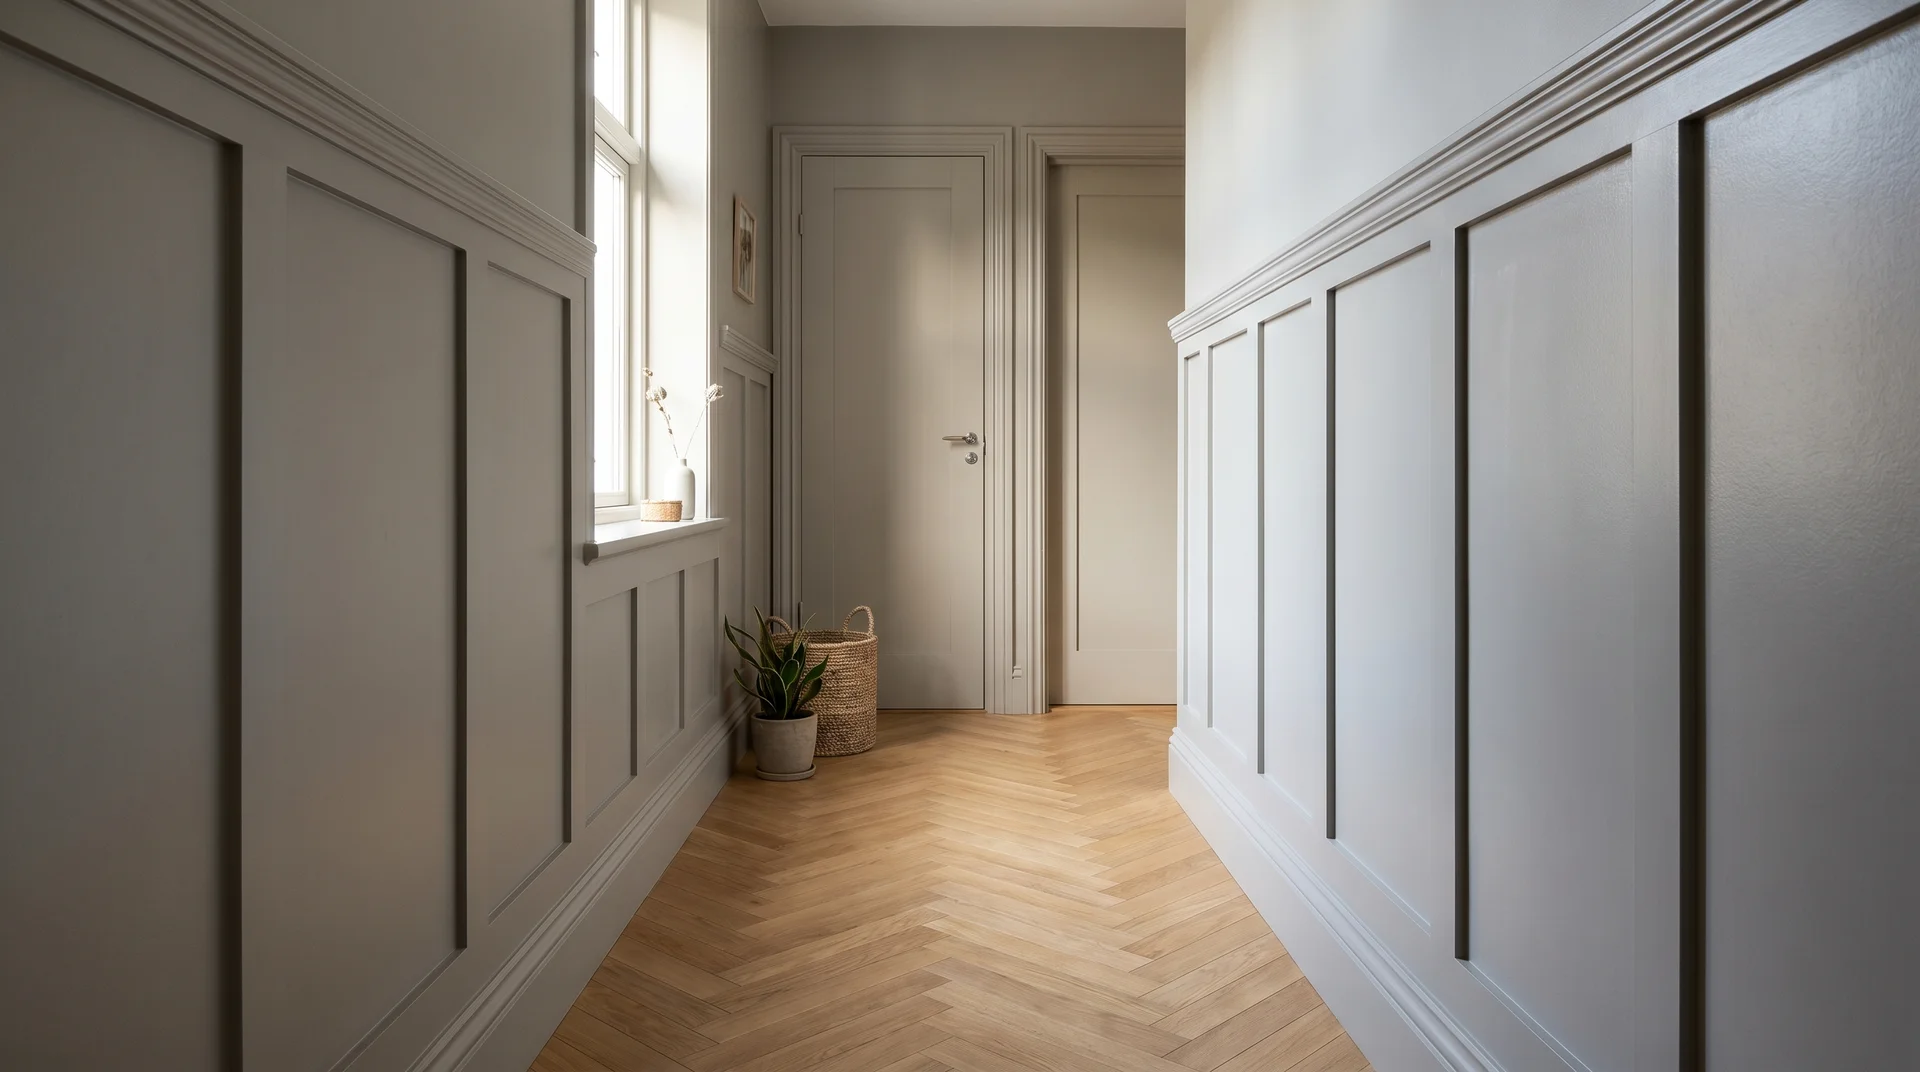
Paint every surface below the top cap the same shade. The shadow lines from the battens do all the visual work without any contrast. Test the color in the actual hallway first. Hallway lighting shifts colors more than any other room in the house.
- Materials Cost: $100 to $190
- Avoid if: Walls have heavy texture or visible damage
- Best For: Homes with neutral-painted trim and doors
3. Deep Color from Floor to Ceiling
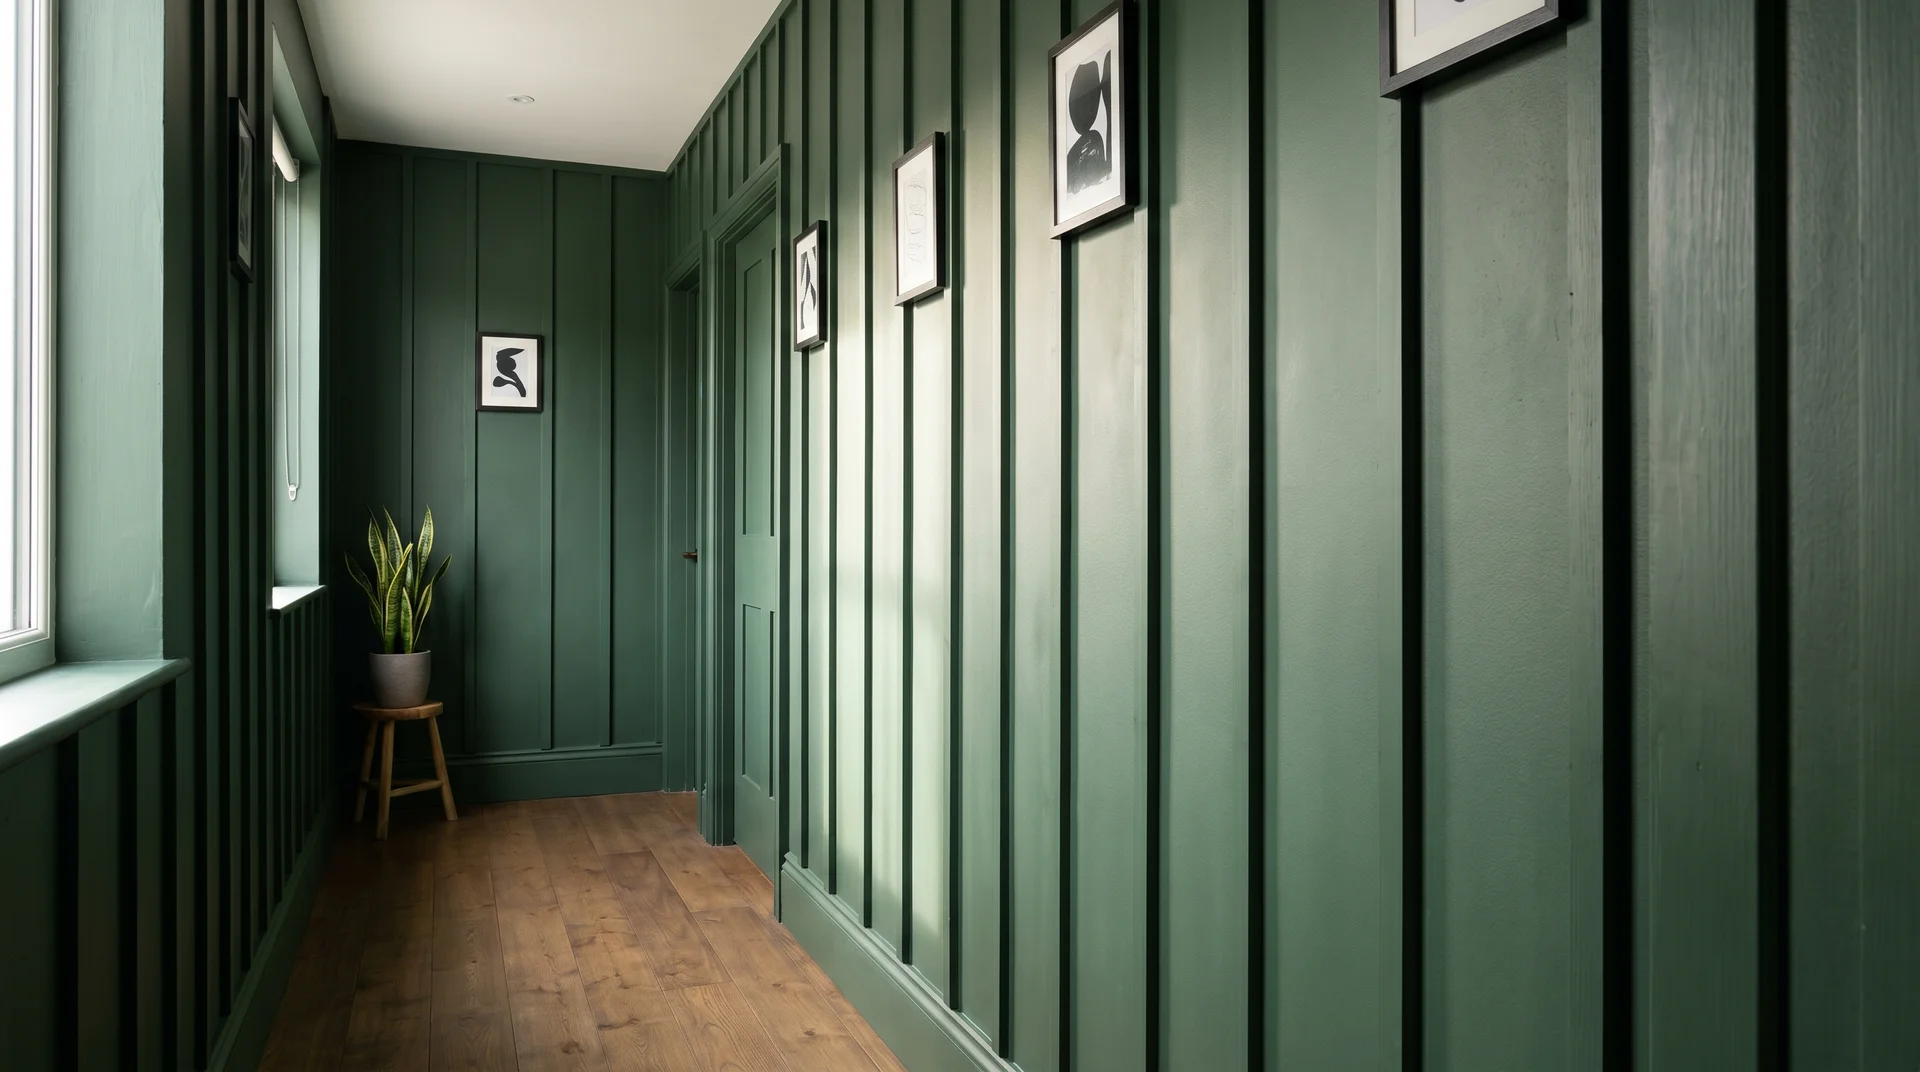
One saturated color on boards, upper wall, trim, and door frames. Forest green, warm charcoal, and navy produce the strongest results. Use a matte finish throughout. It hides wall imperfections that a satin finish would show under a dark shade.
- Materials Cost: $120 to $220
- Avoid If: Hallway is long with no windows
- Best For: Short hallways and entryways with natural light
4. Wide-Spaced Battens for a Modern Look
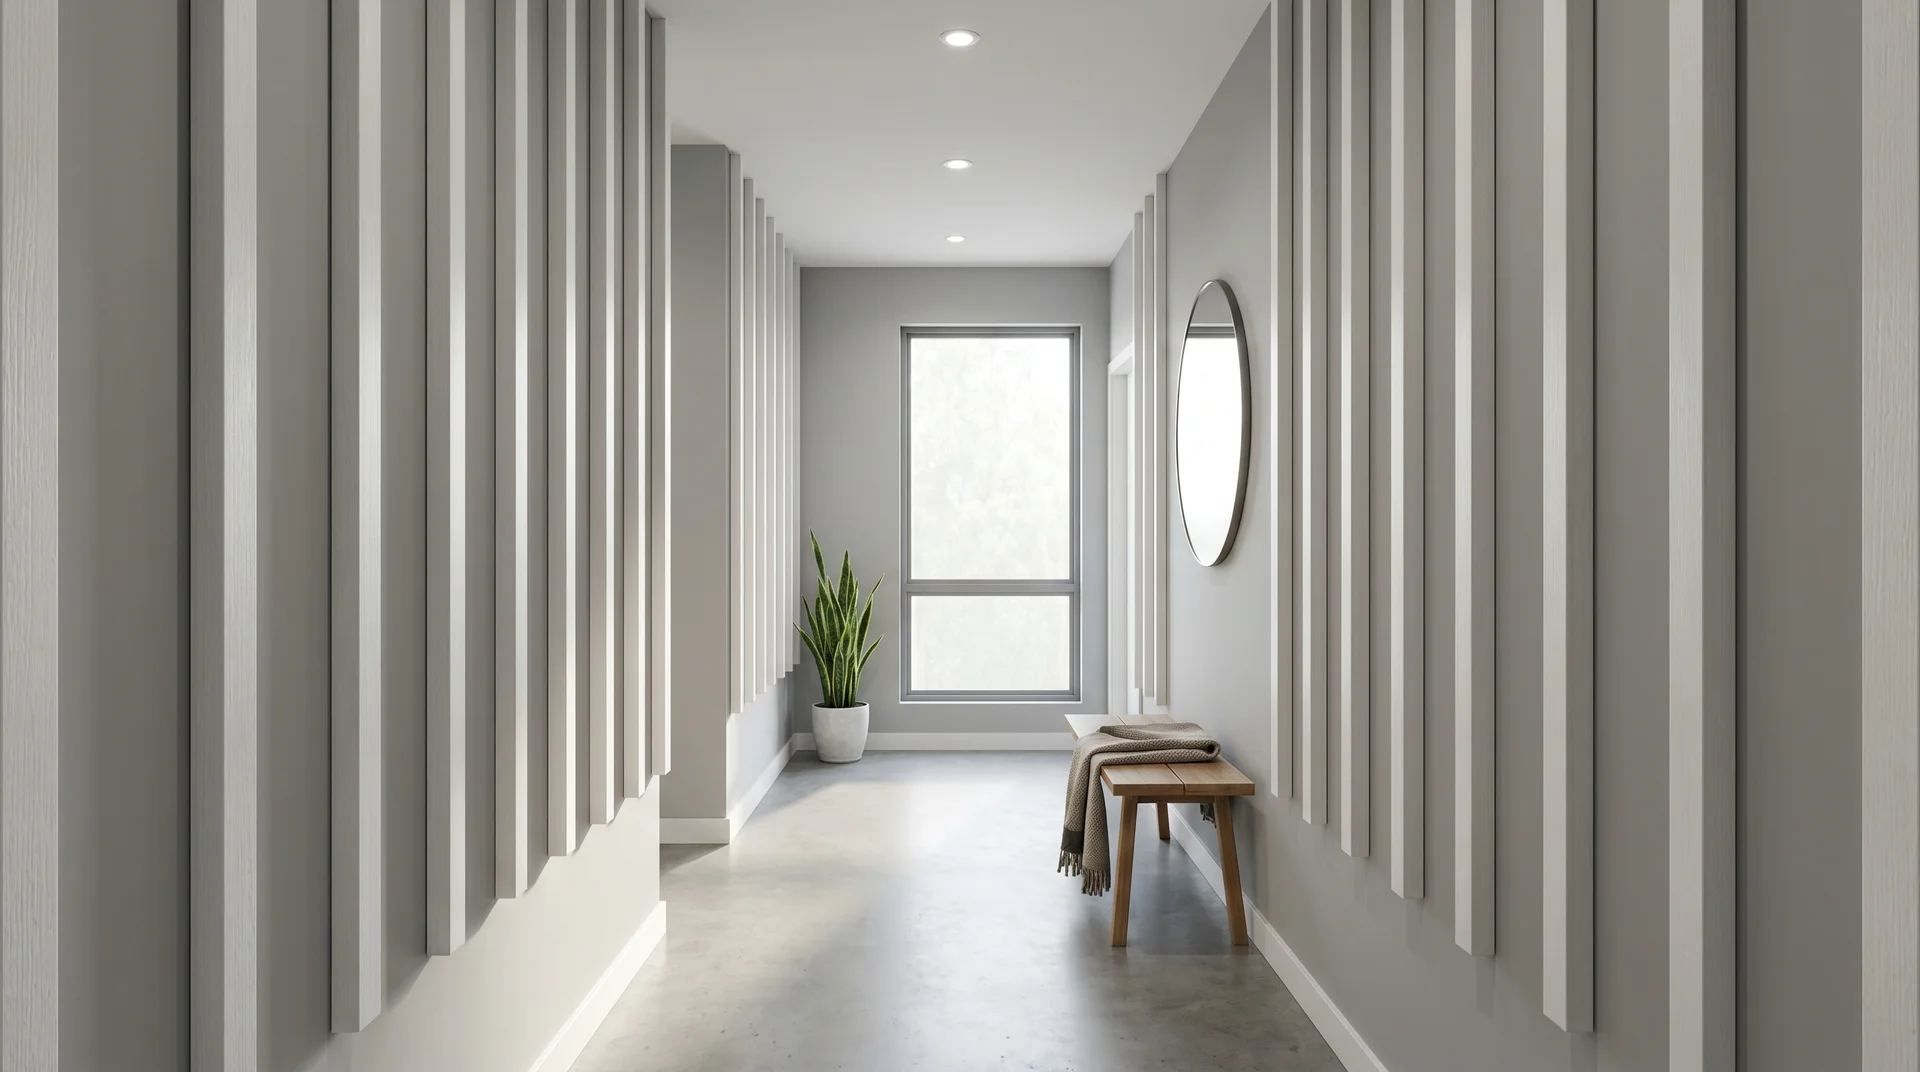
Push batten spacing to 18 to 24 inches instead of the standard 12 to 14. Fewer boards, cleaner lines, and lower material cost. Calculate spacing before cutting anything so the end gaps match the middle gaps exactly.
- Materials Cost: $75 to $150
- Avoid If: Home has traditional or ornate trim
- Best For: Contemporary homes and very narrow hallways
5. Full-Height Floor-to-Ceiling Boards
Battens run from the baseboard to the ceiling, with no top cap needed. The vertical lines make the ceiling read as taller. Check every board with a long level. A slight lean over 8 feet is far more visible than the same lean in a half-wall version.
- Materials Cost: $200 to $400
- Avoid If: Ceiling height is under 8 feet
- Best For: Entry halls and spaces meant to make a strong first impression
6. Widened Top Cap as a Display Shelf
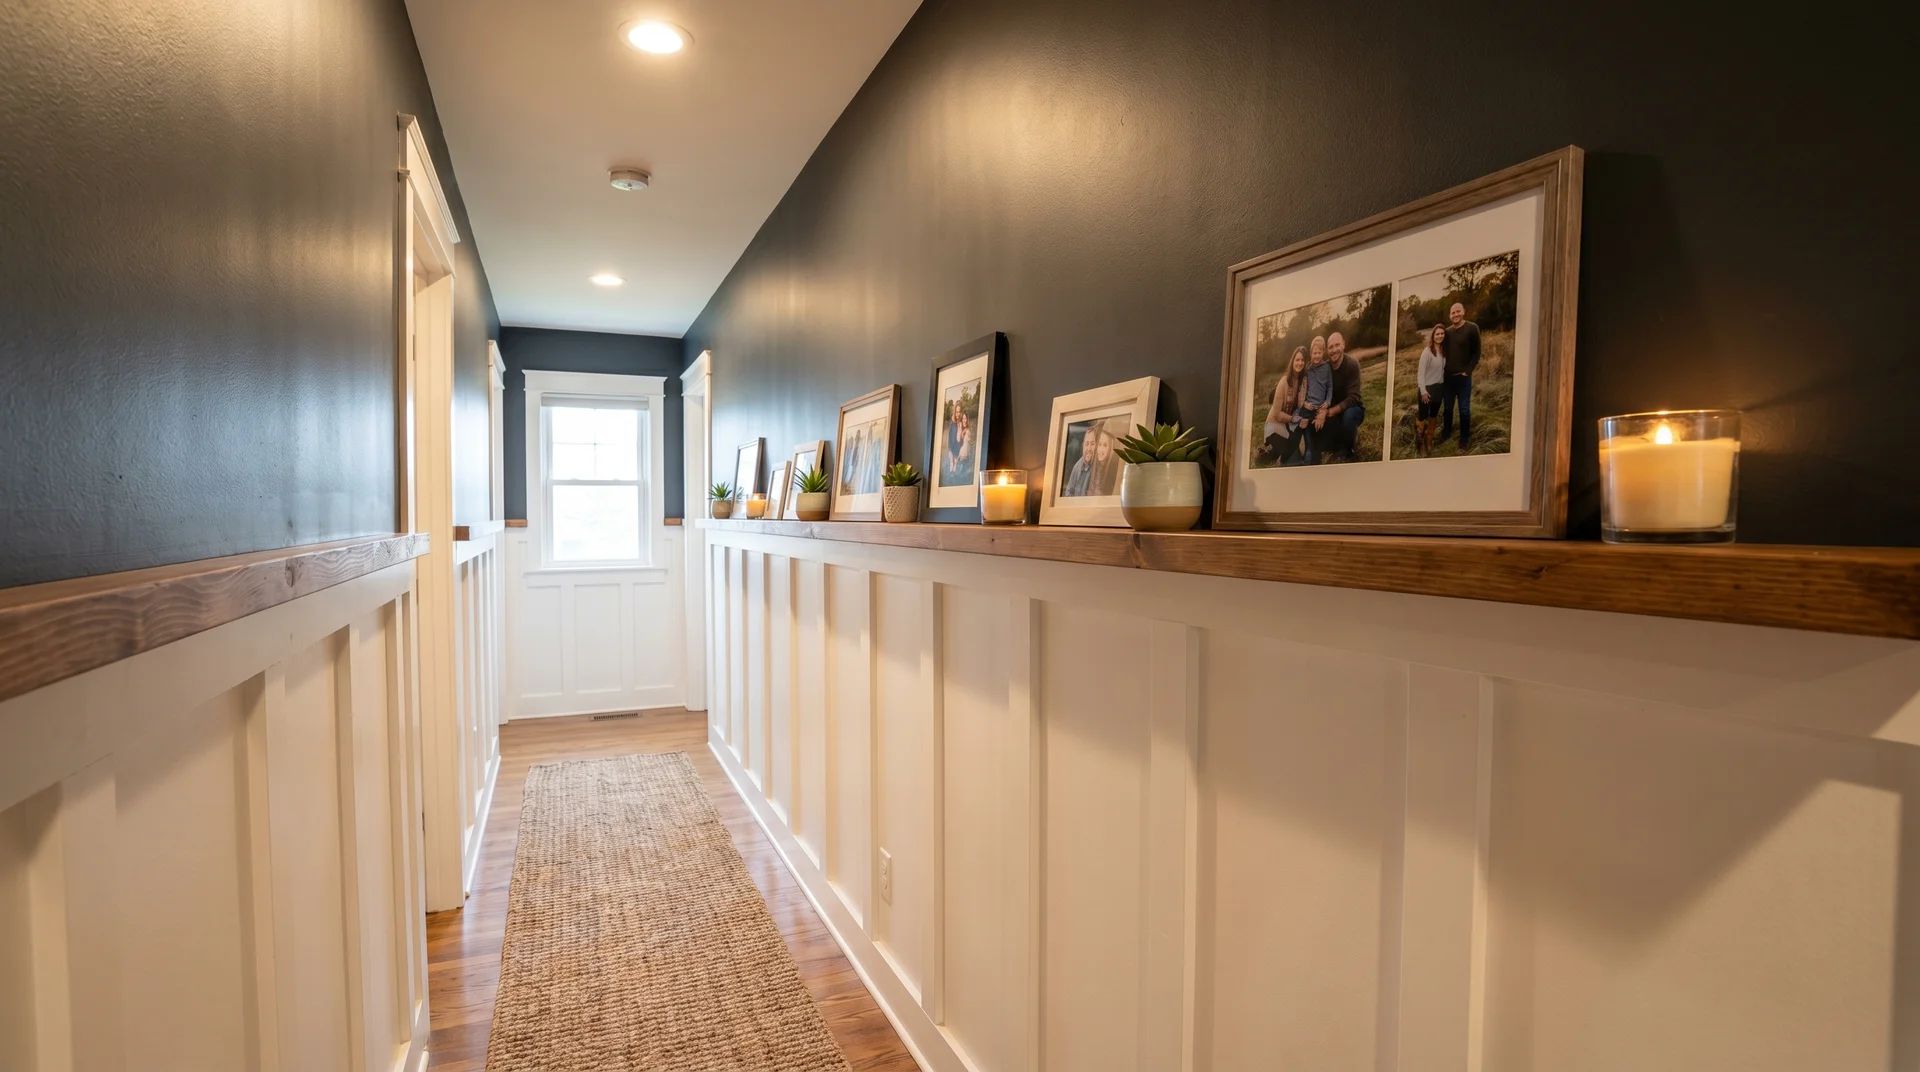
Swap the standard 1×2 cap for a 1×4 or 1×6 board. The ledge holds frames, plants, and candles at eye level. Nail the wider shelf directly into studs. A loaded shelf puts real sideways pressure on the installation over time.
- Materials Cost: $120 to $230
- Avoid If: Very high foot traffic with small children
- Best For: Hallways that need styling space without full shelving
7. Colored Boards on a White Wall
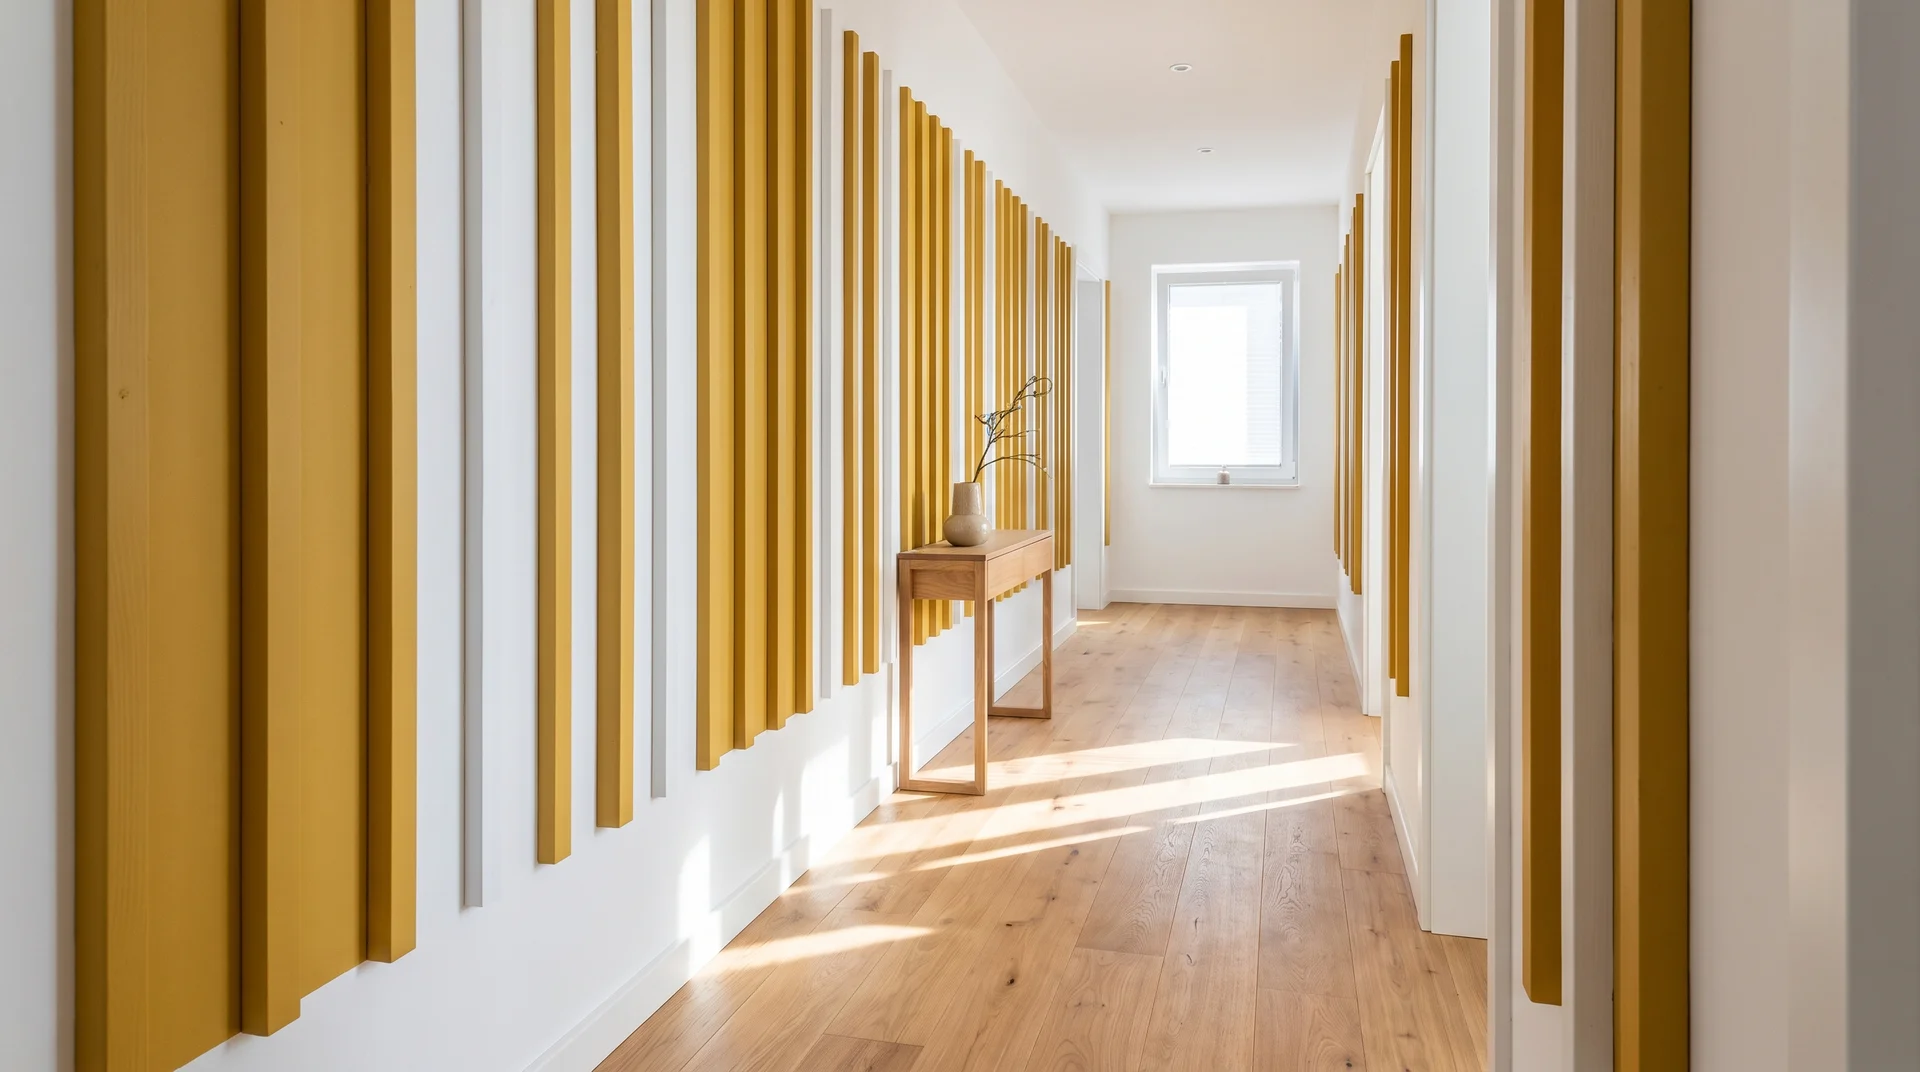
Paint the boards a bold color and keep the wall behind them white. The battens become the focal point rather than the background. The color shifts as natural light changes through the day, so test a sample on the wall before committing.
- Materials Cost: $100 to $200
- Avoid If: You plan to change the accent color scheme soon
- Best For: Hallways connecting to a room that uses the same accent color
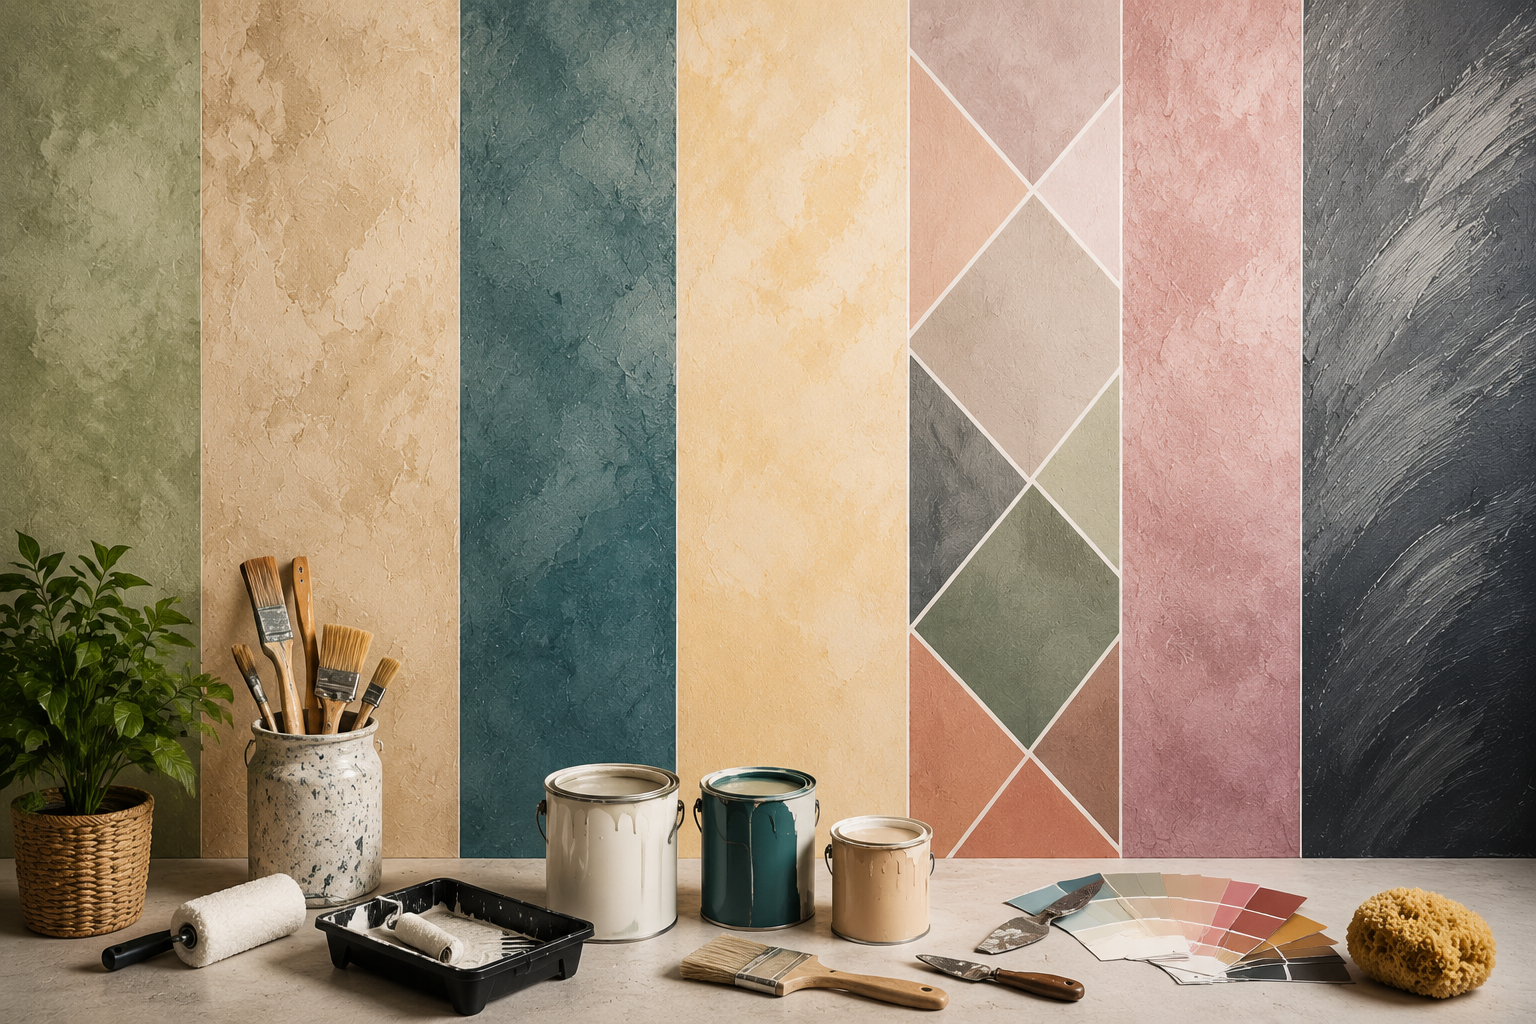
Color Combinations That Work Well in a Hallway
The color split between the board-and-batten section and the upper wall is where the design comes together. A few combinations that hold up well in hallway lighting:
- Whiteboards, dark upper wall: charcoal gray or deep navy above whiteboard and batten creates high contrast. It makes a narrow hallway feel more defined rather than cramped.
- Greige boards, warm off-white above: a low-contrast tonal pairing that works well in homes with natural wood floors and warm light fixtures.
- Dark boards, lighter wall above: forest green or slate blue below with soft white above give a formal, polished finish suited to traditional-style homes.
Test paint samples on the actual wall before committing. Hallway lighting, which is often artificial, shifts colors more than in any other room in the house.
How High Should Board and Batten Go?
Stopping at roughly half the wall height creates the most pleasing result for standard ceilings. For a standard 8-foot wall, half the height is around 48 inches.
If you are adding a top trim or cap, factor in that extra height so the finished top lands right around the halfway mark. Getting the height right trips up first-timers.
Standard Height for 8-Foot Walls
The most common recommendation for a standard 8-foot ceiling is to stop the board-and-batten at 48 to 54 inches above the floor. This gives you a balanced look without going too high or too low.
A good rule of thumb is that the vertical boards should reach around two-thirds of the wall height for walls that are 95 inches tall, which puts the boards at around 63 inches high.
The exact height is a personal choice. Here are the common options:
- 32 to 36 inches: lower and more subtle- works well in narrow hallways.
- 48 inches: the classic halfway point for 8-foot ceilings.
- 54 to 60 inches: slightly taller- creates a more dramatic effect.
- 60 inches with a small ledge brings the finished height to 61 inches, a clean option that adds a finished look without a full shelf.
Pro Tip: Measure your height from three different points along the wall. Floors are rarely perfectly level, and averaging the measurements gives you a more accurate result.
What to Put Above the Board and Batten?
Finishing the lower half feels great. Then you look at the upper wall and wonder what comes next.
Wallpaper is the most popular choice. Adding wallpaper above the board-and-batten makes it go much further. You get a striking pattern without having to spend money to cover the entire wall. Choose subtle patterns for narrow hallways and bolder prints for larger spaces.
Paint is the simplest option. White below and a deep color above are timeless. Two shades of the same color, darker below and lighter above, create a tonal look that feels intentional and considered.
Open shelving adds function above the treatment. Floating shelves work well for books and plants. Display ledges above a board-and-batten hallway wall create a gallery-style display that looks personal and well-planned.
Conclusion
A board-and-batten hallway treatment is one of the most satisfying home projects you can finish in a single weekend. The materials cost less than a few hundred dollars. The result looks like it cost far more.
Pick a design idea that fits your home first. Then match your height, spacing, and color to that specific look. Getting those three things right is what separates a finished result from one that looks improvised.
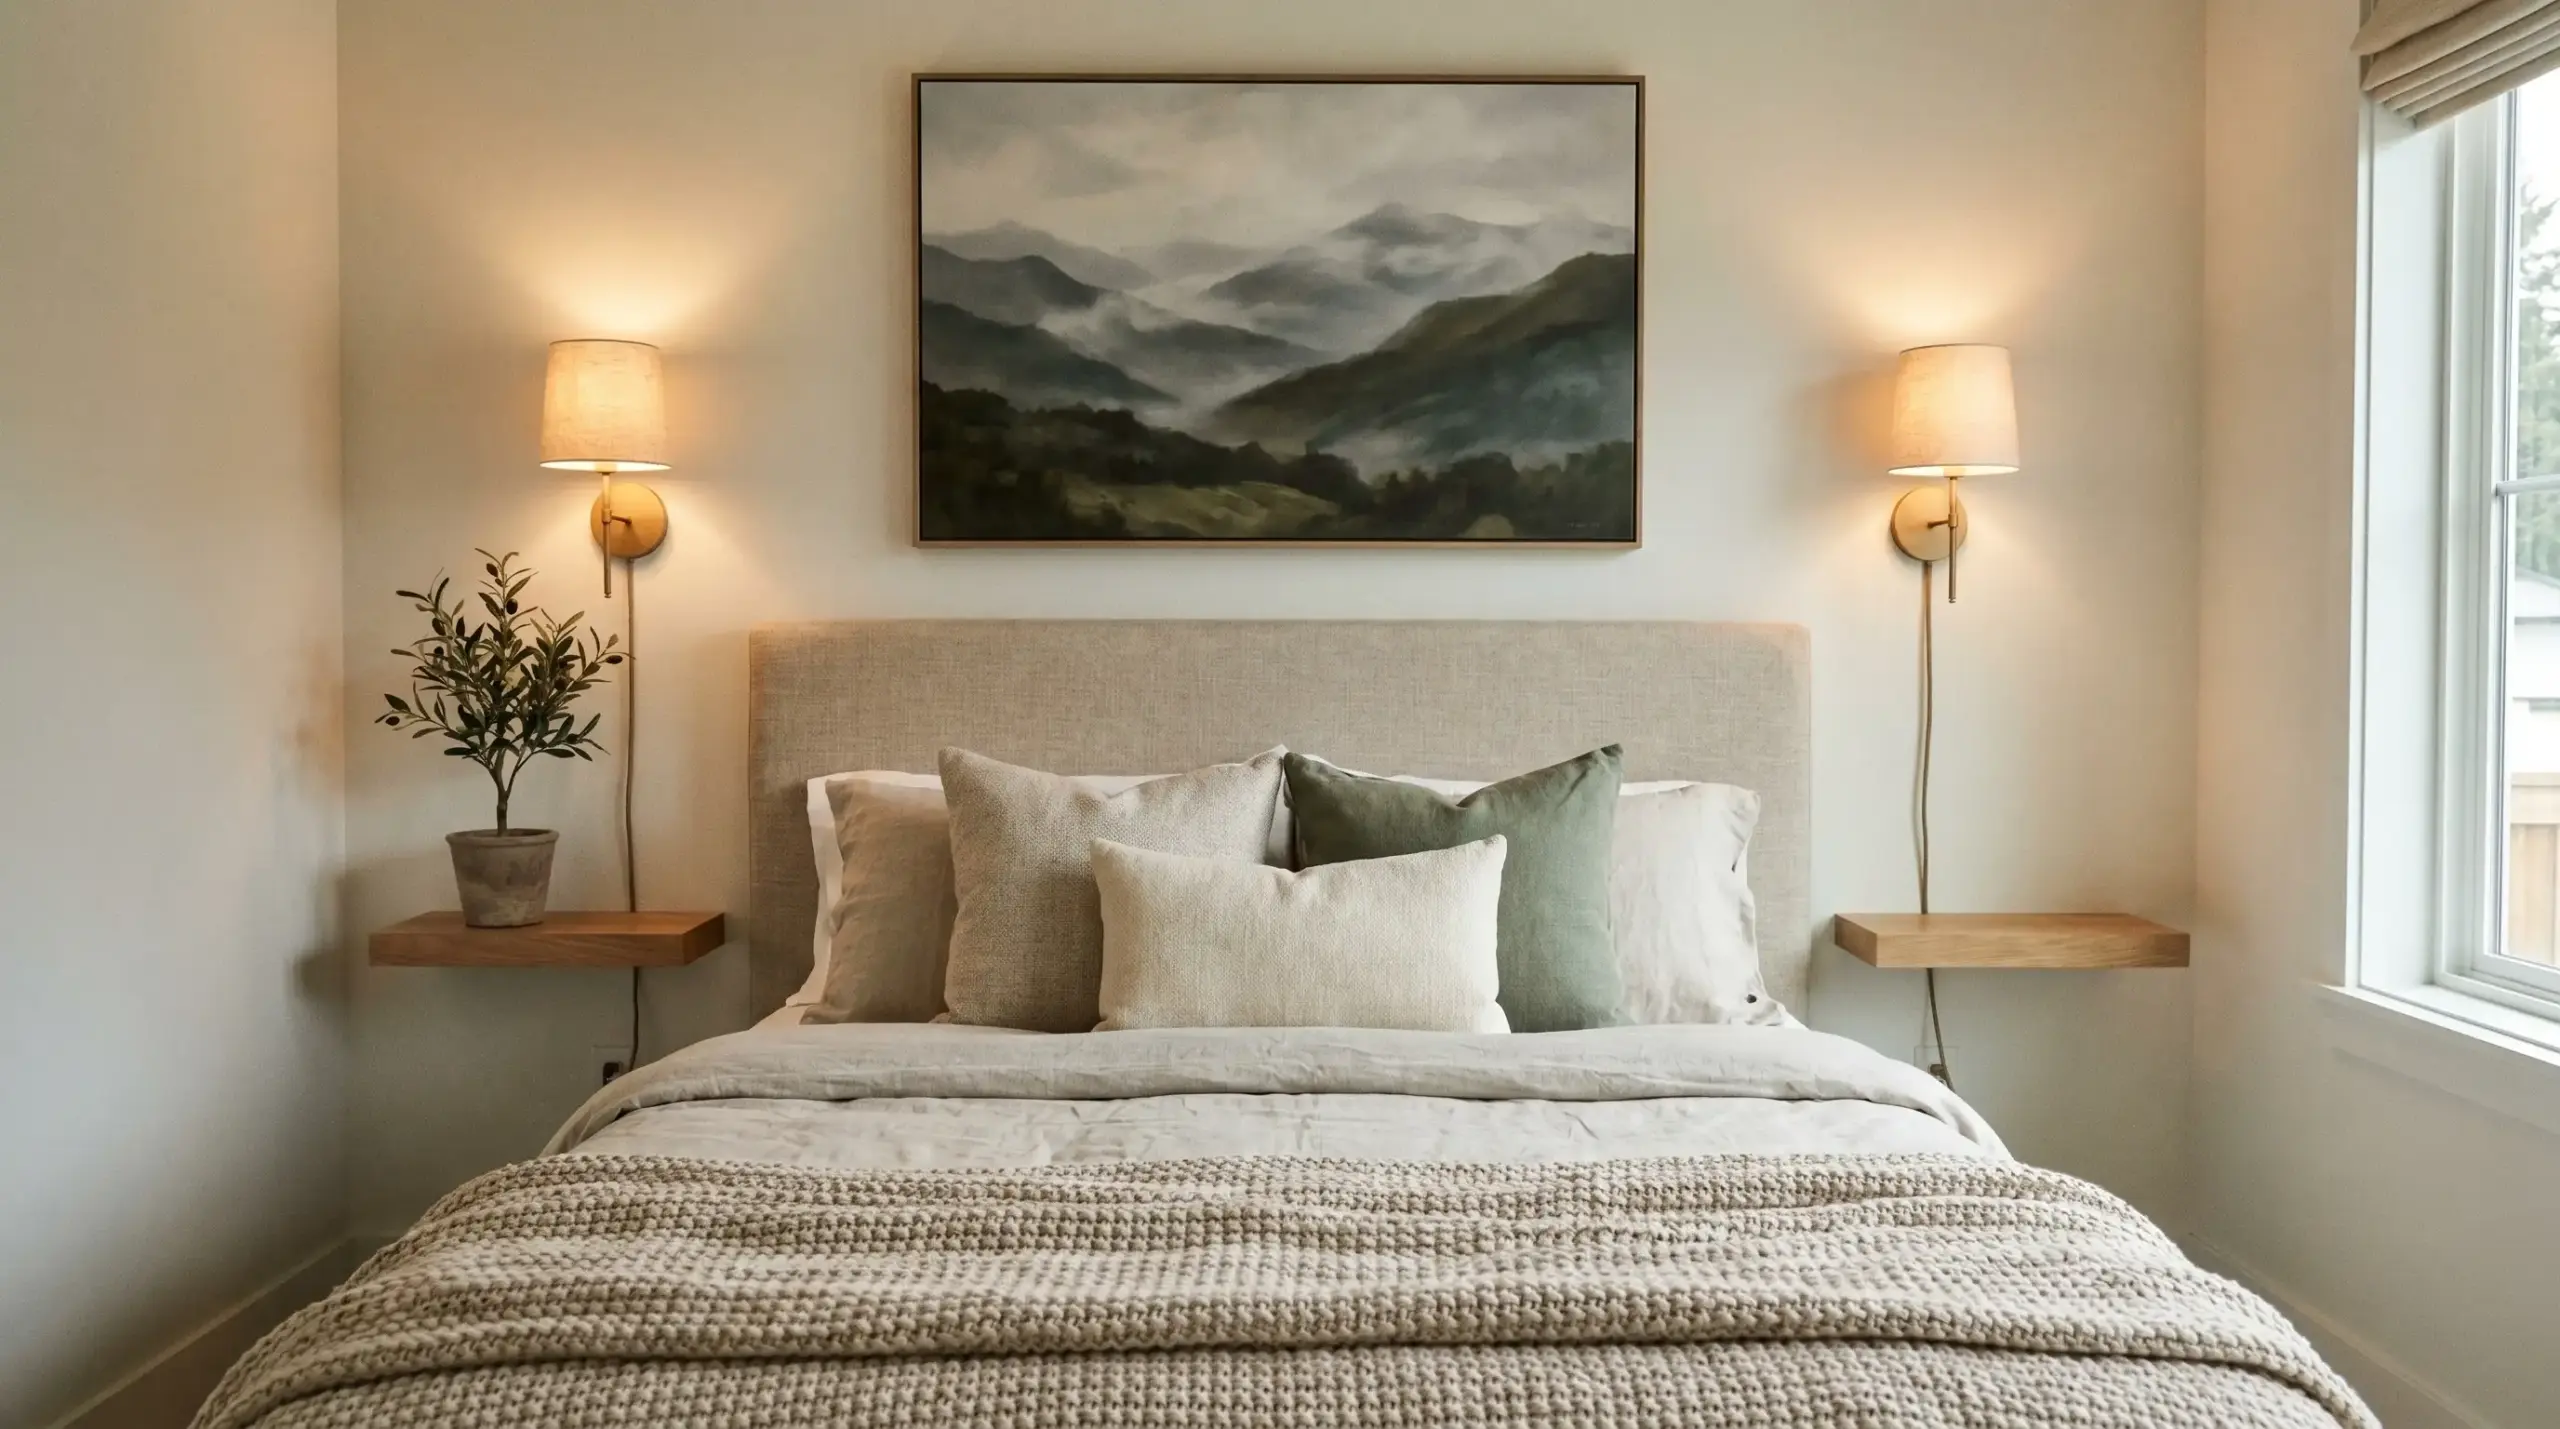
Start with one wall. The same technique works in bedrooms, living rooms, and bathrooms once you have done it once.
Frequently Asked Questions
What Are the Disadvantages of Board and Batten?
It can be time-consuming and costly to install, especially in long hallways, and it can highlight wall imperfections if not done precisely. Maintenance and repainting can also be more demanding than flat walls.
Is Board and Batten Still Trendy?
Yes, it remains popular for adding texture and architectural interest, and it fits both modern and classic interiors. Its timeless appeal works in various home styles.
What Is The Purpose Of Board-And-Batten?
Board-and-batten is used for buildings such as barns and garden sheds because it is affordable and straightforward to assemble.
What Are The Different Types Of Board-And-Batten?
Whileboard-and-batten siding is typically made of wood, but it can also be made of vinyl, fiber cement, or steel.
Will Board-And-Batten Make a Hallway Look Smaller?
Dark colors or wide battens in narrow hallways can make the space feel more enclosed, so lighter shades and careful spacing are recommended. Proper lighting helps keep the hallway open and inviting.