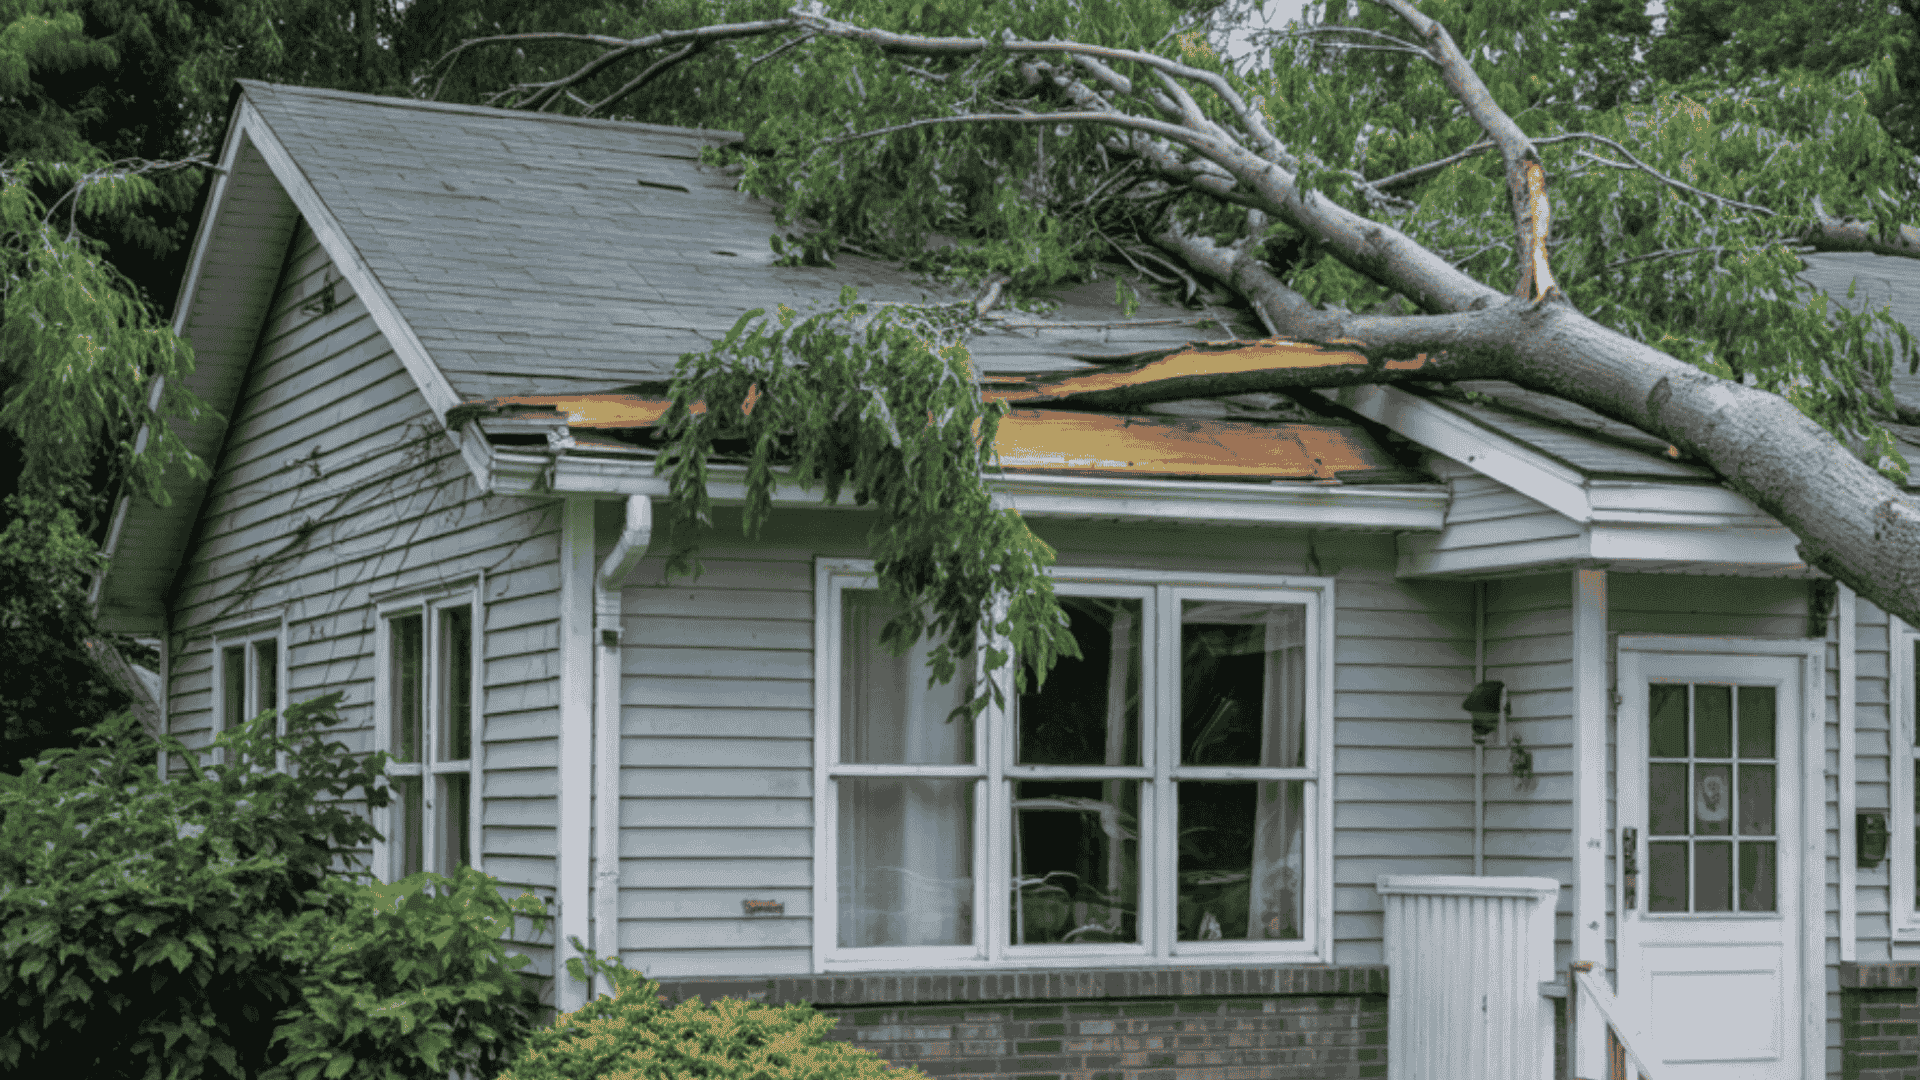
Did your roof survive a storm, but look worse for wear? Storm damage to your roof requires immediate action.
Most Landlords make critical mistakes in the first 24 hours, costing them thousands in denied insurance claims.
Missing shingles, water stains on your ceiling, or debris in your yard signal potential problems that need quick attention.
The difference between a fully covered claim and paying out of pocket often comes down to how fast you document damage and contact your insurer.
Insurance companies scrutinize delayed reporting and inadequate evidence. Without proper photos, professional inspections, and timely notification, even legitimate storm damage claims get rejected.
Taking the proper steps now protects both your home and your wallet. Your response speed matters more than you think.
What Is Considered Storm Damage to a Roof?
Storm damage refers to sudden roof damage caused by a specific weather event. Insurance companies cover damage from wind, hail, lightning, or flying debris.
They don’t cover gradual wear from age or poor upkeep. Why the difference matters: A shingle that cracks from sun exposure over 15 years won’t get covered. But that same shingle torn off by 60 mph winds does. Insurance pays for sudden impact, not slow wear.
The timing of damage is what insurers look at first. Your claim approval depends on proving the storm caused the problem, not years of neglect. Storm damage doesn’t always show up immediately. Watch for these hidden signs
Signs of hidden damage below the surface:
- Shingle edges lift slightly but don’t come off completely
- Dark spots appear where granules are missing from hail impact
- Soft or spongy areas form on the roof when you press gently
- Ceiling stains or water marks show up inside your home
- Cracked or split flashing around chimneys and vents
Visible damage is easy to photograph: missing shingles, dented vents, torn flashing. Hidden damage requires professional tools such as moisture meters and infrared cameras to find and document.
Types of Roof Storm Damage
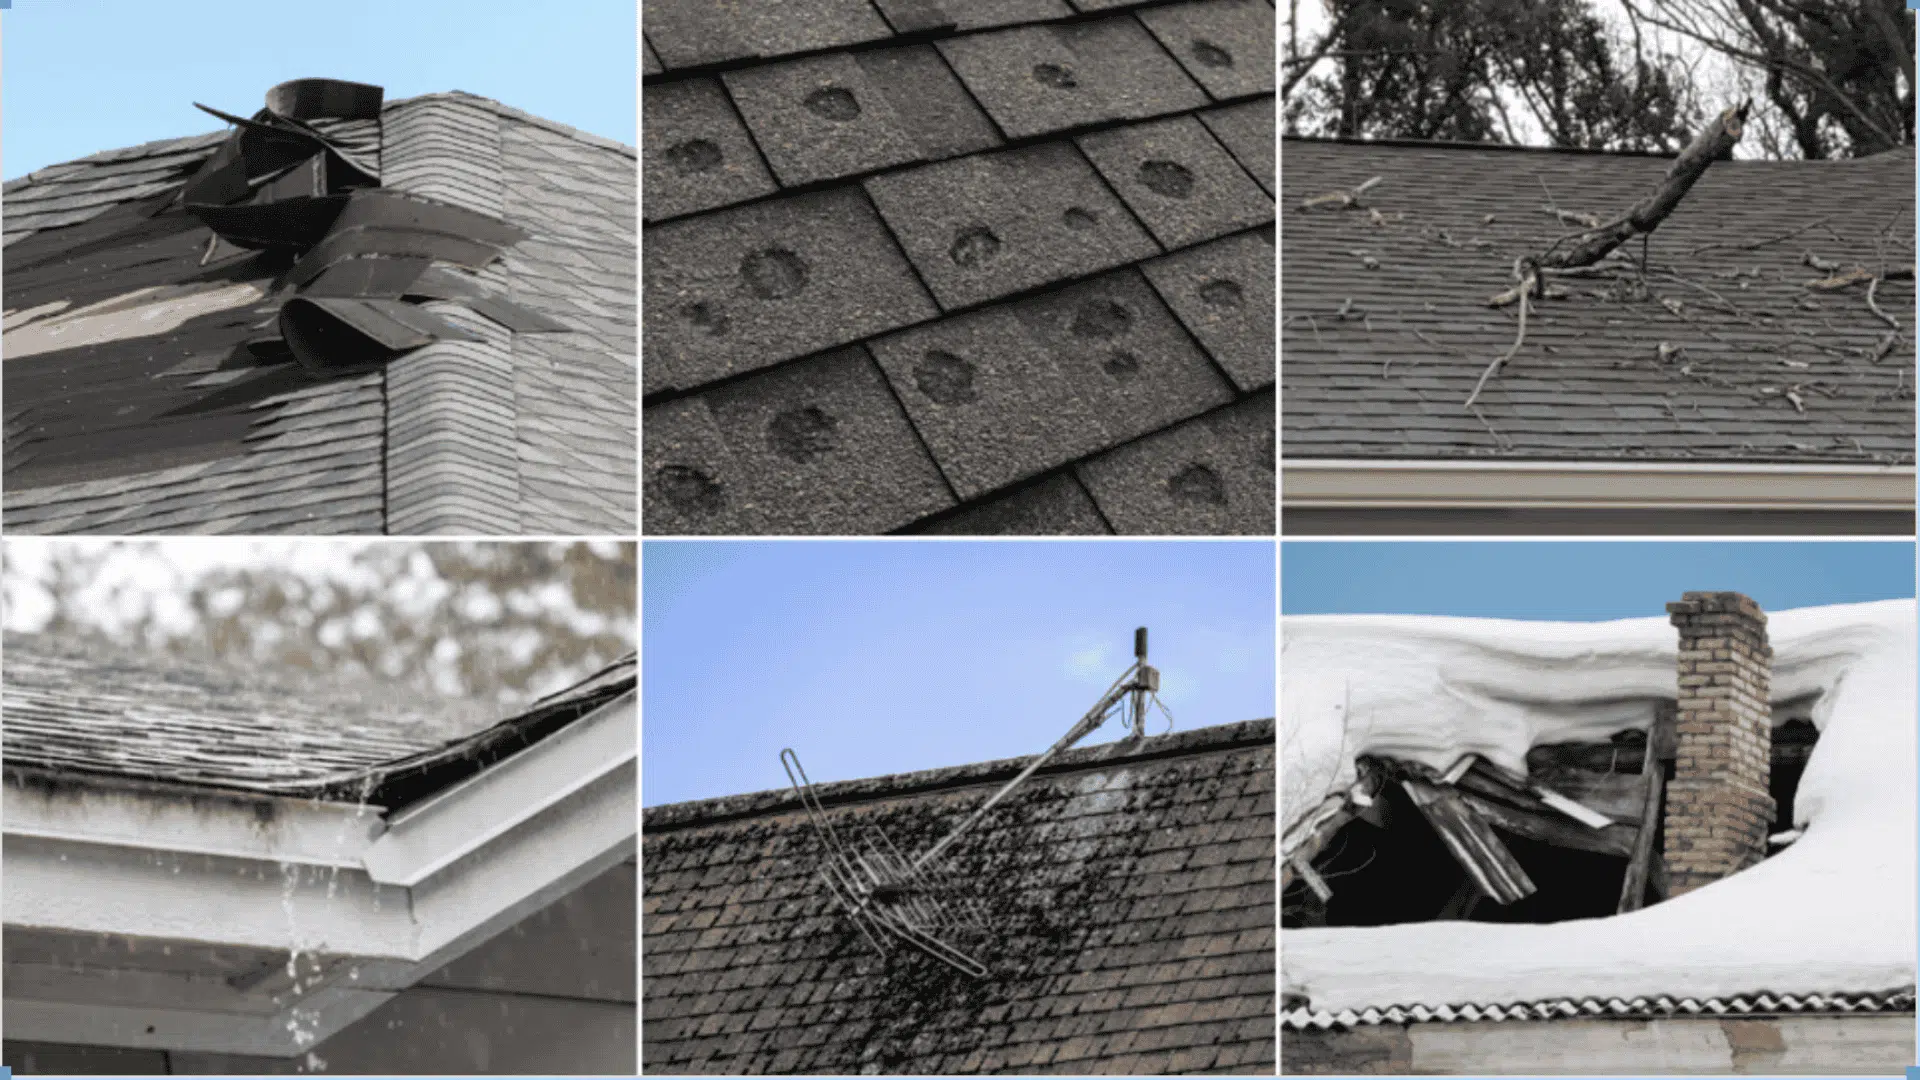
Different storms cause different types of roof damage, and knowing what to look for helps you document your claim accurately.
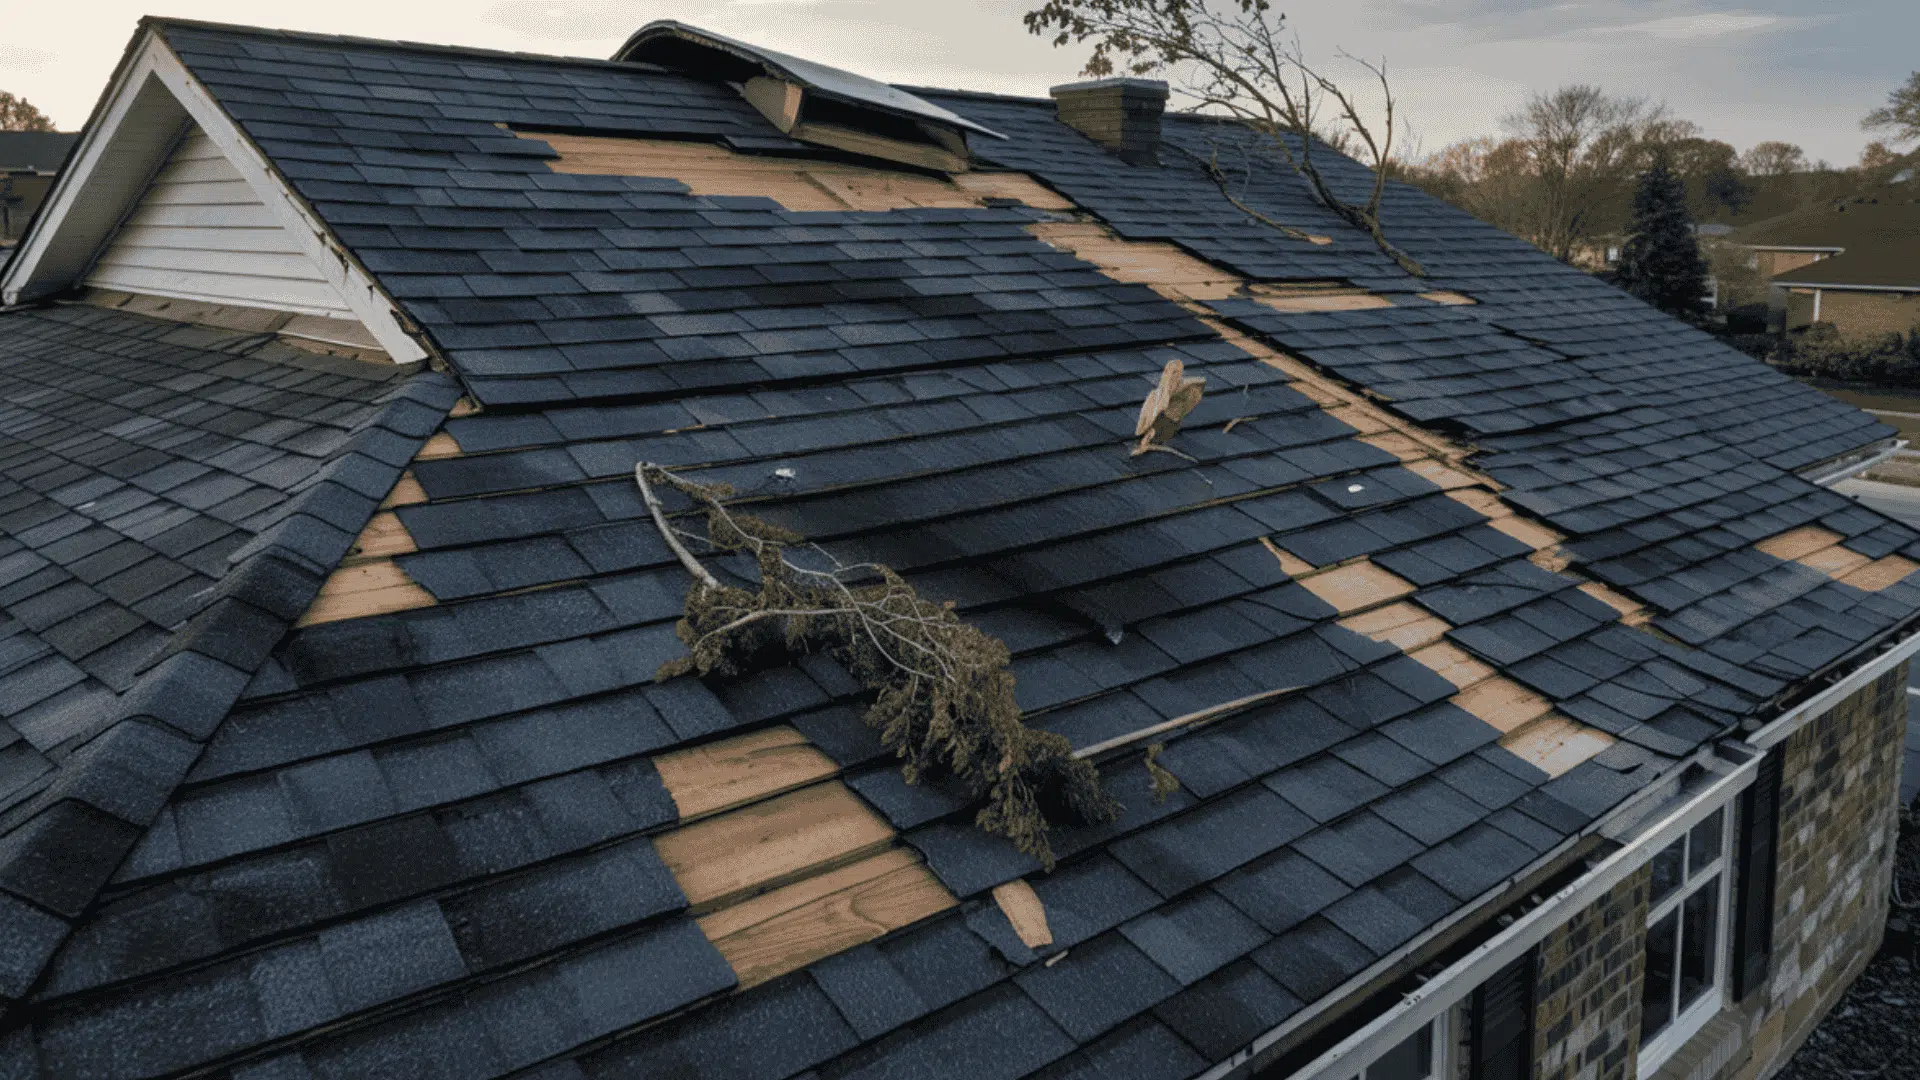
1. Wind damage: Wind damage happens when gusts lift or tear shingles from your roof. You’ll see missing tabs, creased shingles where they bent back, or entire sections blown off. Wind speeds above 50 mph can break the seal between shingle layers.
2. Hail damage: Hail damage creates bruising on asphalt shingles and dents on metal components. Granule loss appears as dark spots where the protective coating wore away. Metal vents, flashing, and gutters show circular dents.
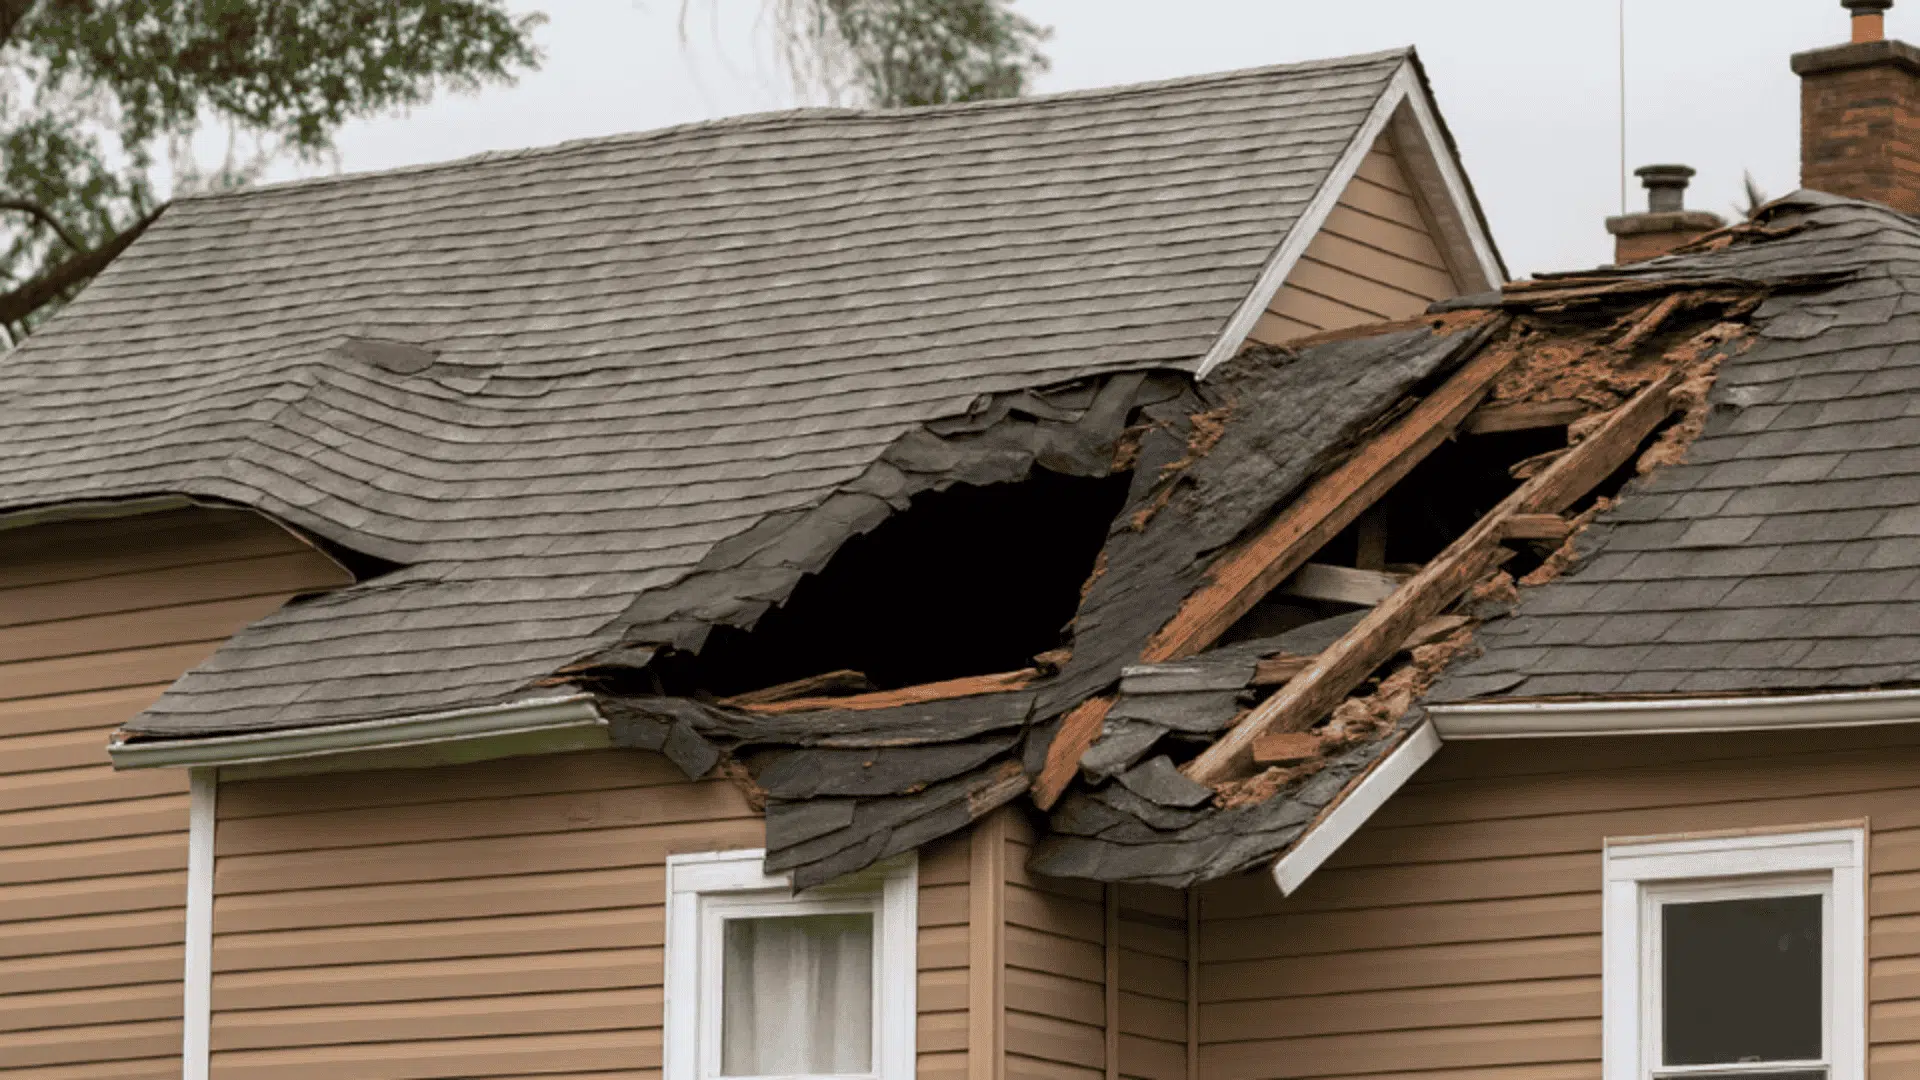
3. Debris Damage: Debris impact damage occurs when tree branches, patio furniture, or other flying objects strike your roof. Punctures, cracks, and broken decking result from heavy impacts. Even small branches can tear shingles or damage underlayment during high winds.
4. Heavy rain: Heavy rain and water intrusion exploit existing weak spots in your roof. Water seeps through damaged flashing, worn valleys, or compromised shingles. Once inside, it saturates insulation, rots decking, and creates interior ceiling stains.
5. Lightning and electrical damage: Lightning and electrical damage can burn holes through roofing materials or split wood decking. Strikes often travel through metal components such as vents and gutters.
6. Ice and snow damage: Ice and snow damage build up as ice dams along the roof edges. Melting snow refreezes at the eave, forcing water under shingles. Heavy snow can stress roof structures and, in extreme cases, cause sagging or collapse.
Each damage type requires specific inspection methods and documentation approaches for insurance purposes.
How to Inspect Your Roof After Storm Damage?
After identifying potential storm damage, you need to inspect safely and document thoroughly. Follow these three inspection levels to build a strong insurance claim.
1. Safe Ground-Level Roof Inspection
Start from the ground using binoculars or your phone’s zoom feature. Check for missing, lifted, or curled shingles and look for bare patches where granules have washed away.
Examine metal components for dents on flashing, downspouts, or vents. Take clear photos and label each: “north slope missing shingles 11/18/2025” with circles or arrows highlighting damage.
2. Indoor & Attic Inspection
Head to your attic with a flashlight and look for wet insulation that appears darker or feels damp. Follow water trails along rafters back to their entry point. Check for light coming through the roof decking and feel for soft spots or moisture.
Move to interior living spaces and inspect ceilings for brown or yellow stains. Press gently on discolored areas—soft drywall means water damage. Indoor moisture doesn’t always appear immediately; it can take 24-48 hours to become visible.
3. Professional Storm Damage Roof Inspection
Licensed contractors use specialized tools to find subsurface hail bruising, underlayment tears, and hidden water retention. They inspect ridge-and-valley areas where damage tends to concentrate.
Many use drone documentation to capture high-resolution roof images. Professional inspections directly affect insurance approval rates. Adjusters trust contractor reports over homeowner photos alone.
What To Do Next After Roof Storm Damage?
After inspecting your roof and documenting any visible damage, your next steps depend on what you found and its severity.
If you see missing shingles, schedule a professional inspection within 48 hours, as exposed underlayment can fail quickly in the event of additional rain.
If you find light attic moisture, install a tarp safely over the affected area from a ladder without climbing on the roof, then call your insurer immediately, as moisture spreads quickly through insulation and wood.
If you have active leaks or roof sagging, this is an emergency. Call a 24-hour roofing service right away and evacuate rooms below the damaged area because sagging indicates structural compromise that could worsen suddenly.
If you only see granules in gutters, request a hail damage inspection, even without other obvious signs, because granule loss often indicates hidden impact damage that may not show up in photos but still qualifies for insurance coverage.
Acting quickly on these triage steps prevents claim denials since insurance companies scrutinize delayed repairs and extended damage timelines. Your response speed demonstrates that you took reasonable steps to minimize losses, a requirement in most policies.
Documenting Roof Damage for an Insurance Claim
Proper documentation is the difference between a denied claim and full coverage. Organize your evidence systematically from day one.
1. Create a dedicated folder on your phone or computer dated with the storm date and organize all evidence chronologically.
2. Photograph all roof slopes from multiple angles with close-ups of specific damage, wide shots of your entire house, and gutters filled with granules or debris.
3. Take photos of debris on the roof or in your yard, branches, shingles, or objects that prove storm severity, plus attic moisture and interior damage like ceiling stains.
4. Collect and photograph receipts for temporary repair, including tarp purchases, bucket rentals, or emergency service invoices that are typically reimbursable.
5. Download weather alerts and radar screenshots from NOAA and Weather.gov showing wind speeds, hail size, and storm timing for your ZIP code as third-party evidence.
Strong documentation with timestamps, multiple angles, and official weather data directly increases claim approval rates and payout amounts.
Roof Storm Damage Repair Costs & What Insurance Covers
Cost factors and insurance coverage determine your out-of-pocket expenses after storm damage.
| Repair Type | Typical Cost Range | What Insurance Covers | What Insurance Denies |
|---|---|---|---|
| Few replaced shingles | $300 – $800 | Sudden storm damage minus deductible | Pre-existing damage |
| Partial re-roofing (wind damage) | $3,000 – $8,000 | Materials, labor, debris removal | Poor maintenance |
| Full roof replacement (hail) | $8,000 – $25,000+ | Interior damage from covered roof damage | Wear and tear |
| Premium materials (metal, tile, slate) | Higher costs | “Like kind and quality” replacements | Unrelated upgrades |
Cost factors that increase your bill: Steep roof pitch, multiple valleys, dormers, architectural features, and regional labor rates in coastal or urban areas.
Coverage key: Accurate professional inspections with detailed reports and material specifications directly affect your payout amount. Vague assessments let adjusters minimize claim values.
How to Make Temporary Roof Repairs After Storm Damage?
If you can safely contain damage without climbing on your roof, take these protective steps while waiting for professional help.
What To Do:
- Use heavy-duty tarps secured with sandbags or 2×4 boards without nailing into the roof.
- Place buckets under active leaks and change them frequently.
- Use plastic sheeting to redirect water away from furniture and electronics.
- Absorb standing water immediately with towels or a wet vacuum.
What NOT To Do:
- Do not walk on a wet roof; slippery surfaces cause falls.
- Do not climb steep pitches without proper safety equipment.
- Avoid temporary repairs during storms or high winds.
- Do not nail directly into your roof; additional punctures create more leak points.
Document every step with photos showing the damage before your fix, during installation, and after securing it. This visual timeline proves you took reasonable mitigation steps, which insurers require before approving claims.
How to Choose a Roofing Contractor After Storm Damage
The contractor you hire after storm damage determines whether your repairs meet insurance standards and avoid costly mistakes.
1. Local license and current insurance: Verify state licensing board status and request copies of the certificate of insurance showing liability and workers’ compensation coverage.
2. Verifiable reviews and reputation: Check Google Business profile, Better Business Bureau rating, and references from jobs completed in the last six months.
3. Local business address: Avoid P.O. boxes or out-of-state addresses; local contractors remain accountable and have reputations to protect.
4. Reasonable payment terms: Legitimate contractors request 10% or less upfront and payment upon completion, not large deposits before work starts.
5. No pressure tactics: Contractors offering same-day-only deals or promising to “waive your deductible” are committing insurance fraud.
Taking the time to vet your contractor now prevents insurance claim complications and poor workmanship that can cost more to fix later.
Conclusion
Storm damage to your roof demands immediate response. The actions you take on the first day determine whether insurance covers your repairs or leaves you paying thousands out of pocket.
Quick documentation captures evidence before rain washes it away. Early professional inspections catch hidden damage that worsens over time.
Let licensed contractors handle dangerous inspections while you focus on photographing visible damage and protecting your interior from water intrusion. The strength of your insurance claim depends on organized evidence. Timestamped photos, weather reports, and professional contractor assessments turn denied claims into approved payouts.
The difference between full coverage and partial reimbursement often comes down to the quality of the documentation.
Have roof storm damage questions? Share your experience in the comments below and help other homeowners through this stressful process.