A fresh coat of paint can change the entire feel of a room. But the real difference comes from the painting techniques you choose for the walls.
Most of us just grab a roller, dive in, and cross our fingers. But that’s usually how you end up with patchy spots, frustrating streaks, and a weekend you’ll never get back.
The truth is, the way you load your brush or sweep a roller matters more than the name on the paint can. It’s those small, professional habits that determine whether your walls look “DIY” or “designer” for years to come.
In this guide, I’ll walk you through room preparation, tool selection, wall painting methods, and the mistakes that trip up most beginners. Every tip here comes from real project experience.
Let’s get started.
How to Prepare a Room for Painting?
To prep your walls for painting, follow these essential steps to ensure a smooth and lasting finish. Proper preparation helps your paint adhere better and last longer, avoiding common issues like peeling and uneven coverage.
- Clean the Surface: Remove dust, dirt, and grease by wiping the walls with a damp cloth or sponge. A clean surface ensures better paint adhesion.
- Repair Damage: Fill cracks or holes with spackling or wall filler. This step creates a smooth surface for an even paint application.
- Sand the Walls: Lightly sand the wall once the repairs are dry. Sanding helps smooth out rough spots and old paint, ensuring a clean, even coat.
- Apply Primer: Use a primer suited to your wall type and paint. Primer helps the paint stick and enhances color coverage, especially on new or patched surfaces.
- Tape the Edges: Protect trim and baseboards with painter’s tape. This keeps the paint lines crisp and prevents accidental smudges.
Pro Tip: After sanding, run your hand across the wall. If it feels rough, sand again. This small check makes a noticeable difference in the final coat.
Basic Painting Techniques for Walls
When painting walls, mastering basic techniques ensures a flawless finish. These simple steps will help you achieve smooth, even coverage and long-lasting results.
| Technique | Description |
|---|---|
| Cutting In | Use a brush to paint edges along trim and corners before rolling. |
| Rolling | Roll paint in an “M” or “W” pattern to evenly cover large areas. |
| Back-rolling | After rolling, use a dry roller to smooth out the surface. |
| Feathering | Blend edges where fresh paint meets dried areas to avoid marks. |
| Multiple Coats | Apply several thin coats for even coverage, allowing each to dry. |
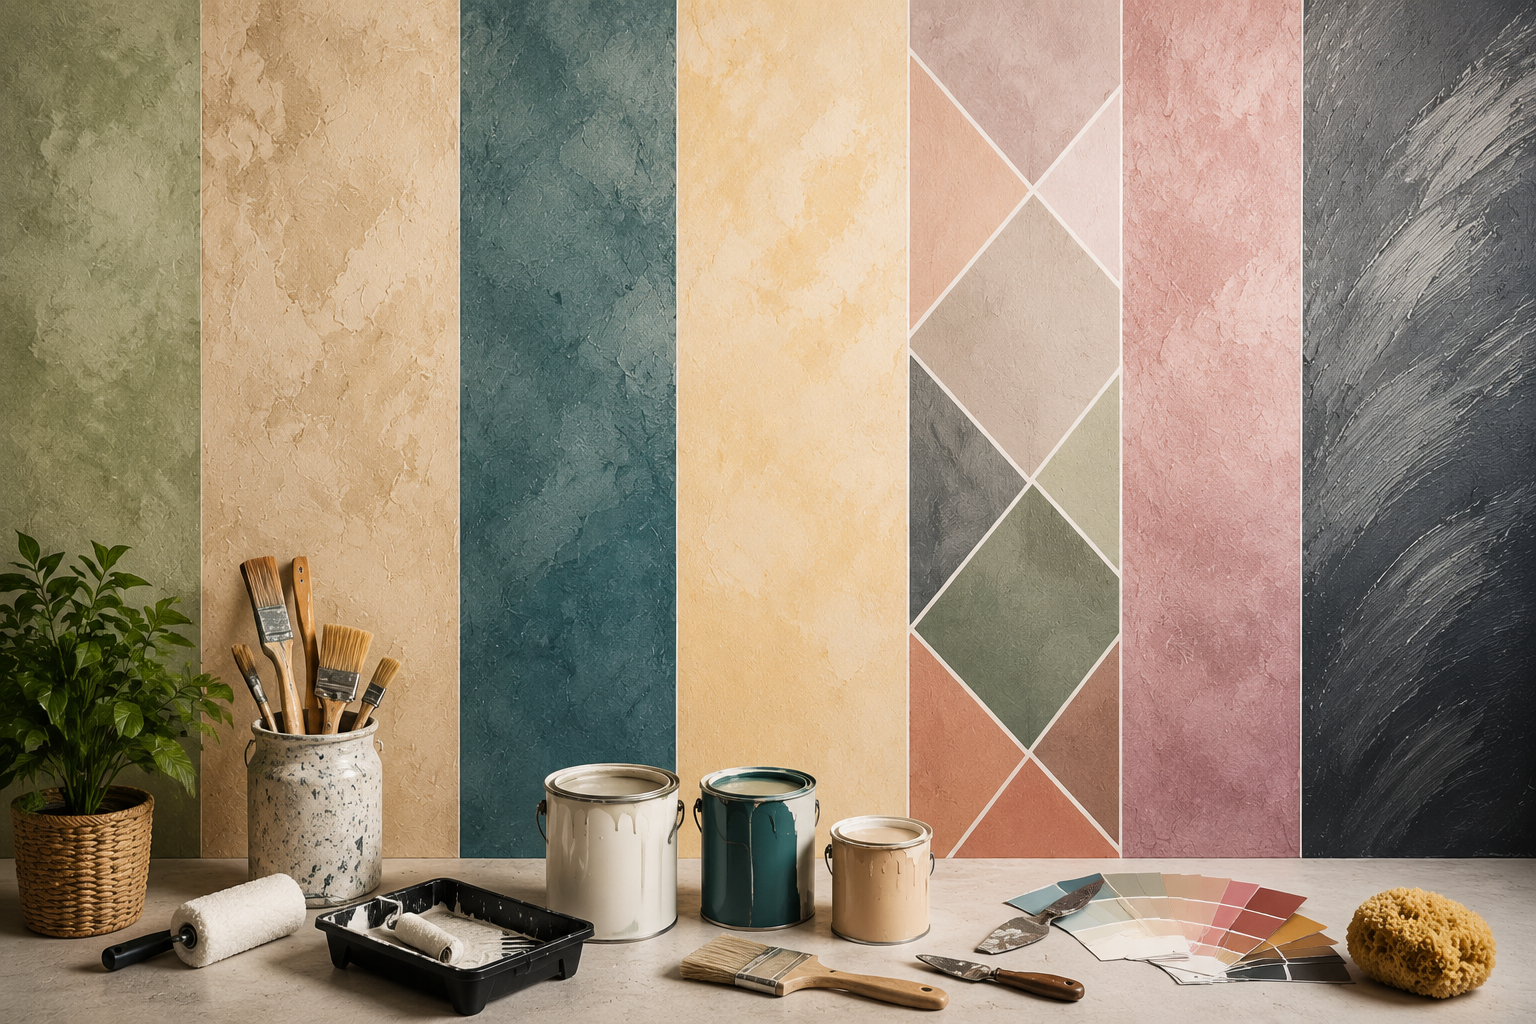
What Is Decorative Wall Painting?
Decorative wall painting refers to any method that goes beyond a standard flat coat to add texture, pattern, or visual depth to a surface. Techniques like color washing, sponging, and rag rolling fall under this category. So do more structured methods like stenciling, striped walls, and geometric designs.
Most decorative methods involve either a glaze (a transparent layer mixed with paint to slow drying time) or layered coats of different colors.
The base coat is usually applied with a roller, while the decorative layer is added with a brush, sponge, rag, or specialty tool.
You do not need professional training to try these. Each technique in this guide includes a full supply list and step-by-step instructions.
11 Painting Techniques for Walls
Mastering the right painting techniques can make a huge difference in the final result. Here are 11 essential methods to help you achieve professional-looking walls with ease.
1. Color Washing
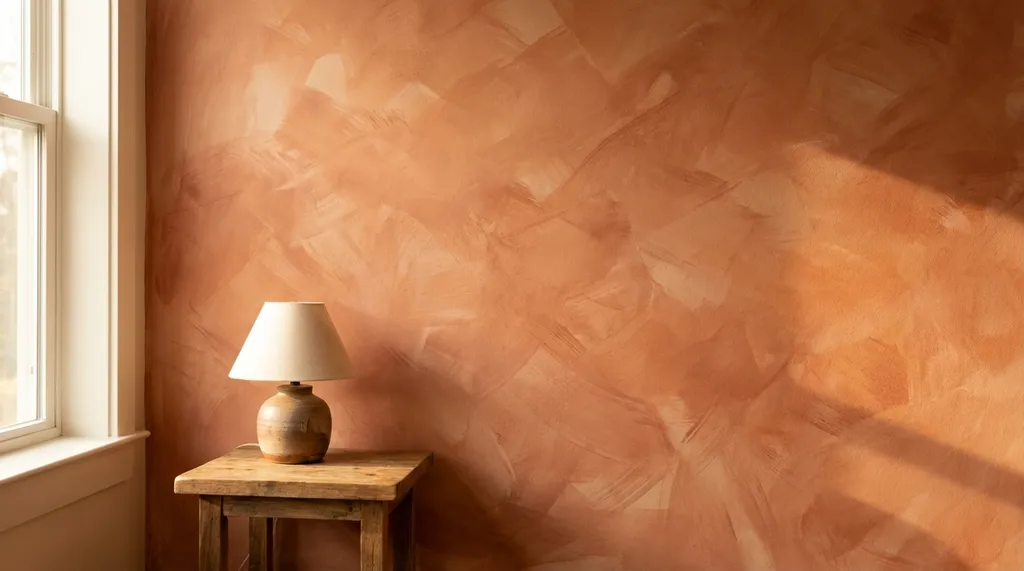
Color washing is a decorative painting technique that involves applying a thin, translucent glaze over a dry base coat. This glaze is typically created by mixing paint with a glazing medium or water, resulting in a soft, textured appearance on the walls.
What you need: Base coat, glaze, wide brush or rag, cheesecloth or sponge
Steps:
- Apply a solid base coat (lighter color). Let it dry.
- Mix your top color with glazing liquid or water to create a wash.
- Apply the wash in sections using a brush, rag, or sponge.
- Use circular or feathery strokes while the layer is still wet.
- Let each layer dry and repeat until you get the look you want.
Effect: Soft, mottled texture; can mimic old plaster or Tuscan walls.
Best For: Living rooms, bedrooms, and dining areas with warm lighting.
2. Dry Brushing
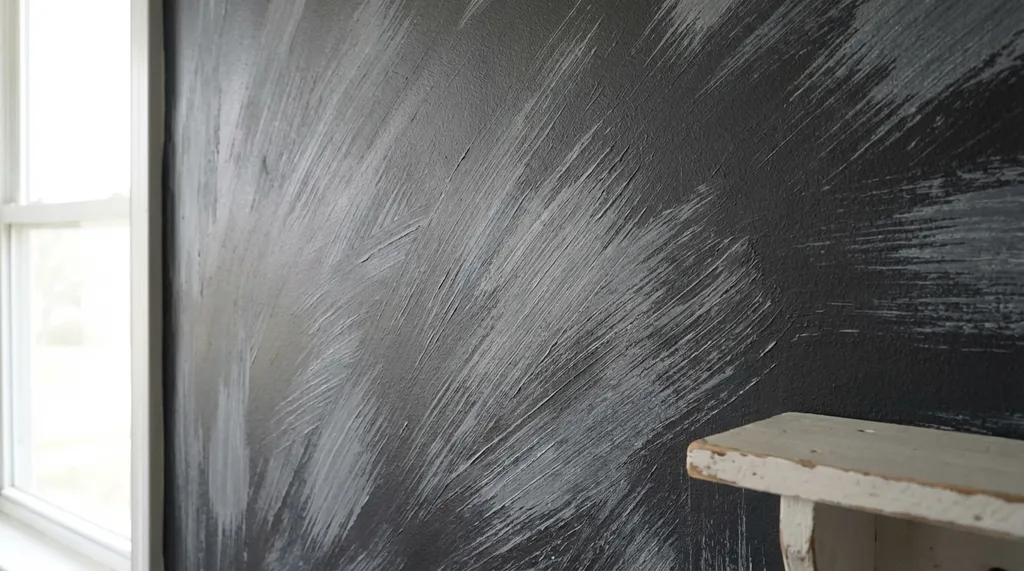
Dry brushing adds subtle texture without heavy coverage. It gives walls a slightly worn, rustic look. I often recommend this for farmhouse or cottage-style rooms. It’s also one of the quickest techniques to finish.
What you need: Flat brush, base coat, contrasting paint, paper towel
Steps:
- Apply a base coat and let it dry completely.
- Dip a flat brush lightly into the contrasting paint.
- Wipe most of the paint off on a paper towel until the brush feels almost dry.
- Drag the brush across the wall using light, quick strokes.
- Work in one direction for a uniform look or go random for a rougher feel.
- Repeat until you get the coverage you want.
Effect: Soft, worn texture with the base color showing through.
Best For: Accent walls, textured feature sections, and rustic-themed interiors.
3. Sponging
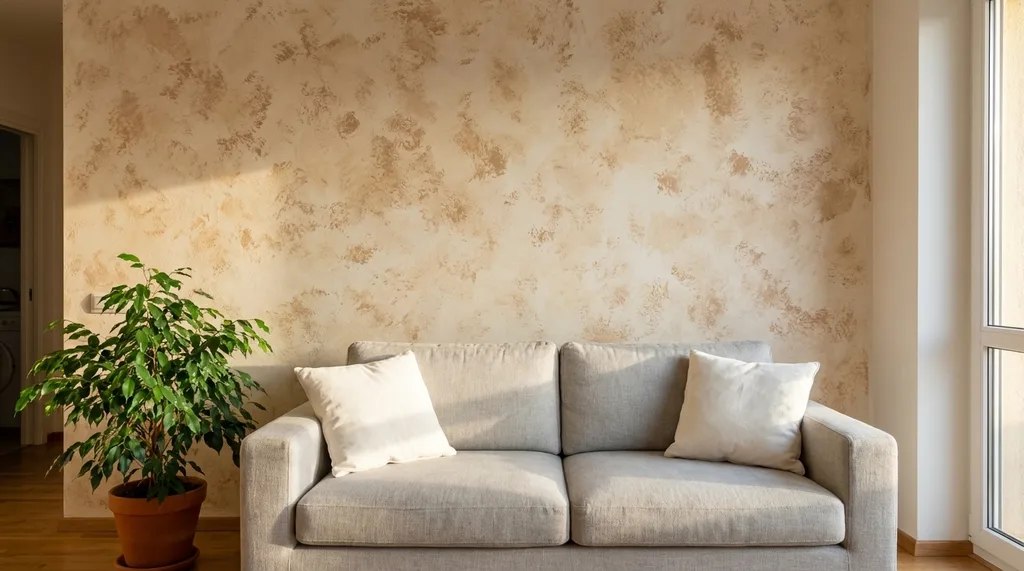
Sponging is one of the easiest decorative methods. It works for both bold and subtle finishes. Beginners love this technique because mistakes blend in naturally. It’s also very forgiving with color choices.
What you need: Natural sea sponge, base coat, second paint color, paper plate or tray
Steps:
- Apply a base coat and let it dry fully.
- Pour the second color onto a paper plate or tray.
- Dip a damp sea sponge into the paint and blot off the excess.
- Dab the sponge onto the wall in a random pattern.
- Rotate the sponge as you go to avoid repeating the same shape.
- Step back every few dabs to check for even coverage.
- Add more colors for extra depth.
Effect: Textured, layered look with depth, subtle or bold depending on color contrast.
Best For: Bathrooms, powder rooms, and smaller spaces that need visual interest.
4. Rag Rolling
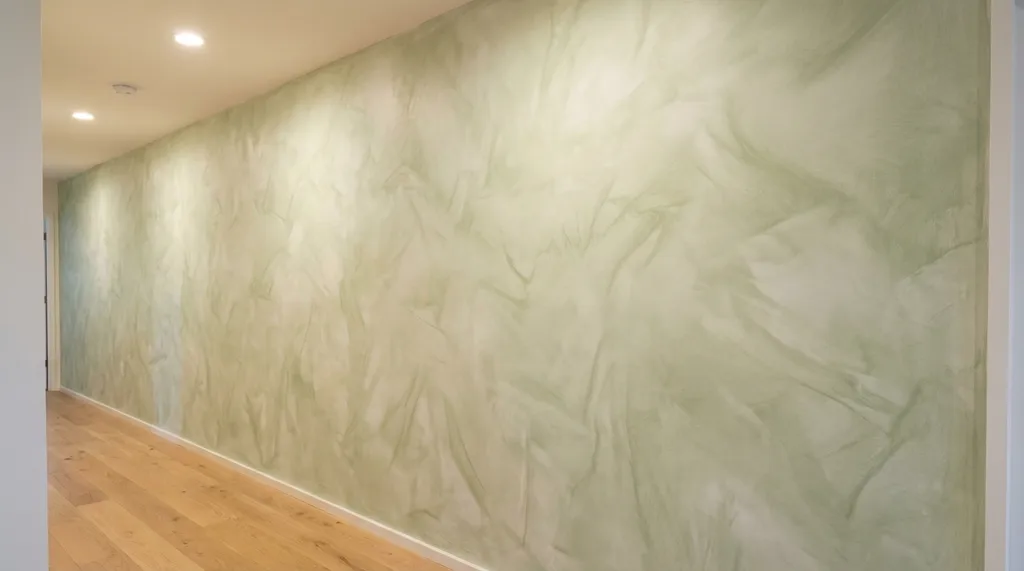
Rag rolling gives walls a soft, fabric-like texture. It adds visual interest without being too bold. The technique creates a finish similar to crushed velvet or linen. Each pass of the rag leaves a slightly different pattern.
What you need: Base coat, glaze, lint-free rag or cheesecloth, paint tray
Steps:
- Apply a base coat and let it dry completely.
- Apply a glaze coat over the dried base color.
- While the glaze is still wet, loosely bunch up a lint-free rag.
- Roll the rag across the wall in light, random strokes.
- Work in small sections so the glaze stays wet throughout.
- Reload or replace the rag when it gets too saturated.
Effect: Soft, fabric-like texture that resembles crushed velvet or aged linen.
Best For: Hallways, feature walls, and rooms with a traditional or classic style.
5. Ombre Walls
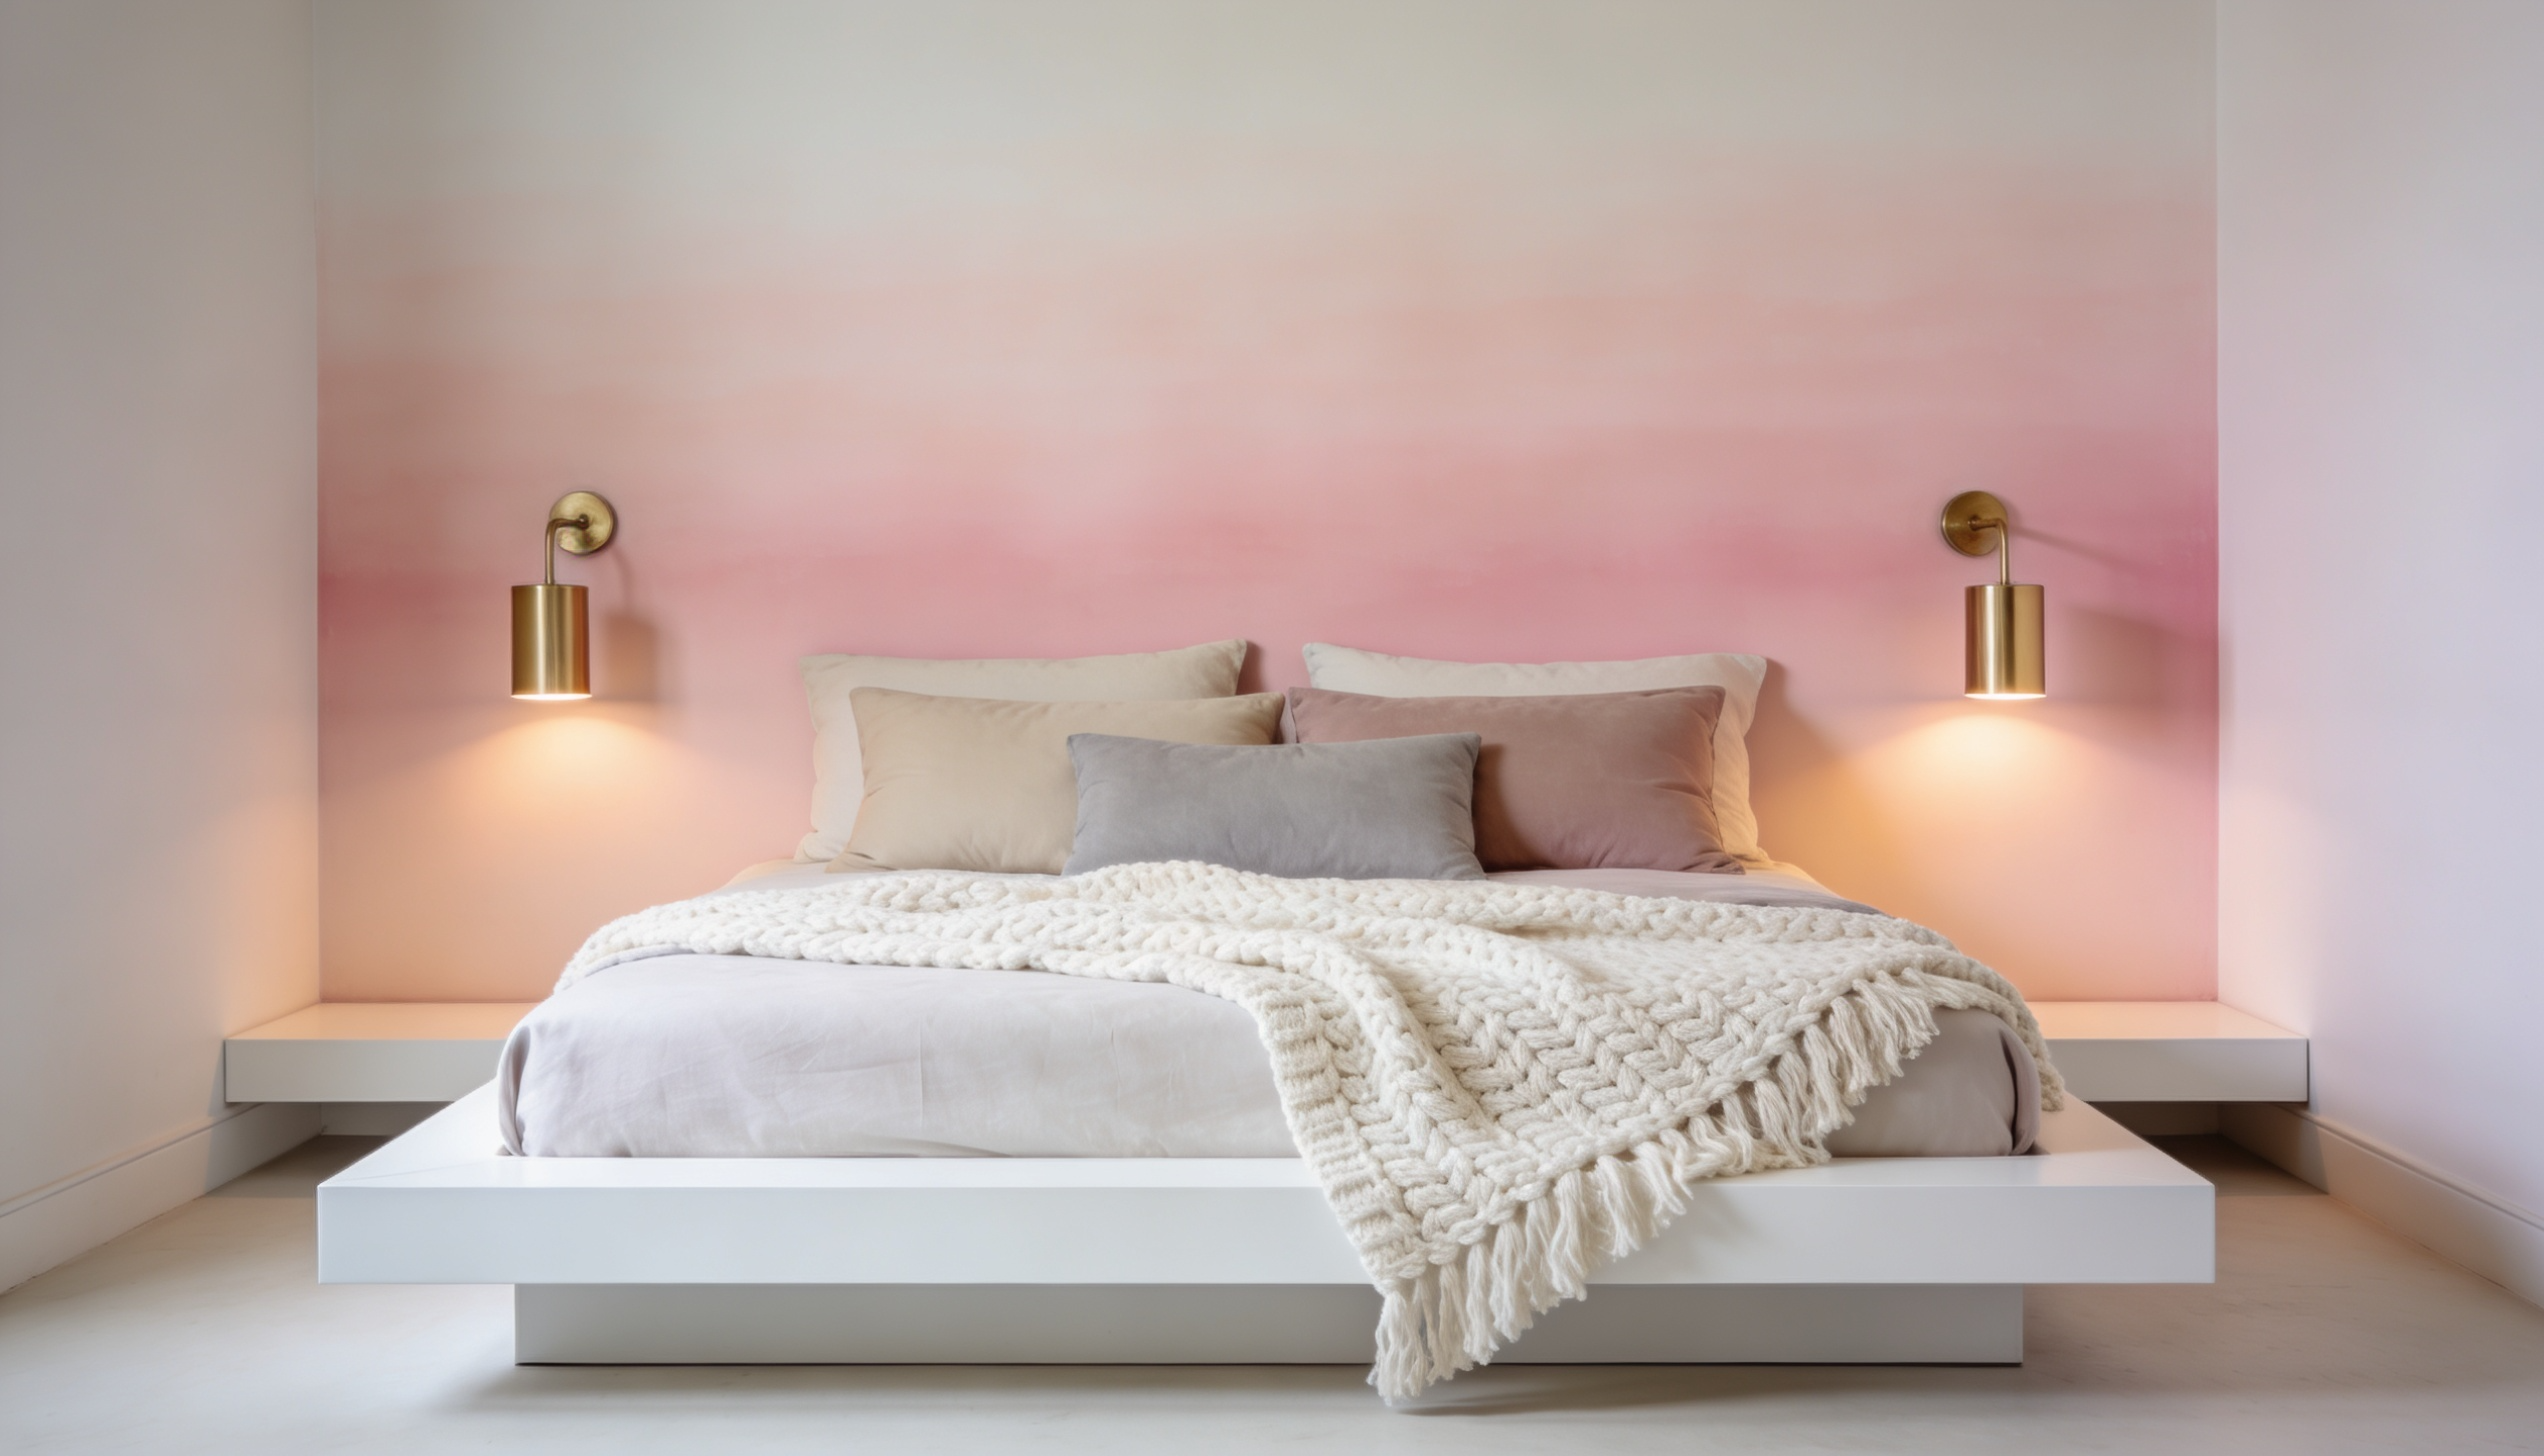
Ombre blends two or more shades from light to dark across the wall. It creates a smooth gradient that draws the eye. This technique takes more patience than most. But the result is worth the extra time.
What you need: Three shades of the same color, rollers, a dry brush, or a damp roller for blending
Steps:
- Paint the lightest shade across the whole wall as your base. Let it dry.
- Apply the medium tone to the middle section of the wall.
- Add the darkest shade to the bottom section.
- Blend where the colors meet using a dry brush or damp roller.
- Use long, horizontal strokes when blending the edges.
- Work fast so the edges stay wet for a smooth transition.
Effect: A smooth color gradient from light to dark, with a calm, artistic feel.
Best For: Bedrooms, nurseries, and creative spaces where you want a calm visual flow.
6. Stripes
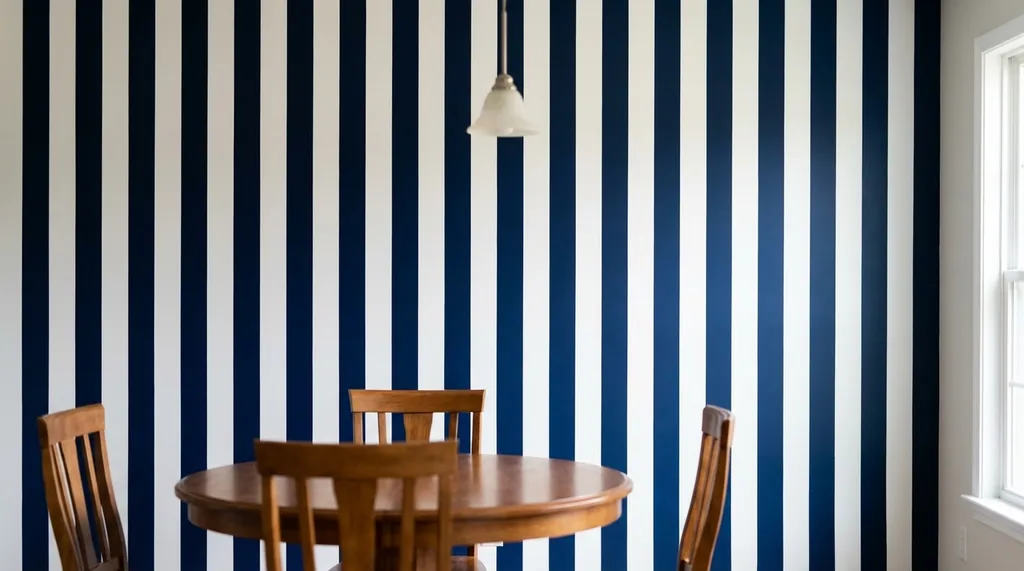
Striped walls add structure and visual height or width to a room. They suit both modern and traditional spaces. Vertical stripes make low ceilings feel taller. Horizontal stripes make narrow rooms feel wider.
What you need: Base coat, second paint color, painter’s tape, pencil, level, small roller
Steps:
- Paint the base coat and let it dry for at least 24 hours.
- Measure your stripe width and mark it lightly with a pencil.
- Apply painter’s tape along the marked lines.
- Press the tape edges firmly to stop paint from bleeding.
- Apply the second color between the tape lines using a small roller.
- Remove the tape while the paint is still slightly wet for clean edges.
Effect: Structured, graphic look, bold with high contrast or subtle with tonal shades.
Best For: Dining rooms, entryways, and kids’ rooms that call for a playful or structured feel.
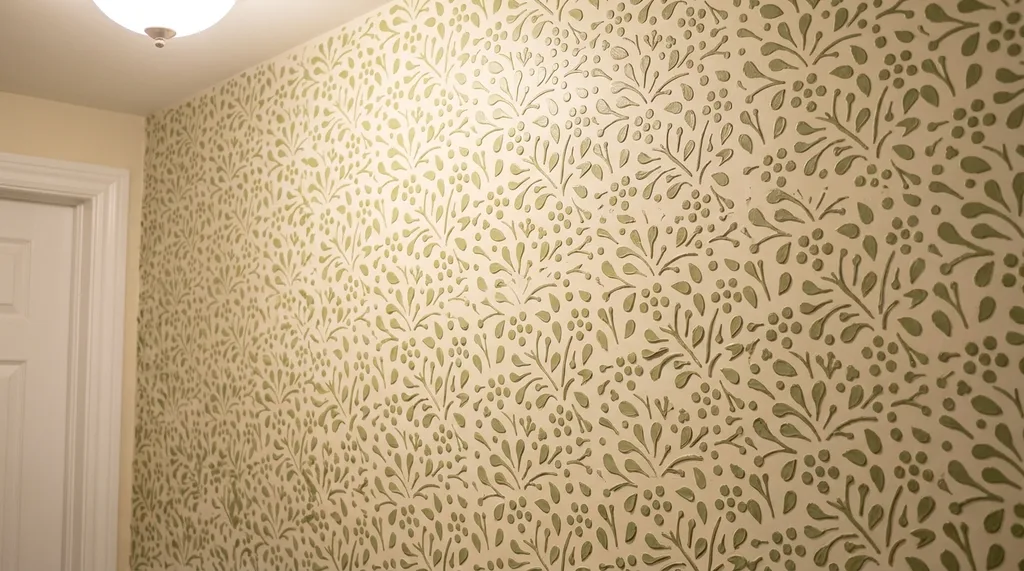
7. Stenciling
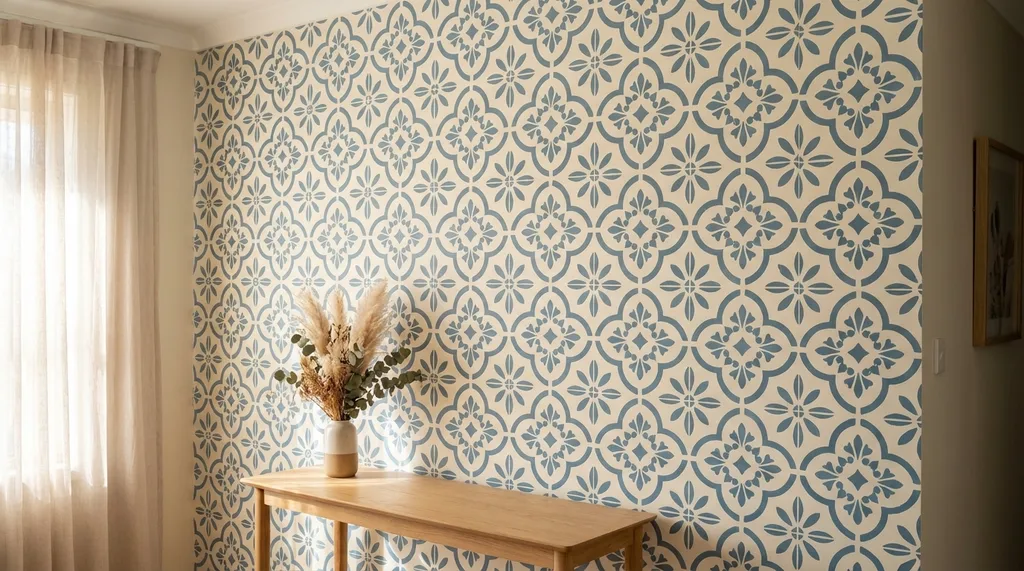
Stenciling lets you add repeating patterns to any wall without freehand drawing. It’s a cost-effective alternative to wallpaper. The range of stencil designs available today is huge. You can find anything from floral prints to geometric grids.
What you need: Stencil, painter’s tape, flat or matte paint, stencil brush, or small foam roller
Steps:
- Make sure the base coat is fully dry before you start.
- Secure the stencil firmly to the wall with painter’s tape.
- Load a stencil brush or foam roller with a small amount of paint.
- Apply paint using light, even pressure over the stencil.
- Carefully peel the stencil off before moving to the next section.
- Line up registration marks for even spacing across the wall.
- Clean the stencil after every few uses to keep the edges sharp.
Effect: Clean, repeating pattern resembling printed wallpaper.
Best For: Accent walls, powder rooms, and spaces where wallpaper isn’t practical.
8. Metallic Finish
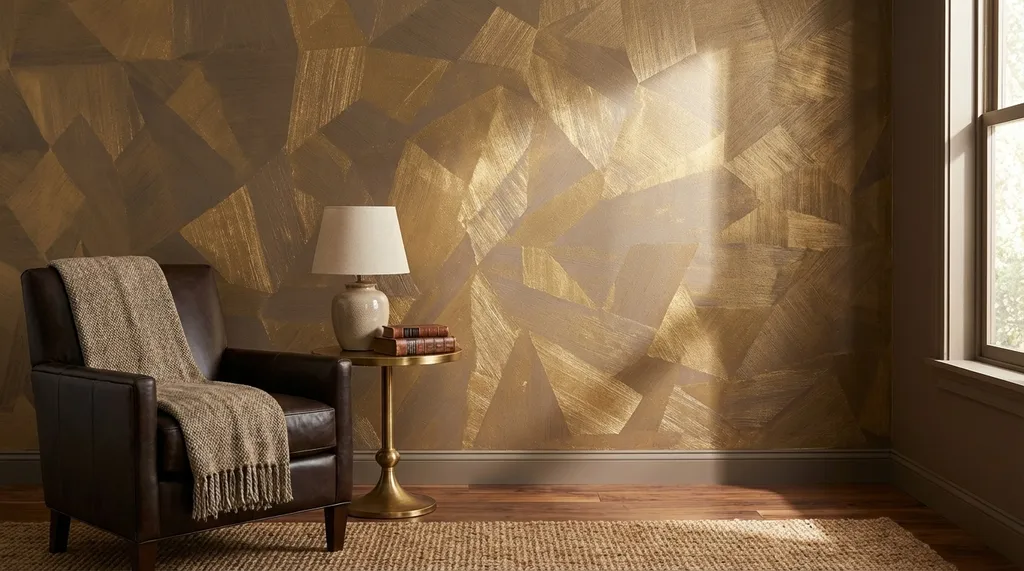
A metallic finish adds a reflective, high-end look to any wall. It works best on accent walls where light hits the surface directly. This technique catches and bounces light across the room. It works especially well in rooms with large windows.
What you need: Base coat, metallic glaze (gold, silver, or copper), wide brush, paint tray
Steps:
- Apply a solid base coat close to your metallic color. Let it dry.
- Use a warm taupe base under gold or a cool grey under silver.
- Brush on the metallic glaze using a crosshatch pattern.
- Work in sections across the wall from top to bottom.
- Let the first coat dry completely before adding the second.
- Apply a second thin coat to build depth and shimmer.
Effect: Reflective, layered finish with a rich, warm, or cool metallic sheen.
Best For: Living room accent walls, dining rooms, and spaces where you want a rich focal point.
9. Textured Roller Technique
Patterned rollers press raised designs onto walls with very little effort. They come in many styles, from wood grain to floral prints. This is one of the fastest ways to add a decorative touch to a plain wall. The roller does most of the design work for you.
What you need: Base coat, patterned or textured roller, paint tray, level, or chalk line
Steps:
- Apply a base coat and let it dry fully.
- Pour your top coat color into the tray and load the textured roller evenly.
- Start at the top of the wall and roll downward in one steady motion.
- Overlap slightly on each pass to keep the pattern aligned.
- Reload the roller when the pattern starts to fade.
- Use a level or chalk line to keep your starting point straight on each row.
Effect: Raised, repeating surface pattern with a consistent decorative texture.
Best For: Feature walls, children’s rooms, and spaces where you want quick decorative results.
10. Two-Tone Walls
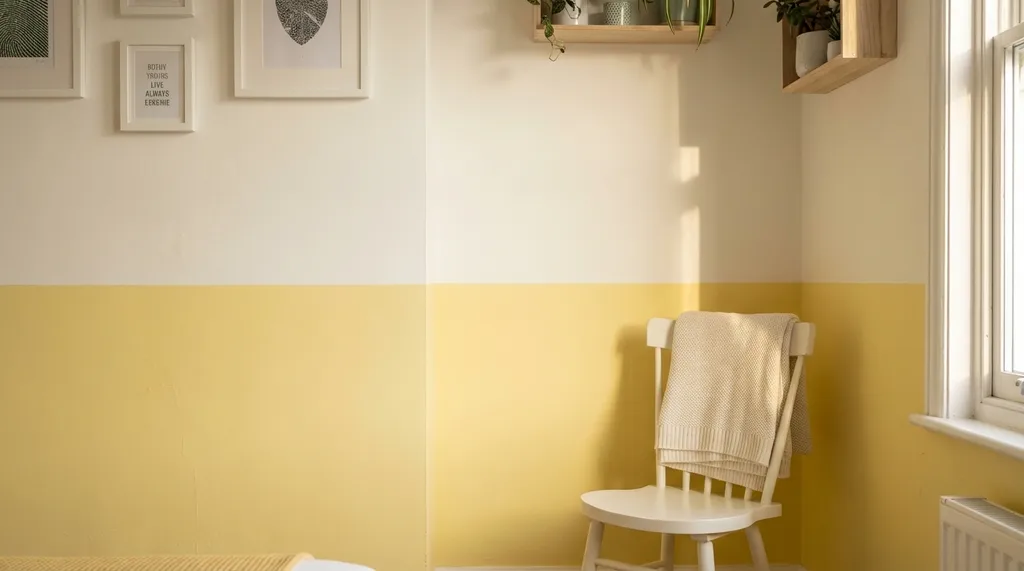
Two-tone walls split the surface into two contrasting colors at a set height. This method adds depth and can make ceilings appear taller. It’s a simple technique that creates a strong visual impact. You don’t need any specialty tools for this one.
What you need: Two paint colors, painter’s tape, a level, a pencil, and a roller
Steps:
- Decide where to split the wall; chair-rail height (roughly three feet up) is a common choice.
- Use a level and pencil to mark a clean, straight line across the wall.
- Apply painter’s tape along the dividing line.
- Paint the top section first and let it dry completely.
- Paint the bottom section with the second color.
- Remove the tape carefully while the paint is still slightly wet.
Effect: Clean horizontal split with strong visual contrast or a soft tonal division.
Best For: Bedrooms, living rooms, and hallways are ideal for a modern, structured look.
11. Geometric Designs
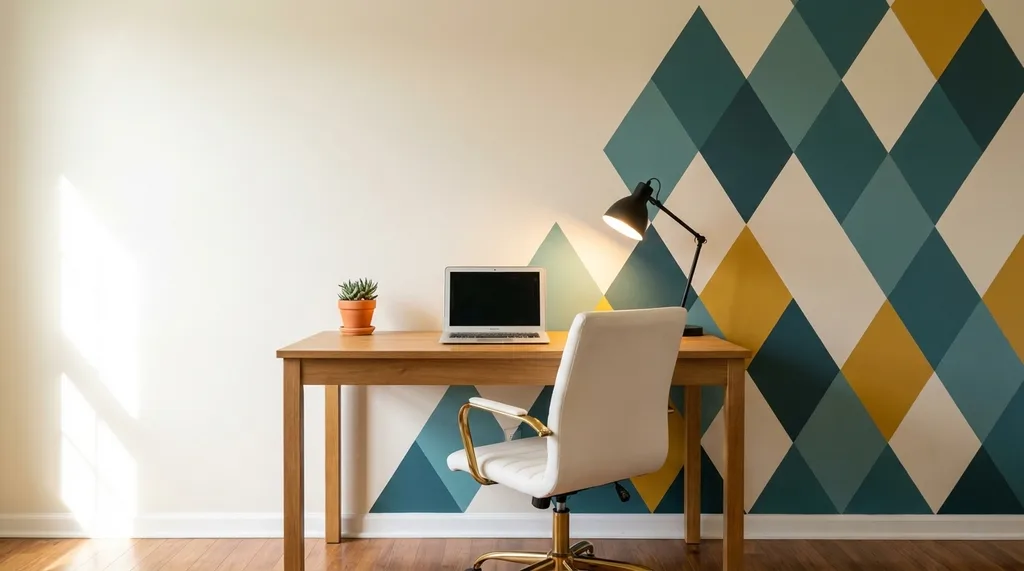
Geometric shapes bring a bold, modern feel to any space. Triangles, hexagons, and diamonds are all popular choices. This technique takes planning and precision to get right. But the payoff is a wall that becomes the room’s centerpiece.
What you need: Base coat, two or more paint colors, painter’s tape, pencil, level, ruler
Steps:
- Plan your design on paper first and sketch the layout to scale.
- Use a pencil, ruler, and level to map the shapes directly onto the wall.
- Apply painter’s tape firmly along every edge of the shape.
- Paint each section in a single color at a time.
- Let each color dry fully before taping off the next shape.
- Remove the tape slowly at a 45-degree angle for clean lines.
Effect: Bold, graphic pattern with sharp lines and strong color blocks.
Best For: Home offices, accent walls, and creative spaces that need a statement feature.
Also read: How Much Does It Cost to Paint a Room?
Tips from Professional Painters
A good technique means nothing if the basics go wrong. These tips come from real projects I’ve worked on over the years. Follow them, and your walls will look better on the first try.
- Test on a sample board first: Try your technique and color on cardboard before applying it to the wall. What looks good on a swatch doesn’t always match a full wall.
- Work in small sections: Paint two- to three-foot areas at a time. This keeps patterns consistent, especially with color washing, rag rolling, and sponging.
- Never skip primer: Without it, paint peels, cracks, or shows uneven color. Always prime bare walls, patched spots, and dark surfaces.
- Use side lighting while you paint: Angle a bright work light across the wall. It reveals drips, thin spots, and missed areas that ceiling lights won’t catch.
- Don’t overload your roller: Too much paint causes drips. Too few leaves leave streaks. Roll off the excess in the tray before each pass.
How to Choose the Right Paint Finish for Each Room?
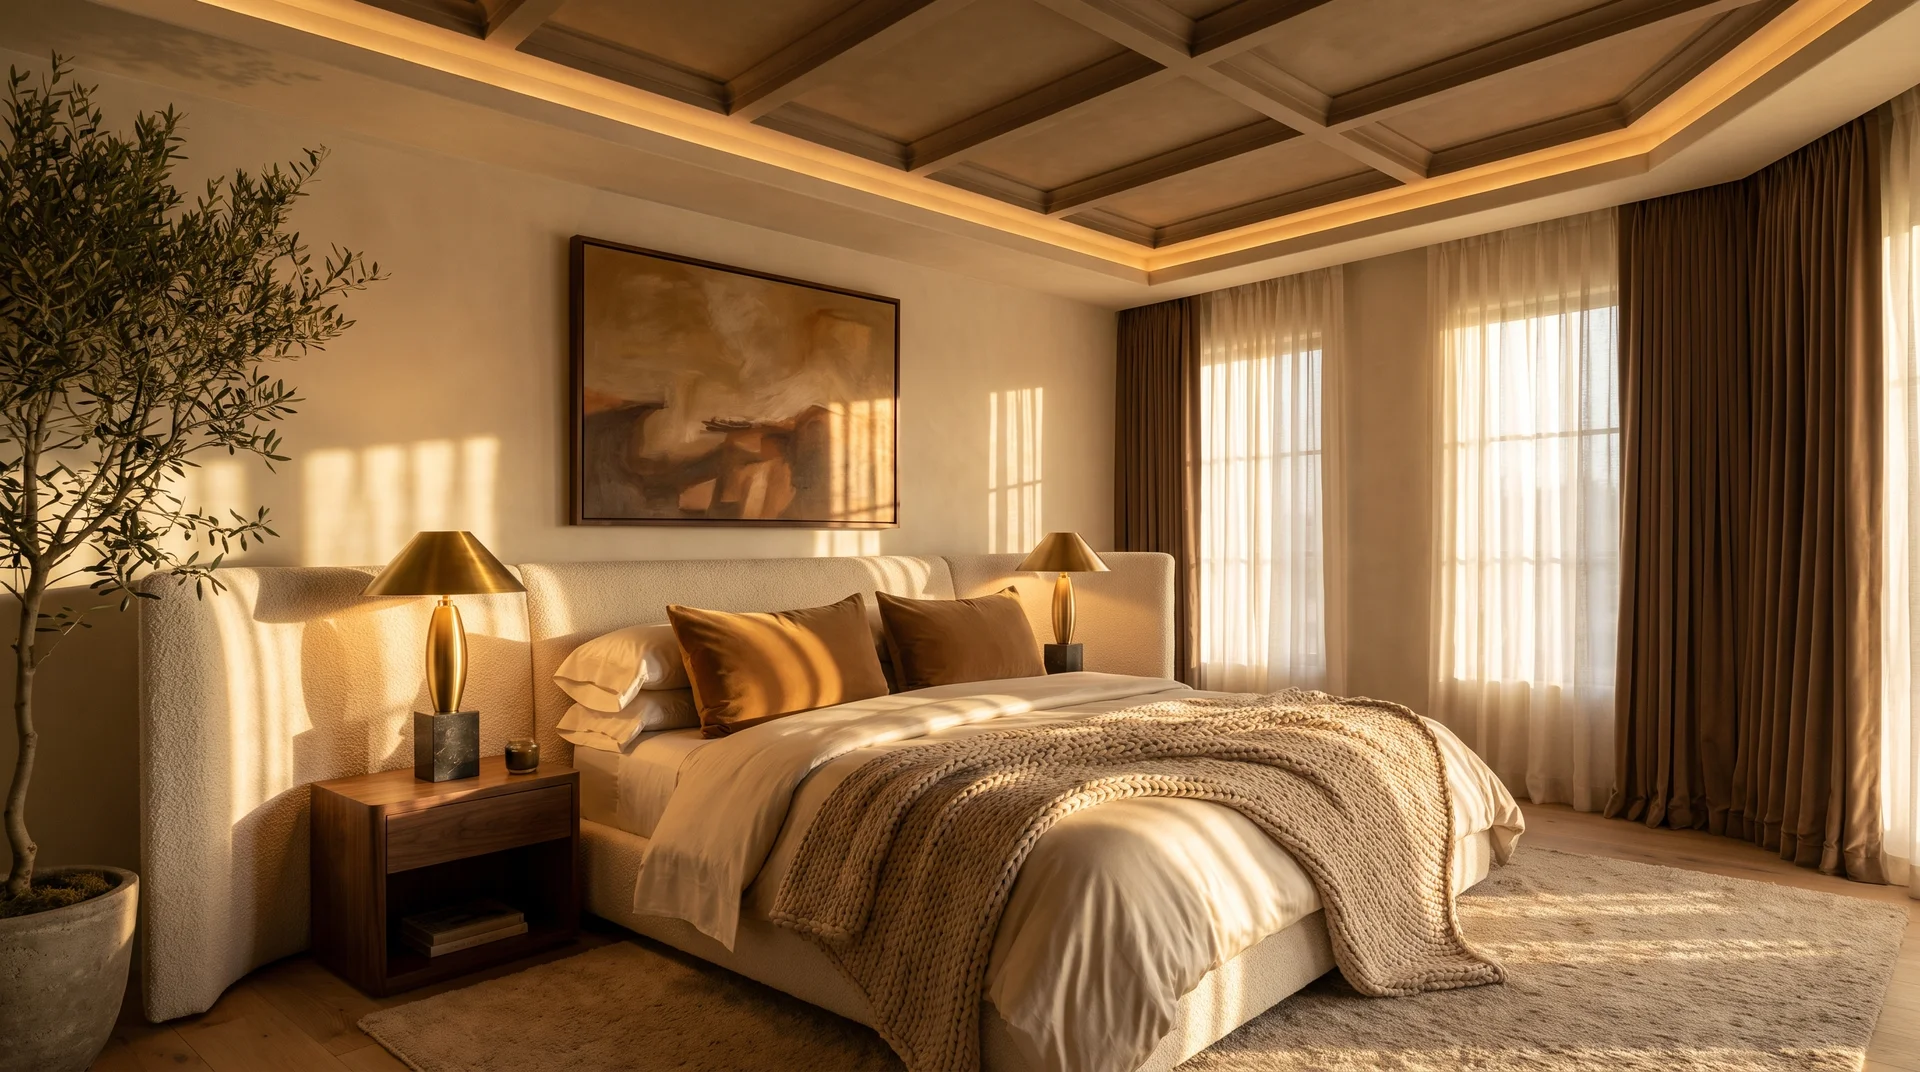
The finish you pick matters as much as the color itself. Use matte or flat paint in low-traffic rooms like bedrooms; it hides wall flaws well but doesn’t clean easily.
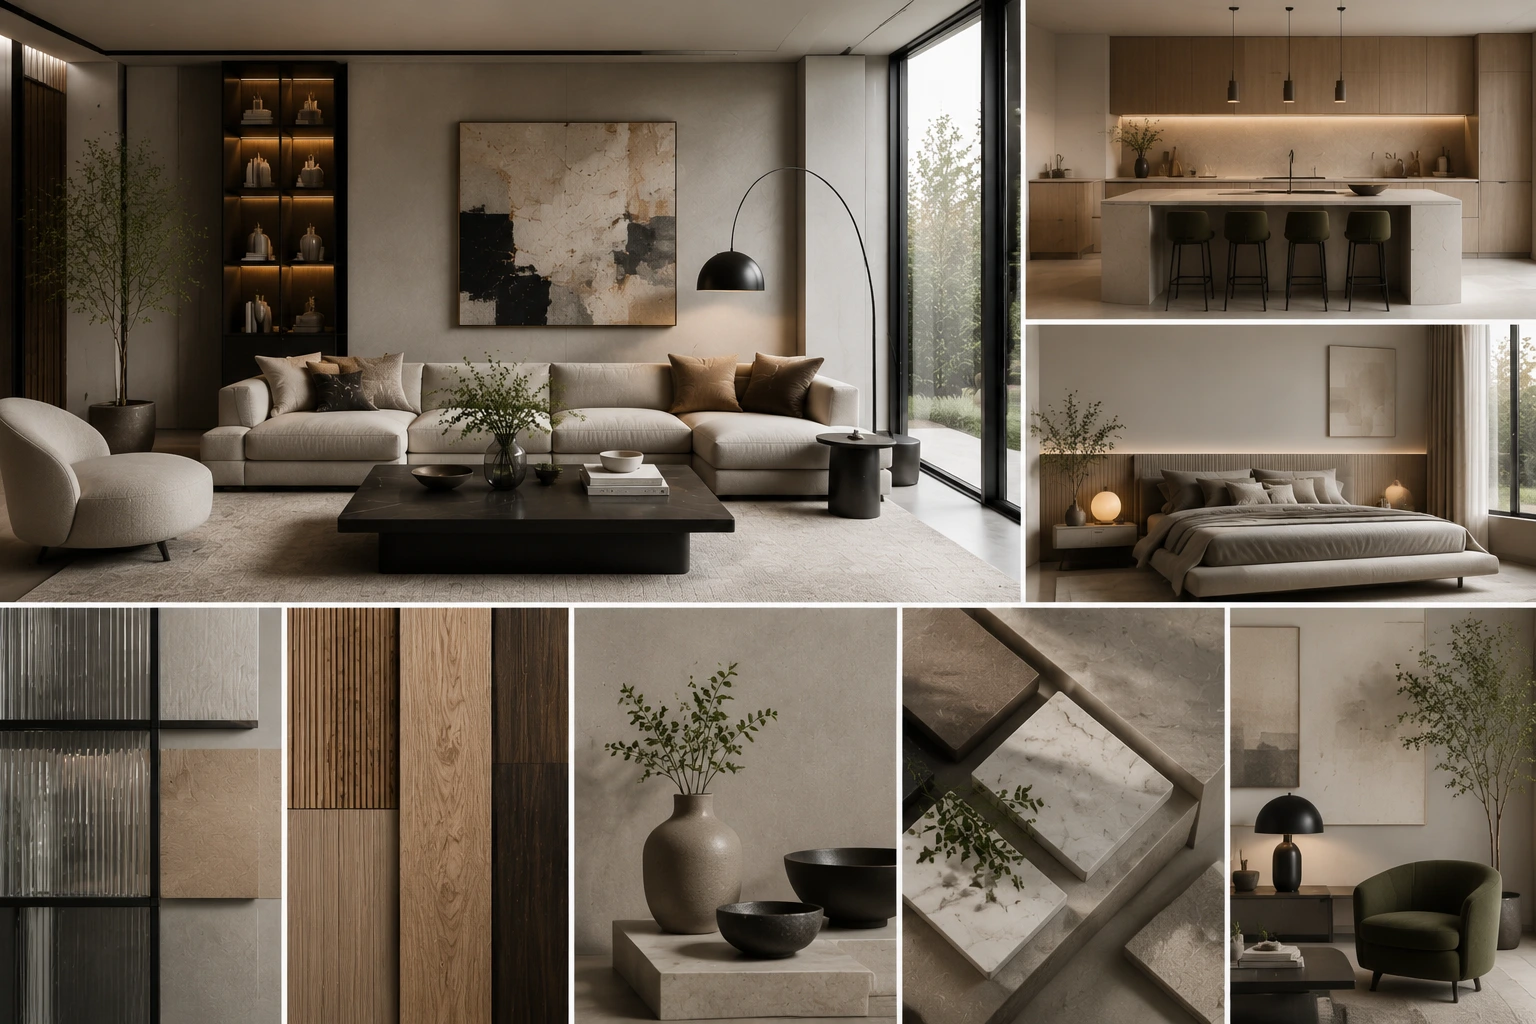
Eggshell is a solid all-rounder for living rooms and dining areas, adding a subtle sheen without being overly shiny. Satin works best in kitchens, bathrooms, hallways, and kids’ rooms because it handles moisture and wipes clean without losing its look.
Choosing quality house paint brands also makes a noticeable difference in how well these finishes hold up over time.
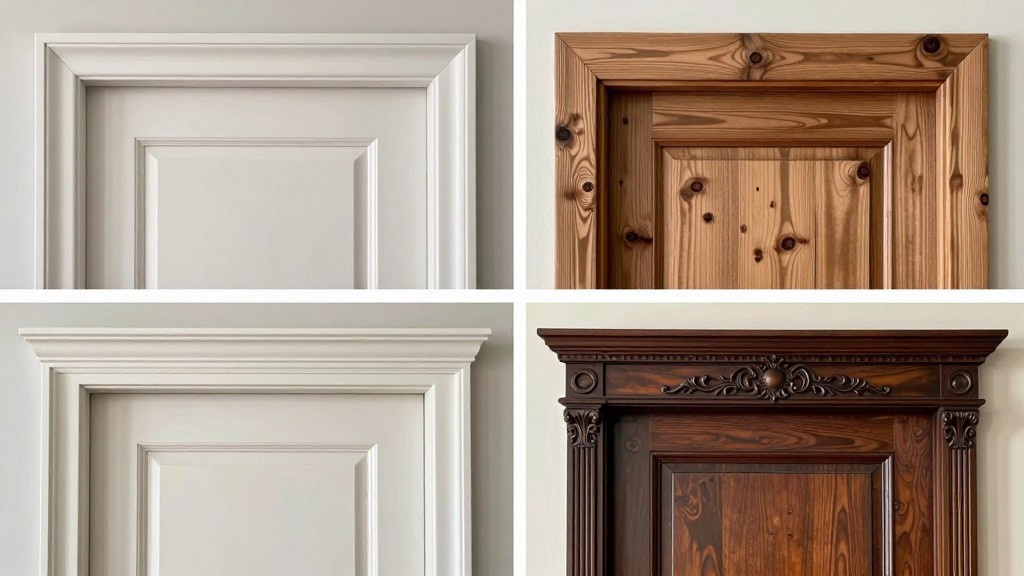
Semi-gloss is best saved for trim, doors, and cabinet surfaces where you need a durable, easy-clean finish.
Conclusion
These wall painting techniques give you real options beyond a basic coat of paint.
From the soft texture of color washing to the sharp lines of geometric designs, each method changes how a room looks and feels. You don’t need to be a professional to get good results.
You need the right technique, a little patience, and proper prep work. Start with one method that fits your skill level and the room you have in mind.
Test it on a small section first before going full wall. Have you tried a technique before? Share your experience in the comments below.
Frequently Asked Questions
How Do I Get a Perfect Line Between My Wall and Ceiling?
Apply painter’s tape along the ceiling edge. Press it firmly with a putty knife. Use an angled brush with steady, slow strokes for a clean line.
Do You Cut-in Twice when Painting?
Yes. Cut in once before the first coat and again before the second. This builds full coverage along edges and corners where rollers can’t reach.
What is the Hardest Color to Paint Over?
Red and dark yellow are the hardest to cover. They bleed through most paints. Use a stain-blocking primer first, then apply two to three topcoats.