You just painted your walls, and now tiny bumps are popping up? It’s a frustrating issue, but you’re not alone. So, why does paint bubble?
Typically, it’s due to moisture, heat, or poor surface preparation that prevents the paint from properly adhering.
When this happens, air or water gets trapped beneath the paint, causing the surface to lift and form unsightly bubbles. The good news?
This problem is both fixable and preventable with the right approach. In this guide, we’ll walk you through the main causes of paint bubbling, how to repair it effectively, and which products will help you get the job done right.
We’ll share tips to ensure your paint job stays smooth and bubble-free long-term.
What Is Paint Bubbling?
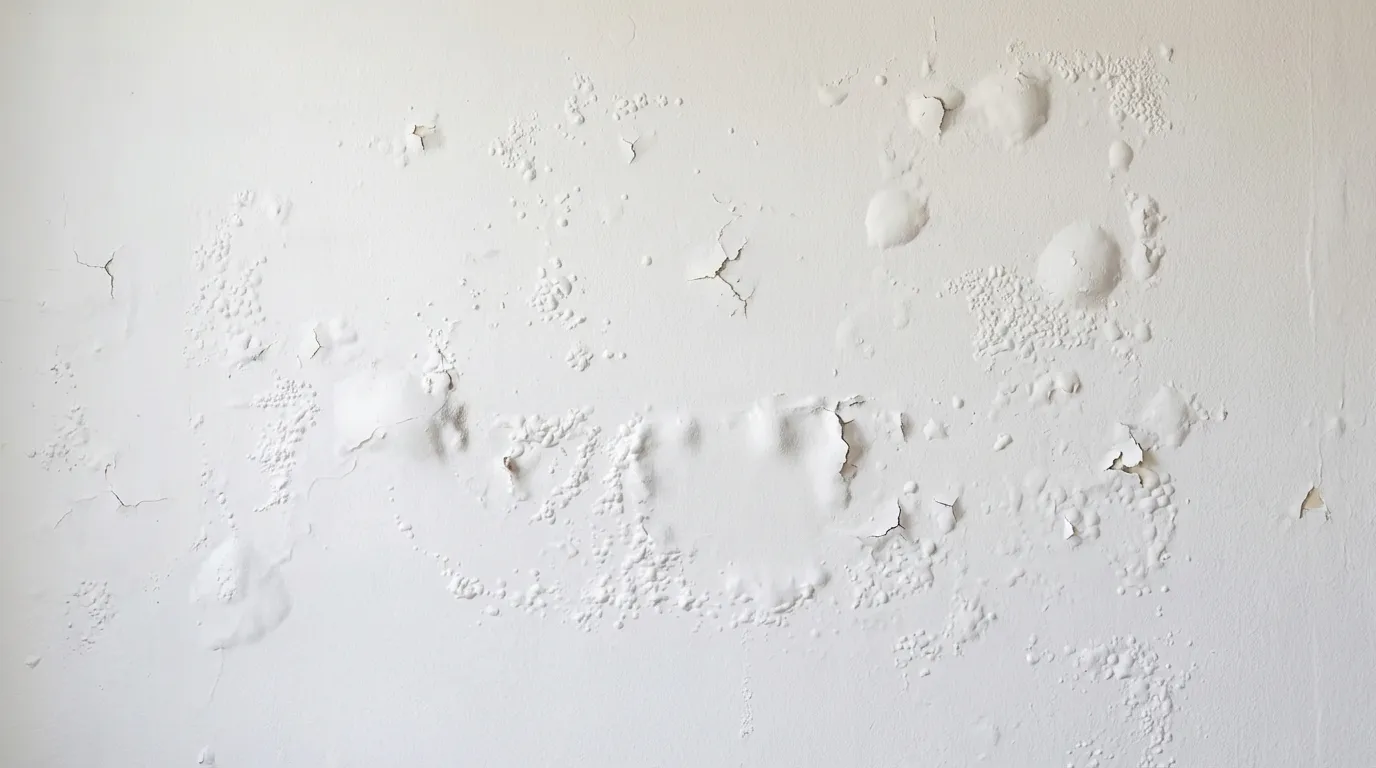
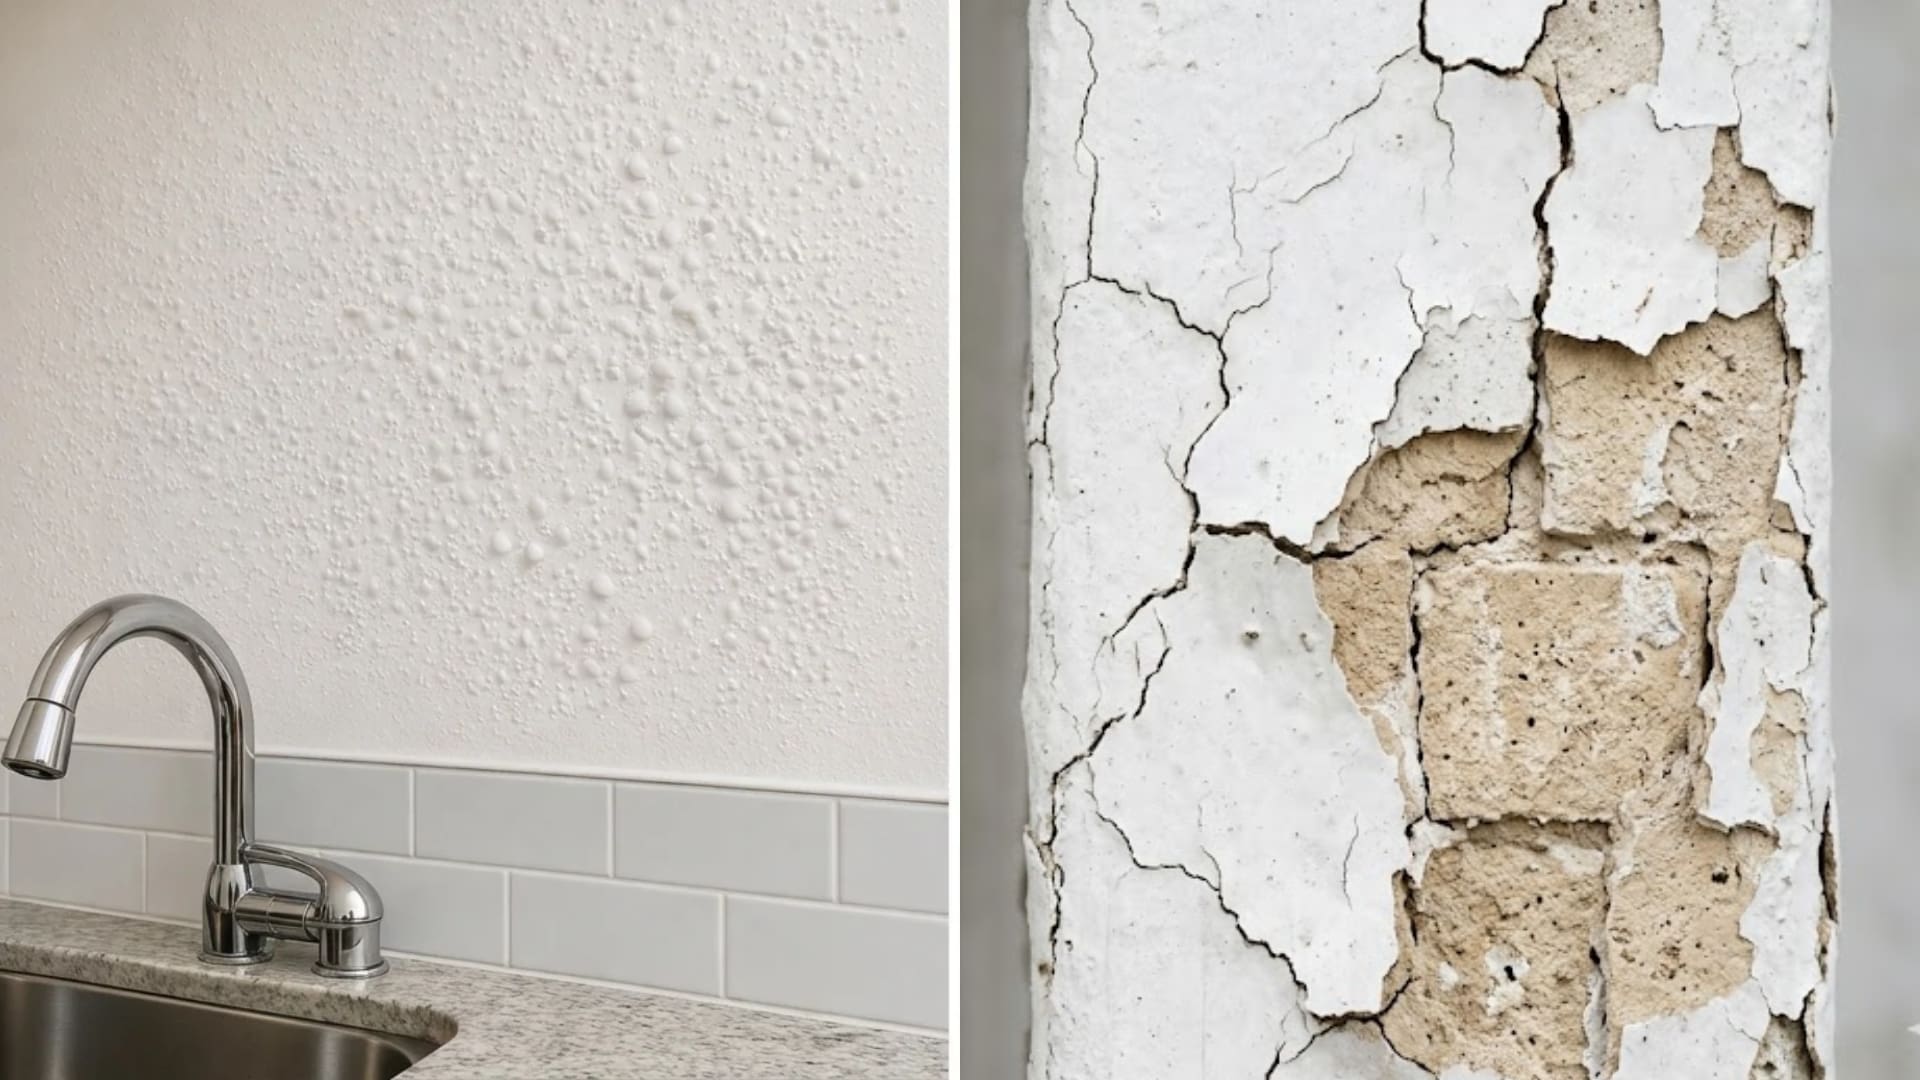
Paint bubbling is a common problem where the paint film lifts from the surface beneath it. This creates raised pockets of air or water between the paint and the wall.
Here is how it shows up:
- Interior walls: Common near kitchens and bathrooms.
- Ceilings: Often caused by roof leaks or attic condensation.
- Exterior surfaces: Rain, sunlight, and temperature changes weaken the paint’s bond over time.
Paint bubbles are more than a cosmetic flaw. They point to trapped moisture, poor adhesion, or serious damage. Ignoring them leads to cracking and peeling.
Why Does Paint Bubble?

Understanding why paint bubbles is the first step toward fixing and preventing it. Most cases come down to a few common triggers. Here are the main ones.
1. Moisture and Water Damage
Moisture is the number one reason paint bubbles. Water from leaks, high humidity, or condensation seeps into the wall. It then gets trapped between the surface and the paint layer. This breaks the bond and pushes the paint outward.
Poor sealing around windows, doors, and rooflines makes this worse. Rooms without proper exhaust fans, such as bathrooms and kitchens, trap moisture. Over time, that hidden dampness ruins even a well-done paint job.
2. Heat and Sun Exposure
Direct sunlight quickly heats painted surfaces. The paint expands as it absorbs heat and contracts when it cools. This repeated cycle weakens adhesion and forms blisters. Darker paint colors absorb more heat, which increases the risk.
Painting in direct sun or during peak afternoon heat also causes the top layer to dry too fast. The layer beneath stays wet, and the trapped moisture forms bubbles.
3. Poor Surface Preparation
A dirty or greasy surface will not hold paint well. Dust, oil, and leftover residue create a weak layer between the wall and the new coat. Old peeling paint that has not been scraped off causes the same problem.
Skipping primer is another common mistake. Primer seals the surface and gives the paint something to grip. Without it, the paint sits loosely and lifts over time.
4. Painting on Damp Surfaces
Applying paint on a surface that is still wet is a sure way to get bubbles. The moisture gets sealed under the paint. As it tries to escape, it pushes the paint film upward. Always let walls dry fully after washing or after rain before painting.
5. Low-Quality Paint or Incorrect Application
Cheap paint often has fewer binding agents. This means it does not stick to surfaces as well. Applying thick coats also causes problems. The outer layer dries while the inside stays soft. This uneven drying creates air pockets that turn into bubbles.
Not waiting long enough between coats leads to the same issue. Each layer needs to dry completely before the next one goes on.
Most paints need at least four hours between coats, though full curing can take up to 30 days depending on the formula and conditions.
6. Incompatible Paint Layers
Applying latex paint over oil-based paint without proper prep can cause bubbling. The two formulas do not bond well together. The new coat fails to grip the old one and starts to lift.
If you need to switch from oil to latex, sand the old surface first. Clean it well, apply a bonding primer, and then add your topcoat. This extra step prevents adhesion failure.
Paint Bubbling vs Paint Blistering
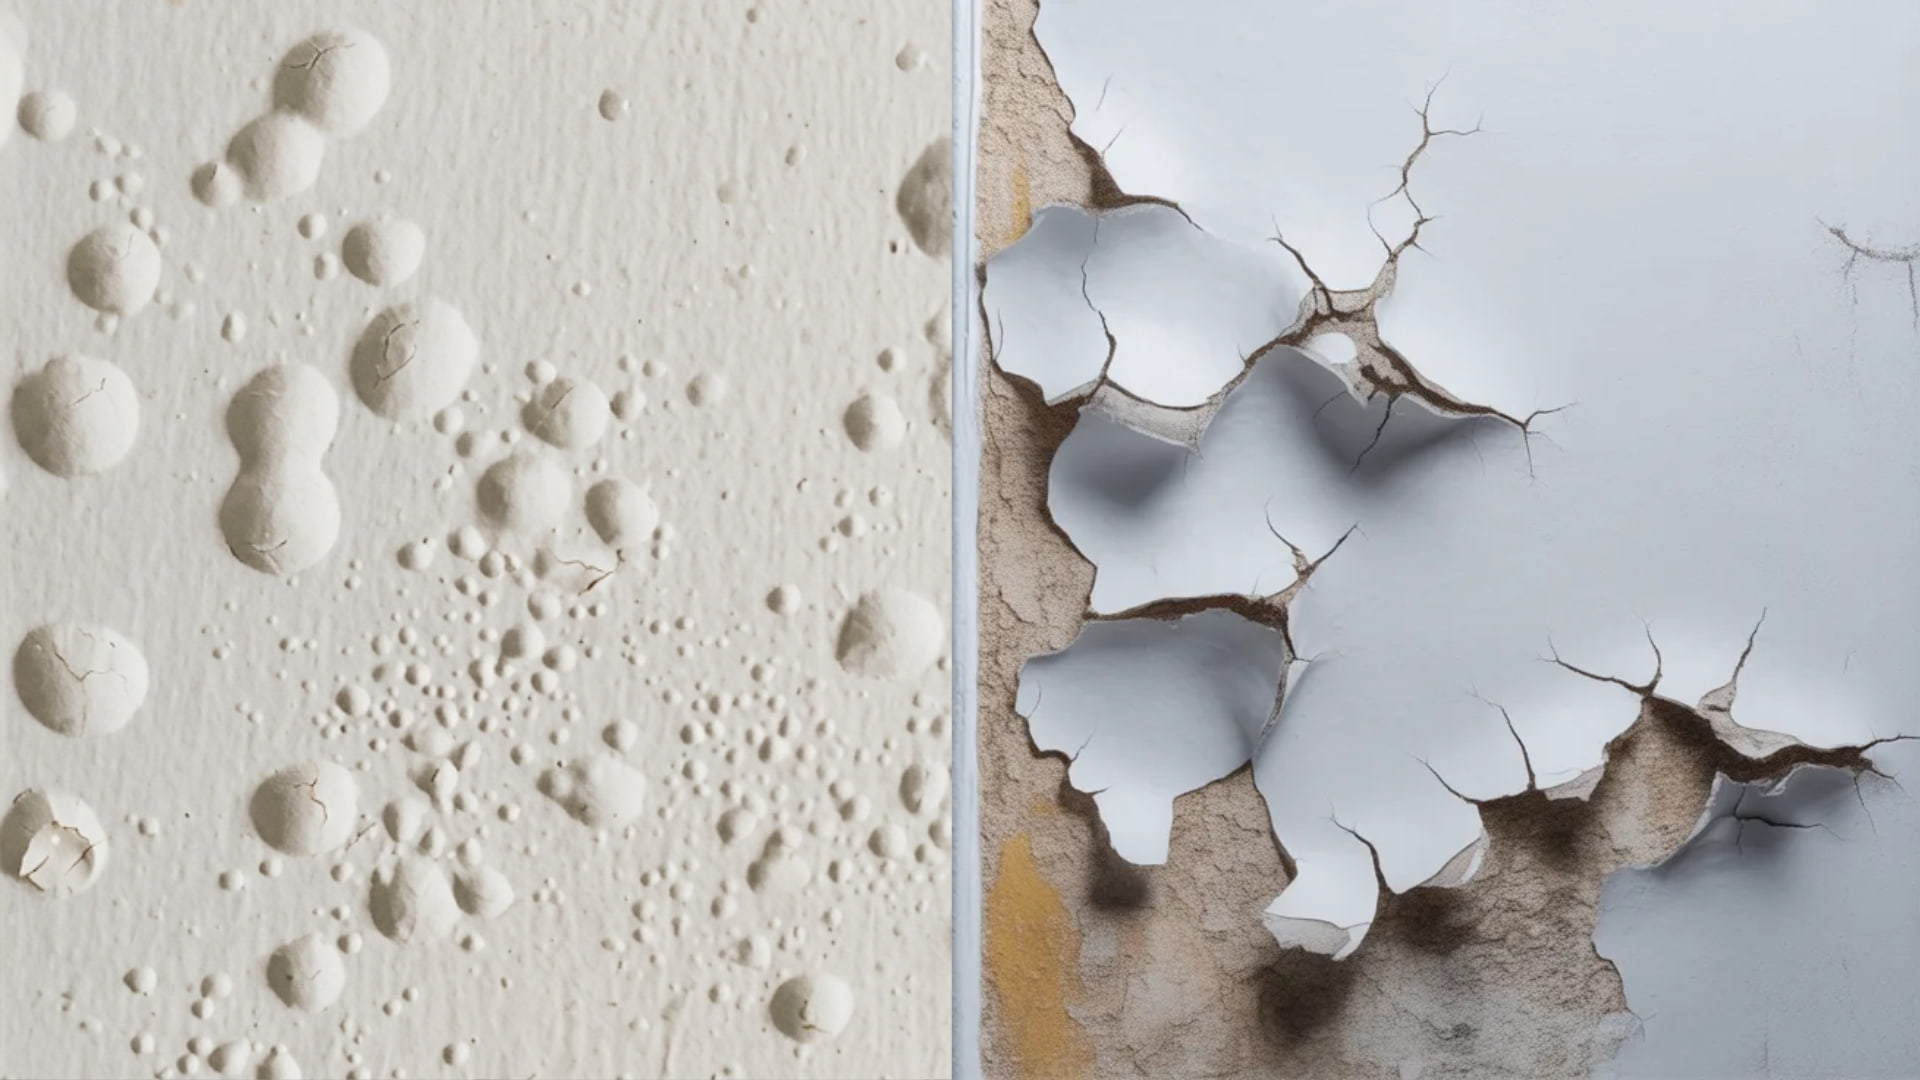
These terms are often used in the same way, but they differ slightly.
- Bubbling: Appears during or soon after painting. Caused by trapped air, dirt, or damp surfaces.
- Blistering: Appears after the paint dries. Caused by heat or moisture pushing the dried film off the surface.
Both look like raised bumps, and both mean the paint has lost its grip. The fix is the same: remove the damaged area, prep the surface, and repaint.
Interior vs Exterior Paint Bubbling: What’s the Difference?
Interior bubbling is mostly caused by humidity, steam, poor ventilation, and skipping primer. Bathrooms and kitchens are the most affected areas.
Direct sunlight, rain, temperature swings, and poor surface sealing trigger exterior bubbling. The paint expands in heat and contracts when it cools, which breaks the bond over time.
Will Paint Bubbles Go Away on Their Own?
It depends on what caused them.
Small bubbles from trapped air during rolling may flatten as the paint dries. Waiting a few hours before taking action is a reasonable approach in this case.
But bubbles caused by moisture, heat, or poor prep will not go away. They harden as the paint cures and eventually crack and peel. This exposes the bare surface to further damage, making the repair more extensive and costly.
If bubbles are still visible after the paint has fully dried, they need to be fixed. The sooner you act, the easier the repair will be.
How to Fix Paint Bubbles?
Fixing paint bubbles is straightforward. But you need to address the root cause first, or the problem will come back after repainting.
- Identify the cause: Look for leaks, damp patches, or grease on the wall. If you spot signs of a roof leak, fix that before touching the paint.
- Scrape the damaged area: Use a putty knife to remove all bubbled and loose paint. Apply joint compound to fill uneven spots if needed.
- Sand smooth: Use fine-grit sandpaper and wipe away dust with a damp cloth.
- Dry completely: Use fans or a dehumidifier if moisture was the cause.
- Apply primer: Use a moisture-blocking primer for damp-prone areas. Let it dry fully.
- Repaint: Apply thin, even coats. Let each dry before adding the next. Paint between 50°F and 85°F and use the right roller for your surface.
How to Prevent Paint Bubbling
Fixing bubbles after the fact takes time. Preventing them is faster and cheaper. Here are the steps that stop paint bubbles before they start.
Clean the surface before painting. Wipe down walls with a damp cloth or a mild detergent solution. Remove all dust, grease, and loose paint with a scraper or sandpaper.
Let surfaces dry completely. After washing walls or after rain, wait at least 24 hours before applying any paint. Use a moisture meter if you are unsure.
Always use primer. A quality primer creates a strong bond between the wall and the paint. For high-moisture rooms, use a moisture-blocking primer. For surfaces with old oil-based paint, use a bonding primer.
Paint in the right conditions. Avoid painting in direct sunlight, extreme heat, or high humidity. The ideal temperature range is 50°F to 85°F with low humidity.
Apply thin, even coats. Thick coats trap air and dry unevenly. Roll in one direction and allow each coat to dry fully before applying the next.
Improve ventilation in problem areas. Install exhaust fans in bathrooms and kitchens. Keep windows open when possible to reduce indoor humidity.
Paint Bubbling Solutions and Recommendations
The right products can prevent and fix paint bubbles. Here are trusted options professionals rely on. For bathrooms, kitchens, and basements, choose paints with mold-resistant additives.
Acrylic latex formulas hold up well in humid conditions. A satin or semi-gloss finish repels moisture better than flat paint and is easier to clean. Popular picks include :
Both are built for lasting, steam-tolerant protection in high-moisture spaces.
Final Thoughts
Paint bubbles mostly come down to moisture, heat, poor surface prep, or incompatible paint layers.
The fix follows a simple pattern: find the cause, scrape, sand, prime, and repaint. But the best fix is prevention.
Clean and dry your walls before painting. Use a quality primer. Choose the right paint for the room’s conditions. And always paint in the right weather.
Small patches of bubbling are easy to handle on your own. But if the problem keeps coming back or covers a large area, bring in a professional. A pro can spot hidden issues and save you from repeated repairs.
Frequently Asked Questions
Can I Paint Over Bubbled Paint?
You can paint over bubbled paint, but first sand down the bubbles, apply a primer, and ensure the surface is smooth before reapplying the paint for a clean, even finish.
Why Is My Paint Bubbling on the Second Coat?
The first coat was not fully dry before you applied the second. Wait at least four hours between coats. If bubbles appear, sand the area smooth and repaint once the surface is completely dry.
Why Does Paint Bubble in Bathrooms?
Steam and humidity in bathrooms create moisture behind the paint. Use an exhaust fan during and after showers, and choose a moisture-resistant paint with a satin or semi-gloss finish.
How Long Does It Take for Paint to Fully Cure?
Most latex paints dry to the touch within a few hours, but full curing takes about 30 days. Until the paint is fully cured, it is more vulnerable to moisture, heat, and physical damage.
Can Weather Cause Paint to Bubble After It Dries?
Yes. Exterior paint can bubble weeks or months later if moisture seeps behind it or if direct sun repeatedly heats an area that was not fully bonded during application.