You ordered the part. It showed up. It does not fit.
That is one of the most common and most avoidable frustrations in home repair. Old shower valves are often the cause.
You cannot just pick a cartridge off a shelf and hope it works. The wrong part leads to leaks, wasted money, and a shower still out of order.
According to HomeGuide, a full shower valve replacement costs $225 to $575 on average. Getting old shower valve identification right the first time saves you from all of that.
This guide covers every step: by valve type, by brand, and by what to do when markings are missing.
Why Old Shower Valve Identification Matters
Ordering the wrong part is not a minor inconvenience. It can set a repair back by days.
Shower valve parts are brand-specific. A Moen cartridge will not fit a Delta valve body. Internal dimensions, stem shapes, and sealing systems are all proprietary.
Knowing the brand and model also tells you whether a replacement cartridge is still in production.
Many original parts for valves made before 1985 are no longer available, which changes the repair plan.
A plumber who has to identify your valve from scratch charges for the time spent. Walk in with the brand confirmed, and the job costs less.
Old Shower Valve Identification by Brand
These five brands cover most old shower valves in US homes.
Moen: The horseshoe retaining clip is the clearest sign. Older single-handle Moen valves most commonly use the 1222 series cartridge. The PosiTemp valve body, common in 1980s builds, uses this same clip system.
Delta: The Monitor series uses a cartridge with two flat sides and two rounded sides. Delta consistently places escutcheon screws at roughly the five- and seven-o’clock positions.
Kohler: Look for the K logo on the valve top or trim. Kohler uses proprietary cartridges not interchangeable with other brands. Replacement parts for 1970s and 1980s models sometimes require a call to Kohler directly.
Price Pfister: The exposed retaining nut is visible once the trim is removed. Internal parts carry the 0X8 or JX8 label. Older models use push-pull for on/off and a turn for temperature.
American Standard: Most often two-handle and compression-style in older homes. Model years were inconsistent. Check the valve body for embossed model numbers after removing the trim.
What Type of Old Shower Valve Do You Have?
The number of handles on your shower wall is the fastest way to identify an old shower valve.
- Two-Handle Mixing Valve: Two separate handles, one hot and one cold. Very common in homes built before the 1980s. Inside, these are compression-style or cartridge-based.
- Single-Handle Valve: One lever or knob controls both temperature and flow. Common from the 1970s onward. The mechanism inside is typically a ball, cartridge, or pressure-balancing unit.
- Diverter Valve: A separate knob or lever redirecting water between the tub spout and showerhead. Look for a twist-knob or pull-up lever near the tub spout.
- Compression Valve: The oldest type, common from the 1950s through the 1970s. A rubber washer compresses against a seat to stop flow. These drip steadily once the washer wears down.
- Cartridge Valve: A slide-in cartridge controls flow and temperature. Found in single and two-handle versions. Moen, Delta, and Pfister all use cartridge systems.
- Ceramic Disc Valve: Uses two rotating discs instead of washers. More durable and rarely drips. Became common after 1980.
Two handles mean a mixing or compression valve. One handle means a cartridge or ball mechanism. That distinction shapes everything that follows.
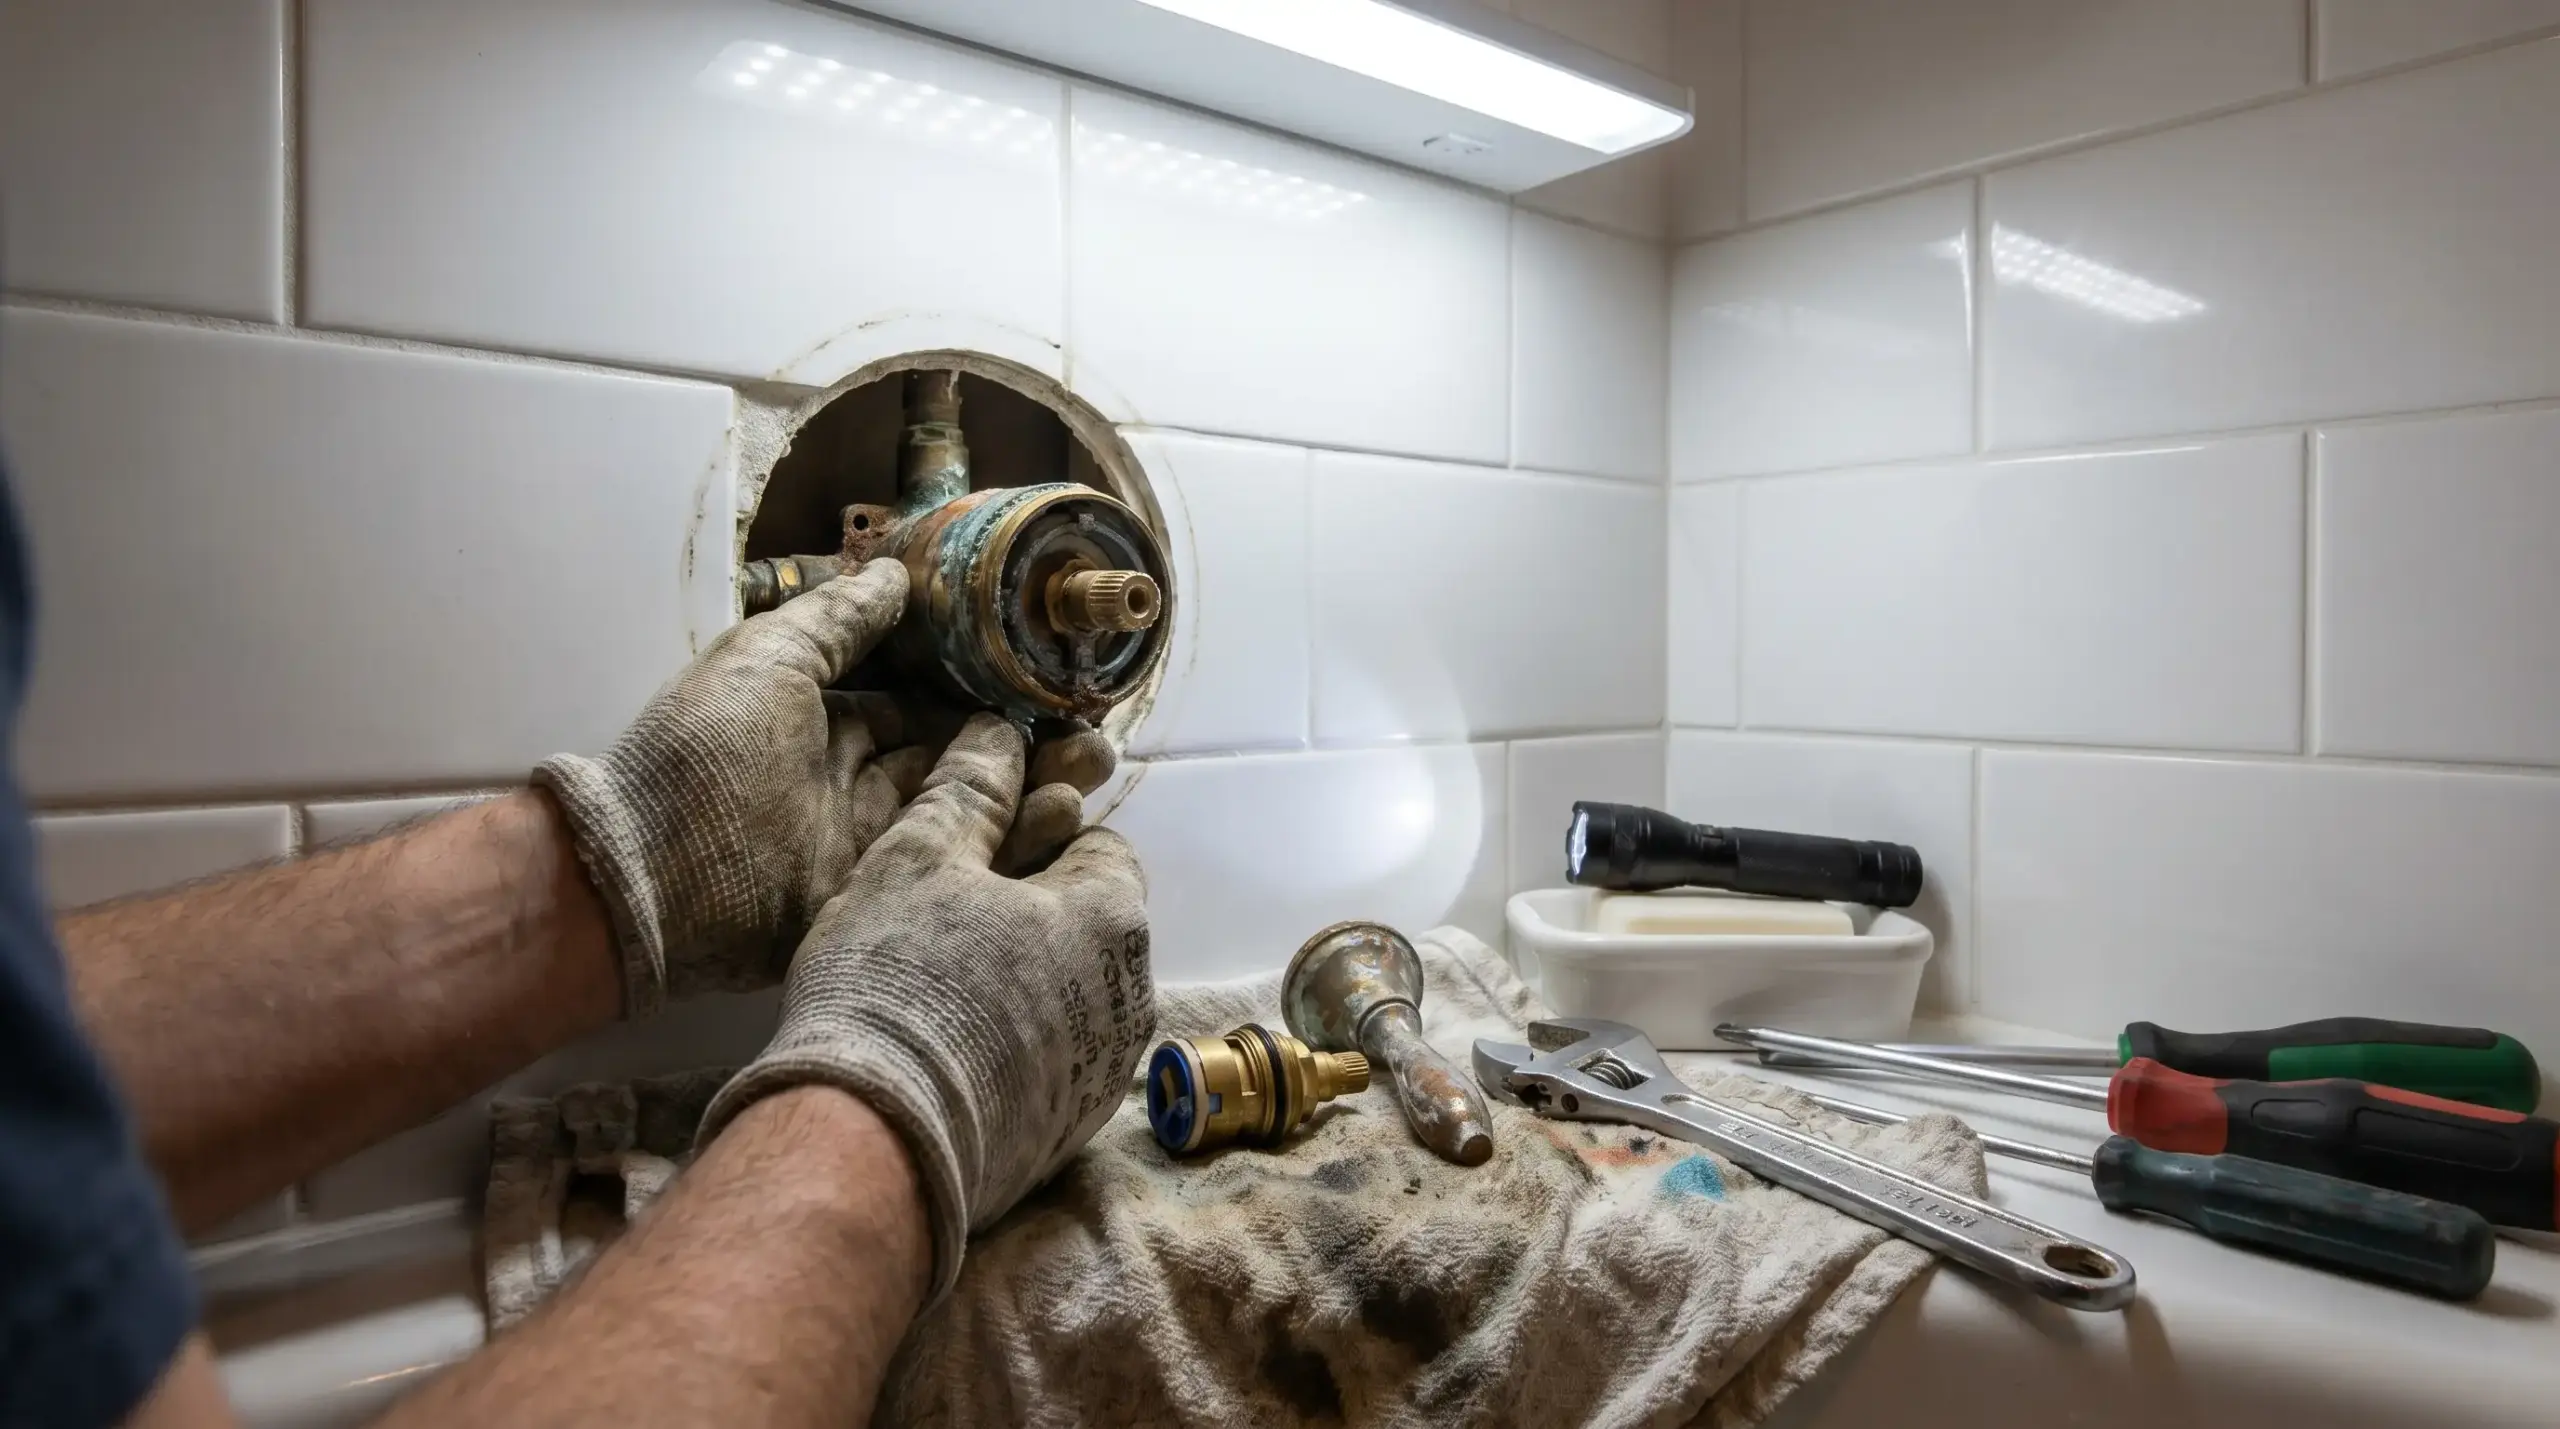
How to Find Brand Markings on an Old Shower Valve
Brand markings are the fastest path to the right part. Here is where to look, in order of effort.
1. Check the Escutcheon Plate
The escutcheon is the flat decorative plate on the wall behind the handle. Run a flashlight along its edges. Look for an etched logo, brand name, or model number. Hard water and soap scum hide a lot.
2. Check the Handle Cap
The small button at the center of the handle often hides the retaining screw. Many manufacturers mold a small logo onto this cap. Pry it off with a flathead screwdriver.
3. Remove the Handle and Inspect the Stem
Turn off the water supply first. Unscrew the retaining fastener and pull the handle off.
- Brass stems with visible threading point to compression or older cartridge valves.
- Plastic bodies indicate a more modern mechanism.
4. Pull the Cartridge
Most cartridges have a brand name or model number molded on the body. Here is what to look for by brand:
| Brand | What to Look For |
|---|---|
| Moen | White plastic body held by a horseshoe-shaped retaining clip. That U-shaped clip is the clearest Moen identifier. No other major brand uses it the same way. |
| Delta | Two flat sides and two rounded sides on the stem connector. This shape is consistent across the Monitor series. |
| Pfister | Exposed retaining nut on the valve body, visible once the trim plate is removed. |
| Kohler | K marking on the valve top or trim. Older cartridges use a push-pull for on/off and a turn for temperature. |
If the cartridge has numbers on it, write them down. Cross-referencing on a manufacturer or plumbing supply website confirms the brand within minutes.
Signs Your Old Shower Valve Needs Replacing
| Sign | What It Means |
|---|---|
| The temperature still fluctuates after a new cartridge | The valve seat is damaged. A cartridge alone cannot fix that. |
| Dripping continues after a cartridge swap | The seat is scored. The full valve body needs replacing. |
| The valve lacks pressure balancing | Older mixing valves can scald when cold pressure drops suddenly. |
| Parts are discontinued | Universal kits seal less reliably than original parts. Ongoing repair costs can outweigh the cost of a full replacement. |
| The valve is over 20 years old, with recurring leaks | Shower valves last 10 to 20 years. Replacing cartridges in a failing valve body is an expensive short-term fix. |
If the valve is past its service life, a full replacement is the smarter call. For anyone already planning a bathroom remodel on a budget, addressing the valve as part of that project saves both time and money.
Conclusion
Start with the handle count. That one detail tells you the valve type, which narrows the brand, which points you to the right part.
Most valves in US homes belong to five brands, and each one leaves a clear physical marker.
A horseshoe clip, an asymmetric cartridge connector, and an exposed retaining nut. You do not need special tools to find any of them.
When markings are gone, the cartridge dimensions and a few clear photos do the same job.
And if the valve keeps failing after a fresh cartridge, stop replacing parts.
The body itself is the problem, and a full swap costs less in the long run than repeated short-term fixes.
Frequently Asked Questions
1. How Do I Figure out What Shower Valve I Need?
Check your plumbing type, desired functions (thermostatic or pressure-balanced), and brand compatibility. Consult the manufacturer’s guide or measure the existing valve dimensions to ensure proper replacement.
2. How Do I Identify My Shower Model?
Look for model numbers on the valve trim, shower handle, or behind escutcheon plates. Manufacturer websites or manuals often help match the number to the specific model.
3. Are all shower valves universal?
No. Valves differ by brand, type, and function. Universal replacements rarely exist, so always confirm compatibility with your shower system before purchasing.